*This post may contain affiliate links to support the cost of this blog. At no cost to you, I may make a small commission if you purchase through these links. Read our Privacy Policy HERE


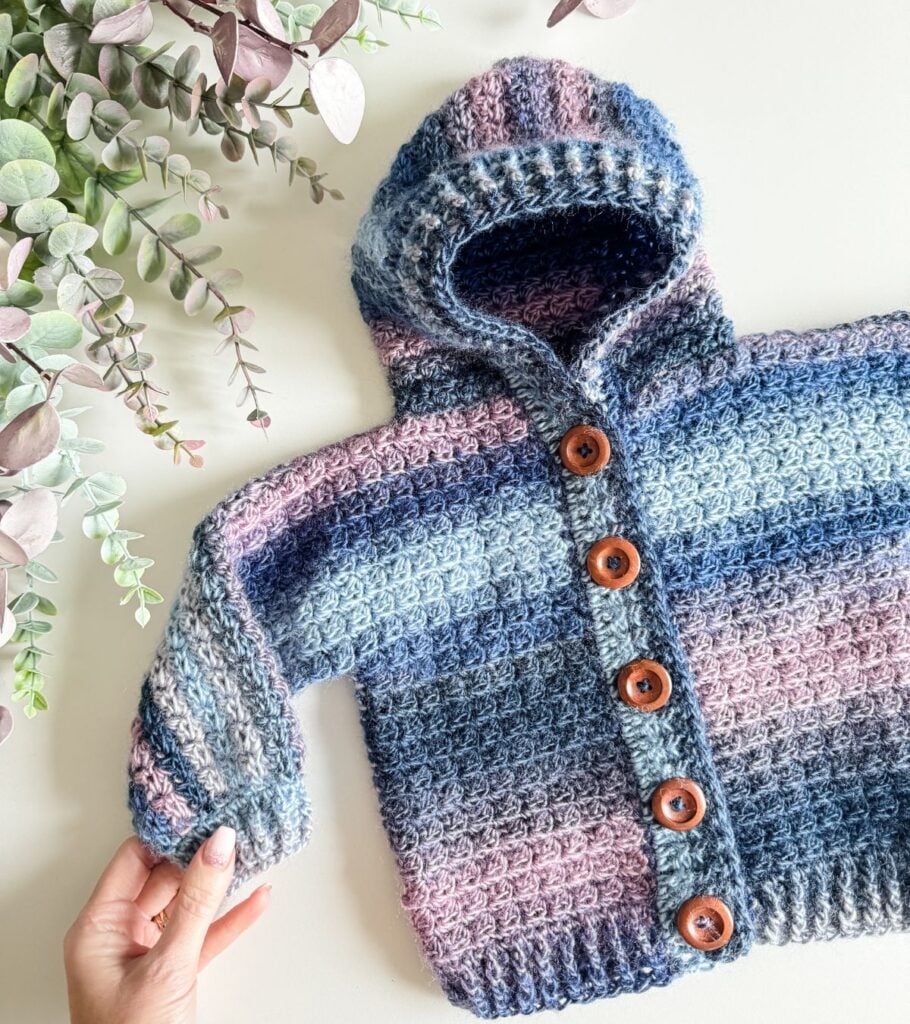
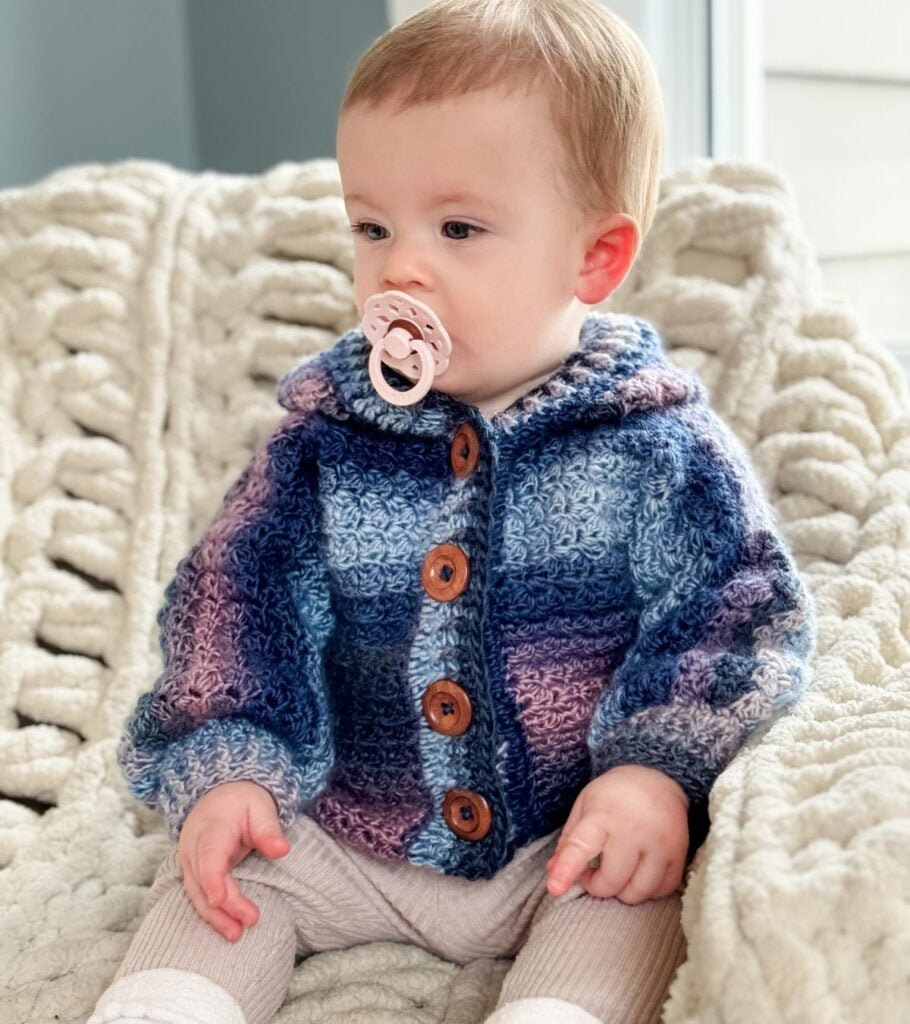
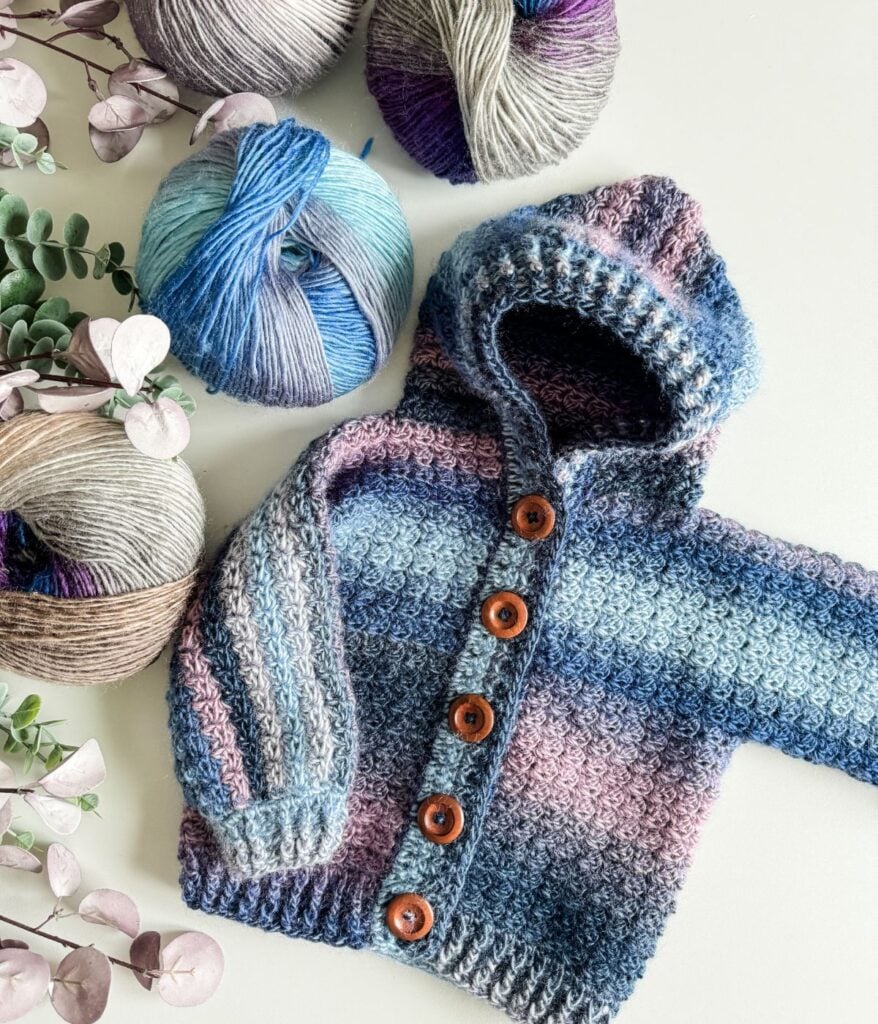
Introducing the Rainbow Hugs Hoodie Crochet Pattern – a delightful and vibrant children’s hooded cardigan that’s both cheerful and cozy!
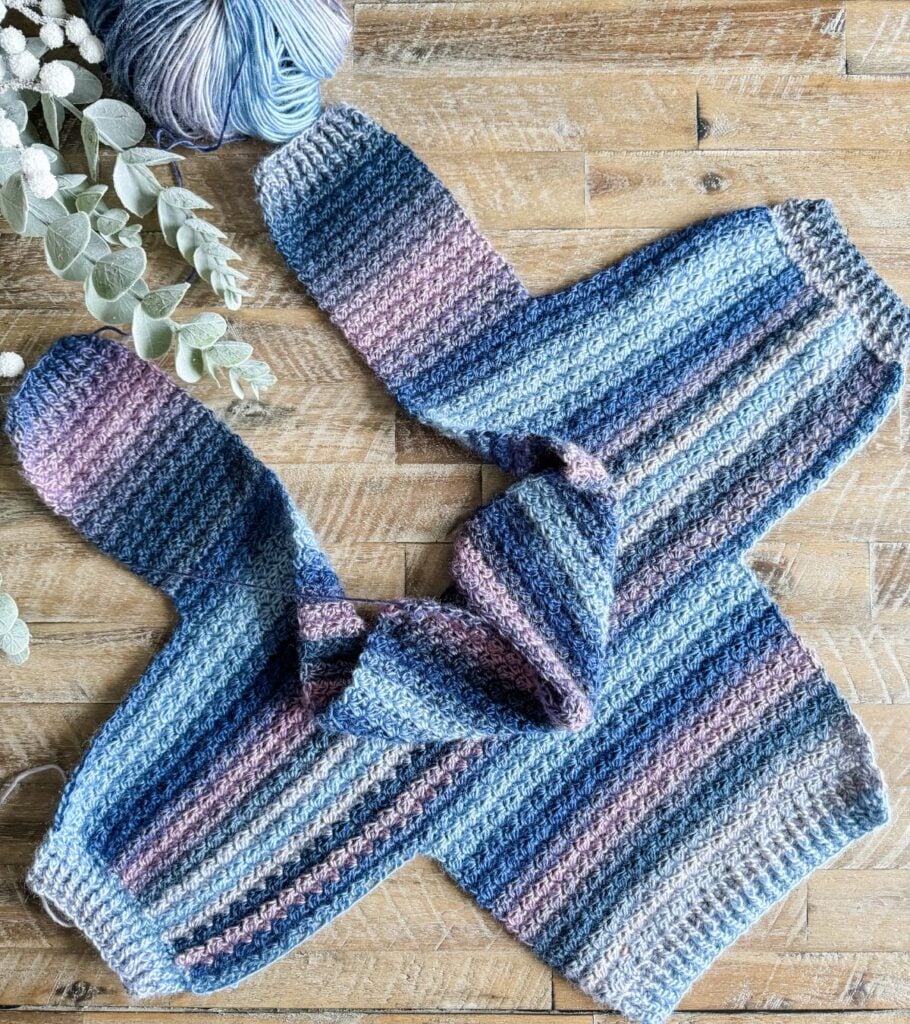
This pattern features a charming button-up design and is crafted with minimal seaming, as the entire piece is crocheted flat in one piece. The only seaming required is for the sides and sleeves, making it a relatively seamless project.
Whether you opt for the lively Prism gradient yarn or a solid colour, this pattern offers versatility and a playful aesthetic. The pattern includes a detailed schematic, a comprehensive size chart, measurement instructions, step-by-step video tutorial, and a list of yarn substitutes.
In terms of stitches, the pattern incorporates single and double crochet, as well as front and back post double crochet for the ribbing, creating a textured and visually appealing design. Let’s begin a colourful and cozy crochet journey with the Rainbow Hugs Hoodie!
Below, you will find everything you need to make this children’s crochet hoodie, including the yarn, hook, materials, free written pattern for blog subscribers, pictures and a video tutorial. If you love this free crochet sweater pattern, please share!

Key Takeaways
- The article introduces the Rainbow Hugs Hoodie Crochet Pattern, a cheerful children’s hooded cardigan.
- It features a button-up design, minimal seaming, and is suitable for various yarns, including the recommended Mary Maxim Prism Yarn.
- The pattern includes a size chart, detailed instructions, and a helpful video tutorial for making the hoodie.
- Crocheters can find yarn substitutes and must ensure proper gauge for the best fit.
- The pattern is designed to be a unique, handmade gift, perfect for chilly weather.
Crochet Hooded Cardigan For Children
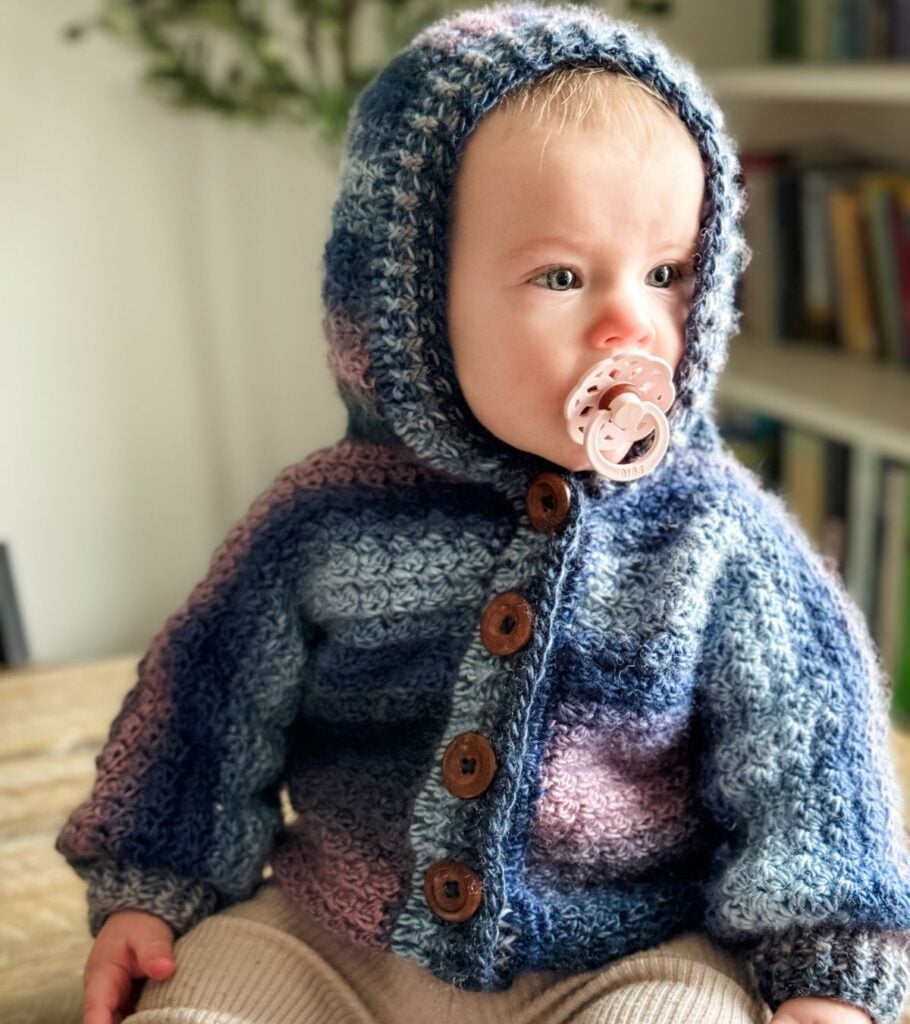
Making a hooded button-up crochet sweater for a child or baby is a beautiful way to bestow a handmade token of love and care upon the little one. The thoughtful creation not only promises a unique and personalized garment but also a practical and stylish addition to the child’s wardrobe.
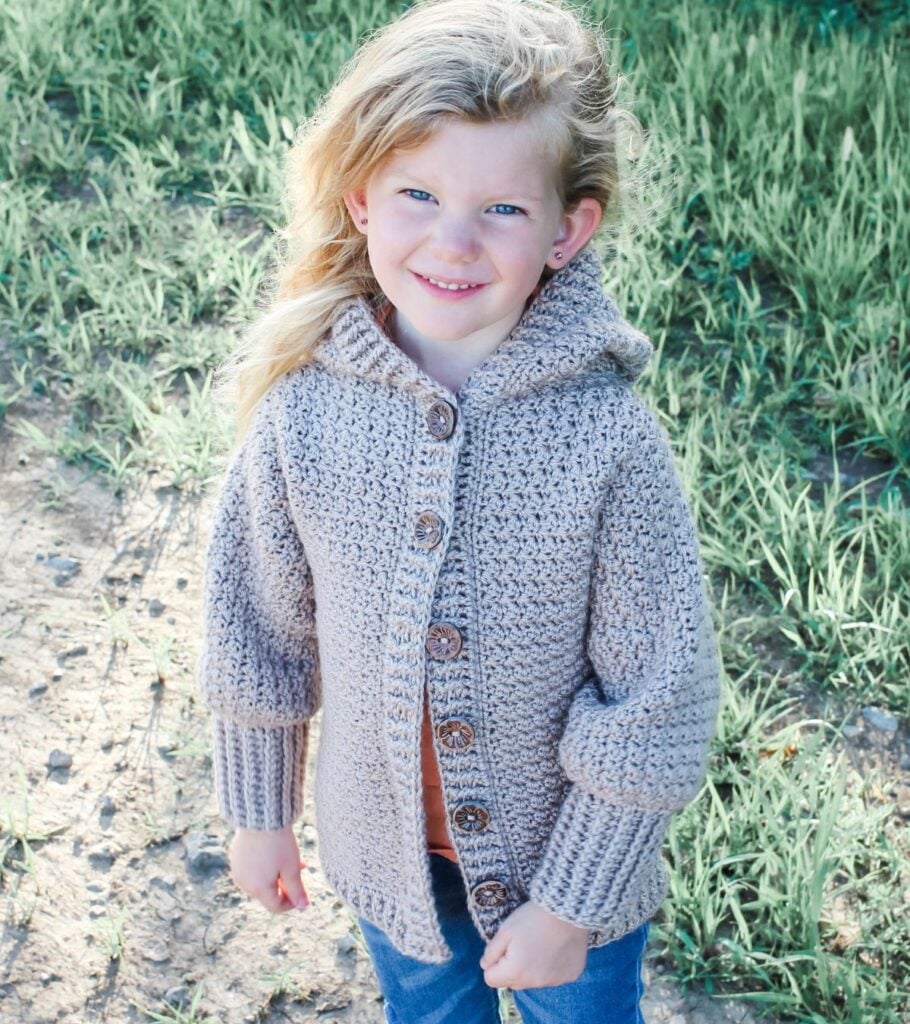
The hooded design ensures warmth and coziness, making it perfect for chilly weather, and the button-up feature offers convenience during dressing and undressing. Furthermore, the sweater will be a cherished heirloom that can hold sentimental value for years to come. Engaging in the creation of this sweater provides a delightful and rewarding project, allowing the maker to experience the joy of producing a meaningful and heartfelt gift for the little one.
Video Tutorial

Best Yarn for a Children’s Crochet Sweater
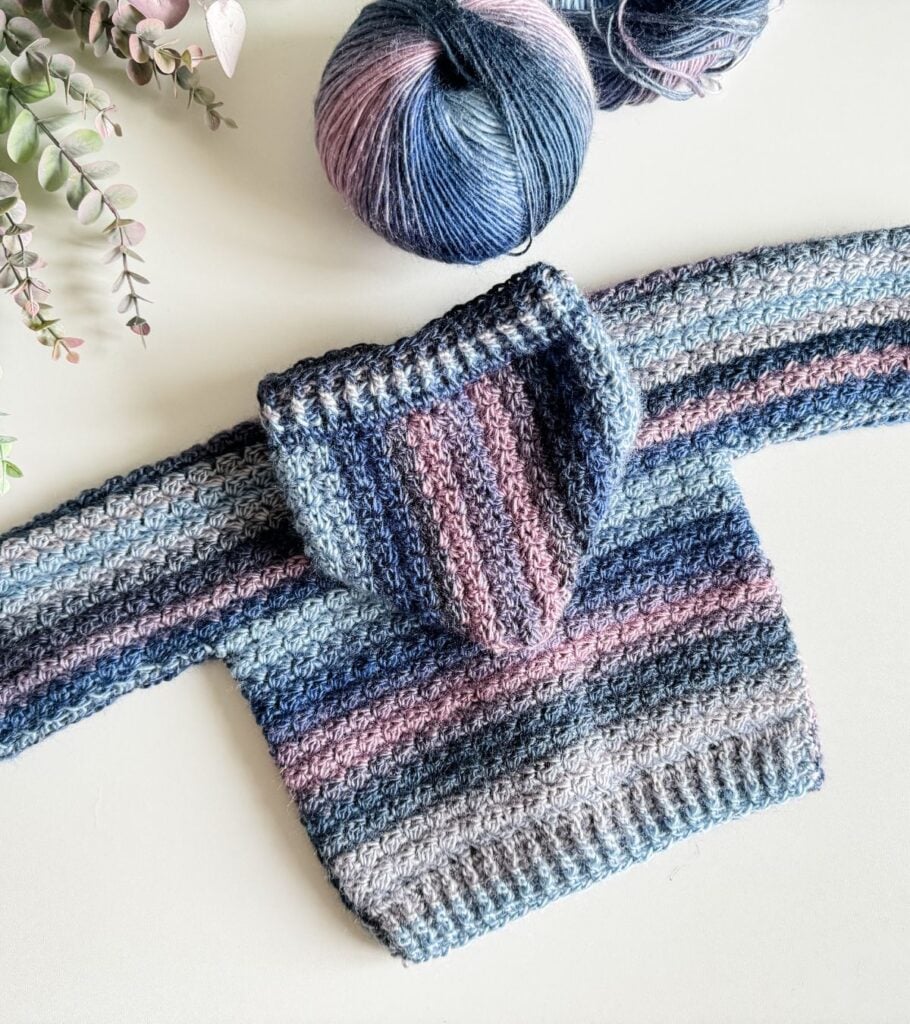
Mary Maxim Prism Yarn is ideal for crafting a children’s crochet sweater due to its exceptional qualities. With an array of more than ten captivating and vibrant colour schemes, this yarn offers a perfect blend of visual appeal and luxurious softness. Crafted from 100% acrylic, it is a lightweight yet snug DK yarn that provides the utmost comfort for little ones. Whether you opt for bright and lively hues or subtle and serene shades, Mary Maxim Prism Yarn caters to various styles and preferences. This yarn offers ample material for various creative projects, making it the perfect choice for bringing a touch of colour and delight into a child’s wardrobe through a charming crochet sweater.

Rainbow Hugs Hoodie Yarn Requirements
DK Weight #3
290yds/100g, 100% Acrylic Shown in Misty
See Yarn substitutes for alternatives.
0-6mth (6-12mth, 18-24mth, 2, 4, 6, 8, 10, 12)
2 (3, 3, 4, 4, 5, 6, 7, 8) balls. See the size chart for more details on sizing and yardage.
Sizes
0-6mth (6-12mth, 18-24mth, 2, 4, 6, 8, 10, 12)
Size Chart


Substituting Yarn
Yarn substitution is a valuable skill that allows crochet enthusiasts to adapt to pattern requirements when the original specified yarn is not readily accessible.
In the Rainbow Hugs Hoodie pattern, Mary Maxim Prism, a #3 DK weight yarn in the Misty colorway, is the recommended yarn choice.
For those considering a yarn substitution, a list of suitable alternatives has been thoughtfully provided below. It’s crucial to note that conducting a gauge swatch with the chosen substitute yarn is vital. This step enables you to make any necessary adjustments to your hook size, ensuring that the gauge matches the pattern’s specifications.
By prioritizing the correct gauge, you can confidently create a finished garment that aligns with the intended design and measurements.
Yarn Substitutes
Mellowspun (CDN) – 284 yards/100g
Lion Brand mandala or Baby – 590 yds/150g
Bernat Softee Baby (CDN) – 362 yds/140g
Brava Sport – 273 yds/100g
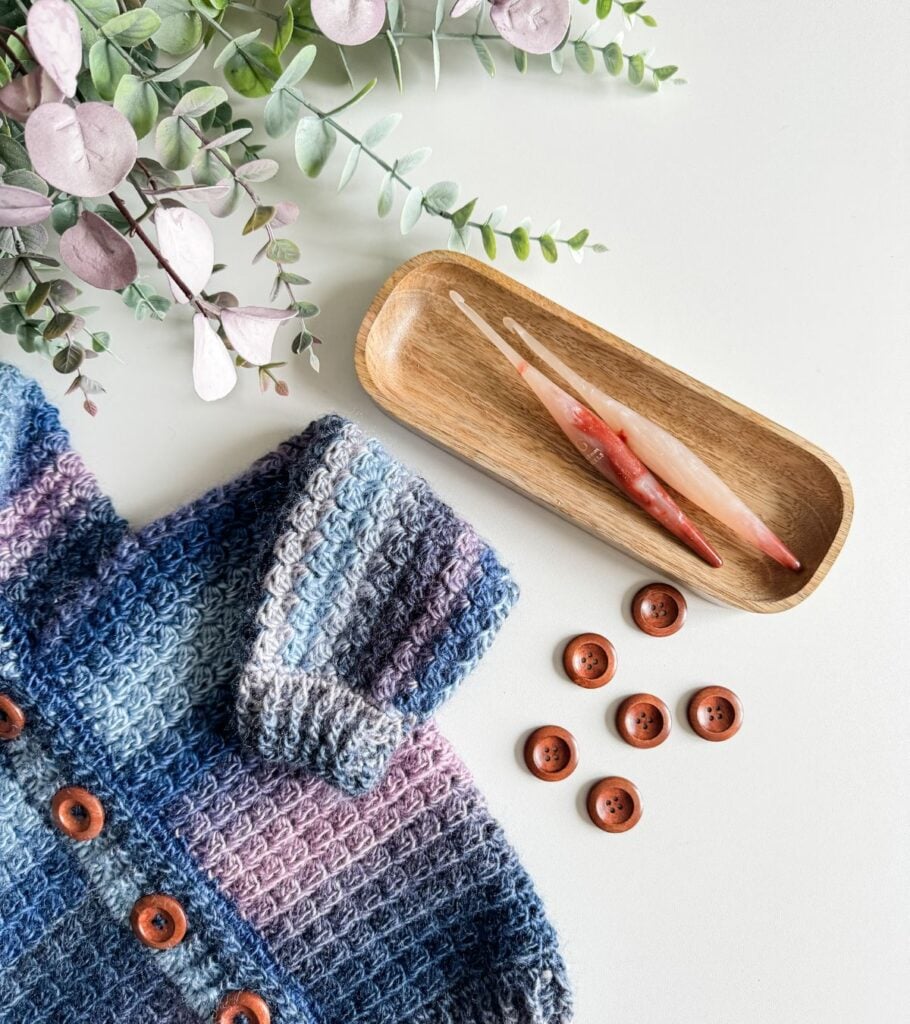
Crochet Hooks Needed
Additional Supplies for the Children’s Hooded Cardigan
25mm Wooden Buttons (4-10)
Helpful Resources
- Join our Facebook Crochet Community for pattern support and inspiration
- Subscribe on YouTube for hundreds of free tutorials
- Sign up for our newsletter and receive 40% off your first Ravelry purchase!
- Sign up for our YouTube Membership
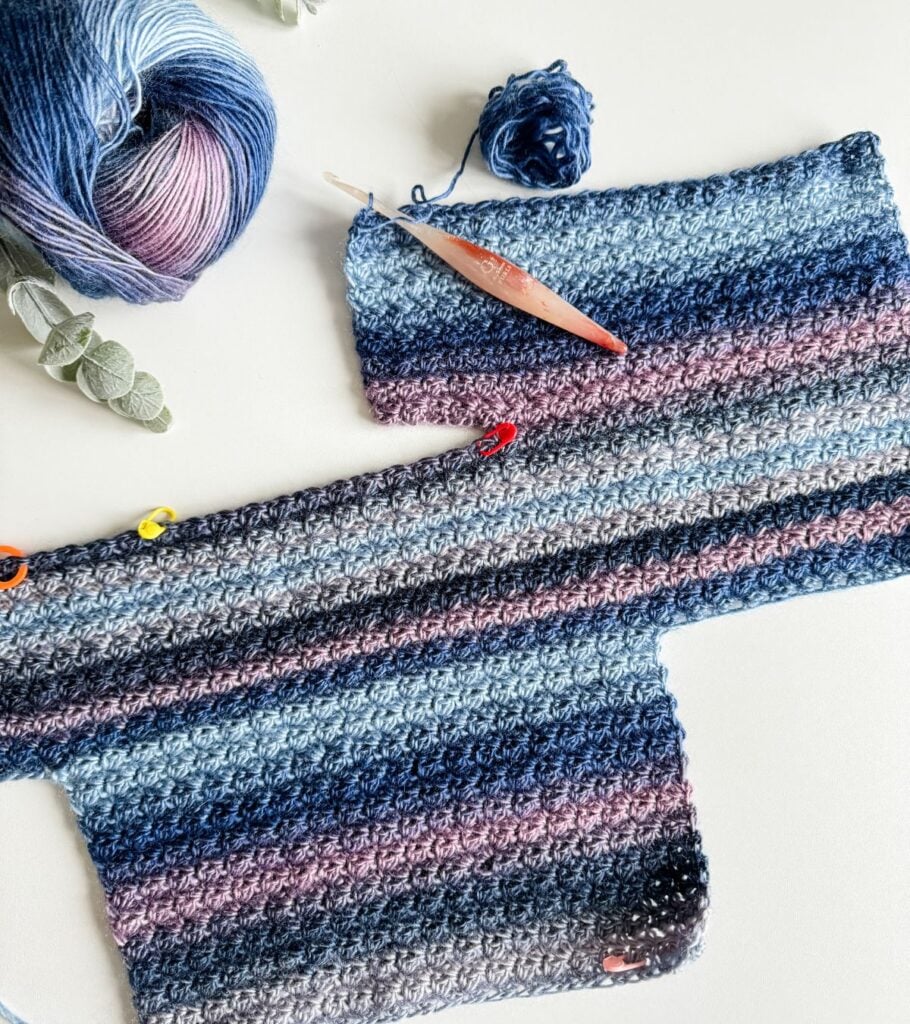
Children’s Hooded Cardigan Construction
The hoodie is worked flat in one piece, beginning at the back and concluding with the front panels. Following that, the hood is attached, working it to the neck opening and fronts, and finally, the ribbing is added. The sides and sleeves are then seamed together to complete the cardigan. The pattern is written for the smallest size, with larger sizes indicated in parentheses. If only one number is provided, it applies to all sizes. For a detailed guide, a step-by-step video tutorial is available on our YouTube channel specifically tailored for the 6-12 month size.
Children’s Hooded Cardigan Gauge
16 sts and 16 rows equal to 4″ in (sc, dc) stitch pattern
Ribbing: 9 sts and 6 rows equal to 2″
Abbreviations
Bpdc – Back Post Double Crochet
Ch – Chain
Fpdc – Front Post Double Crochet
PM – Place Marker
Rep – Repeat
RS – Right Side
Sc – Single Crochet
Sk – Skip
Sl St – Slip Stitch
Sp(s) – Space(s)
St(s) – Stitch(es)
WS – Wrong Side
( ) – Work step in parentheses in indicated stitch
[ ] – Work step in brackets number of times indicated
Special Stitches
Back Post Double Crochet (bpdc): Yo (Yarn Over), insert your hook from back to front to back around the post of the next stitch; yo, pull up a loop; yo, pull through 2 loops on your hook, yo, pull through remaining two loops on your hook.
Front Post Double Crochet (fpdc): Yo, insert your hook from front to back to front around the post of the next stitch; yo, pull up a loop; yo, pull through 2 loops on your hook; yo, pull through the remaining two loops on your hook.
Rainbow Hugs Hoodie
FAQ & Terms
This pattern requires an intermediate skill level.
This pattern is professionally written in technical writing and tech edited for accuracy. You need to be familiar with technical repeats.
1. Affiliate Links & Ad Support
This post may contain affiliate links. At no extra cost to you, purchases made through these links may earn MJ’s Off The Hook Designs a small commission. The content on this site is supported by advertisements. By using this site, you agree not to circumvent, block, or tamper with these ads.
2. Copyright & Intellectual Property
All content on this blog, including free crochet patterns, instructions, charts, photos, videos, and written materials, is the property of MJ’s Off The Hook Designs Inc. and is protected under copyright and other intellectual property laws.
3. Personal Viewing & Use Only
Free patterns published on this site are provided for viewing only on this blog. You may not:
• Copy, download, print, take screenshots, or redistribute the pattern in any form (digital or physical) outside this blog.
• Post the pattern or instructions elsewhere online or share it publicly without written consent.
Even for “personal use,” the pattern must only be used while viewing this blog post with the ads intact. Tampering with, hiding, or removing ads while accessing the pattern is strictly prohibited.
4. Screenshots & Unauthorized Sharing
Screenshots or any other method of copying the pattern for offline use or redistribution is prohibited. Sharing patterns in forums, social media groups, or private messages without permission is also prohibited.
5. Legal Enforcement
Violation of these terms may constitute copyright infringement and could result in civil or criminal penalties under intellectual property laws. By using this pattern, you agree to comply fully with these terms.
6. Questions & Permissions
For questions about these terms or for permission to use or share patterns outside of these rules, please contact MJ’s Off The Hook Designs Inc. in writing.
Thank you for respecting our work and supporting MJ’s Off The Hook Designs.
Yes! You may sell finished items made from MJ’s patterns, but please credit:
“Pattern by MJ’s Off The Hook Designs Inc.”
Pattern Support is only available in our Facebook Community group and Video Tutorials.
No additional support is provided for modified patterns, alternate yarns, or changes to gauge.
Pattern
0-6mth (6-12mth, 18-24mth, 2, 4, 6, 8, 10, 12)
Notes
The pattern is written for the smallest size, with the larger sizes in parentheses ( ). If there is only 1 number, it applies to all sizes—a step-by-step video tutorial is provided on YouTube for size 6-12mth.
Back
Row 1 (RS):
With the larger hook, ch 38 (42, 46, 48, 52, 56, 58, 62, 66), work (1 sc, 1 dc) in the back bump of the 2nd ch from hook, sk ch, *work (1 sc, 1 dc) in next ch, sk ch; rep from * across, ending with 1 sc in last ch, turn—37 (41, 45, 47, 51, 55, 57, 61, 65) sts.
Project Tip: Use a stitch marker to clearly identify the right side (RS) of your work, ensuring you don’t mix up the RS and WS as you progress.
Row 2 (WS):
Ch 1 (not included as a st here and throughout, work (1 sc, 1 dc) in first st, sk st, *work (1 sc, 1dc) in next st, sk st; rep from * across, ending with 1 sc in the last st, turn—37 (41, 45, 47, 51, 55, 57, 61, 65) sts.
Rows 3-20 (24, 28, 32, 36, 40, 44, 48, 52):
Rep Row 2.
Sleeves
Notes: To lengthen or shorten the sleeve, increase or reduce the sleeve chain. Measure underarm to the wrist to determine the required sleeve length. The cuff adds an additional 1.5-2.5″.
Left Sleeve
With a new ball of yarn, join to the opposite side of the working yarn. RS facing join to the top left side of work with a sl st, ch 20 (24, 28, 32, 36, 40, 44, 48, 52) and fasten off (this sets up the left sleeve).
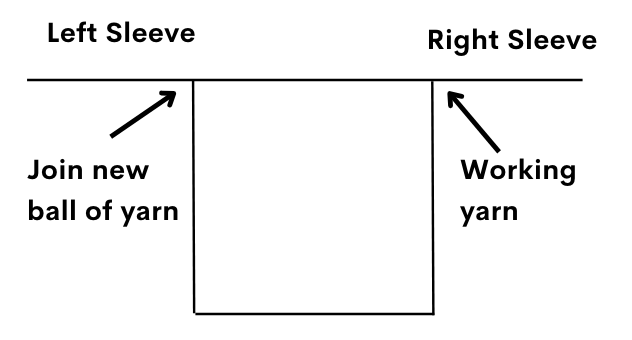
Right Sleeve
Join back into working yarn top right.
Row 1 (RS):
Ch 21 (25, 29, 33, 37, 41, 45, 49, 53), work (1 sc, 1 dc) in the 2nd ch from hook, sk ch, *work (1 sc, 1 dc) in next ch, sk ch; rep from * across right sleeve (chs), body (sts), left sleeve (chs), ending with 1 sc in last ch, turn—77 (89, 101, 111, 123, 135, 145, 157, 169) sts.
You will now work both the sleeves and back at the same time.
Row 2 (WS):
Ch 1, work (1 sc, 1 dc) in first st, sk st, *work (1 sc, 1dc) in next st, sk st; rep from * across, ending with 1 sc in the last st, turn—77 (89, 101, 111, 123, 135, 145, 157, 169) sts.
Rows 3-14 (16, 18, 18, 20, 20, 22, 22, 24):
Rep Row 2, ending on WS. Don’t fasten off.
Mark Neck Opening
From Left and Right side count over 29 (33, 37, 41, 45, 49, 53, 57, 61) sts, pm in next st. The neck opening is 19 (23, 27, 29, 33, 37, 39, 43, 47) sts.
Right Sleeve / Front Panel
Centre Row (RS):
With working yarn, ch 1, work (1 sc, 1 dc) in first st, sk st, *work (1 sc, 1 dc) in next st, sk st; rep from * across, to marker, ending with 1 sc in last st, (leave neck opening unworked), turn—29 (33, 37, 41, 45, 49, 53, 57, 61) sts.
Would you like to save this?
You can unsubscribe at any time.
Row 1 (WS):
Ch 9 (11, 13, 13, 15, 17, 17, 19, 21), work (1 sc, 1 dc) in the 2nd ch from hook, sk ch, *work (1 sc, 1 dc) in next ch, sk ch; rep from * across ch and front (sts), ending with 1 sc in last st, turn—37 (43, 49, 53, 59, 65, 69, 75, 81) sts.
Row 2 (RS):
Ch 1, work (1 sc, 1 dc) in first st, sk st, *work (1 sc, 1 dc) in next st, sk st; rep from * across, ending with 1 sc in the last st, turn—37 (43, 49, 53, 59, 65, 69, 75, 81) sts.
Rows 3-14 (16, 18, 18, 20, 20, 22, 22, 24):
Rep Row 2, ending on RS. Don’t fasten off.
Mark Body
From sleeve edge count over 20 (24, 28, 32, 36, 40, 44, 48, 52) sts, pm in the last st (marks off the sleeve length).
Front Right Panel
Row 1 (WS):
Ch 1, work (1 sc, 1 dc) in first st, sk st, *work (1 sc, 1 dc) in next st, sk st; rep from * across, ending with a sc in the last st before marker, turn—17 (19, 21, 21, 23, 25, 25, 27, 29) sts.
Rows 2-20 (24, 28, 32, 36, 40, 44, 48, 52):
Rep Row 1—17 (19, 21, 21, 23, 25, 25, 27, 29) sts.
Band
Row 1 (WS):
With smaller hook, ch 2 (not included as a st here and throughout), work 1 dc in each st across, turn—17 (19, 21, 21, 23, 25, 25, 27, 29) sts.
Row 2 (RS):
Ch 2, sk first st, *1 fpdc next st, 1 bpdc next st; rep from * across, ending with 1 dc in turning ch, turn—17 (19, 21, 21, 23, 25, 25, 27, 29) sts.
Rows 3-4 (4, 4, 6, 6, 6, 8, 8, 8):
Rep row 2. Fasten off and weave in tails.
Left Sleeve / Front Panel
Centre Row (RS):
With the larger hook and RS facing sk over the neck opening. Put a slip knot on the hook, Ch 8 (10, 12, 12, 14, 16, 16, 18, 20). Starting in the first st to the left of marker, work (1 sc, 1 dc), sk st, *work (1 sc, 1 dc) in next st, sk st; rep from * across, ending with 1 sc in the last st, turn—29 (33, 37, 41, 45, 49, 53, 57, 61) sts plus 8 (10, 12, 12, 14, 16, 16, 18, 20) chs.
Row 1 (WS):
Ch 1, work (1 sc, 1 dc) in first st, sk st, *work (1 sc, 1 dc) in next st, sk st; rep from * across, working across ch, ending with 1 sc in the last ch, turn—37 (43, 49, 53, 59, 65, 69, 75, 81) sts.
Row 2 (RS):
Ch 1, work (1 sc, 1 dc) in first st, sk st, *work (1 sc, 1 dc) in next st, sk st; rep from * across, ending with 1 sc in the last st, turn—37 (43, 49, 53, 59, 65, 69, 75, 81) sts.
Rows 3-14 (16, 18, 18, 20, 20, 22, 22, 24):
Rep Row 2, ending on RS. Fasten off and weave in tails.
Mark Body
From sleeve edge count over 20 (24, 28, 32, 36, 40, 44, 48, 52) sts, pm in the last st (marks off the sleeve length).
Front Left Panel
Row 1 (WS):
With the larger hook and WS facing sk over the sleeve. Put a slip knot on the hook, in the first st to the left of the marker, work (1 sc, 1 dc), sk st, *work (1 sc, 1 dc) in next st, sk st; rep from * across, ending with 1 sc in the last st, turn—17 (19, 21, 21, 23, 25, 25, 27, 29) sts.
Rows 2-20 (24, 28, 32, 36, 40, 44, 48, 52):
Rep Row 1—17 (19, 21, 21, 23, 25, 25, 27, 29) sts.
Band
Work the same as the front right.
Back Band
Row 1 (WS):
With smaller hook, join yarn with a sl st to first st, ch 2, work 1 dc in each st across, turn—37 (41, 45, 47, 51, 55, 57, 61, 65) sts.
Row 2 (RS):
Ch 2, sk first st, *1 fpdc next st, 1 bpdc next st; rep from * across, ending with 1 dc in turning ch, turn—37 (41, 45, 47, 51, 55, 57, 61, 65) sts.
Rows 3-4 (4, 4, 6, 6, 6, 8, 8, 8):
Rep row 2. Fasten off and weave in tails.
Sleeve Cuff
Repeat for left and right sleeves.
Setup Row:
With RS facing and the smaller hook, join yarn to the edge of the sleeve, ch 1, work 23 (25, 27, 27, 29, 29, 31, 31, 33) sc evenly across the edge, turn—23 (25, 27, 27, 29, 29, 31, 31, 33) sts.
Row 1 (WS):
Ch 2, work 1 dc in each st across, turn—23 (25, 27, 27, 27, 29, 29, 31, 31, 33) sts.
Row 2 (RS):
Ch 2, 1 fpdc first st, 1 bpdc next st, *1 fpdc next st, 1 bpdc next st; rep from * across, ending with 1 dc in turning ch, turn—23 (25, 27, 27, 27, 29, 29, 31, 31, 33) sts.
Rows 3-4 (4, 4, 6, 6, 6, 8, 8, 8):
Rep row 2. Fasten off with a long tail for seaming the sleeves and body.
Hood
Setup Row:
With RS facing and larger hook, join yarn to the first st of front panel, work across front right, 8 (10, 12, 12, 14, 16, 16, 18, 20) sc, in corner work 1 sc, across back neck work 19 (23, 27, 29, 33, 37, 39, 43, 47) sc, corner 1 sc, front left 8 (10, 12, 12, 14, 16, 16, 18, 20) sc, turn—37 (45, 53, 55, 63, 71, 73, 81, 89) sts.
Row 1 (WS):
Ch 1, work (1 sc, 1 dc) in first st, sk st, *work (1 sc, 1 dc) in next st, sk st; rep from * across, ending with 1 sc in the last st, turn—37 (45, 53, 55, 63, 71, 73, 81, 89) sts.
Rows 2-28 (30, 32, 32, 34, 36, 38, 38, 40):
Rep Row 1. Fasten off with a long tail for seaming the hood. With RS facing, Fold the hood in half. With a yarn needle, whip stitch the hood together. Weave and trim tails.
Seaming
Using the tail at the cuff, join the sleeves and sides together using your preferred seaming method.
#1 Fold with RS facing and whip stitch together. Then, weave in tails and trim.
#2 Alternatively, fold with WS facing and use the mattress stitch for a more discreet finish.
Collar/Hood Edge
Setup Row:
With RS facing and the smaller hook, join yarn to the front right bottom edge with a sl st, ch 1, work sc sts evenly along the front right, hood and front left, turn.
Row 1 (WS):
Ch 2, work 1 dc in each st across, turn.
Marking Buttonholes
With the RS facing on the front right side, count 2 post sts from the bottom edge, pm in the 3rd post, then *count 8 post sts, pm in the 9th post; rep from * to create as many buttonholes as desired.
Please note that as the sizes increase, the width of the collar varies. For each size, buttonhole rows are worked on the specified rows as follows: Size 0-6 (6-12, 18-24, 2, 4, 6, 8, 10) row 2 (2, 2, 3, 3, 3, 4, 4, 4. Place the markers in the row before the buttonhole row, each size as follows: row 1 (1, 1, 2, 2, 2, 3, 3, 3). Watch the video for a visual demonstration.
Buttonhole Row:
At the marker, ch 1, sk 1 st, continue in fpdc, bpdc pattern.
Next Row:
Work 1 dc in the ch-1 sp, continue in fpdc, bpdc pattern.
Use these instructions to create the buttonhole as you work the collar rows and come to a place marker.
Row 2 (RS):
Ch 2, sk first st, *1 fpdc next st, 1 bpdc next st; rep from * across, ending with 1 dc in turning ch, turn.
Rows 3-4 (4, 4, 6, 6, 6, 8, 8, 8):
Rep row 2. Fasten off and weave in tails. Sew buttons to the left front opposite buttonholes.
Pockets (optional)
Make 2
Row 1 (RS):
With the larger hook, ch 14 (14, 16, 16, 18, 20, 20, 22, 22), work (1 sc, 1 dc) in the back bump of the 2nd ch from hook, sk ch, *work (1 sc, 1 dc) in next ch, sk ch; rep from * across, ending with 1 sc in last ch, turn—13 (13, 15, 15, 17, 19, 19, 21, 21) sts.
Row 2 (WS):
Ch 1, work (1 sc, 1 dc) in first st, sk st, *work (1 sc, 1 dc) in next st, sk st; rep from * across, ending with 1 sc in the last st, turn—13 (13, 15, 15, 17, 19, 19, 21, 21) sts.
Rows 3-9 (9, 11, 11, 13, 15, 15, 17, 17):
Rep Row 2.
Band
Row 1 (WS):
With smaller hook, ch 2, work 1 dc in each st across, turn—13 (13, 15, 15, 17, 19, 19, 21, 21) sts.
Row 2 (RS):
Ch 2, 1 fpdc first st, 1 bpdc next st, *1 fpdc next st, 1 bpdc next st; rep from * across, ending with 1 dc in turning ch, turn—13 (13, 15, 15, 17, 19, 19, 21, 21) sts.
Rows 3-4:
Rep row 2. Fasten off with a long tail for sewing.
With a yarn needle, sew pockets to the front panels. Sew approximately 1″ from the bottom band in the centre of the panel. Weave in tails.
Washing Instructions
Handwashing or gentle machine washing:
To clean your cardigan, handwashing is highly recommended. Fill a basin or sink with lukewarm water and add a mild detergent suitable for delicate fabrics. Gently immerse the garment and agitate it softly to cleanse. Avoid excessive squeezing or wringing to prevent stretching or misshaping. Rinse thoroughly with clean water.
Alternatively, if you prefer to use a washing machine, place the garment inside a garment bag or pillowcase to protect it. Use a gentle cycle with cool water and mild detergent. Avoid harsh spin cycles or high temperatures that can damage the fibres.
Drying: After washing, gently remove excess water without wringing the garment. Lay it flat on a clean, absorbent towel, arranging it into shape. Roll up the towel and gently press to remove more moisture. Then, let the garment air dry.
Upgrade to the Premium PDF Pattern!
Digital PDF Download
Digital pattern only. No physical item will be shipped.
You May Also Love These Patterns
This pattern is designed by Michelle Moore of MJ’s Off The Hook Designs Inc based in Lakefield Ontario Canada. Your go to source for modern easy crochet patterns. Published on January 9th, 2024.
Thank you for visiting MJ’s Off The Hook Designs I hope you enjoyed this pattern and feel inspired to pick up your hook and start creating.
You can find even more crochet patterns in our Ravelry and Etsy shops.
For daily inspiration and behind the scenes peeks join me over on Facebook or Instagram or join our YouTube Membership for exclusive content!
You’ve got questions, we’ve got a community!
Crocheting is better with friends! Join our group to post pictures and ask all your pattern support questions.