*This post may contain affiliate links to support the cost of this blog. At no cost to you, I may make a small commission if you purchase through these links. Read our Privacy Policy HERE
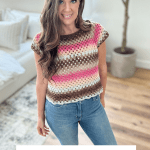
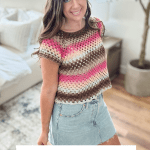
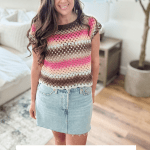
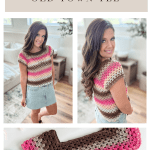
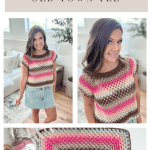
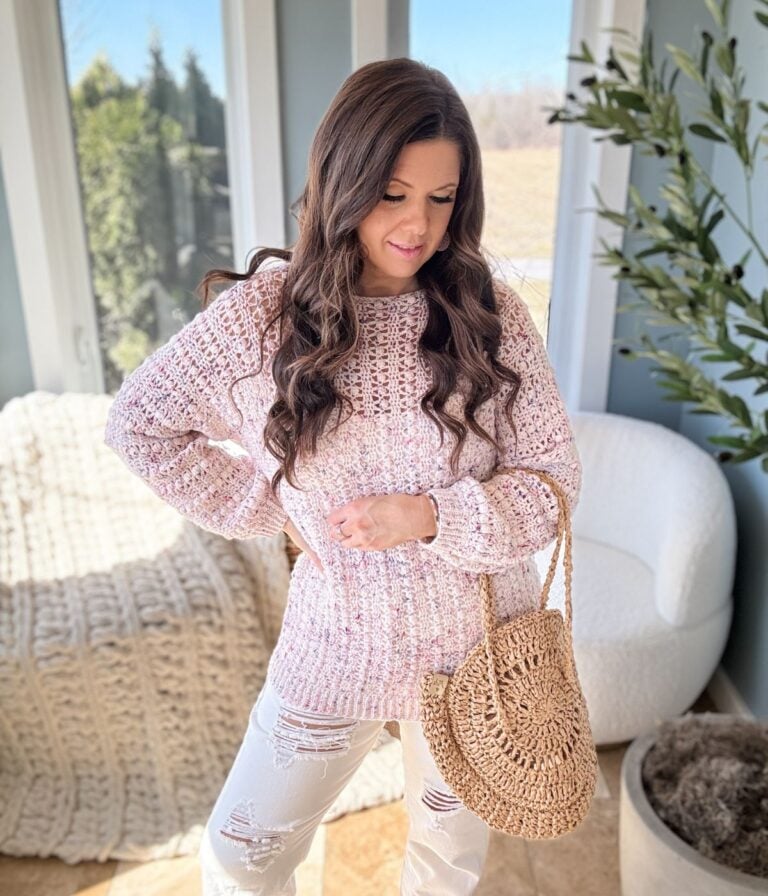
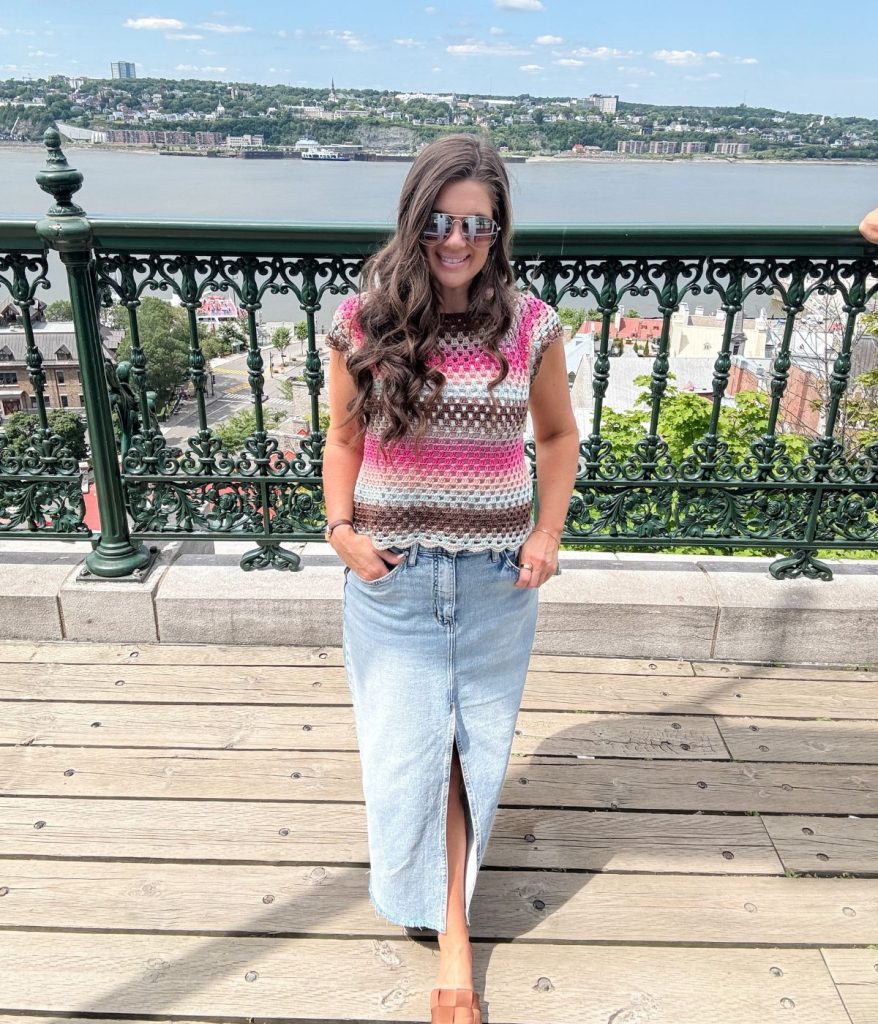
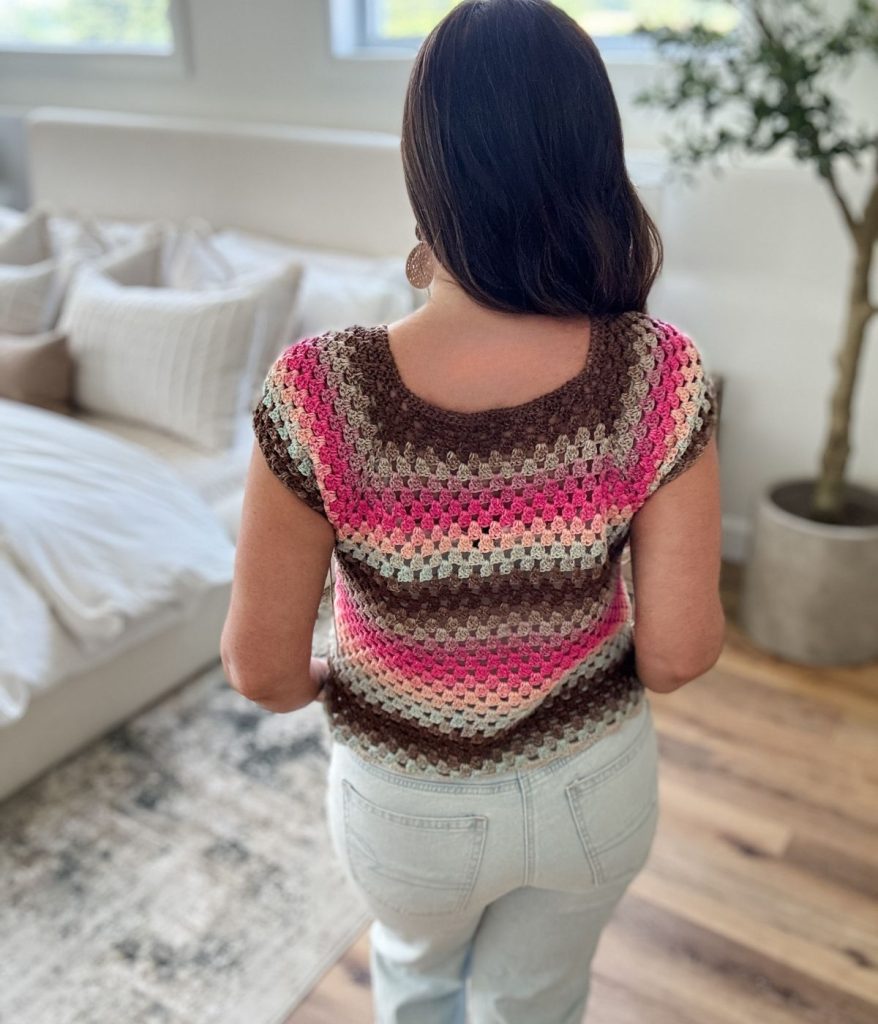
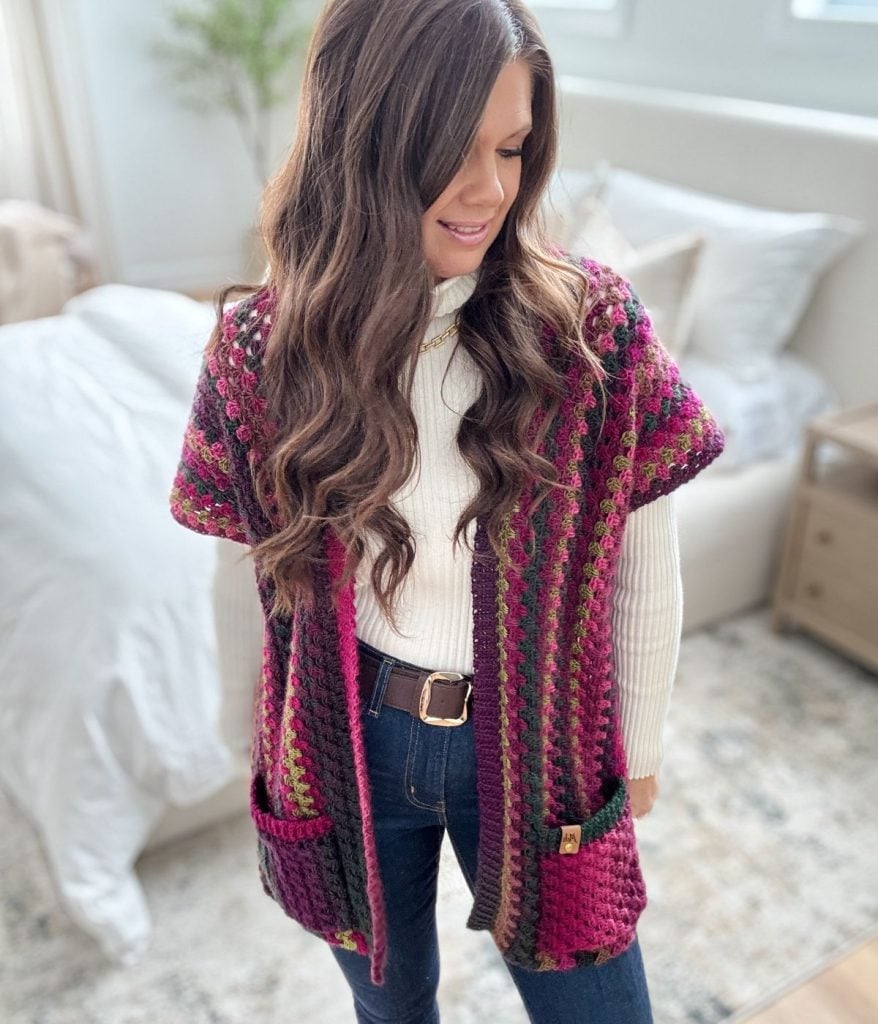
Step into summer with the Old Town Tee, a cheerful crochet top inspired by the winding cobblestone streets and historic charm of Old Quebec City.
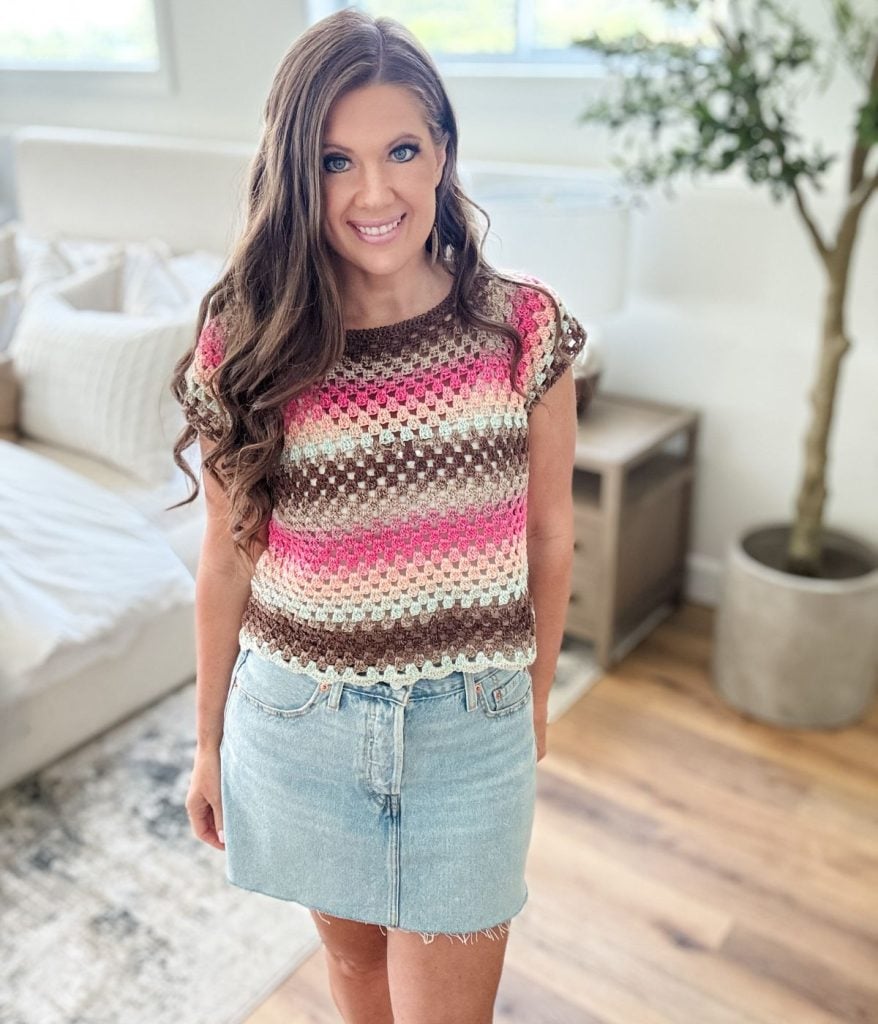
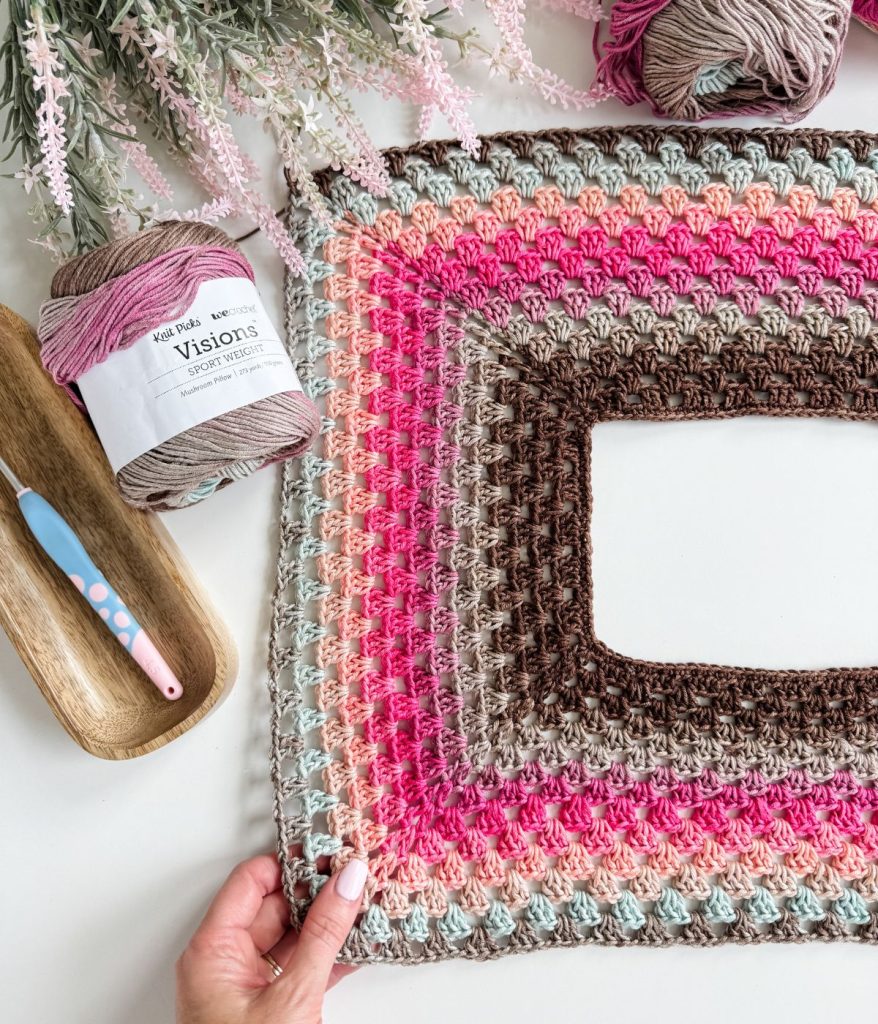
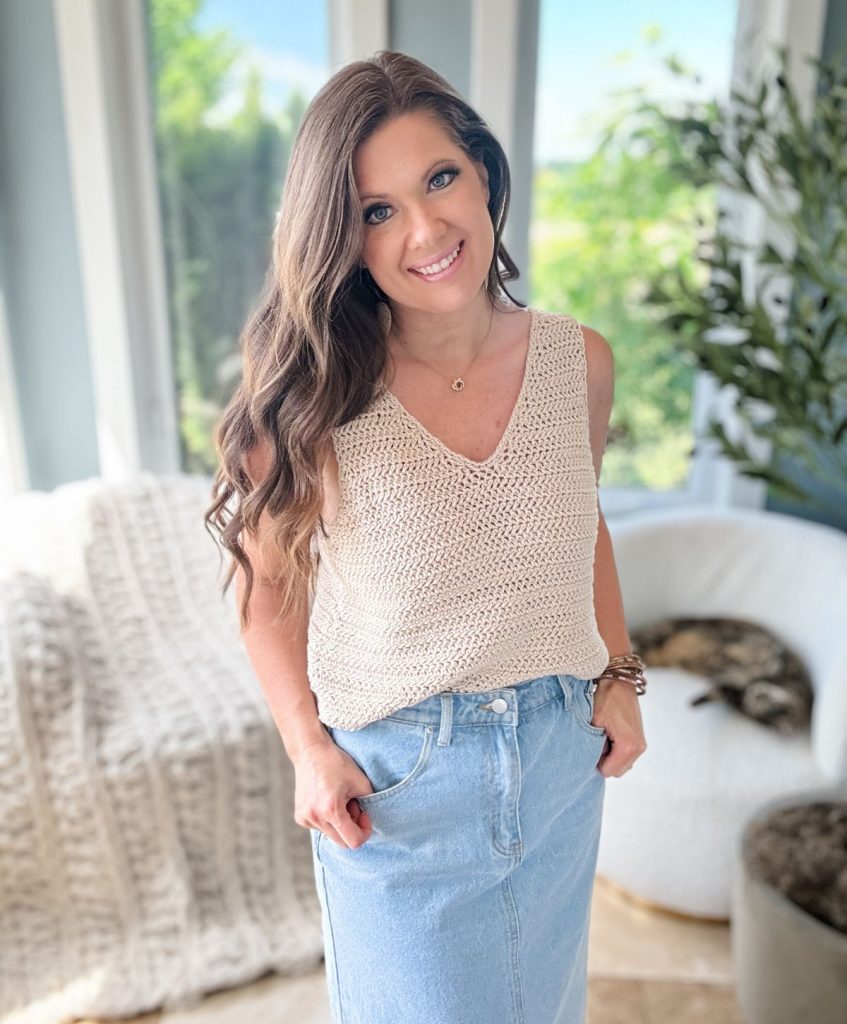
Designed with WeCrochet’s Visions gradient yarn, this eye-catching tee echoes the pastel storefronts, sunlit stone walls, and flower-filled balconies that make Quebec’s oldest neighbourhood so unforgettable.
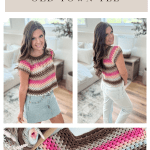
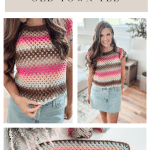
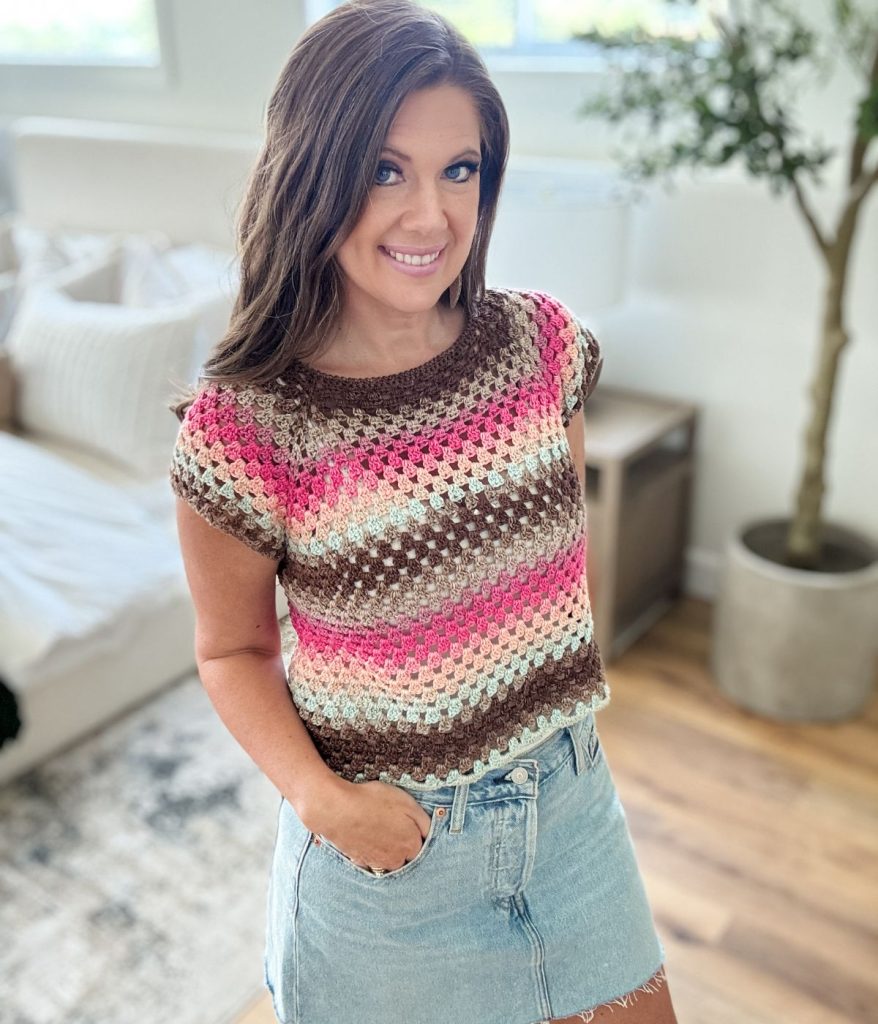
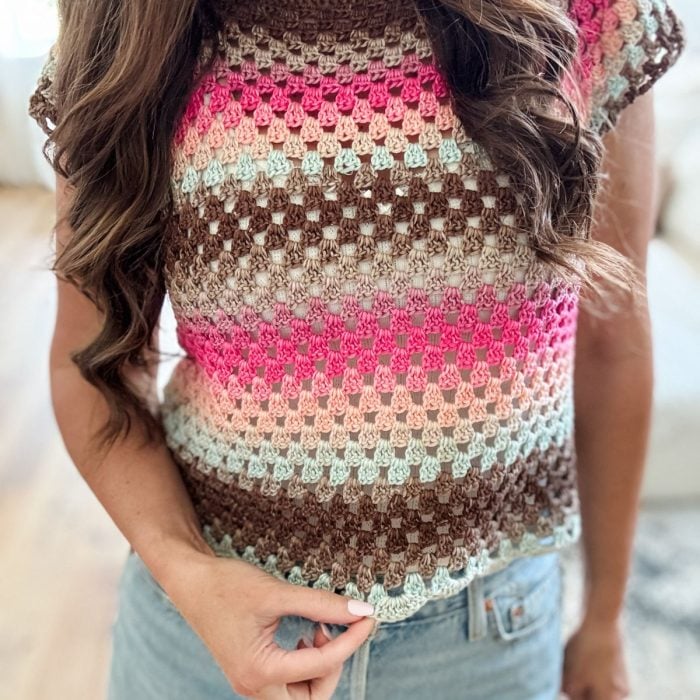
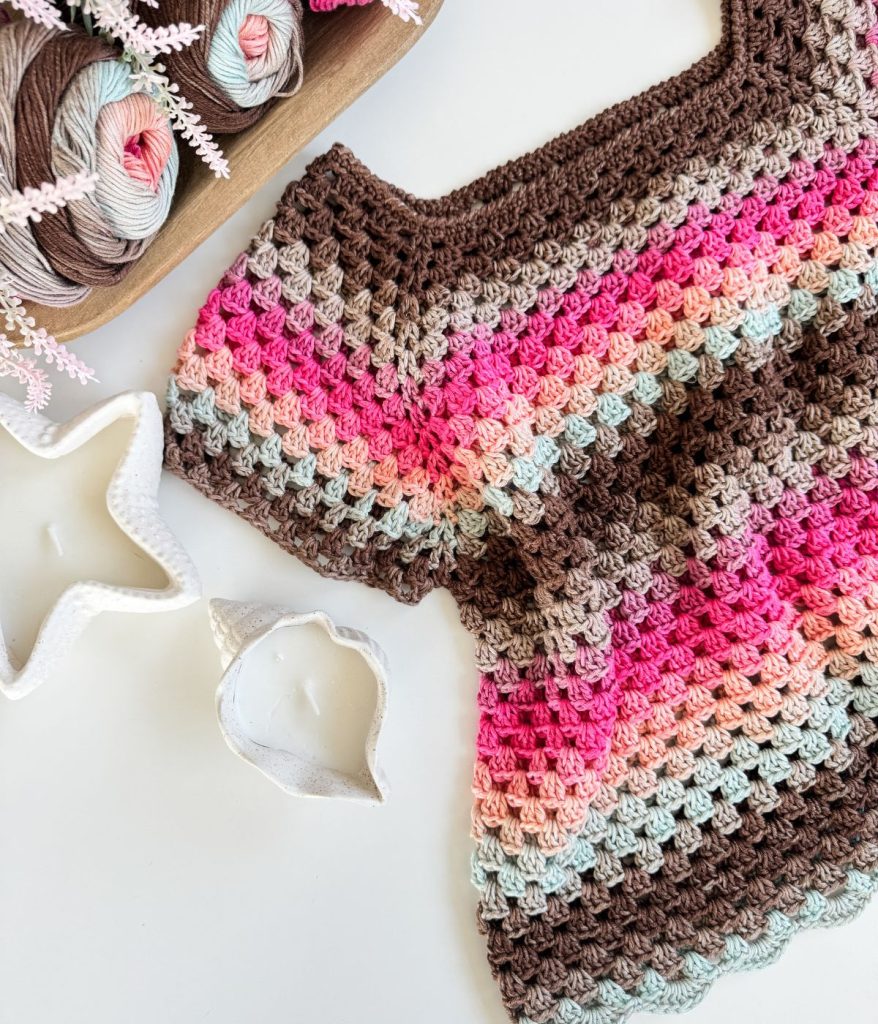
Worked seamlessly from the top down in the round, the Old Town Tee features gentle cap sleeves and a whimsical scalloped hem, bringing a touch of vintage flair to a modern silhouette. The smooth gradient transitions create a stunning ombré effect, making every tee as uniquely beautiful as the city that inspired it.
Lightweight, breathable, and easy to wear, it’s perfect for strolling open-air markets and sipping coffee on terrace cafés. Whether you’re an adventurous beginner or a seasoned maker, the pattern includes sizes XS to 5X and a complete step-by-step video tutorial on YouTube to guide you every step of the way.
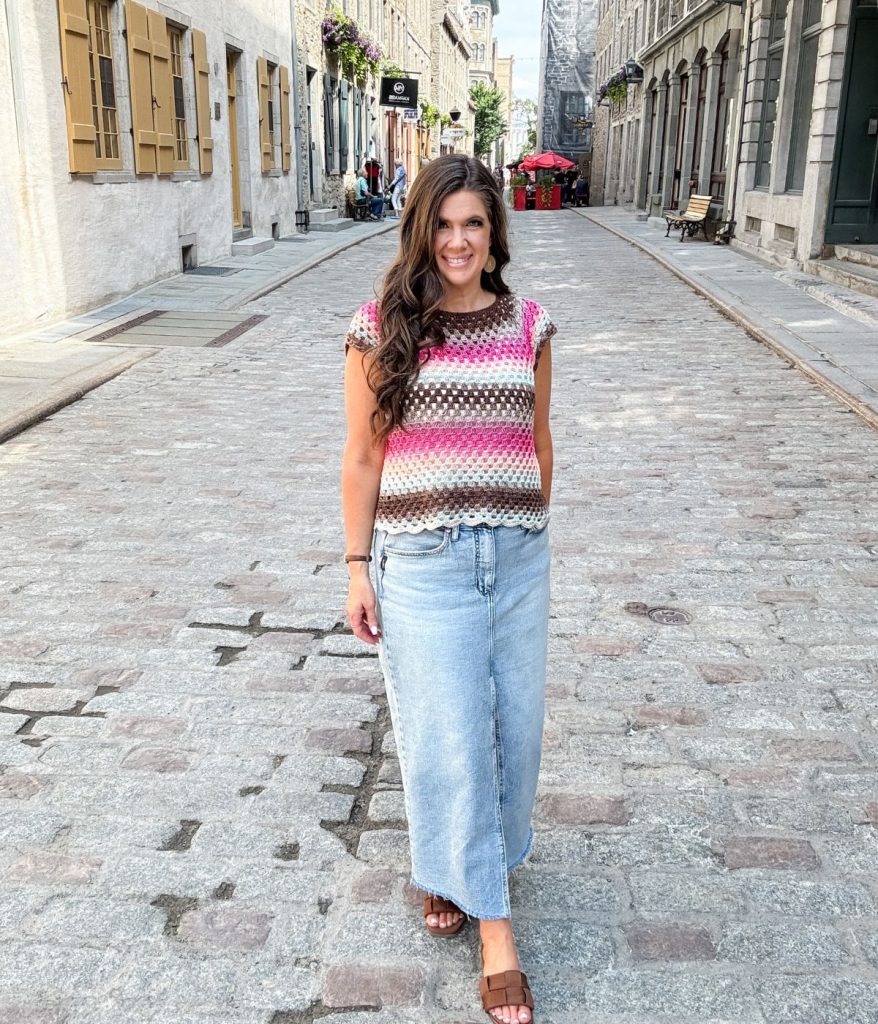
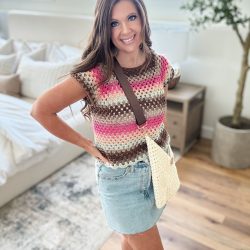
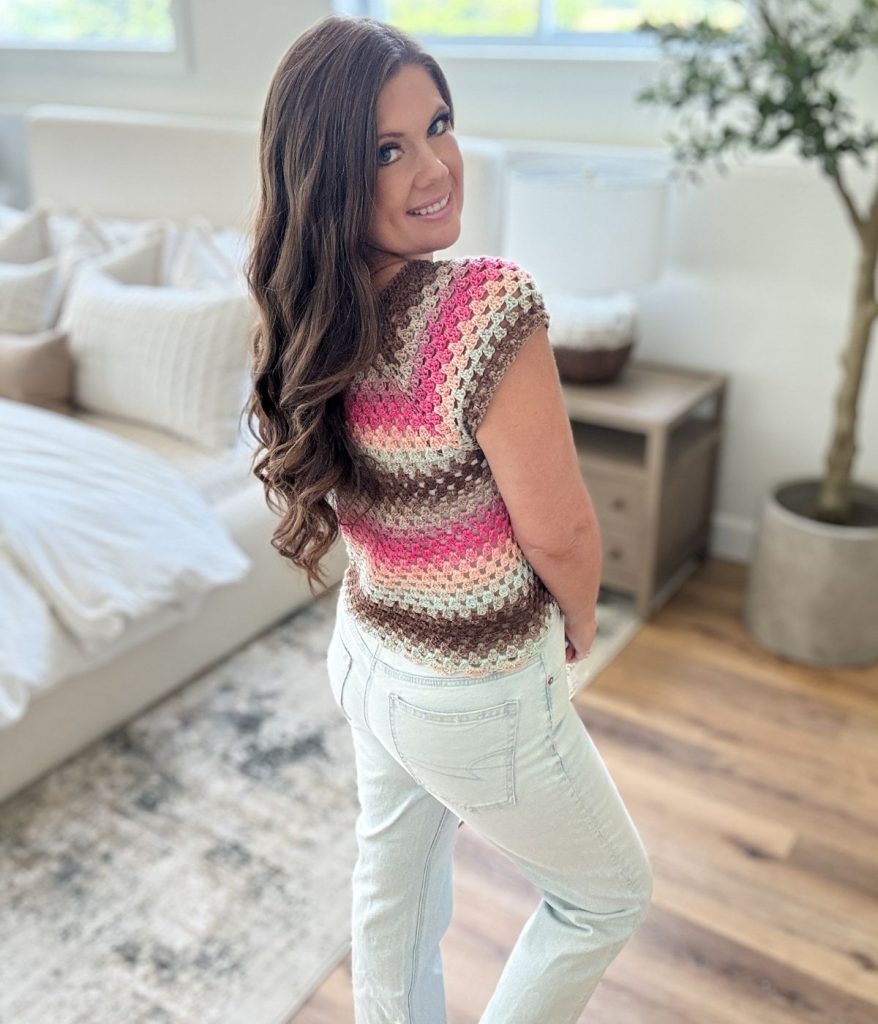
Pair it with your favourite denim, a flowy skirt, or shorts, the Old Town Tee is a versatile wardrobe staple that captures the essence of summer in every stitch.
Quebec
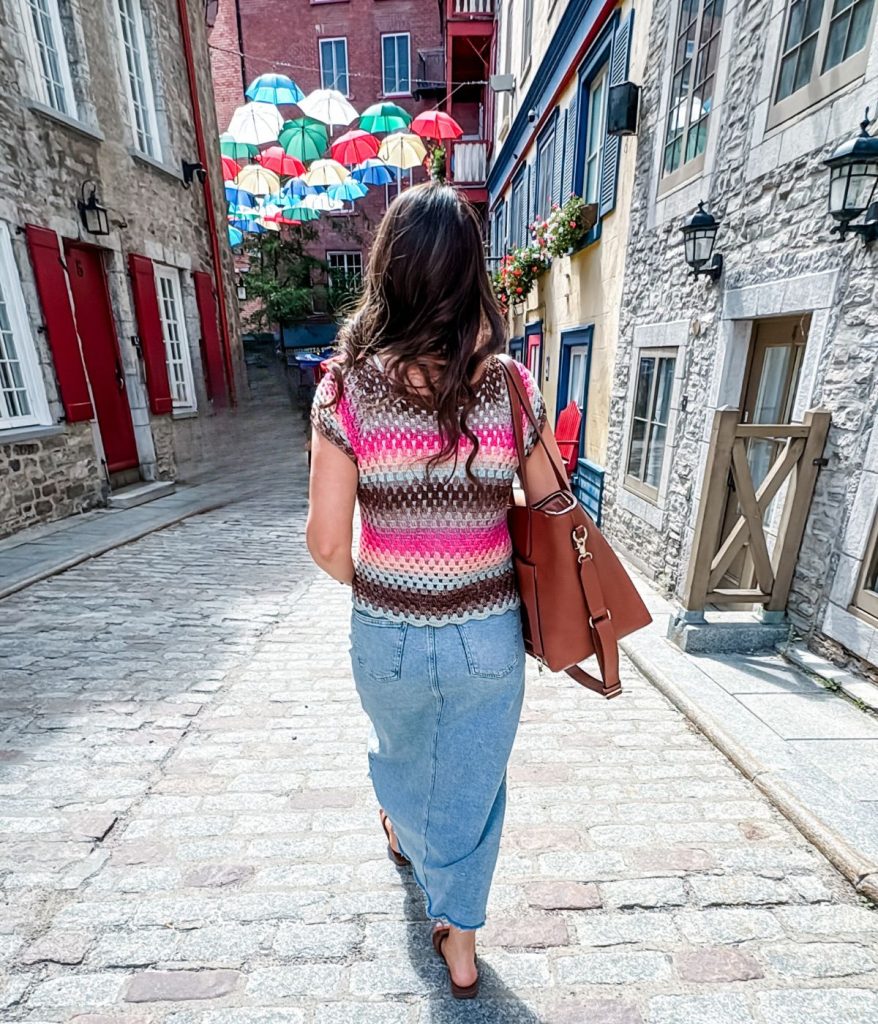
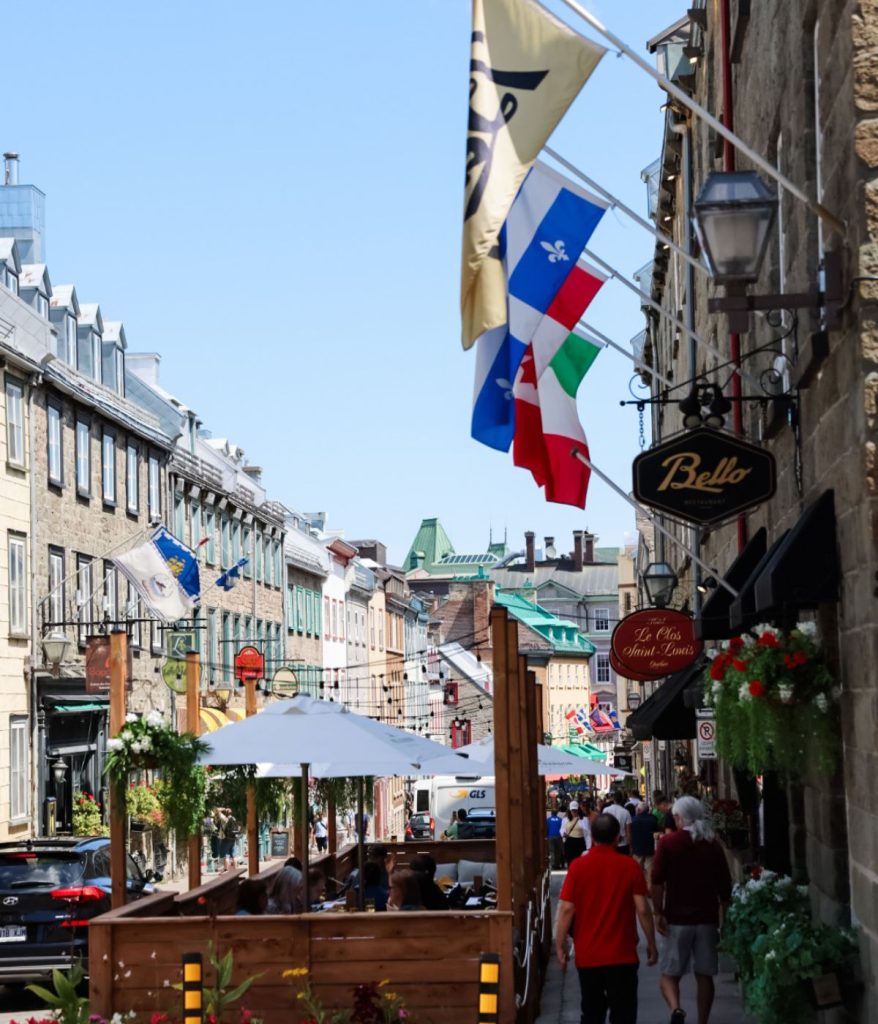
The Old Town Tee was inspired by our recent trip to Quebec City. A Canadian gem that feels like a slice of Europe. We travelled by Via Rail, starting with two nights in Montreal before continuing on to Quebec City. From the moment we arrived, we were immersed in charm: cobblestone streets, pastel storefronts, flower-filled balconies, and the striking Château Frontenac, a grand hotel built in 1893 that overlooks the St. Lawrence River and anchors the city’s skyline.
We explored the city on foot, taking in its rich history on a walking tour, strolling through lush gardens, and soaking up the vibrant atmosphere. Evenings were spent enjoying local cuisine, sipping drinks beneath the colourful umbrellas of Rue du Cul-de-Sac, and listening to live street music while savouring ice cream. Designed in WeCrochet’s Visions gradient yarn, the Old Town Tee captures the soft, romantic tones of Quebec’s oldest neighbourhood, from sunlit stone walls to blooming balconies, and the timeless beauty that makes this place unforgettable.


Yarn Requirments
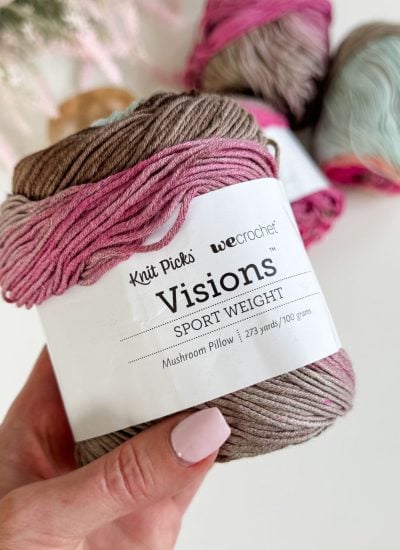
WeCrochet Visions Sport Weight #2
273yds/100g, 50% Cotton, 50% Viscose Shown in Mushroom Pillow
See the size chart below for yarn requirements
Size Chart
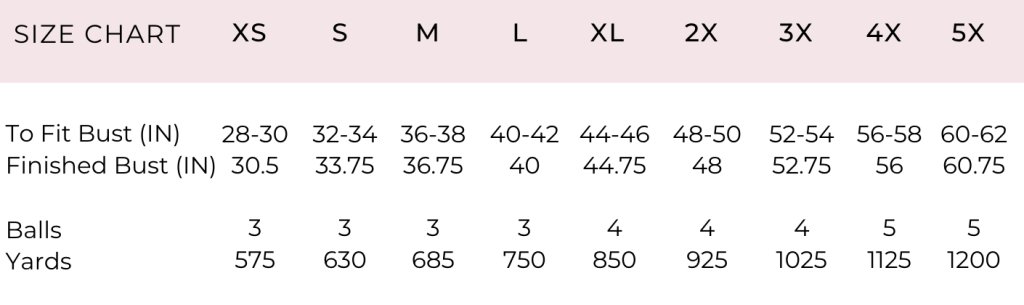
Please note, this design is intended to be a close fit with negative ease for the larger size range. If you prefer a more relaxed or oversized fit, consider sizing up. When choosing your size, refer to your preferred Finished Bust Measurement. For reference, the model is wearing a size Medium, has a 36″ bust, and is 5’6″ tall.
Yarn amounts are approximate and may vary depending on the brand and your individual tension. To be safe, it’s always a good idea to purchase a little extra yarn to ensure you have enough to complete your project.
Skill Level
Gauge:
Body: 5 clusters and 5 ch-sps (20 sts) & 9.5 rows equal to 4″ with 4.5mm crochet hook in pattern
Yarn Substitution:
Before beginning your project, it’s highly recommended to create a gauge swatch. This step ensures your stitch tension matches the pattern’s specifications, especially important if you’re substituting yarn or the recommended yarn is unavailable. Achieving the correct gauge is essential for the intended fit and drape of the garment.
If you’re using a different yarn weight, be aware that it can affect the final size of your project. As long as you can meet the required gauge and your fabric still has a nice drape and flow, you can proceed without modifying the pattern. However, if your yarn works up significantly larger and you can’t meet gauge, you may need to adjust the pattern yourself or consider making a smaller size.
Adjusting your hook size is the most common way to achieve the correct gauge. You might also find that switching hook brands or styles helps. Keep in mind, not all Sport Weight (#2) yarns are created equal—thickness, drape, and softness can vary widely between brands.
For your swatch, I recommend using a granny stitch swatch, similar to what’s shown in our Mountascapes tutorial (linked HERE). After completing the swatch, measure the center for accuracy. If you have too many stitches, go up a hook size; if you have too few, switch to a smaller hook. You can also adjust stitch length by pulling gently on your yarn or modifying your tension.
Finally, I’ve included several yarn alternatives that would work well for this project if a substitution is needed.
Suitable Yarn Substitutes for Visions
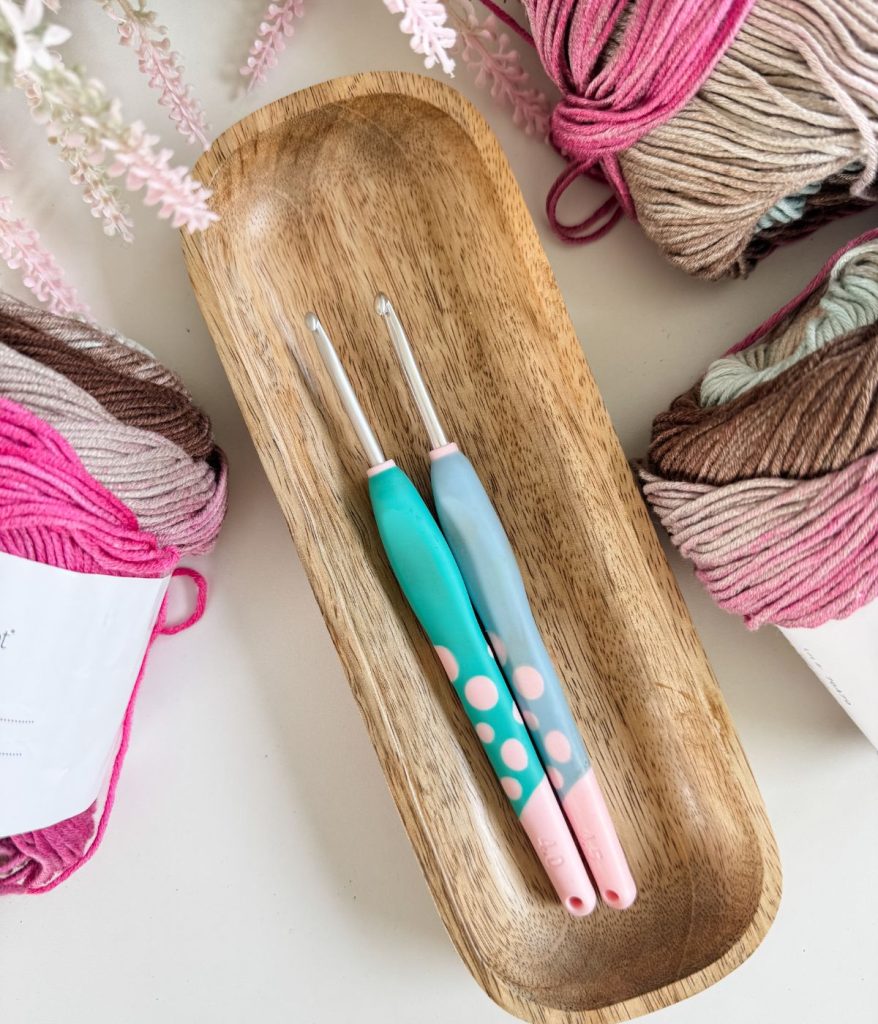
Crochet Hooks Required
Or size needed to obtain gauge
Materials
Abbreviations
Ch – Chain
Dc – Double Crochet
Rep – Repeat
RS – Right Side
Sc – Single Crochet
Sk – Skip
Sl St – Slip Stitch
Sp(s) – Space(s)
St(s) – Stitch(es)
V St – dc, ch 1, dc in the same st
( ) – Work step in parentheses in indicated stitch
[ ] – Work step in brackets the number of times indicated
Special Stitches
Cluster: Work 3 dc in indicated space.
Reverse Single Crochet (rev sc): Work as you would a regular single crochet, but insert your hook from left to right and stitch in the opposite direction, moving to the right instead of the left.
Shell: Work 7dc in the indicated space.
Construcion
The Old Town Tee is worked seamlessly from the top down in a raglan style, allowing you to easily customize the length as you go. The yoke is worked in the round, with increases at the raglan seams to shape the shoulders. Once the yoke is complete, the sleeves are separated and the body is joined and worked in a continuous round. The body is finished with a delicate scalloped edge hem for a playful and polished look. To complete the top, each sleeve is joined and finished with one simple round, making this a quick and satisfying garment to crochet.
Video Tutorial For The Granny Stitch Top
The included step-by-step video tutorial (demonstrated in size Medium) walks you through the entire construction of the Old Town Tee—from starting the top-down raglan yoke, shaping the body and sleeves, to working in continuous rounds and finishing with the scalloped edging. You’ll also learn how to try on the top as you go for the perfect fit and how to customize the length. This video serves as a great visual complement to the written pattern and is ideal for both visual learners and adventurous beginners.

Watch the Tutorial Now
In this video, we’ll guide you through each step of the pattern, allowing you to create the Old Town Granny Stitch Tee in size Medium.
Purchase the Beautifully Designed AD-FREE PDF Download
The Premium PDF includes the schematic, stitch chart and a row chart to keep track of each section of the yoke.
Old Town Tee: Granny Stitch Top Pattern
FAQ & Terms
This pattern requires an Intermediate – Advanced Skill Level
This pattern is professionally written in technical writing and tech edited for accuracy. You need to be comfortable reading technical repeats.
This post may contain affiliate links. Purchases made through these links may earn MJ’s Off The Hook Designs Inc. a small commission at no extra cost to you. Content on this site is supported by ads—please do not block or remove them.
Copyright
All patterns, photos, and written content are the property of MJ’s Off The Hook Designs Inc. and protected by copyright law.
Usage
Free patterns are for viewing only on this blog. You may not copy, download, print, screenshot, or redistribute any part of the pattern. Access must remain through this page with ads visible. Use of ad blockers, reader view, or any similar tools that remove or hide ads and site content is strictly prohibited.
Legal Notice
Unauthorized reproduction or distribution may result in copyright infringement penalties.
By accessing this post, you agree to these terms and conditions.
Yes! You may sell finished items made from MJ’s patterns, but please credit:
“Pattern by MJ’s Off The Hook Designs Inc.”
Pattern Support is only available in our Facebook Community group and Video Tutorials.
No additional support is provided for modified patterns, alternate yarns, or changes to gauge.
If you’re seeing the message “Email subscription failed, please try again”, don’t worry — it’s usually an easy fix! Here are a few quick things to try:
First, double-check your login details. Make sure you’re signing in with the same email you originally used to create your Grow account. If you’re not sure, click “Forgot Password” to reset your login. Once you’ve updated it, return to my site and try again.
Next, clear your browser’s cache and cookies. Sometimes the login just gets stuck. You can also try opening the page in a private or incognito window, or switching to another browser like Chrome, Safari, or Firefox to see if that does the trick.
It also helps to make sure you’re logged into Grow directly. Visit https://grow.me and sign in there first. Once you’re logged in, come back to my site and refresh the page — your pattern should unlock automatically.
If you’re still having trouble, check your browser’s privacy settings. Grow needs cookies to verify your account, so make sure cookies and cross-site tracking are allowed. On iPhone, go to Settings → Safari → Privacy & Security, then turn off “Prevent Cross-Site Tracking” and “Block All Cookies.” On Android or Chrome, go to Settings → Site Settings → Cookies and select “Allow all cookies.”
Lastly, ad blockers or browser extensions can sometimes block the login pop-up. Try turning them off temporarily while you sign in. If nothing seems to work, log out of Grow completely by going to https://grow.me, selecting your profile icon, and choosing Log Out. Then come back to my site and try logging in again.
If you’re still stuck after trying all of this, please reach out through my Contact Page and let me know what device and browser you’re using (and include a screenshot if you can).

Pattern
Notes
The top is worked from the top down in the round. All sizes have the same neck opening size. Work the top in rounds until the required size is reached. The pattern is written for the smallest size, with the larger sizes in parentheses ( ). If there is only 1 number, it applies to all sizes—a step-by-step video tutorial is provided on YouTube.
Rounds – (12, 14, 14, 14, 14, 14, 14, 14)- -(13, 15, 17, 19, 21, 23, 25, 27):
Ch 4, 1 dc in the same st, ch 2, (2 dc, ch 2) in each ch-2 sp to v st, v st in v st, ch 1, (cluster, ch 1) in each ch-1 sp to v st, v st in v st, ch 2, (2 dc, ch 2) in each ch-2 sp to v st, v st in v st, ch 1, (cluster, ch 1) in each ch-1 sp to v st, sl st in the v st to join—x (74, 82, 90, 98, 106, 114, 122, 130) clusters, 4 v sts.
Separate Body and Sleeves
Body
Notes:
The body is worked in a continuous round without joining. Use a stitch marker to mark the first cluster of each round. As you progress, the starting cluster will shift diagonally across the front of the top.
Round 1:
Sk over the right sleeve section to the next v st, sl st in the v, sl st in the next ch-1 sp, ch 2, 2 hdc in the same sp, ch 1, (cluster, ch 1) in each ch-1 sp to next v st, sk v st, sk sleeve section and next v st, (cluster, ch 1) in each ch-1 sp to last ch-1 sp, don’t join—38 (42, 46, 50, 54, 58, 62, 66, 70) clusters.
Note: Using matching yarn, work a slip stitch into each of the V-stitches that separate the sleeve section to join. Alternatively, you can complete this step when attaching the yarn to begin working the sleeve.
Round 2:
(Cluster, ch 1) in each ch-1 sp around.
Increase Rounds
For Sizes XL–5X only. You may also choose to increase for smaller sizes if a looser fit is preferred. Increases should be evenly spaced across the front section of the top. To increase, work (cluster, ch 1, cluster) into a single ch-1 space. Begin increases at Round 3.
- Size XL: Work 1 round of increases, adding 2 extra clusters. You should have 56 clusters at the end of the round.
- Size 2X: Work 1 round of increases, adding 2 extra clusters. You should have 60 clusters at the end of the round.
- Size 3X: Work 2 rounds of increases, adding 2 clusters per round. You should have 66 clusters total.
- Size 4X: Work 2 rounds of increases, adding 2 clusters per round. You should have 70 clusters total.
- Size 5X: Work 3 rounds of increases, adding 2 clusters per round. You should have 76 clusters total.
Rounds 3-22:
(Cluster, ch 1) in each ch-1 sp around—38 (42, 46, 50, 56, 60, 66, 70, 76) clusters. Try on the top as you go to check the fit and adjust the length as desired. For sizes with increases, work the indicated increase rounds between Rounds 3–5 as outlined above.
Edging
Because the start of the round shifts diagonally across the front of the top, you may choose to either stop at Round 22, ending at the side of the top (aligned with the underarm), or continue to Round 23 to finish on the opposite side, also aligned with the underarm. In the last cluster of the round, work a hdc cluster, ch 1.
Round 1:
Shell st in first ch-1 sp, sc in next ch-1 sp, * shell st in next ch-1 sp, sc next ch-1 sp, rep from * around, sl st in dc of first shell to join. Fasten off and weave in tail—19 (21, 23, 25, 28, 30, 33, 35, 38) shell sts.
Sleeves
Left: With matching yarn to the sleeve opening
Round 1 (RS):
If v-sts have not been joined. Put a slip knot on the larger hook (leave a long tail); at the underarm, work a sl st in the first V st (to the right), sl st in next V st (to the left), sl st in next ch-1 sp, ch 3, 1 dc in ch-1 sp, ch 1, *(2 dc, ch 1) in next ch-1 sp; rep from * around, sl st in ch-3 to join—16 (18, 20, 22, 24, 26, 28, 30, 32) 2-dc clusters.
Fasten off and weave in tail. Use the starting tail to stitch closed the hole under the arm.
Right: With matching yarn to the sleeve opening
Round 1 (RS):
Join yarn at underarm in ch-1 sp, ch 3, 1 dc in ch-1 sp, ch 1, *(2 dc, ch 1) in next ch-1 sp; rep from * around, sl st in ch-3 to join—16 (18, 20, 22, 24, 26, 28, 30, 32) 2-dc clusters. Fasten off and weave in the tail. Chaining 1 instead of 2 will slightly draw in the sleeve cap for a more tailored fit.
Neck Edging (optional)
With matching yarn to the neck opening.
Round 1:
Join yarn to the back right side of the top, ch 1, work 1 sc in first st, *rev sc in next st to the right; rep from * around, sl st in first st to join. Fasten off and weave in tails.
Looking for Pattern Support?
Head over to my Facebook Community Group to ask any questions about this pattern, share photos of your MJ’s Designs, and cheer on fellow crocheters!
Our group has a vibrant and supportive community of experienced crocheters who have made various MJ patterns. They are always eager to offer guidance and share their experiences, so don’t hesitate to reach out and connect with them.
Thank you for joining our community, and happy crocheting!
I hope you love our Old Town Tee, Granny Stitch Top Pattern. You might also love these crochet patterns!
For more crochet patterns by MJ’s Off The Hook Designs see our Ravelry and Etsy Shop. Check out our Facebook and Instagram for inspiration.
You’ve got questions, we’ve got a community!
Crocheting is better with friends! Join our group to post pictures and ask all your pattern support questions.