


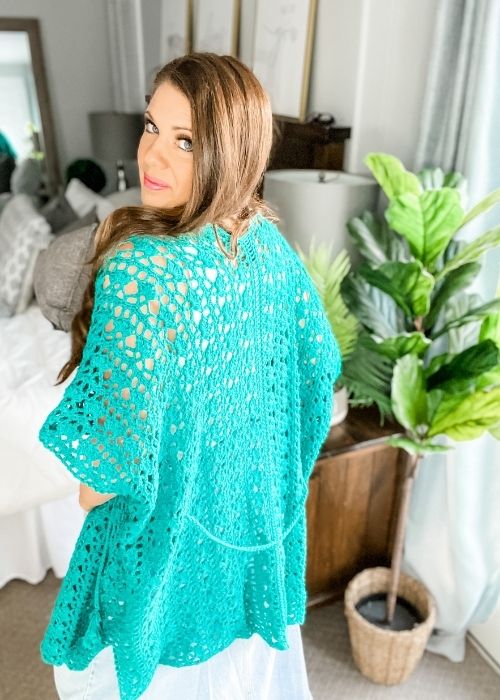
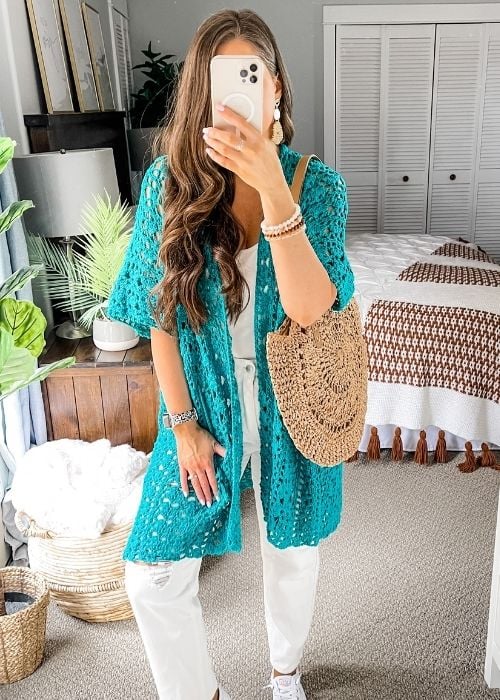
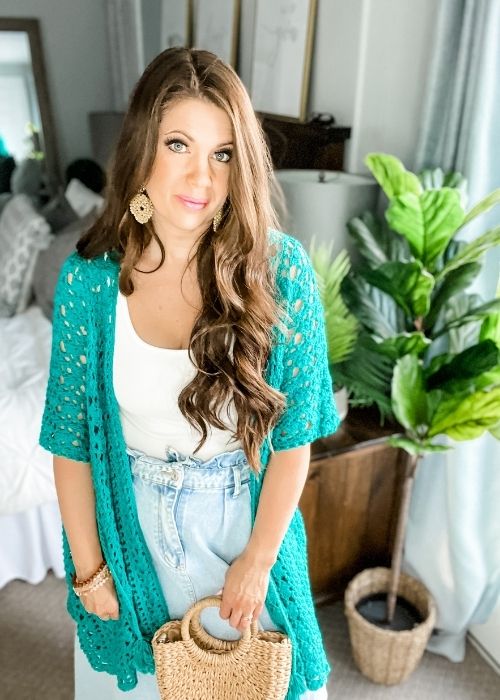
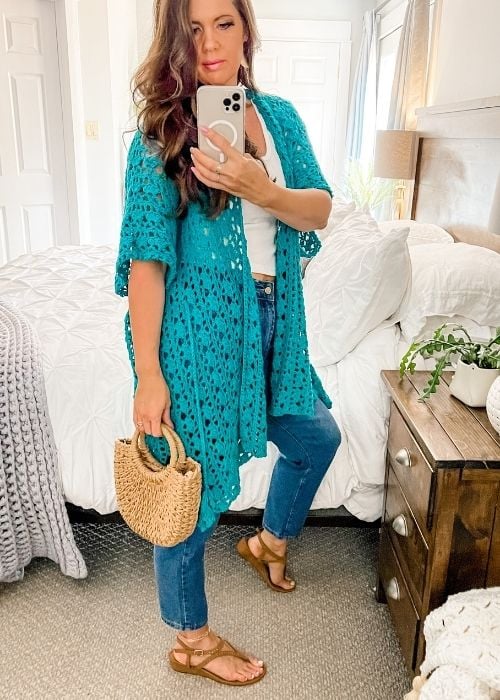
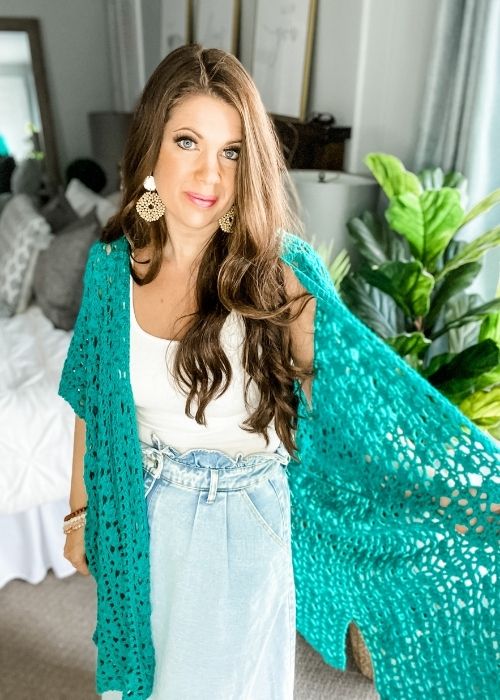
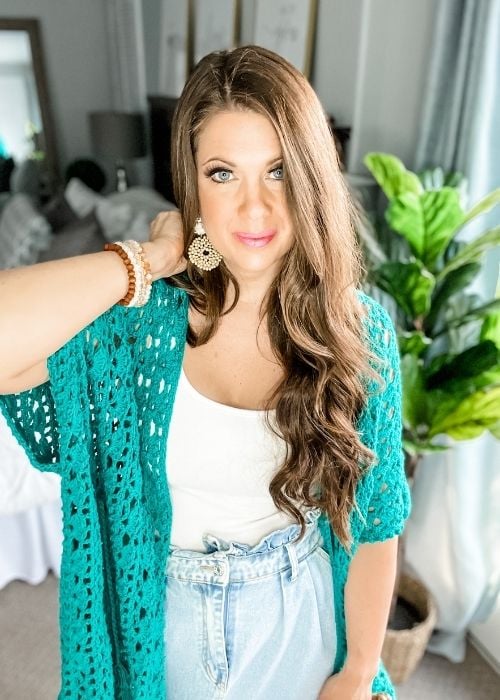
The Lacy Days Kimono crochet pattern is a beautifully versatile piece for Spring/Summer. Easy construction is worked in two pieces from the side across and laced up the back. A gorgeous feather belt finishes off the piece. Leave open and wear as a loose crochet cardigan or use as a beach coverup. This soft feminine design is made in Knit Picks / WeCrochet Cotlin. Shown in Marina. Keep scrolling for the free crochet pattern
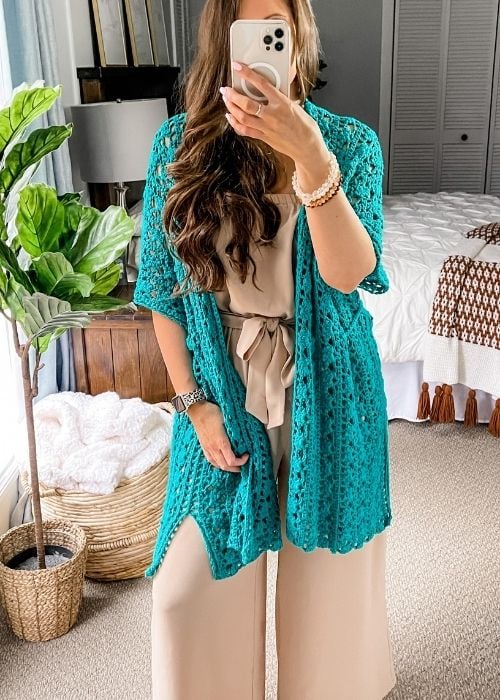
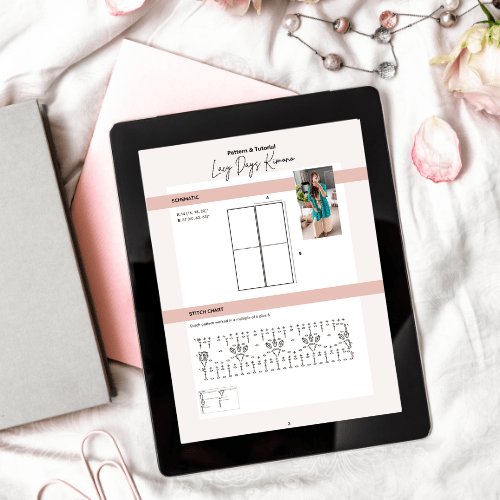
This oversized crochet kimono looks beautiful with any of your Summer outfits! Wear with jeans, shorts a romper or to the beach. The Lacy Days Kimono is an easy crochet coverup pattern and is written in standard American terms. The Crochet Pattern includes sizes XS – 5X. The schematic and lace pattern stitch chart is included with the written PDF.
Table of Contents
The Lacy Days Kimono crochet cardigan pattern calls for a US I/9 (5.5mm) or size needed to obtain gauge.
I love the Furls streamline crochet hooks. You can purchase them HERE with code MJS15
The lace crochet stitch works up quickly and is easily constructed by working two large rectangular panels! It’s a simple pattern to crochet in only two pieces.
The Yarn
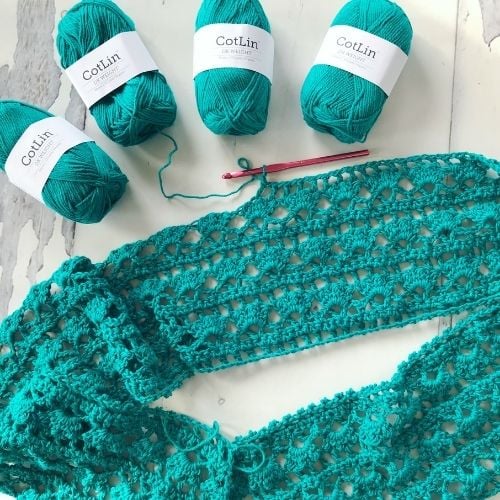
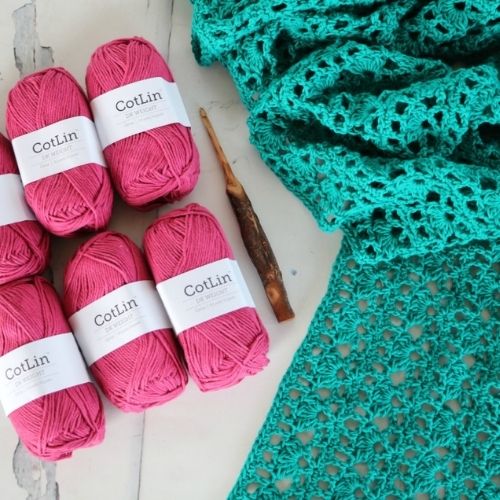
I crochet the Lacy Days Kimono crochet pattern in
Knit Picks/WeCrochet Cotlin DK Weight- 70% Tanguis Cotton, 30% Linen (123 yds/50g) Shown in Marina
Substitutes
Comfy Worsted (slightly thicker)
Lacy Days Kimono Free Crochet Pattern
Get the PDF on RAVELRY, or ETSY or the Digital interactive pattern on Ribblr in Spanish and English

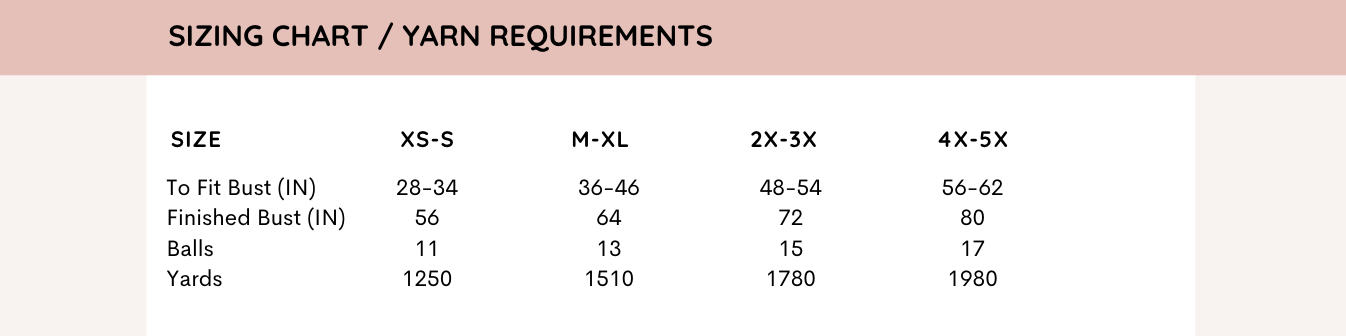
Yarn Requirements Lacy Days Kimono:
Knit Picks/WeCrochet Cotlin DK Weight- 70% Tanguis Cotton, 30%
Linen (123 yds/50g) Shown in Marina
Size Chart
Crochet Hook Requirements:
US I/9 (5.5mm) or size needed to obtain gauge
use code MJS15 for 15% off Furls Hooks
Additional Supplies:
Gauge:
15 sts and 9 rows equal to 4″ in pattern
Swatch – Ch 23 and follow stitch pattern Rows 1-7, Blocked Dimensions 5.25w x 3.5h”
Video:
Watch how to crochet the Lacy Days Kimono on YouTube
Abbreviations
Ch – Chain
Dc – Double Crochet
Pm – Place Marker
Rep – Repeat
RS – Right Side
Sc – Single Crochet
Sk – Skip
Sl St – Slip Stitch
Sp(s) – Space(s)
St(s) – Stitch(es)
WS – Wrong Side
( ) – Work step in parentheses in indicated stitch
[ ] – Work step in brackets number of times indicated
Construction
The Lacy Days Kimono is worked in 2 pieces from the side across. Make 2 large rectangles and lace the back together. The pattern is written for the smallest size with larger sizes in parentheses ( ). Step by step video tutorial is provided on our YouTube channel for M-XL size. This is an oversized piece. Choose size based on desired finished dimensions.
Special Stitches
Stitch (ch 1) – In indicated stitch, work 1 dc, ch 1, 1 dc, all in the same st.
V Stitch (ch 2) – In indicated stitch, work 1 dc, ch 2, 1 dc, all in the same st.
2 Dc Cluster Stitch – Yo (yarn over), go through indicated stitch and pull up a loop, yo, pull through 2 loops, yo, going through the same st, pull up a loop, yo, pull through 2 loops, yo, pull through all 3 loops on the hook.
3 Dc Cluster Stitch – Yo (yarn over), go through indicated stitch and pull up a loop, yo, pull through 2 loops, *yo, going through the same st, pull up a loop, yo, pull through 2 loops; rep from *[1 more time], yo, pull through all 4 loops on the hook.
Copyright
This pattern is the sole property of MJ’s Off the Hook Designs. This pattern is copyright protected and cannot be copied or reproduced in any way. You are welcome to sell your finished items from this pattern. I require a reference or link for my design. My photos are copyright protected and are not to be used to sell your items.

Rectangle Panel – Make 2
XS-S (M-XL, 2X-3X, 4X-5X)
Row 1 (WS): Ch 215 (227, 239, 239), work 1 dc in 7th ch from hook, *ch 1, sk ch, work 1 dc in next ch; rep from * across, turn—211 (223, 235, 235) sts.
Row 2 (RS): Ch 1 (not included as a st here and throughout), work 1 sc in first dc, *work 1 sc in ch-1 sp, work 1 sc in dc; rep from * across, ending with 2 sc in turning ch, turn—211 (223, 235, 235) sts.
Row 3: Ch 4 (counts as 1 dc, ch 1), work 1 dc first st, *ch 2, sk 2 sts, work 1 sc in next st, ch 2, sk 2 sts, work V st (ch 2) next st; rep from * across, ending with V st (ch 1), turn—36 (38, 40, 40) V sts.
Row 4: Ch 3 (counts as first dc of cluster), (work 2 dc cluster, ch 1, work 3 dc cluster) in first ch-1 sp, ch 1, * work (3 dc cluster, ch 1, 3 dc cluster, ch 1, 3 dc cluster) in ch-2 sp, ch 1; rep from * across, end with, work (2 dc cluster, ch 1, 2 dc cluster) in last ch-1 sp, turn—36 (38, 40, 40) cluster shells.
Row 5: Ch 4 (counts as dc, ch 1), work 1 dc in cluster, * ch 1, work 1 dc in next cluster; rep from * across, turn—211 (223, 235, 235) sts.
Rows 6- 29 (33, 37, 41): Rep Rows 2-5 [6 (7, 8, 9) times].
Row 30 (34, 38, 42): Rep Row 2, Fasten off and weave in ends.
Block
Use a blocking mat and pins. Dampen garment and pin piece to measurements. Allow to fully dry. Each panel will measure 14 (16, 18, 20)” x 57 (60, 63, 63)”.
Seaming Back
Lay the rectangle panels side by side RS facing upwards. Place the final Row to the inside and Row 1 of each panel to the outside. The back is seamed in shoe lace style leaving a .75″ lace opening. For each panel pm in 105 (111, 117, 117) st (back), leaving 106 (112, 118, 118) sts for the front of the piece. Double-check count for accuracy.
Cut a piece of yarn 300″ in length. Weave each end of the yarn with a yarn needle through marked sts. Make sure that the yarn is pulled through evenly. Lace-up the back. The last few stitches gradually lace so that it tightens, closing in the gap. See the video for a demonstration.
Seaming Sides
RS facing fold coverup in half at shoulders. Line up the sides for seaming. Make sure all the shells and dc sts are perfectly lined up. Leave a 5 (6, 6, 6)” opening at the bottom of coverup, pm. Leave 9 (10, 11, 12)” opening for arms, pm. When seaming go through dc st, and ch-1 sp on each side.

Belt
Cut 3 pieces of yarn 240 (240, 300, 360)” in length, making a belt approximately 50 (50, 60, 70)” long. Use all 3 strands with a 5.5mm hook and make a long chain. leave a starting and finishing tail of approx. 8″. Tail is used as the base for the feather. With tails make a knot leaving approx. 2.5″ space between belt chain and knot. Cut 48 pieces of yarn 8″ in length per feather (96 total). Knot 2 pieces together, alternate knot direction. Fill in the 2.5″ gap, and cut more pieces if needed. Watch the Video tutorial for a knotting demonstration.
Trim to make a feather shape or cut out a cardboard template. Tape the top of the feather to the template and trim the feather.
Weave the belt through cluster shells. Count shells up from the bottom and across from the opening so that belt is positioned evenly. Do the same for the back. The belt placement can easily be adjusted for size. Shown 11 shells from the bottom and 5 shells from the inside edge/back seam. Steam to finish.
Product Links
4pcs Minimalist Beaded Bracelet
Minimalist Hollow Out Straw Bag
High Waisted Ripped Detail White Jeans
MOTF PREMIUM VISCOSE FORM FITTING SLEEVELESS TOP
Raw Hem Paper Bag Waist Denim Skirt
Women’s BOBS Be Cute Slip On Sneaker
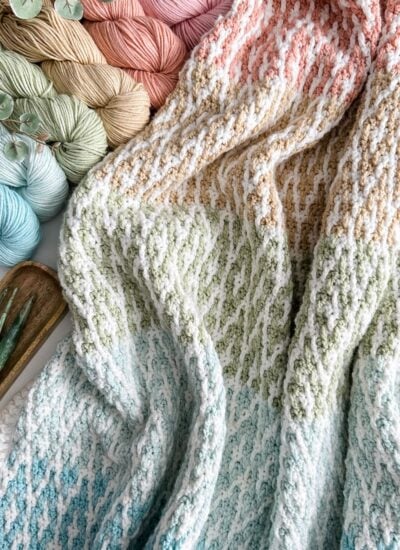
Desert Dunes Mosaic Blanket Pattern
MOTF PREMIUM 14K GOLD PLATED BEADED DROP EARRINGS
Simplee Solid Belted Wide Leg Jumpsuit
For more designs by MJ’s Off The Hook Designs see our Ravelry, Etsy, LoveCrafts, WeCrochet or Ribblr Shop. Check out our Facebook and Instagram for daily inspiration!


*This post contains affiliate links at no cost to you!