*This post may contain affiliate links to support the cost of this blog. At no cost to you, I may make a small commission if you purchase through these links. Read our Privacy Policy HERE


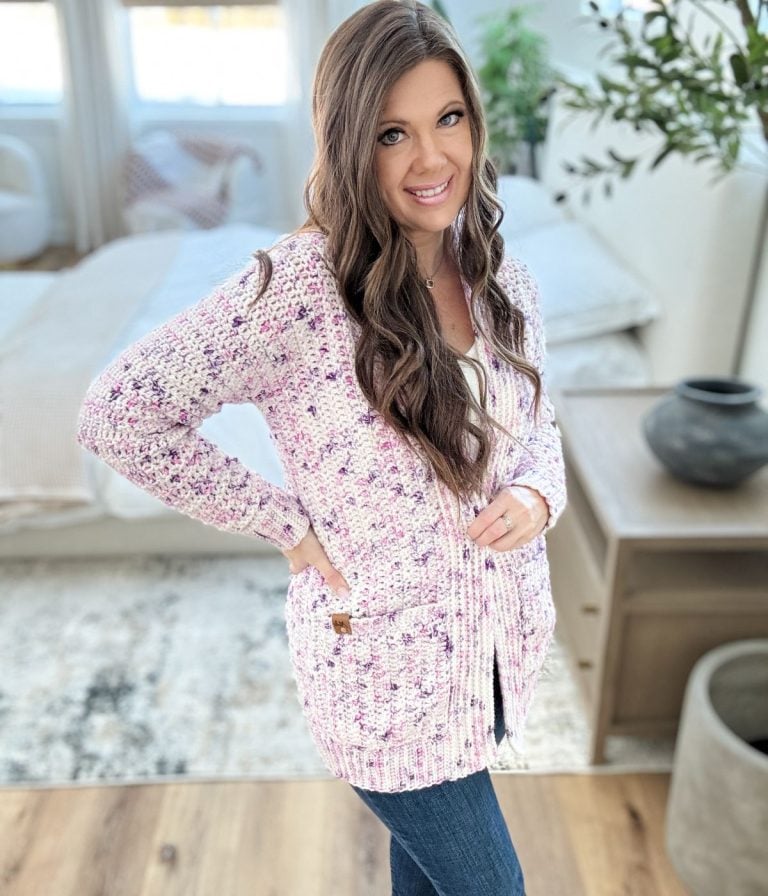
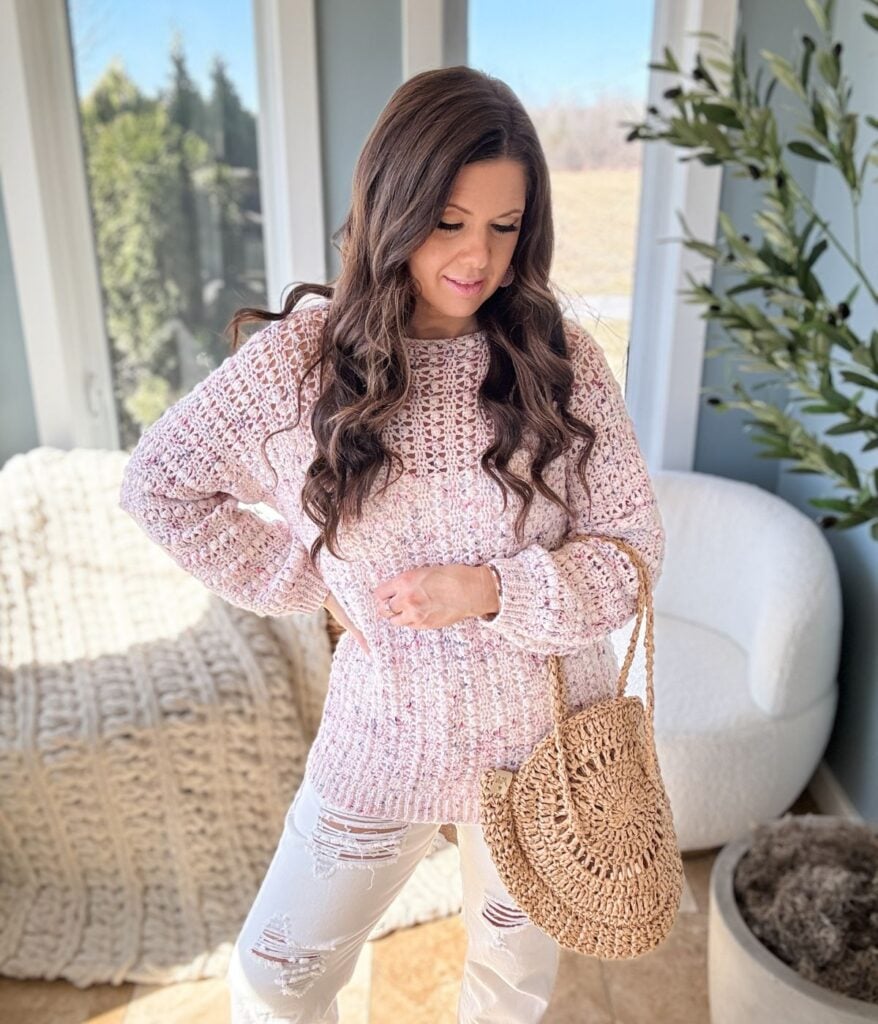
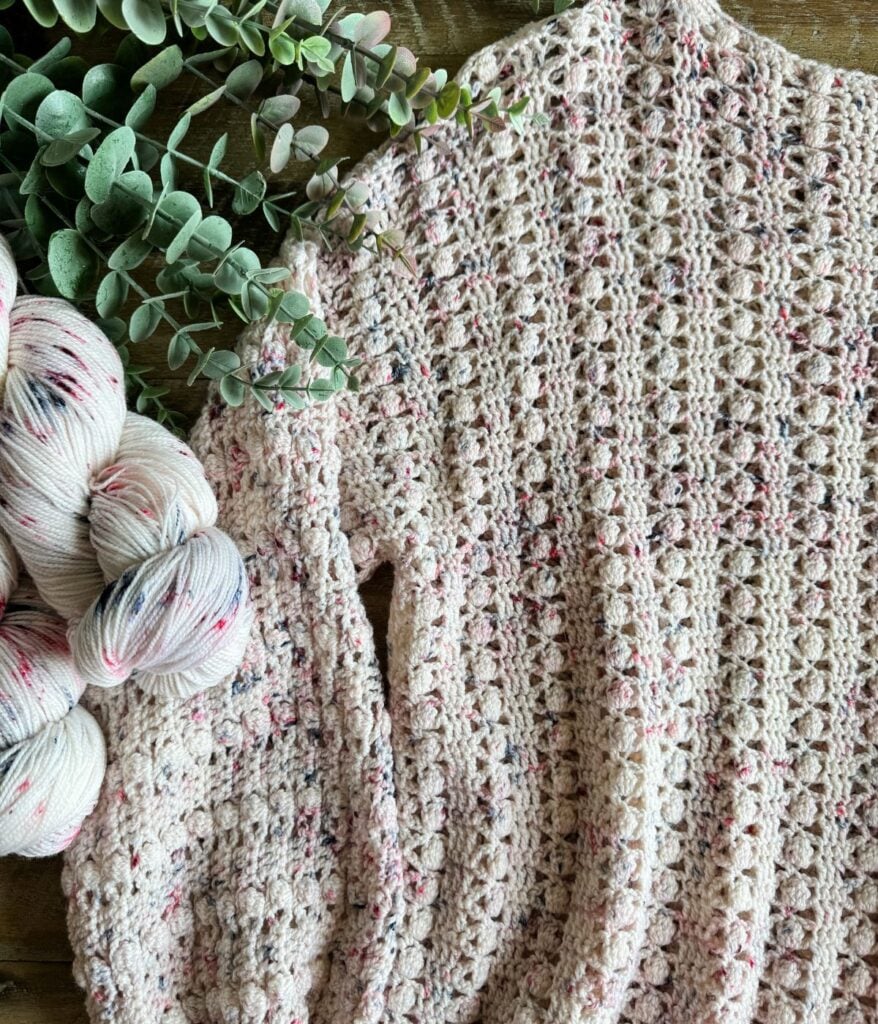
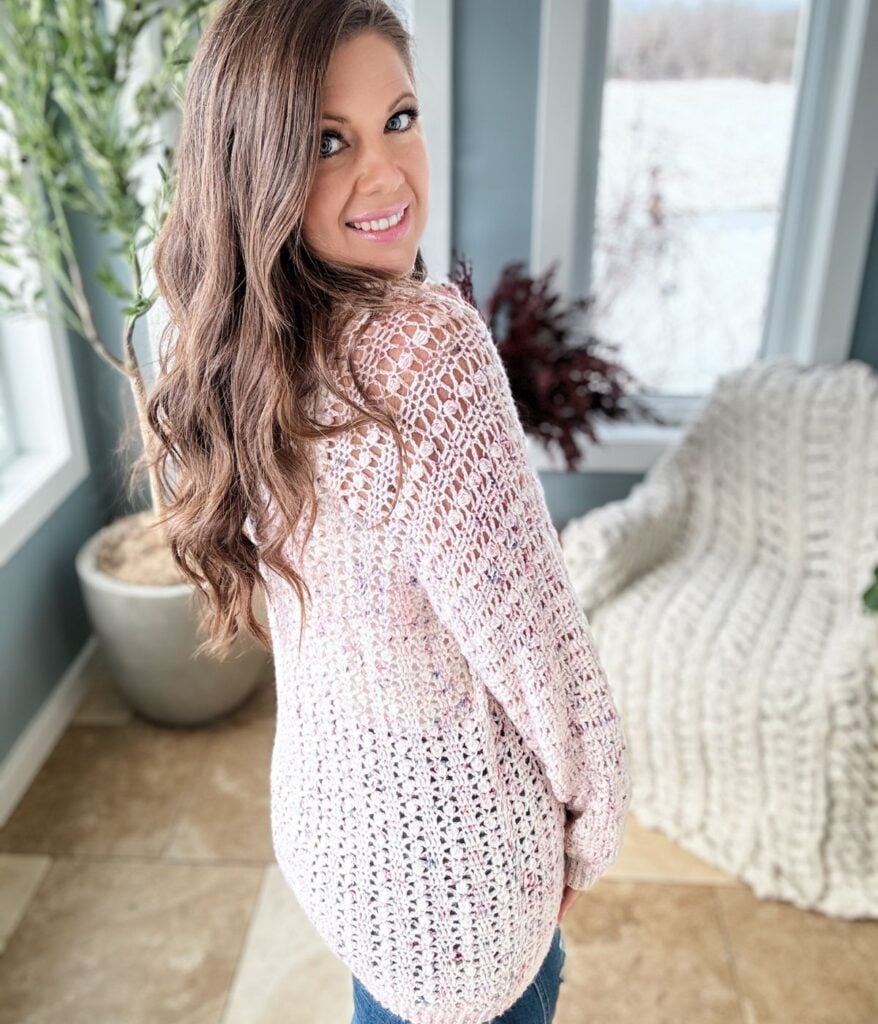
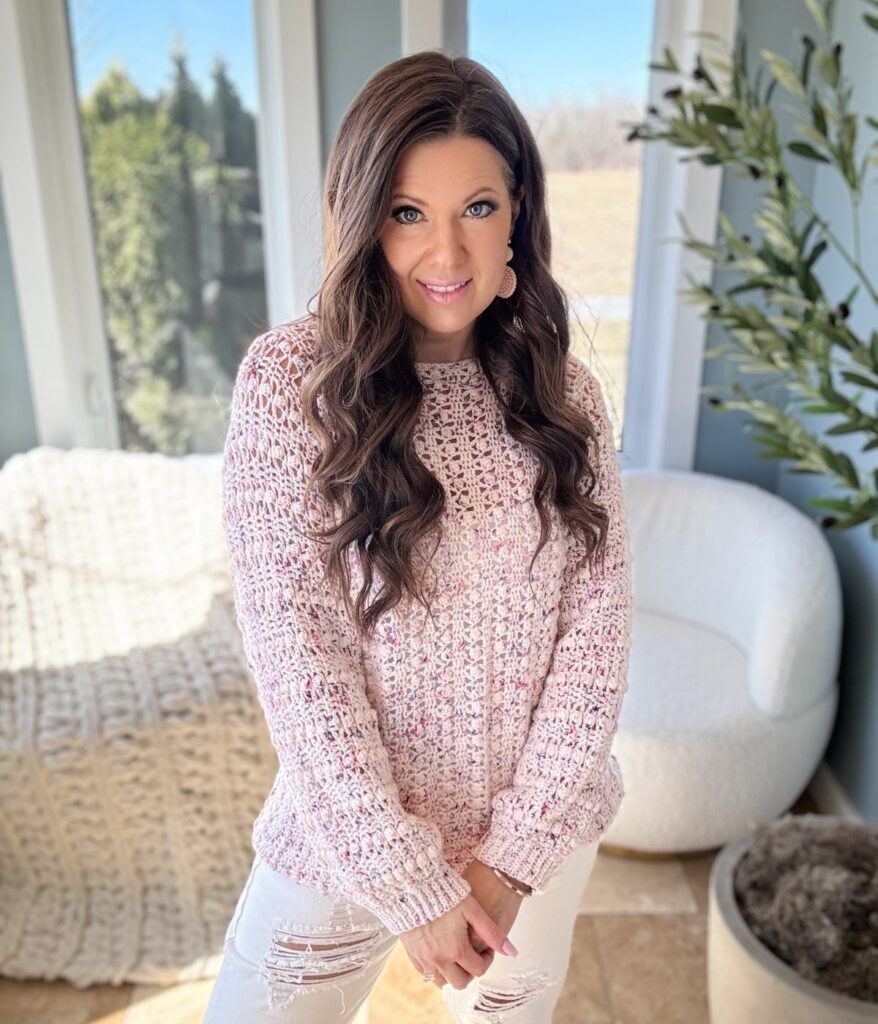
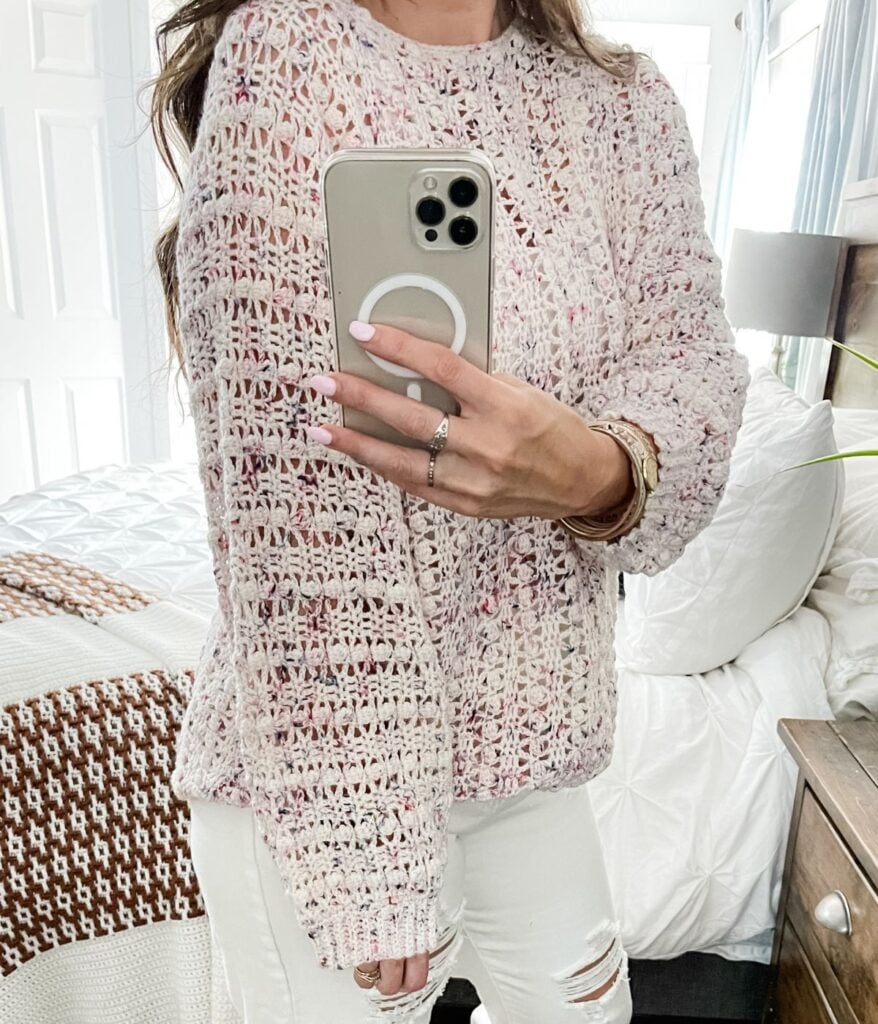
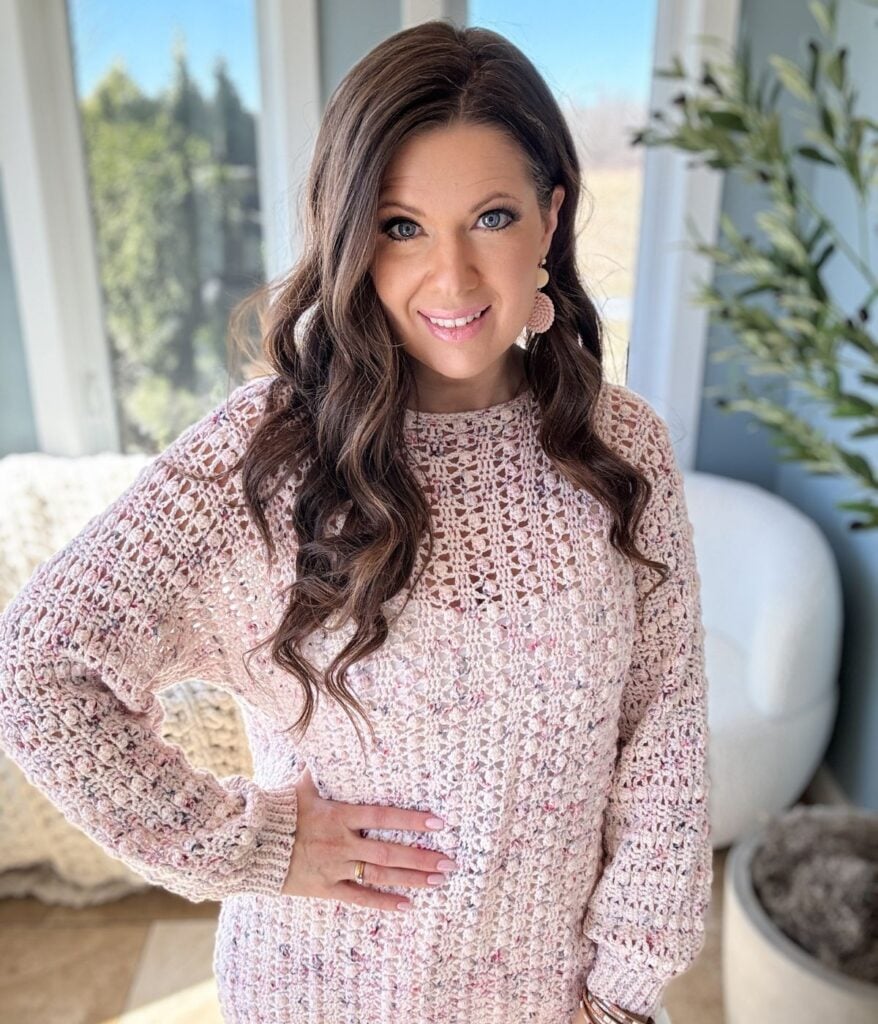
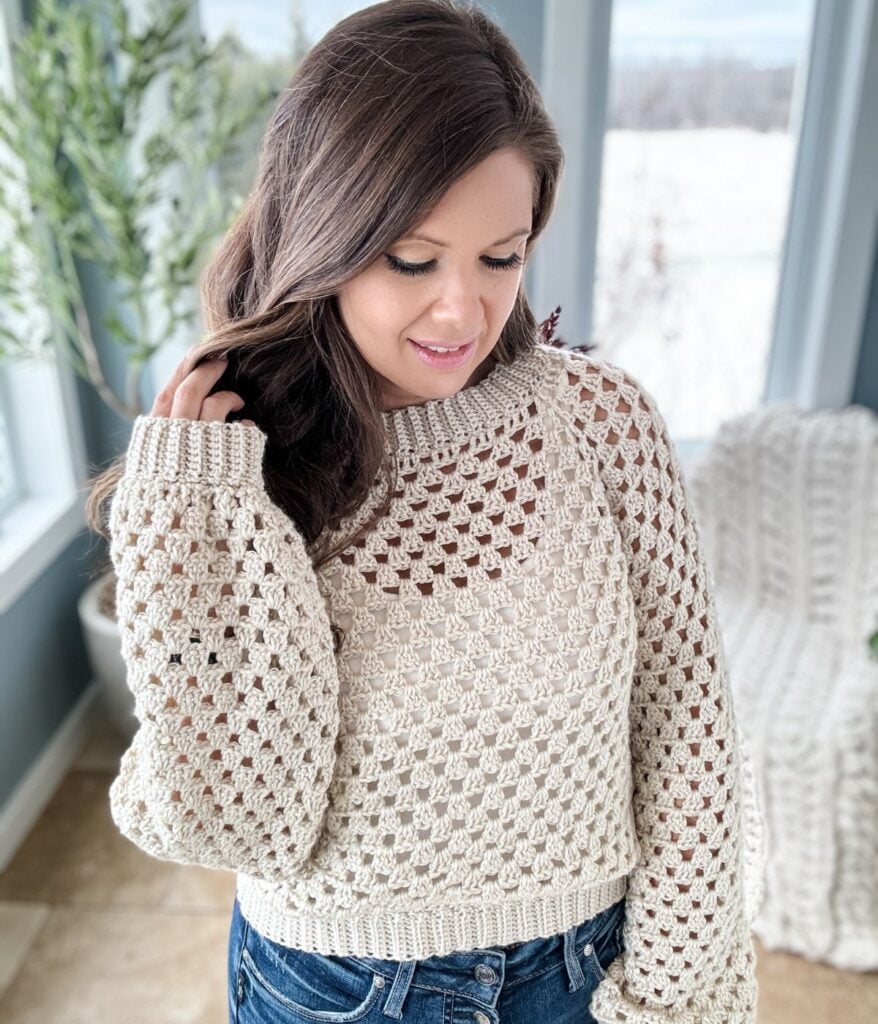
Introducing the Gum Drop Pullover: a delightful, textured lightweight sweater that boasts a seamless construction, making it an ideal choice for beginners and seasoned crocheters alike. Crocheted in one piece with minimal seaming along the sides and sleeves, this pattern promises both ease and elegance.
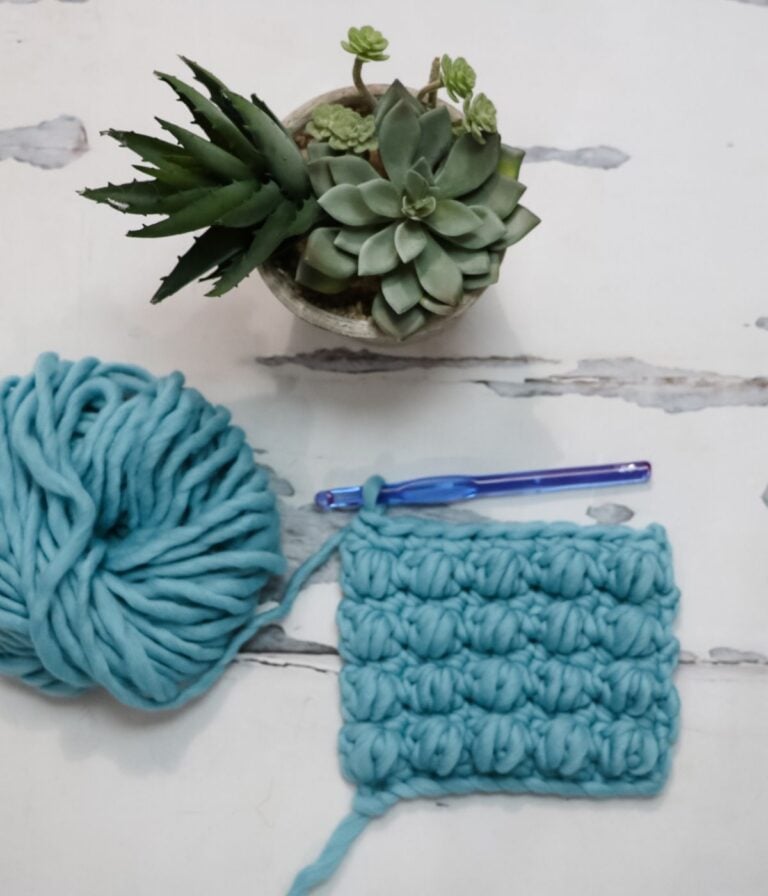
But what truly sets this pullover apart is its charming bobble stitch, creating an open and airy design that’s simply perfect for those breezy summer days. Get ready to crochet your way to a wardrobe staple that’s as fun to make as it is to wear!
The Gum Drop Pullover crochet pattern is a simple design to create and perfect for beginners if you’re new to crocheting garments. The lace bobble stitch is a simple 2-row repeat. You can breeze through this top in no time.
Detailed crochet stitch tutorial and steps are covered in our video tutorial for size large on YouTube.
The Gum Drop Pullover crochet pattern was designed with a focus on comfort and versatility, catering to the demand for longer-length tops that offer both style and ease. Its feminine lace bobble stitch detail adds an elegant flair, elevating it to a chic wardrobe staple.
Recognizing the high request for longer length crochet tops, I sought to create a design that seamlessly blends fashion with practicality. When I came across this beautiful yarn I just couldn’t resist designing something captivating and lacy! The perfect crochet summer top.
Below, you will find everything you need to make the Gum Drop Pullover Crochet Pattern, including the yarn, hook, materials, free written pattern for blog subscribers, pictures and a video tutorial. If you love this free crochet pullover pattern, please share!
Disclaimer
This post contains affiliate links for the items I used to crochet this pattern and clothing articles I have modelled at no cost to you. I make a small commission if you purchase through these links. This blog post also displays ads. The revenue I receive from Ads, and affiliate links, allows me to post this crochet pattern for free on my blog. I do so in good faith that you will not copy and paste this pattern or distribute it in any way. This free pattern is only available for viewing; you cannot print it off. If you prefer not to view the pattern on the blog, you may purchase an AD-FREE digital PDF pattern in one of my pattern shops for a small fee. Whether you purchase this pattern or view the pattern on my blog, I greatly appreciate your support and readership.
Gum Drop Pullover Crochet Pattern Yarn
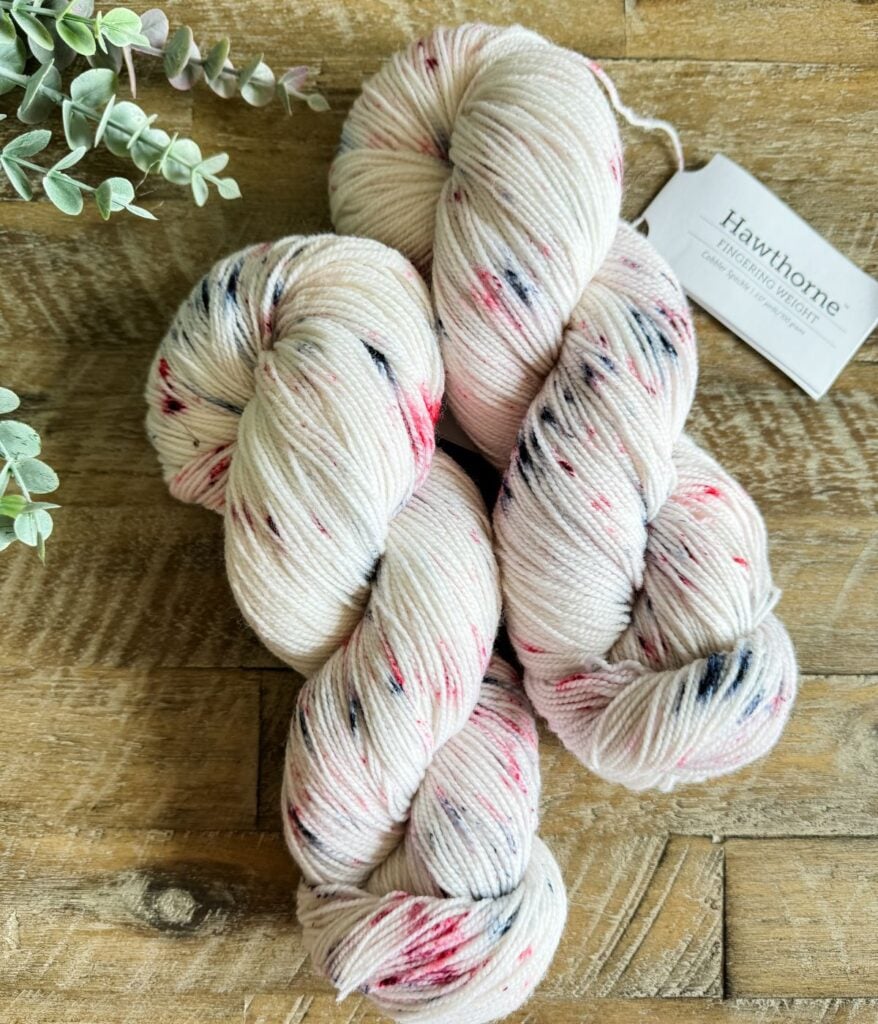
The Gum Drop Pullover is designed in Hawthorne Speckle yarn from WeCrochet. Hawthorne speckle was such a fun yarn to crochet with. The colour range is perfect for summer, adding flair to anything you make. The fingering weight of this yarn made the sweater light and airy. The yarn is so soft, making it a comfortable garment to wear.
Tips for Working with Hand-Painted Yarn
When working with hand-painted yarn, there is a crucial tip for achieving a seamless and harmonious result. Alternate between the various hanks of yarn at regular intervals to blend the colours gradually. This approach helps to avoid abrupt colour shifts and ensures a consistent appearance throughout your project.
Additionally, embracing the distinctive qualities of hand-painted yarn by acknowledging the beauty of subtle colour variations can infuse your finished piece with character and uniqueness. Exploring various blending techniques and embracing the artistic charm of hand-painted yarn can lead to the creation of a genuinely exceptional and individualized Gum Drop Pullover.
Do You Love Fingering Weight Yarn?
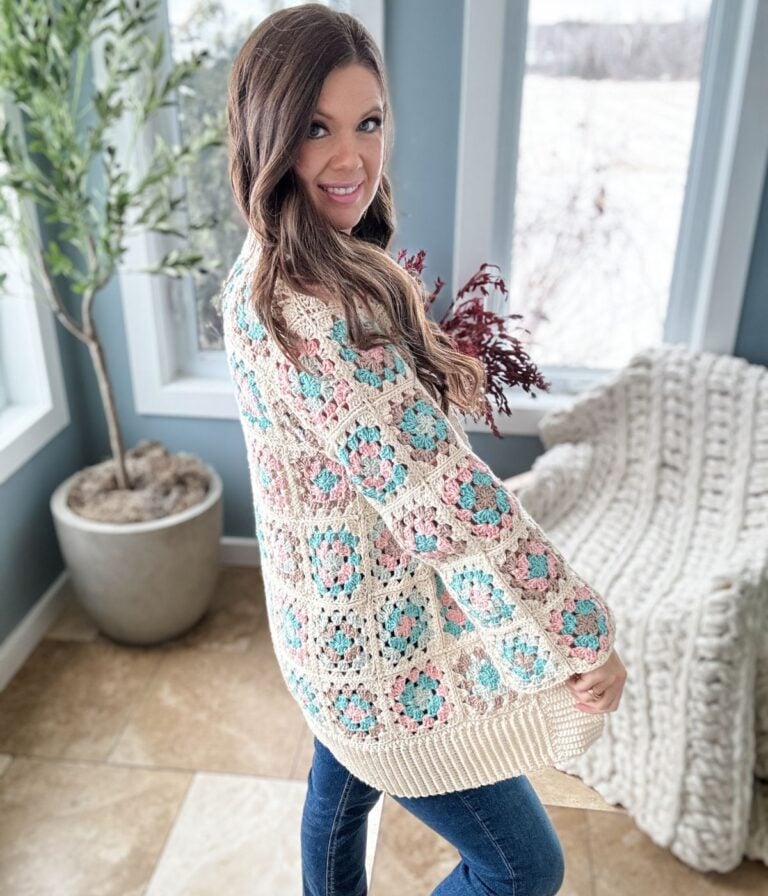
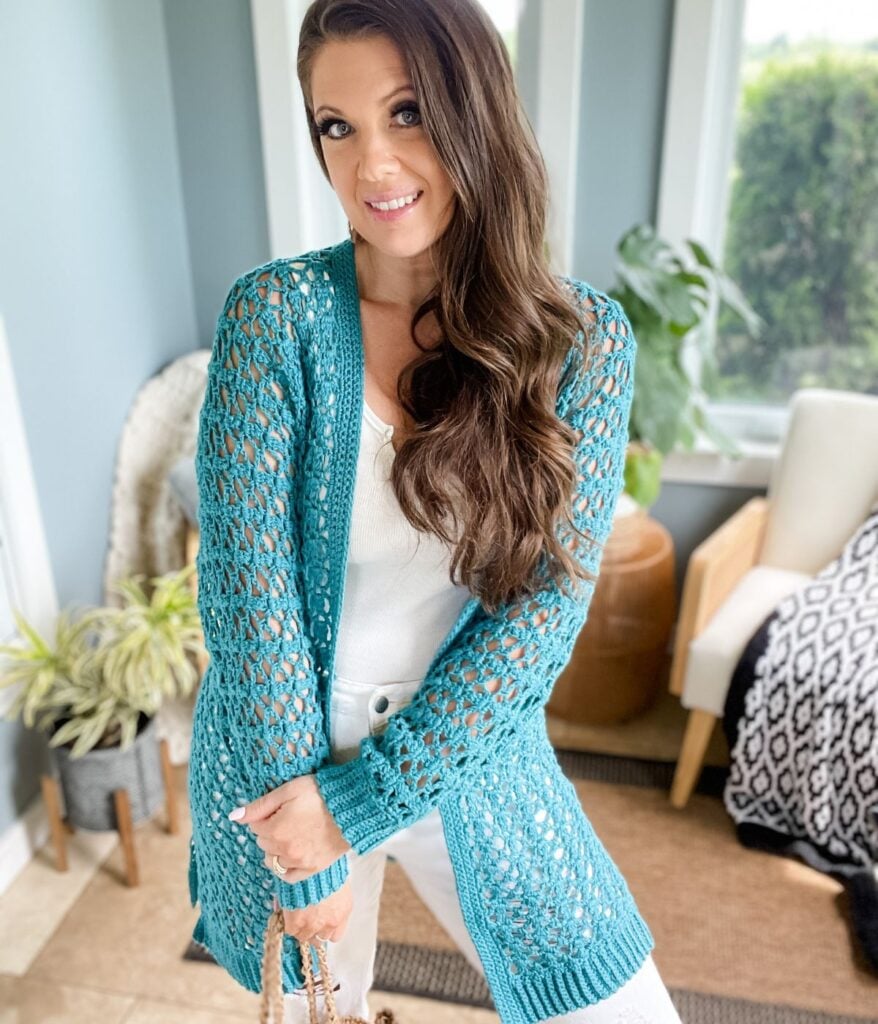
Fingering-weight yarn is perfect for creating distinct garments. If you prefer lighter, less bulky clothing, this type of yarn is ideal for you. Besides the Gum Drop Pullover, my Rocky Mountain Colour Block pullover is another favourite of mine. It’s made with simple stitches that I’m sure you’ll adore too.
Another favourite of mine is the Waffle Stitch cardigan. The waffle stitch creates a cozy, textured fabric that feels wonderfully soft and squishy.
Yarn Requirments
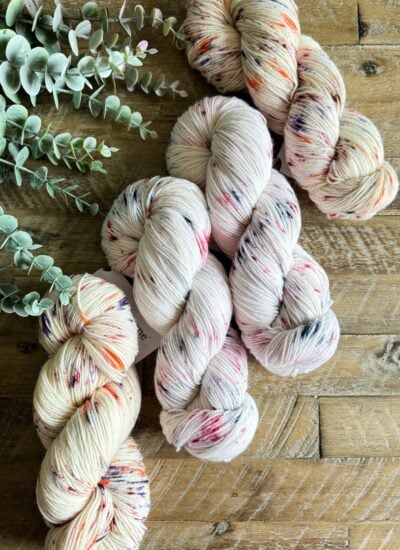
Hawthorne Speckle Hand Painted From WeCrochet
Fingering weight #1 , 80% Fine Superwash Highland Wool, 20% Polyamide (Nylon), (357yds/ 100g), shown in Cobbler
XS (S, M, L, XL) (2X, 3X, 4X, 5X)
4 (5, 5, 5, 6) (6, 6, 7, 7) hanks or 1310 (1450, 1520, 1610, 1720) (1880, 1990, 2200, 2300) yards
Sizes included for the Gum Drop Pullover
XS (S, M, L, XL) (2X, 3X, 4X, 5X)
Fits Bust: 30 (34, 38, 42, 46) (50, 54, 58, 62)”
Finished Bust: 37 (40, 43, 46, 49) (53.5, 56.5, 62, 65)”
Curious about how sizing is determined? Check out the Craft Yarn Council site for helpful information on garment size.
Skill Level
Intermediate, written in standard American terms.
This crochet pattern has been professionally tech-edited and written in technical writing.
Substituting Yarn
Before starting your sweater, it is crucial to begin with a gauge swatch. This preliminary step is essential to ensure that your tension and stitch count align with the pattern’s requirements, Maintaining the correct gauge is key to achieving the intended fit and overall look of your project.
Adjusting your crochet hook size can help you reach the pattern’s specified gauge, and experimenting with different hook styles or brands can also be beneficial. Keep in mind that not all fingering weight #1 yarns are identical, as variations in thickness, drape, and softness can impact the final result.
Gauge Swatch
For your gauge swatch, begin with a foundation row of 25 and work in the stitch pattern as directed. Block your swatch to stretch out the stitch pattern, then measure your stitches at the center of the swatch. Aim for 15.75 stitches by 10 rows for this specific pattern, taking into account that chain-2 spaces count as one stitch, and each bobble stitch counts as one stitch.
If you find that you have too many stitches, consider switching to a larger hook size. Conversely, if there are too few stitches, opt for a smaller hook size. While the height of the stitch is less critical, you can adjust it by adding or reducing rows as needed. Additionally, you can lengthen stitches by pulling up on them or shorten them by tightening your tension.
To assist you in selecting suitable yarn alternatives, I have included some recommendations that I believe would be excellent substitutions for the WeCrochet Hawthorne Speckle fingering weight yarn.
Suitable Yarn Substitutes
$$$ Splurge
75% Superwash Merino Wool, 25% Nylon- 423yds/ 100g
Muse, which features stunning hand-painted dye effects, is now available in fingering weight yarn! These saturated colorways shine on a new fingering weight yarn base, which is comprised of 75% Superwash Merino Wool and 25% Nylon. The resulting yarn is next-to-skin soft yet durable, making it perfect not just for socks but for shawls and lightweight cardigans as well. Muse Fingering Yarn is meticulously dyed by Japanese artisans, who blend and apply colours by hand to achieve various colours and chromatic explosions. The precise distribution of colour minimizes the streaking and pooling you might see in other hand-painted yarns.
$$ Spend
70% Linen, 30% Pima Cotton (180yds/50g)
Capture the spirit of summer with Lindy! Superbly lightweight and endlessly versatile, Lindy is a chainette yarn that is just the thing for warm weather. The linen adds a crisp stitch definition that shows off textures while adding a lovely drape and sheen that gets softer with every wash.
$ Save
75% Pima Cotton, 25% Acrylic (218yds/50g)
Crochet with fine, lightweight cotton all year! With a large selection of colours, this yarn is a perfect cotton option for colorwork crochet. The blend of Pima cotton and acrylic fibres in Comfy makes it easy to crochet heavily textured stitches, like cables. Use Comfy for babies, warm weather, or your favourite sweater that you know you will throw in the washing machine again and again.
Materials
F/3.75mm Crochet Hook or size needed to obtain gauge
Use code MJS15 for 15% off Furls Crochet
Construction
The Gum Drop Pullover is worked in one piece from the bottom up, starting with the back. For the sleeves, a chain is worked outwards from each side of the body. The sleeves and the body are worked as one piece. The neck opening is made by working the Left and Right shoulders separately. A chain is made to close up the neck opening, and then the body/sleeves are continued.
Fasten off once the sleeve reaches the desired width. The front piece is worked, finishing with a join-as-you-go band.

Gauge
Body: 15.75 sts and 10 rows = 4” square blocked in stitch pattern
Ribbing: 11 sts and 11 rows = 2” square not blocked
Obtaining the correct gauge is fundamental to having correct sizing. You may need to adjust your hook size to meet the pattern gauge.
Abbreviations
Blo – Back Loop Only
Ch – Chain
Dc – Double Crochet
Pm – Place Marker
Rep – Repeat
RS – Right Side
Sc – Single Crochet
Sk – Skip
Sl St – Slip Stitch
Sp(s) – Space(s)
St(s) – Stitch(es)
WS – Wrong Side
( ) – Work step in parentheses in indicated stitch
[ ] – Work step in brackets number of times indicated
Special Stitches:
Bobble Stitch (bo): *Yarn over (YO), insert hook into stitch and pull up a loop, YO, pull through two; repeat from *, three more times, YO pull through all five loops on the hook.
Video for the Gum Drop Pullover Pattern
First, we’ll cover the materials you’ll need to get started, ensuring you have everything on hand to start on this exciting project. From the perfect yarn choice to the essential crochet hooks.
Next, we’ll dive into the construction of the pullover itself. Working in one piece from the bottom up, starting with the back. You’ll learn how to create the body of the pullover seamlessly, with sleeves emerging from chains worked outward on each side.
As we progress, I’ll guide you through the unique technique of crafting the neck opening. By working the left and right shoulders separately and creating a chain to close the neck opening.
Once the body and sleeves are complete, we’ll focus on the finishing touches. We’ll bring it all together with a join-as-you-go band, adding a polished edge to your Gumdrop Pullover. By the end of this tutorial, you’ll have not only a beautiful garment but also a newfound confidence in your crochet skills.
Gum Drop Pullover Pattern Tutorial
Join me and follow along to this detailed tutorial to complete this stunning crochet pullover in size Large.


Purchase the Beautifully Designed AD-FREE PDF Download
The PDF includes a stitch chart and schematic

Gum Drop Pullover
COPYRIGHT
The Gum Drop Pullover and its contents are fully owned and copyrighted by MJ’s Off The Hook Designs Inc., and all rights are reserved. This pattern is protected by copyright and other intellectual property laws and may not be reproduced, distributed, or transmitted in any form or by any means, including photocopying, recording, screenshots, printing or other electronic or mechanical methods, without the prior written consent of the author, except in the case of permitted sharing on social media platforms.
Any unauthorized distribution or reproduction of this pattern or elements of the instructions is strictly prohibited and may result in civil or criminal penalties. This free crochet pattern is intended for personal viewing on the blog only. By accessing this pattern, you acknowledge and agree to comply with these copyright terms and conditions.
If you have any questions regarding this copyright notice or the use of the pattern outlined within, please contact MJ’s Off The Hook Designs Inc. in writing.
Thank you for respecting the author’s intellectual property and hard work!
Pattern Support
Additionally, please note that the only pattern support offered for this pattern is available on our Facebook community group and through the YouTube tutorial. The modifications given in the PDF are the only ones included, so if you choose to modify the pattern or use a different yarn weight, you will need to figure out the modifications on your own.
We appreciate your understanding and hope that you have a fantastic experience creating this pattern. Please feel free to lend support to fellow members of the community group as we work together to create beautiful crochet projects.
To unlock Exclusive Content on my Blog, all you need to do is click the box below and the Grow.me app will pop up, allowing you to enter your email and create a password. Once you’ve created an account, every time you see Exclusive Content on my blog, simply login to your Grow account. Be sure to switch to the login screen to enter your login credentials.
If you forget your password, click the “forgot password” link and follow the prompts. Please note that I’m unable to assist with resetting Grow passwords or accessing your Grow account, so be sure to save your login information in a safe place.
To make things even easier, I’ve created a video for both desktop and mobile users that offer additional assistance. You can access this video by visiting my FAQs page HERE or by watching the video below.
Thank you for subscribing and for joining me on my crochet journey. I hope you enjoy the exclusive content available to our subscribers and create beautiful crochet projects using the resources you discover.

Body
Mark Body
With RS facing you, count 9 bobbles from sleeve edge (number of bobbles may be different if sleeve length was altered, pm in the mid- dle of next 3 sc sts, repeat for the other side of the pullover. The body should have a total of 12 (13, 14, 15, 16) (18, 19, 21, 22) bobbles.
Row 1 (rs):
Rs facing you join yarn in right marker, work stitch pattern row 2, ending in marked st. 73 (79, 85, 91, 97) (109, 115, 127, 133) sts.
Row 2 (was):
Work stitch pattern row 1. 73 (79, 85, 91, 97) (109, 115, 127, 133) sts. (12 (13, 14, 15, 16) (18, 19, 21, 22) bobbles).
Row 3:
Work stitch pattern row 2. 73 (79, 85, 91, 97) (109, 115, 127, 133) sts.
Rows 4-46:
Rep row 2 & 3, ending on row 2. 73 (79, 85, 91, 97) (109, 115, 127, 133) sts.
Row 47:
Ch 1, work 1 sc in each st and ch-2 sp across. 73 (79, 85, 91, 97) (109, 115, 127, 133) sts.
Join-As-You-Go Band
Row 1:
Ch 11, 1 sc in 2nd ch from hook and in each ch across, sk first st at the body edge, sl st in next 2 sts (body edge), turn. 10 sts.
Row 2:
Sk sl sts, 1 sc in the BLO of each st across, turn. 10 sts.
Row 3:
Ch 1, work 1 sc in the BLO of each st across, sl st in next 2 sts (body edge), turn. 10 sts.
Rows 4- 73 (79, 85, 91, 97) (109, 115, 127, 133):
Rep Row 2 & 3. The last row fasten off and weave in ends.
Sleeve Cuff
Work for left and right sleeve
Edging
Row 1:
RS facing join yarn to sleeve edge with a ch 1, work 1 sc st per row across. 40 (44, 48, 52, 56) (60, 64, 68, 72) sts.
Join-As-You-Go Band
Row 1:
Ch 11, 1 sc in 2nd ch from hook and in each ch across, sk first st at the sleeve edge, sl st in next 2 sts (sleeve edge), turn. 10 sts.
Row 2:
Sk sl sts, 1 sc in the BLO of each st across, turn. 10 sts.
Row 3:
Ch 1, work 1 sc in the BLO of each st across, sl st in next 2 sts (sleeve edge), turn. 10 sts.
Rows 4- 40 (44, 48, 52, 56) (60, 64, 68, 72):
Rep Row 2 & 3, ending on row 2. On the last Row fasten off, leaving a long tail for seaming.
Finishing
Wet block and pin to measurements, make sure not to stretch out the bands. Allow to dry thoroughly.
Seaming
Repeat for the Left and Right sides. Fold the garment rs facing, lining up the sides and sleeves. With the yarn needle and sleeve tail, whip stitch the sleeve and side together, matching the stitch pattern. Weave in the ends.
Neck Edging
Row 1:
RS facing you, join yarn to the back of the neck with a ch 1, work 1 sc evenly around the opening, sl st in first sc to join.
Row 2:
Ch 1, work 1 sc in each st around, sl st in first sc to join, fasten off and weave in ends.

Looking for Pattern Support?
Head over to my Facebook Community Group to ask any questions about this pattern, share photos of your MJ’s Designs, and cheer on fellow crocheters!
Our group has a vibrant and supportive community of experienced crocheters who have made various MJ patterns. They are always eager to offer guidance and share their experiences, so don’t hesitate to reach out and connect with them.
Thank you for joining our community, and happy crocheting!
You might also love these crochet patterns if you love this pattern!
For more crochet patterns by MJ’s Off The Hook Designs see our Ravelry, Etsy, LoveCrafts, WeCrochet or Ribblr Shop. Check out our Facebook and Instagram for daily inspiration!
You’ve got questions, we’ve got a community!
Crocheting is better with friends! Join our group to post pictures and ask all your pattern support questions.