*This post may contain affiliate links to support the cost of this blog. At no cost to you, I may make a small commission if you purchase through these links. Read our Privacy Policy HERE


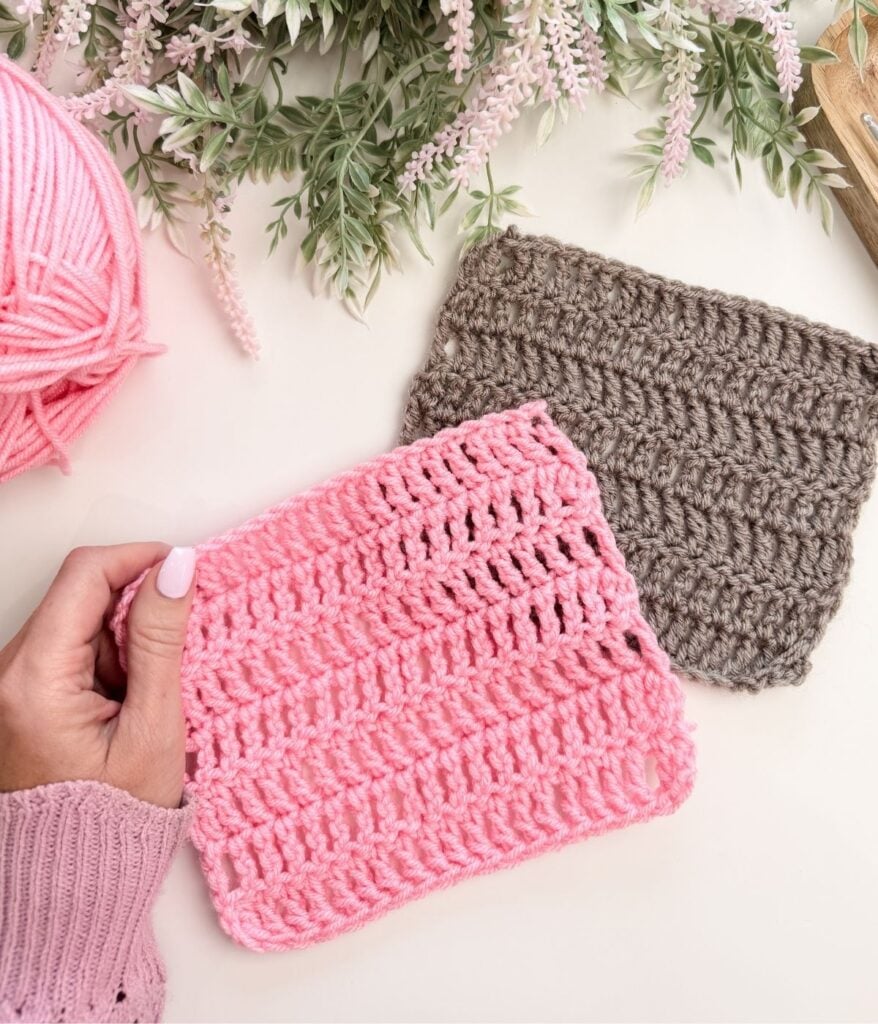
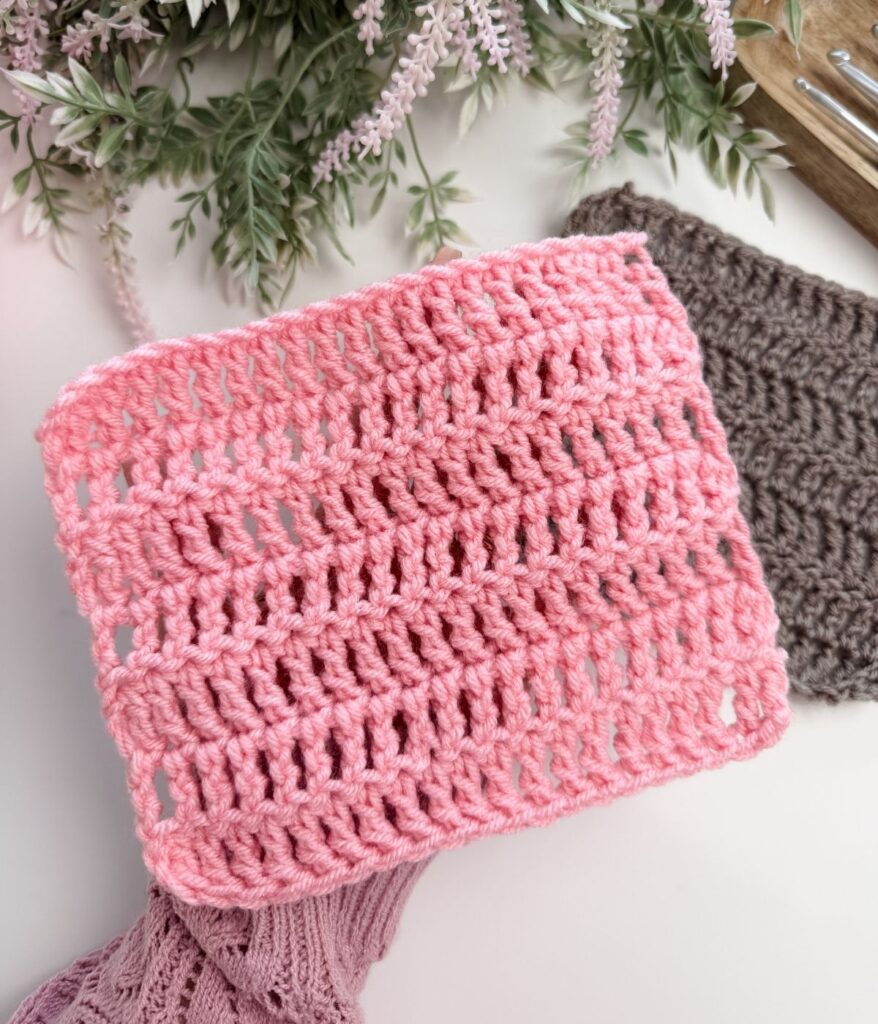
Treble crochet is a tall stitch that creates an open, flexible fabric with beautiful drape. Because it uses extra yarn overs, it builds even more height than double crochet and produces a lighter, airier texture.
This stitch is commonly used in lace patterns, garments, shawls, and projects where you want movement and flow in the fabric. In crochet patterns, treble crochet is abbreviated as tr.
Take your time with this lesson. Although the stitch is taller, the steps follow a familiar rhythm once you understand how the loops are worked off the hook.
What Is Treble Crochet?
Treble crochet is a tall stitch that creates an open fabric with noticeable drape. The extra height comes from working additional yarn overs and completing the stitch in three stages.
Because treble crochet stretches the fabric vertically, it allows more space between stitches, resulting in a lighter texture than shorter stitches.
How Treble Crochet Is Different from Double Crochet
The main difference between double crochet and treble crochet is the number of yarn overs and the number of steps used to complete the stitch.
With treble crochet:
- You yarn over twice before inserting your hook
- You work the loops off the hook in three steps
- The stitch is taller and looser than double crochet
Once you see the pattern in the steps, treble crochet becomes much easier to remember.
Treble Crochet Stitch Anatomy
Understanding the anatomy of your treble crochet stitches will help you place your hook correctly and keep your rows even.
When you look at a completed row of treble crochet, you’ll notice these key parts:
Top of the Stitch
At the top of each stitch, you’ll see a “V” shape made up of two loops:
• The front loop (closest to you)
• The back loop (farthest from you)
In most patterns, your hook will go under both of these loops unless instructed otherwise.
The Post of the Stitch
The long vertical section beneath the top “V” is called the post. Because treble crochet is taller, the post is longer and more visible than in shorter stitches.
Understanding where the post sits will make future techniques, such as front post and back post stitches, much easier to learn.
Becoming familiar with these parts of the stitch will help you confidently identify your first and last stitches.
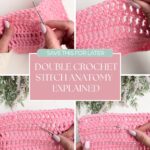
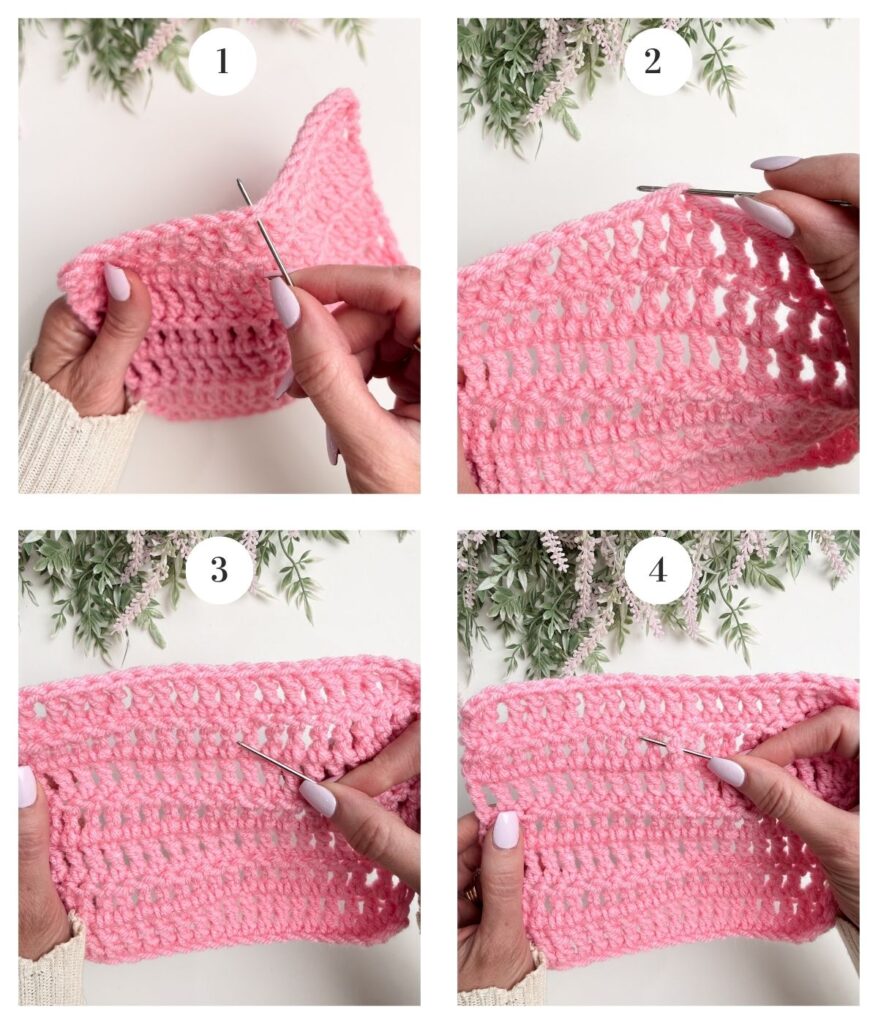
Treble Crochet Stitch Anatomy: Visual Guide
Understanding the anatomy of your treble crochet stitches will help you place your hook correctly and keep your rows even.
In the images below, each number highlights a specific part of the treble crochet stitch:
- The top of the stitch shows the front and back loops (the “V” shape).
- Where to insert your hook under both top loops of the stitch.
- The post of the treble crochet stitch.
- A closer look at the post, showing how it sits vertically beneath the top loops.
Refer to these labels as you examine the close-up images to become more confident in identifying each part of the stitch.
Where to Insert Your Hook
When working treble crochet:
- Insert your hook into the next stitch
- Work under the top two loops of the stitch
- Keep your hook movements smooth and relaxed
Clear stitch placement helps prevent gaps and keeps your rows even.
How to Make a Treble Crochet Stitch
To make a treble crochet stitch:
- Yarn over twice
- Insert your hook into the next stitch
- Yarn over
- Pull up a loop (you will have four loops on your hook)
- Yarn over
- Pull through the first two loops on your hook
- Yarn over
- Pull through the next two loops
- Yarn over
- Pull through the remaining two loops
Repeat this process across the row.
Work slowly and focus on completing each step cleanly.
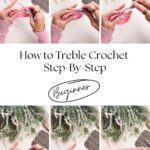
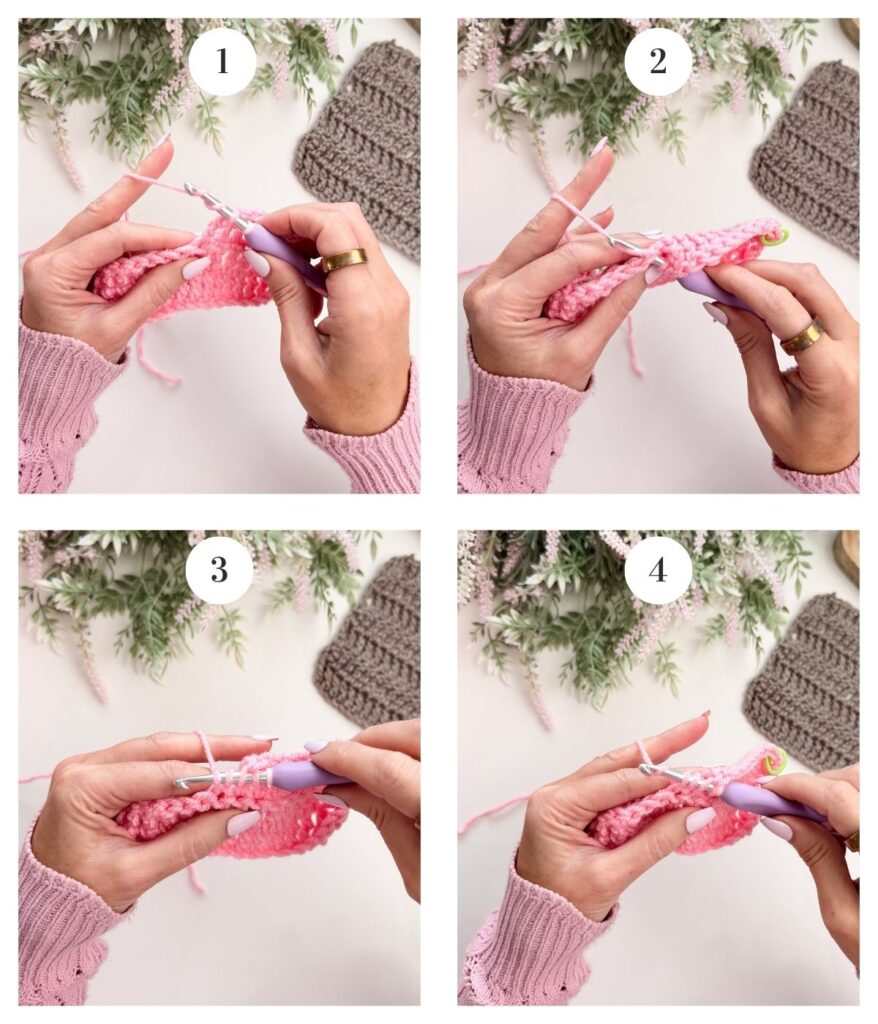
How to Treble Crochet: Step-by-Step Visual Guide
Use the images below as a visual reference while practising your treble crochet stitch.
- Yarn over twice
- Insert your hook into the next stitch, yarn over, and pull up a loop
- You now have four loops on your hook
- Yarn over
- Pull through the first two loops on your hook
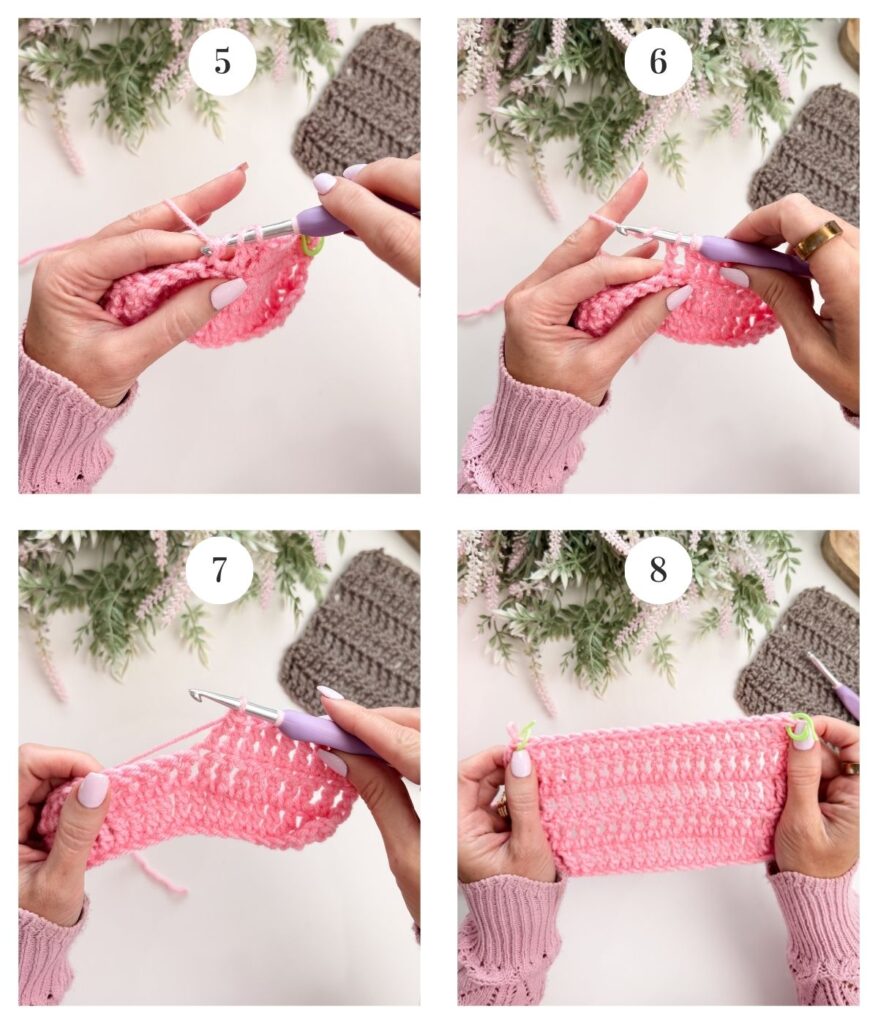
- Yarn over and pull through the next two loops
- Yarn over and pull through the final two loops to complete the stitch
- Completed treble crochet stitch and finished swatch
Video Tutorial
Understanding Loop Height and Tension
Because treble crochet is taller, tension differences are more noticeable.
The last working loop on your hook determines the height of your stitch. If you pull that loop too tight and tilt your hook downward so it rests over the top of the stitch, your stitches will become shorter and tighter.
If you lift your hook too high and pull the loop upward, your stitches will become taller and looser.
For consistent, even stitches, keep your hook riding horizontally along the top of your work. All loops on your hook should sit at an even height before completing each stage of the stitch.
Small adjustments in hook angle can make a big difference in stitch consistency.
How Treble Crochet Should Look
As you work, your treble crochet stitches should:
- Be tall and uniform in height
- Sit evenly across the row
- Create a noticeably more open fabric
If your stitches feel loose at first, that’s normal. Taller stitches naturally have more movement and drape.
Counting Treble Crochet Stitches
Counting stitches is just as important with treble crochet as it is with shorter stitches.
When counting:
- Count each completed treble crochet stitch
- Do not count the loop on your hook
- Use a stitch marker if you find it helpful
Accurate stitch counts help prevent shaping issues later.
Counting Rows in Treble Crochet
Counting rows helps keep your project consistent as it grows.
Each completed row creates a visible horizontal ridge along the side of your work. You can count these ridges to determine how many rows you’ve completed.
If you’re learning, placing a removable stitch marker at the end of each row can make tracking your progress much easier.
Regular row counting will help maintain even fabric and prevent unintended size changes.
Turning Your Work
Traditionally, treble crochet rows are turned by chaining four before beginning the next row. This chain helps bring the yarn up to the height of the stitch.
That said, this is another area where personal preference comes into play.
I often choose to turn and chain one instead of chaining four when working treble crochet. I find this helps prevent a loose-turning chain that can create a noticeable bump or gap along the edge of the fabric. By chaining one and starting the next stitch right away, the edges tend to look cleaner and more even.
Both methods are completely acceptable unless a pattern specifically instructs you to use a specific turning chain. Always follow the pattern when required.
Common Beginner Mistakes
Some common challenges beginners experience with treble crochet include:
Forgetting one of the yarn overs
Pulling through the wrong number of loops
Working too loosely
Missing the first or last stitch
If your stitches don’t look quite right, slow down and focus on each step. Treble crochet rewards a steady pace.
Practise Before Moving On
Before continuing, practise:
- Working several rows of treble crochet
- Watching how stitch height affects drape
- Counting stitches at the end of each row
- Trying both turning methods to see the difference
This practise will help treble crochet feel just as comfortable as shorter stitches.
Helpful Resources
Sign up for our YouTube Membership
Join our Facebook Crochet Community for pattern support and inspiration
Subscribe on YouTube for hundreds of free tutorials
Sign up for our newsletter and receive 40% off your first Ravelry purchase!
What’s Next
Now that you’ve learned the treble crochet stitch, you’ve completed the core basic crochet stitches.
These foundational stitches form the building blocks for more textured and intricate patterns. As you continue learning, you’ll begin combining stitches, working into different parts of the stitch, and exploring new techniques.
Next, head to the finishing tutorial to learn how to fasten off and weave in your yarn tails so your swatches and projects look clean and complete.
This lesson is part of the Learn to Crochet course by Michelle Moore of MJ’s Off The Hook Designs Inc, based in Lakefield, Ontario, Canada.
Thank you for learning with me at MJ’s Off The Hook Designs. I hope this lesson encourages you to keep practising and enjoying the process of crochet.
You’ve got questions, we’ve got a community!
Crocheting is better with friends! Join our group to post pictures and ask all your pattern support questions.