*This post may contain affiliate links to support the cost of this blog. At no cost to you, I may make a small commission if you purchase through these links. Read our Privacy Policy HERE
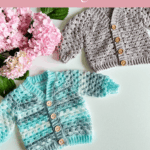
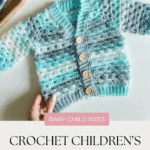
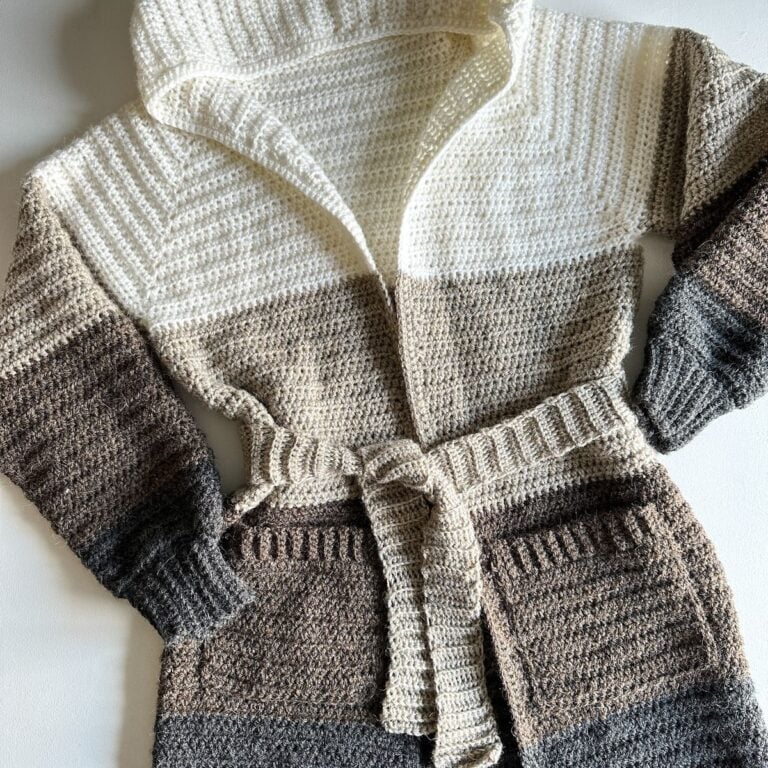
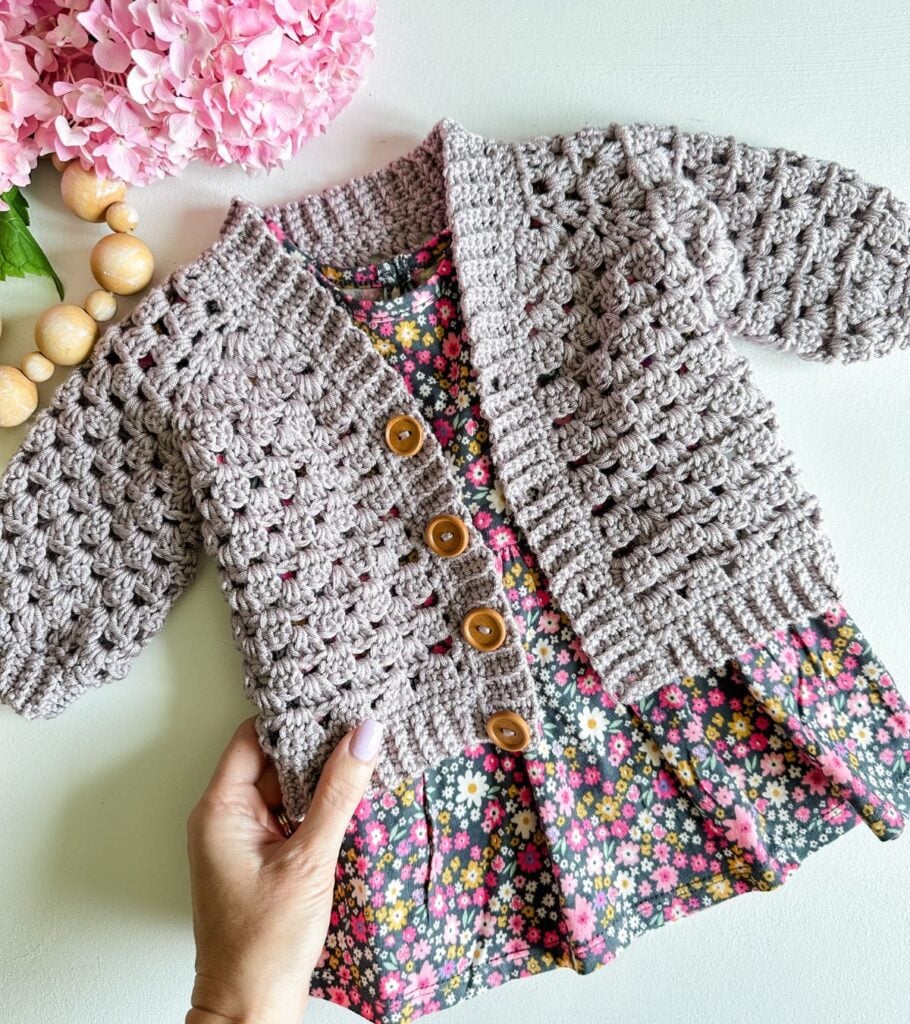
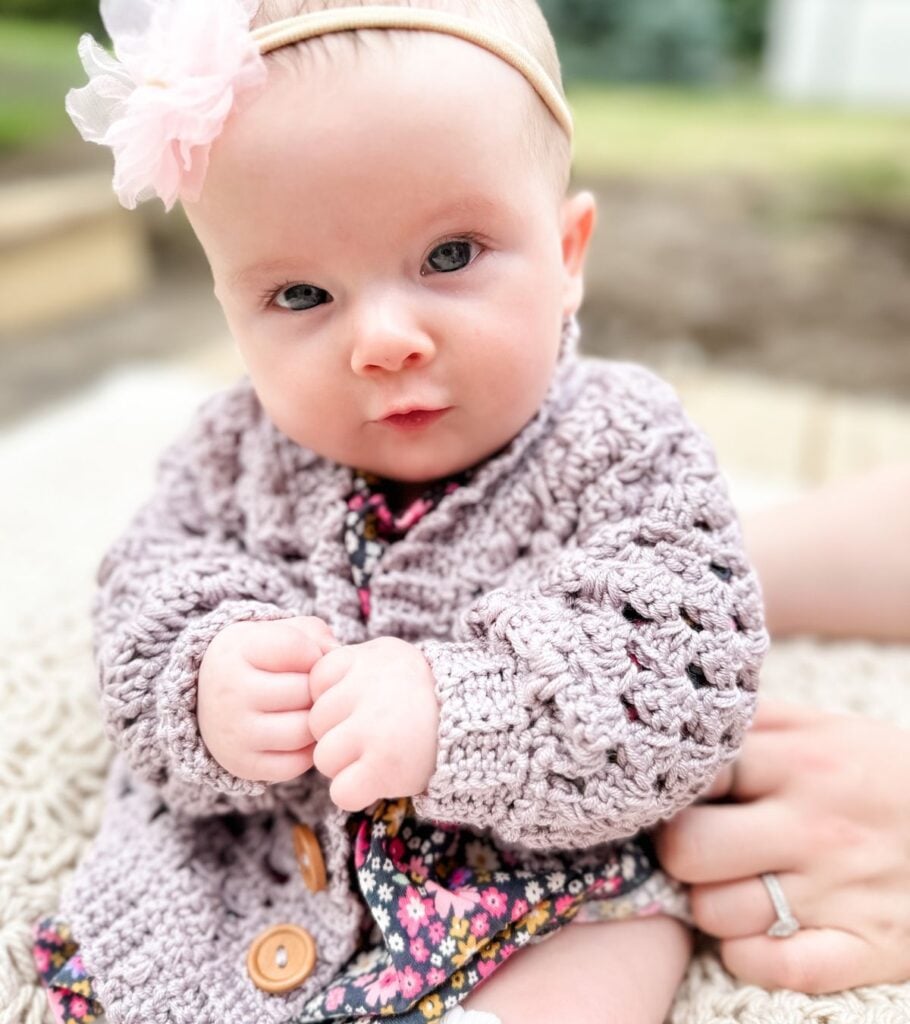
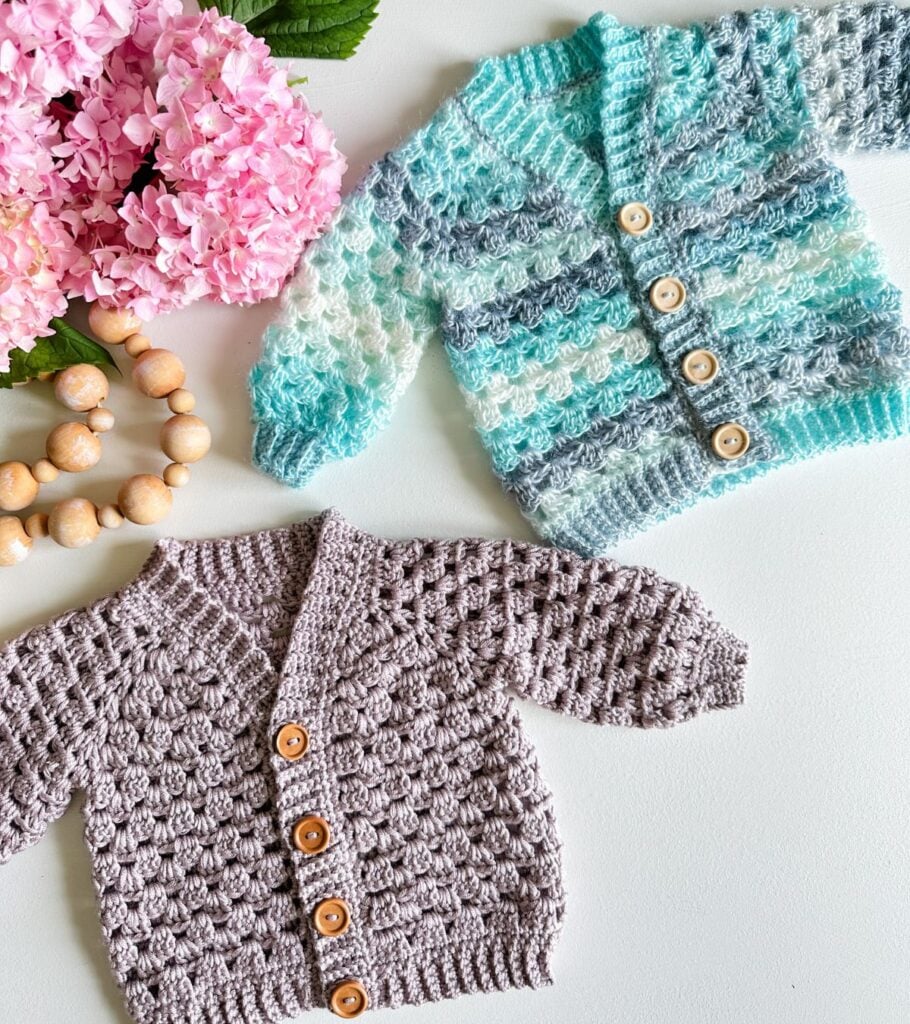
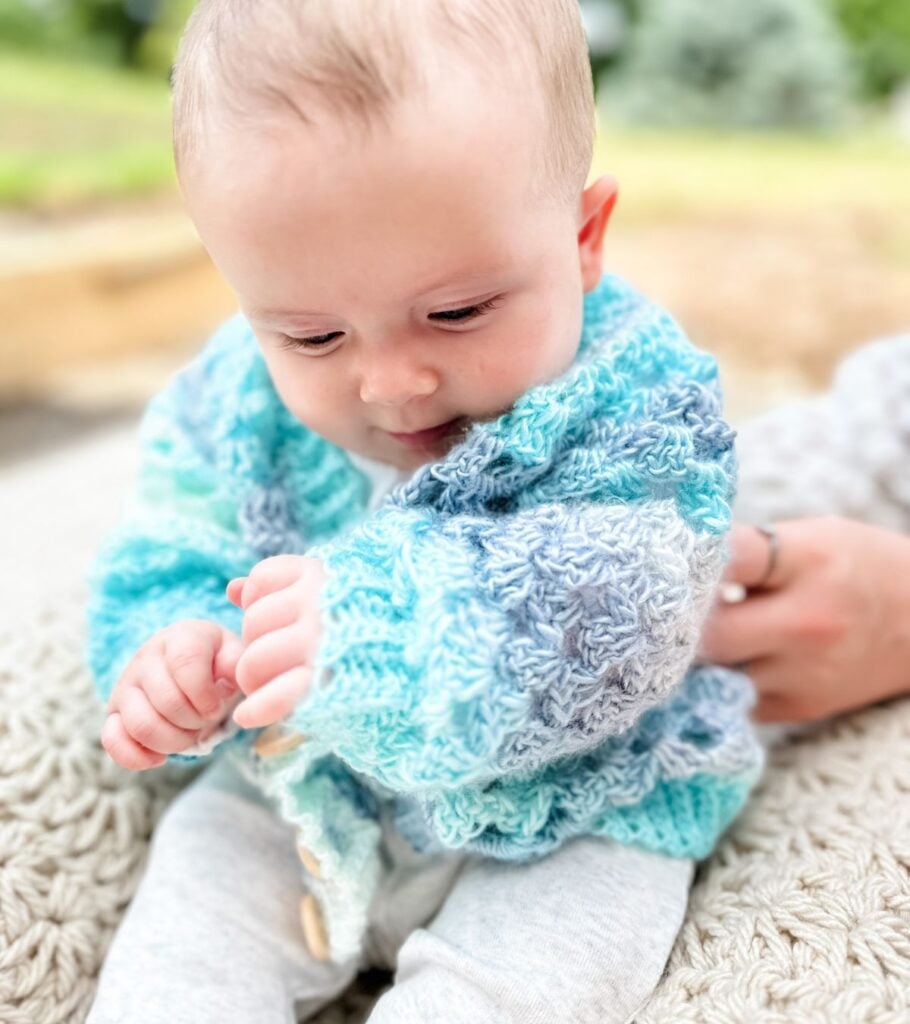
Introducing our latest crochet pattern, a stunning and seamless raglan-style cardigan that is perfect for those who don’t enjoy seaming or are new to crochet.
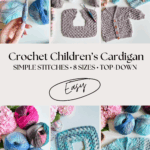
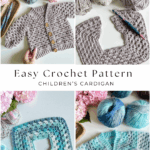
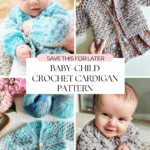
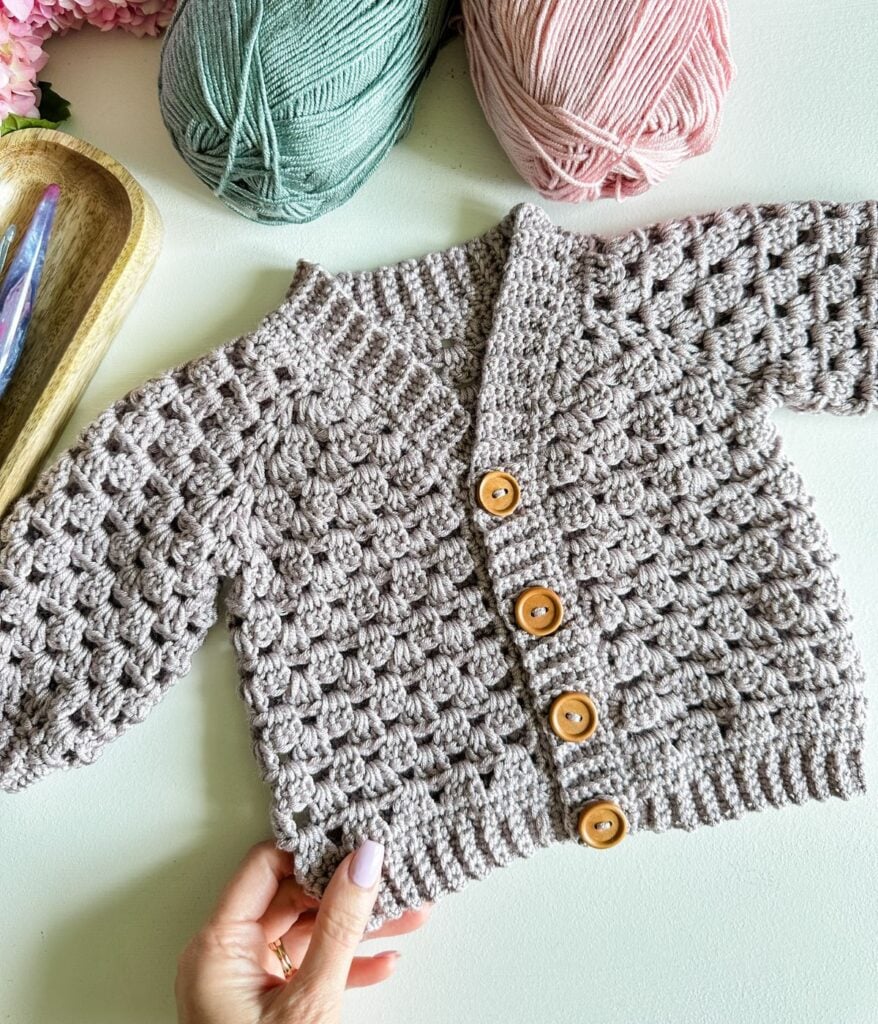
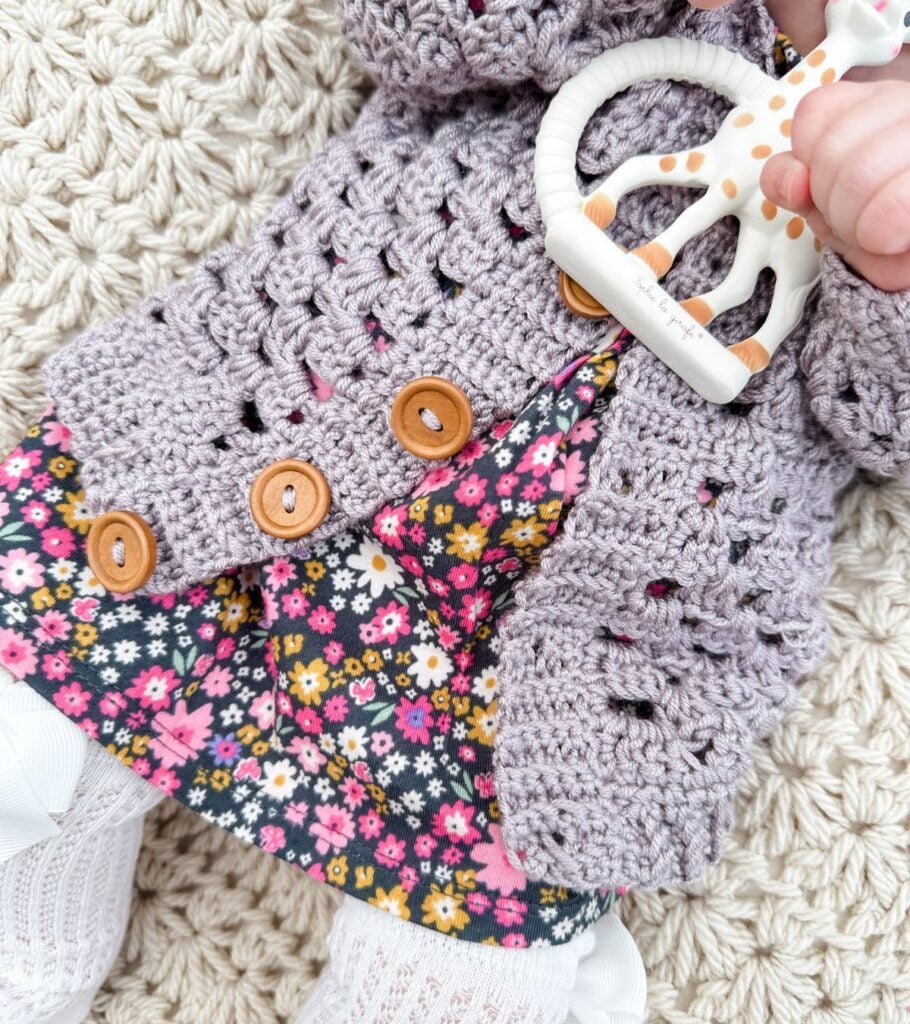
This pattern uses a simple granny stitch cluster pattern featuring double crochet stitches and ch-1 spaces, resulting in a beautiful and textured cardigan that can be worn on many occasions. The cardigan is beginner-friendly and includes sizes from 0-3 months to child size 12, allowing you to tailor it for all the little ones in your life.
To make the crocheting experience smooth and enjoyable, we’ve got you covered with a step-by-step video tutorial that guides you through the whole process from start to finish. Our instructions are written in an easy-to-follow format.
Below you will find everything you need to make this easy children’s crochet cardigan, including the yarn, hook, materials, free written pattern for blog subscribers, pictures and a video tutorial. If you love this Free Crochet Cardigan pattern, please share!

Key Takeaways
- The article introduces a Children’s crochet cardigan pattern, which is beginner-friendly and uses a granny stitch cluster pattern.
- It includes step-by-step video tutorials and written instructions, making it easy for beginners to follow.
- Sizes range from 0-3 months to child size 12, allowing customization for various ages.
- The article offers tips on yarn selection and provides links to yarn substitutes, ensuring quality results.
- Additionally, there’s guidance on washing and caring for the cardigan to keep it in good condition.
Project Overview
This seamless raglan cardigan is worked top down in a simple granny stitch cluster, making it perfect for beginners and anyone who prefers no seaming.
Available from 0 to 3 months up to child size 12, it includes easy to follow instructions and a full video tutorial.
Skill level: Beginner
Sizes: 0-3mth (6-12mth, 18-24mth, 2-4, 6, 8, 10, 12)
Yarn Weight: DK Weight #3
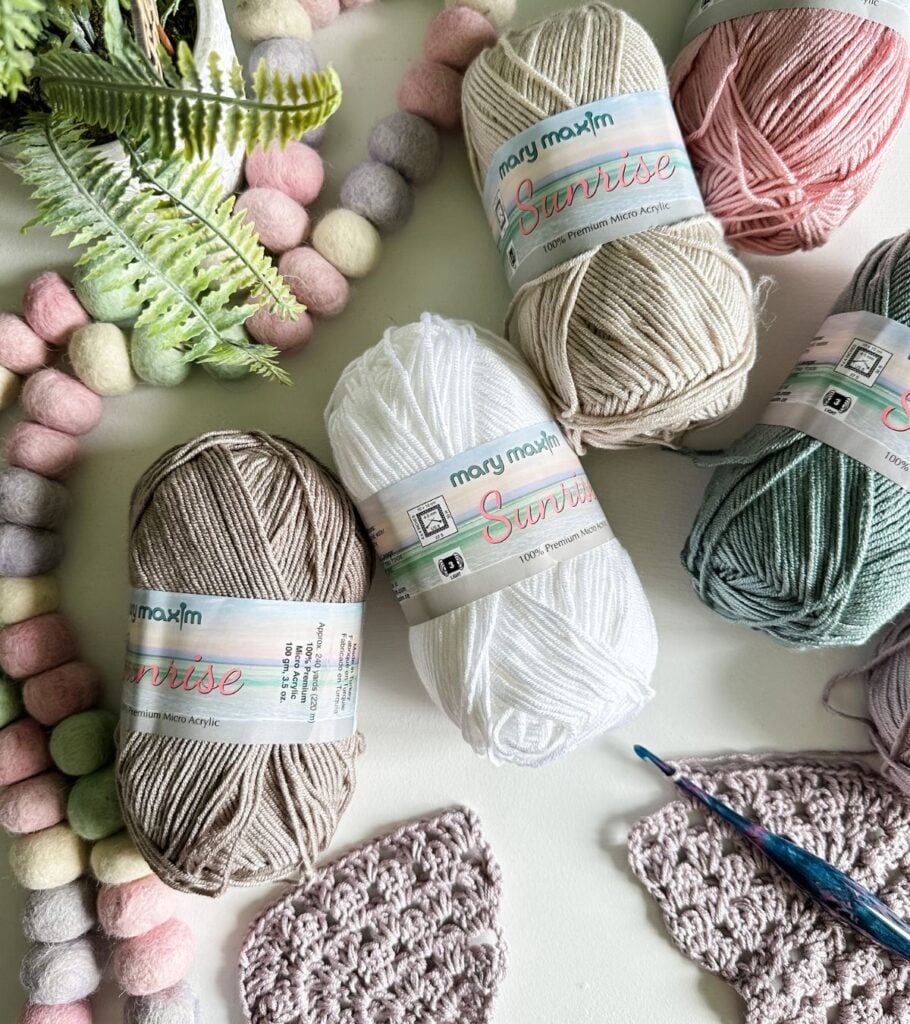
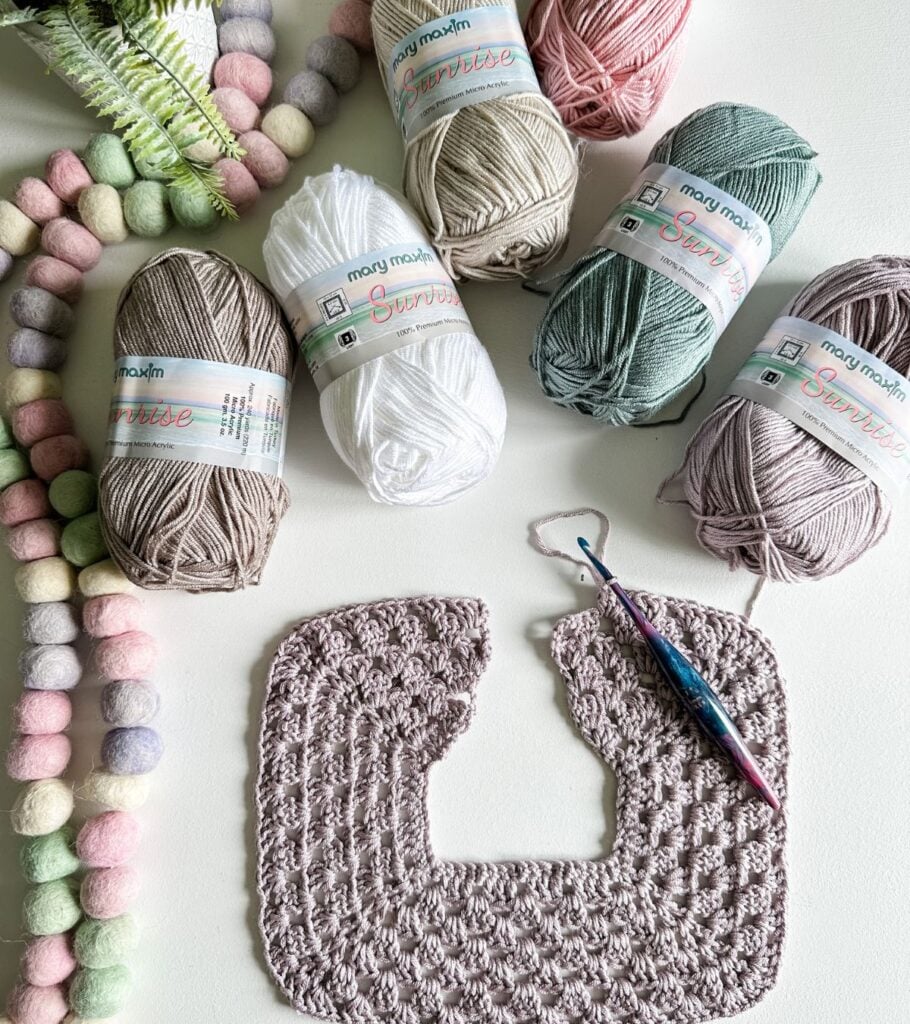
Yarn: Mary Maxim Sunrise(CDN)
Hook Sizes: US G/6 (4mm)
Construction: Top-down in rows until the desired size is reached
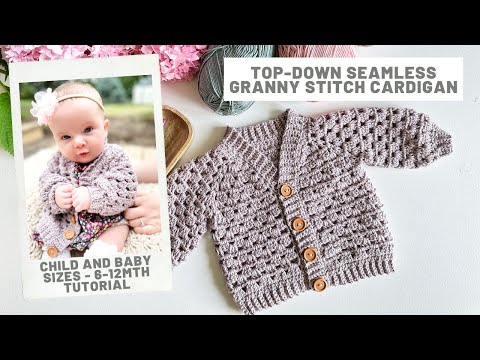
Video Tutorial: https://youtu.be/-xLfyOfGPOw
Can a Beginner Crochet Clothes?
Absolutely! Crocheting clothes can be a great project for beginners as long as you have a basic knowledge of crochet stitches. Whether a pattern is easy or hard largely depends on the specific design you choose. If you are a beginner looking for a simple project, check out this children’s Granny Stitch Cardigan pattern.
This pattern is beginner-friendly and comes with a step-by-step video tutorial to provide you with extra guidance along the way. You’ll be able to create a trendy and fashionable children’s cardigan in no time! With its quick work-up time, this cardigan can also be a great side project to complete in just a couple of days.
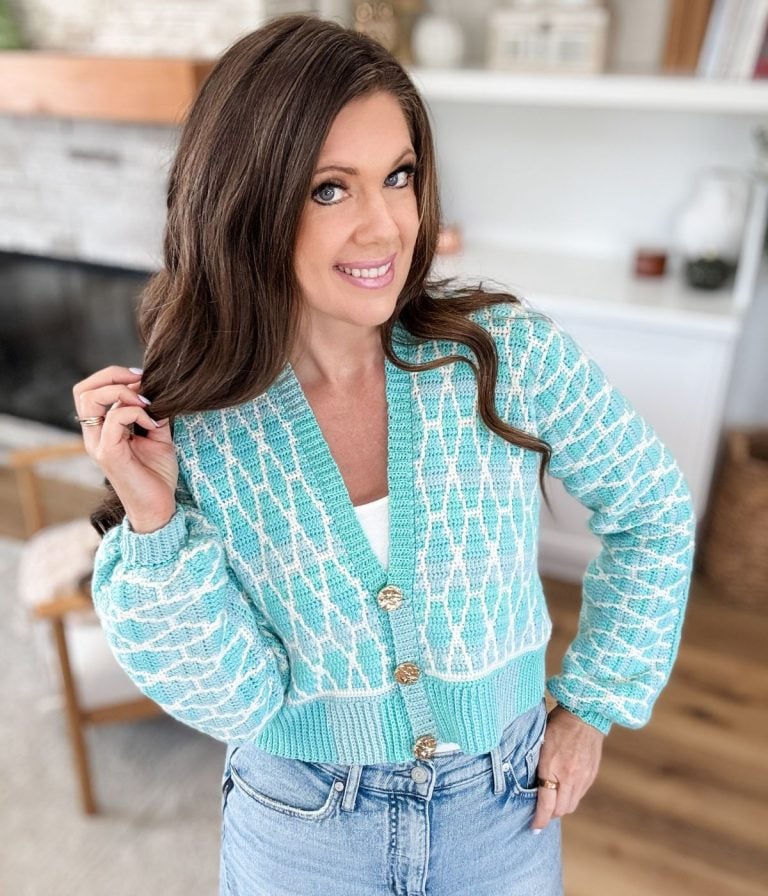
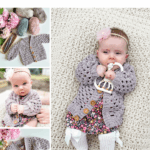
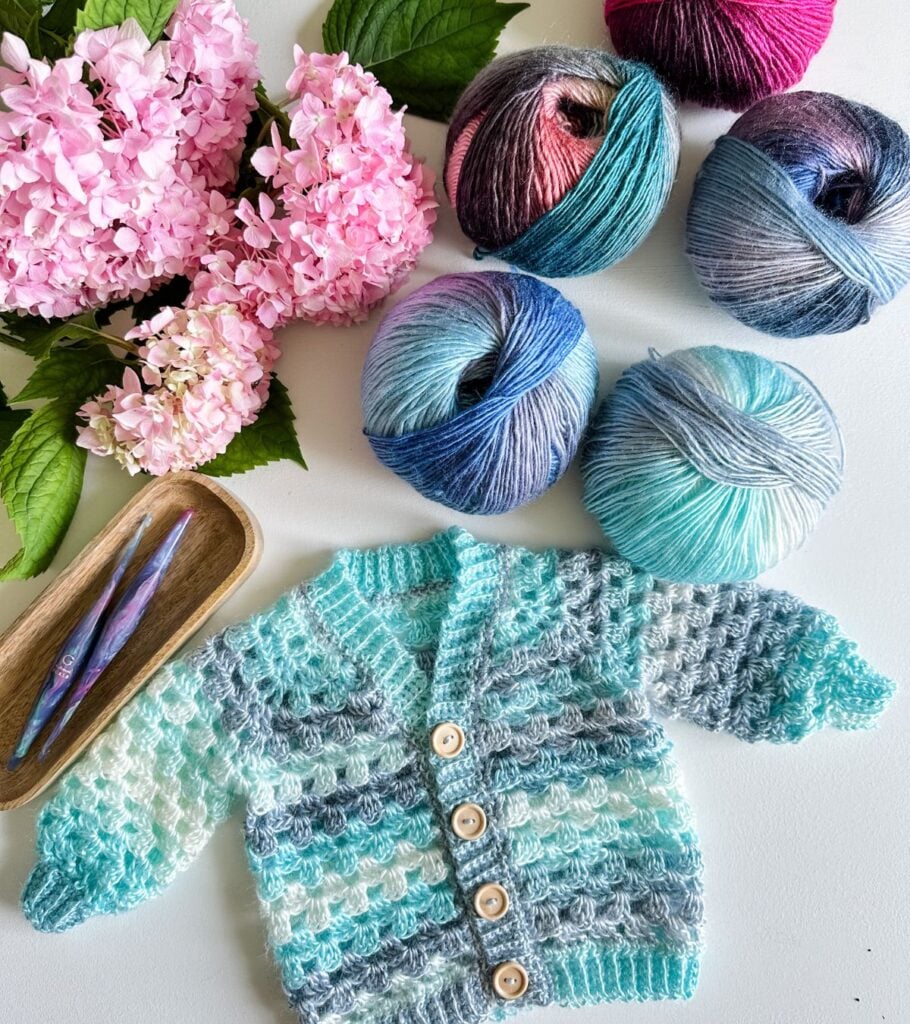
I am so excited to bring to you this adorable children’s crochet cardigan. This cardigan is the children’s version of my Granny Pop Cardigan. This pattern can be crocheted in either Mary Maxim Prism for a variegated look or Mary Maxim Sunrise for a solid colour.
Are Crochet Cardigans in Style?
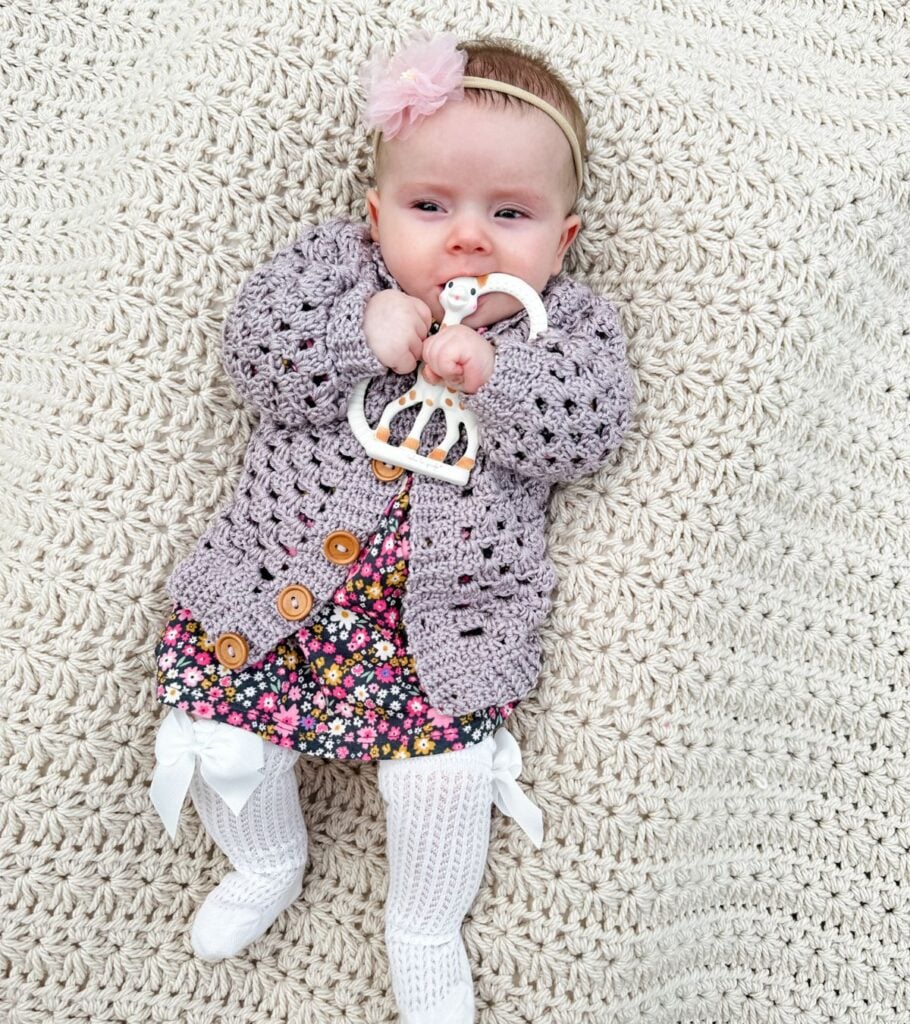
Yes! Crochet cardigans are so in style right now! I love the fact that I can crochet my own clothes. It is such a special feeling to see something trending in the stores and know that I can make it. And what’s even better than crocheting Cardigans for ourselves? Crochet children’s cardigans, of course! This children’s cardigan will definitely be a statement piece on that little one in your life.
Video Tutorial
In this video, we will guide you through each step of the pattern so you can create your very own beautiful cardigan
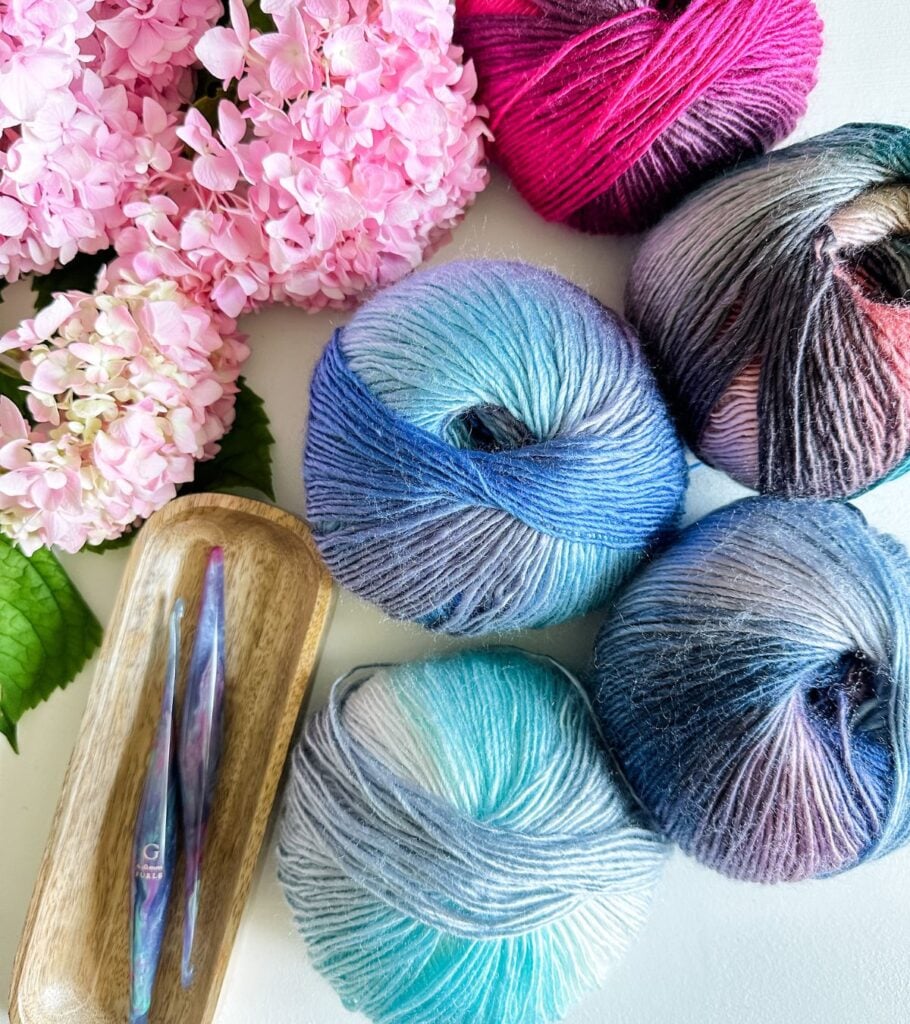
Yarn Requirements
Mary Maxim Sunrise (CDN) or Lullaby (CDN) Shown in Cactus Flower
DK Weight #3, 240yds/100g, 100% Premium Micro Acrylic
OR
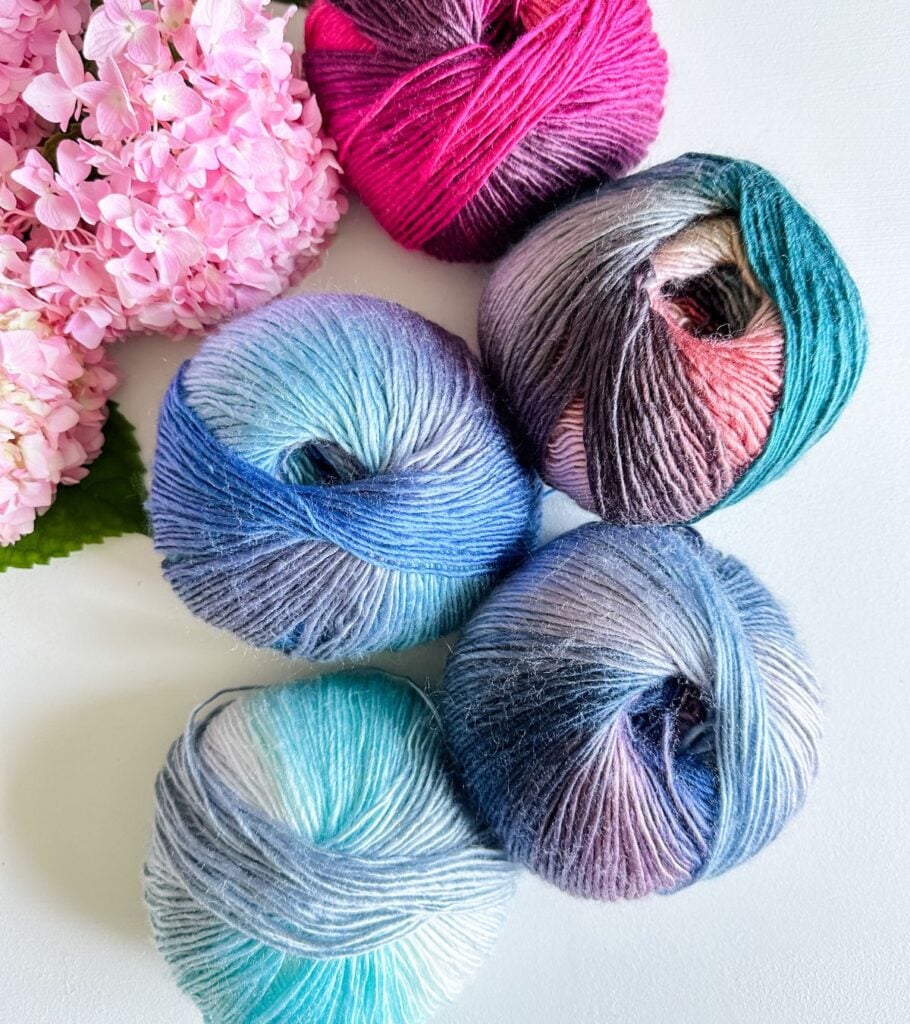
DK Weight #3
290yds/100g, 100% Acrylic Shown in Seascape
0-3mth (6-12mth, 18-24mth, 2-4, 6, 8, 10, 12)
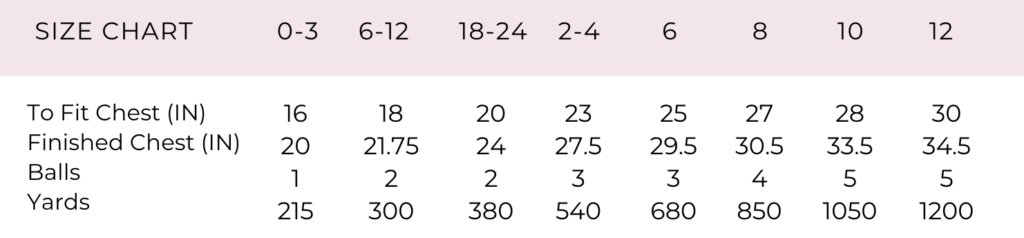
1 (2, 2, 3, 3, 4, 5, 5) balls
Substituting Yarn
Yarn substitution is an indispensable skill for crocheters, empowering you to achieve desired results in case the original yarn listed in a pattern is unavailable.
The Mini Pop Cardigan is crocheted using Mary Maxim Sunrise, a 100% premium micro acrylic Dk #3 yarn in the colour Cactus Flower, as well as Mary Maxim Prism, a stunning gradient yarn in a DK #3 and 100% acrylic composition, specifically in colour Seascape.
If you wish to substitute the yarn for this pattern, I have provided a list of suitable alternatives on the next page. However, please keep in mind that it is important to do a gauge swatch with your chosen yarn and adjust your hook size accordingly to achieve the pattern’s specified gauge for correct sizing. This will ensure that the final garment turns out as intended.
Yarn Substitutes
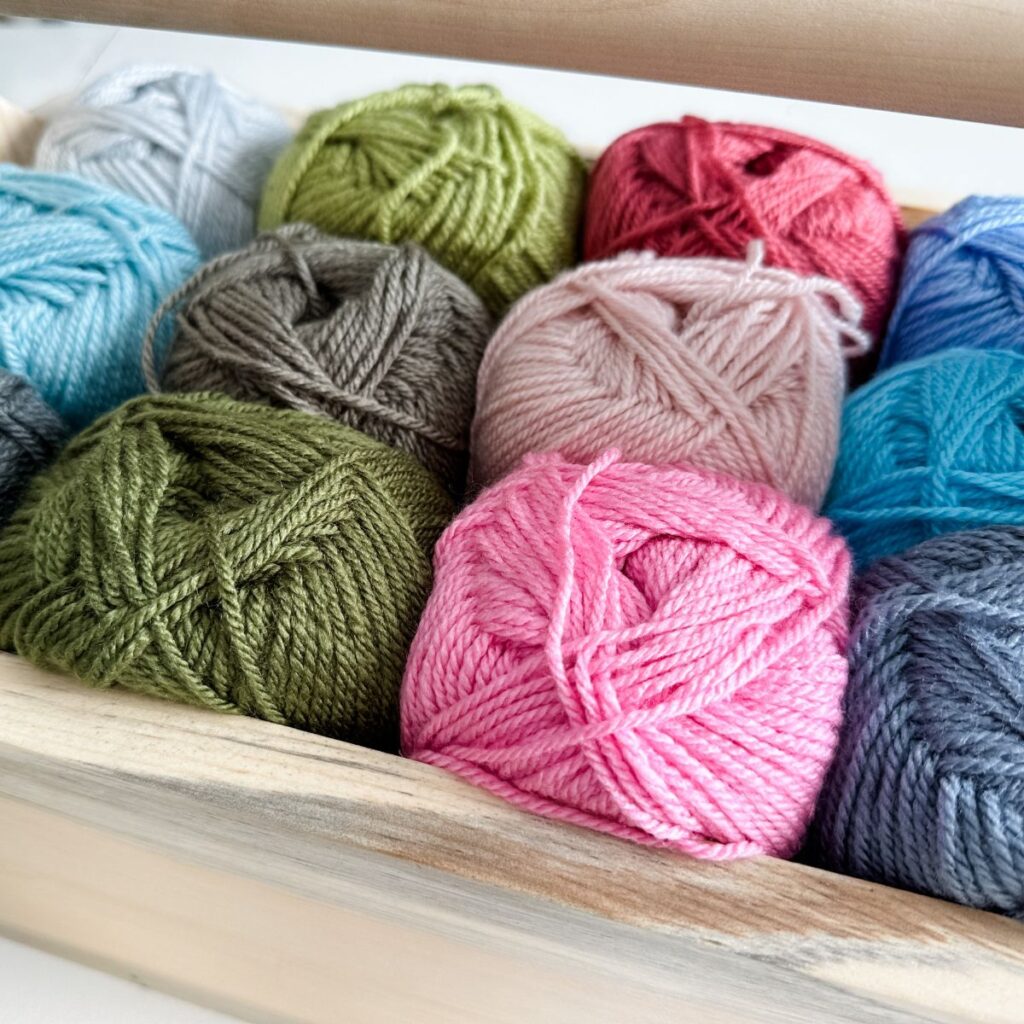
Mellowspun (CDN) is Made of soft, 100% premium acrylic with a special twist that we are very proud of! Choose from 33 luscious shades of dk-weight yarn that blend and complement each other.
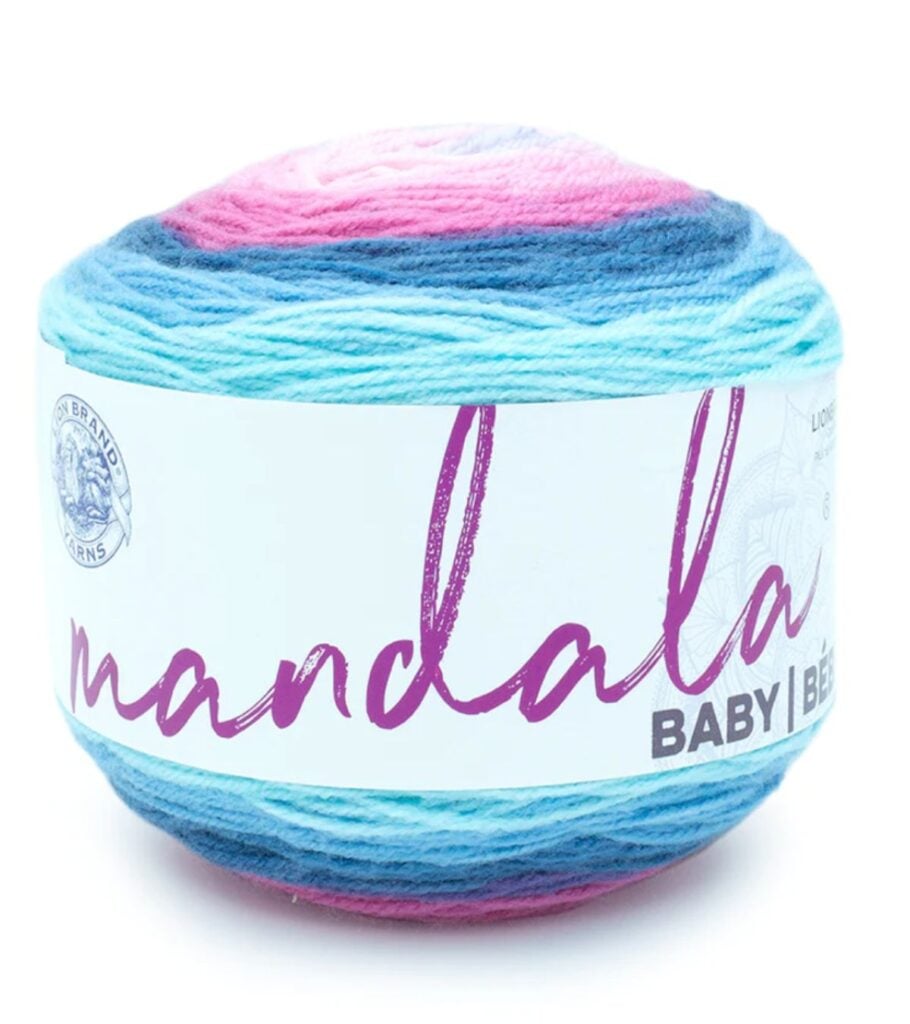
Lion Brand Mandela or Baby Mandala® lovers rejoice! Mandala® Baby is the newest member of the Mandala Family. With 12 bright, happy color combinations of your CYC 3 yarn, one cake is enough to make baby sweaters or stroller blankets.
Premier Bamboo Fair (CDN) Bamboo Fair, the perfect blend of bamboo fibre and cotton, boasts a silky softness and subtle sheen that’s ideal for warm-weather projects. Perfect for a day trip to the beach or a summer picnic. It’s 60% bamboo and 40% cotton, and each is 3.5 oz. The ball contains 273 yds.
Brava Sport – Brava is an affordable and versatile 100% acrylic yarn that’s gentle on sensitive skin but also hard-wearing for durability. Perfect for projects that require easy care and maintenance, it’s hypoallergenic and machine washable, making it accessible for everyone.
Crochet Hooks Needed
Or size needed to obtain gauge.

Additional Supplies
Helpful Resources
- Join our Facebook Crochet Community for pattern support and inspiration
- Subscribe on YouTube for hundreds of free tutorials
- Sign up for our newsletter and receive 40% off your first Ravelry purchase!
- Sign up for our YouTube Membership
Childrens Crochet Cardigan Sizing
0-3mth (6-12mth, 18-24mth, 2-4, 6, 8, 10, 12)
The Schematic is included in the PDF digital download crochet pattern.
Gauge
Body: 17 sts & 8 rows equal to 4″ with 4.5mm crochet hook in pattern
Ribbing: 9 sts & 9 rows equal to 2″ with 4mm crochet hook in sc blo
Childrens Crochet Cardigan Construction
The Mini Pop Cardigan pattern is worked from the top down in rows until the desired size is reached, providing 4-5.5″ of positive ease. Once this occurs, you will separate the sleeves and body by following our instructions.
From there, you will continue to work the body in rows, finishing it off with a band and button-up collar. Next, you’ll need to join back onto the sleeves and work them in the round, following our step-by-step instructions. We’ll show you how to finish off the sleeves with a beautiful cuff, providing you with a seamless and professional look.
Upgrade to the Premium PDF Pattern!
Digital PDF Download
Digital pattern only. No physical item will be shipped.
Children’s Crochet Cardigan Pattern
FAQ & Terms
This pattern requires a beginner skill level.
This pattern is professionally written in technical writing and tech edited for accuracy.
1. Affiliate Links & Ad Support
This post may contain affiliate links. At no extra cost to you, purchases made through these links may earn MJ’s Off The Hook Designs a small commission. The content on this site is supported by advertisements. By using this site, you agree not to circumvent, block, or tamper with these ads.
2. Copyright & Intellectual Property
All content on this blog, including free crochet patterns, instructions, charts, photos, videos, and written materials, is the property of MJ’s Off The Hook Designs Inc. and is protected under copyright and other intellectual property laws.
3. Personal Viewing & Use Only
Free patterns published on this site are provided for viewing only on this blog. You may not:
• Copy, download, print, take screenshots, or redistribute the pattern in any form (digital or physical) outside this blog.
• Post the pattern or instructions elsewhere online or share it publicly without written consent.
Even for “personal use,” the pattern must only be used while viewing this blog post with the ads intact. Tampering with, hiding, or removing ads while accessing the pattern is strictly prohibited.
4. Screenshots & Unauthorized Sharing
Screenshots or any other method of copying the pattern for offline use or redistribution is prohibited. Sharing patterns in forums, social media groups, or private messages without permission is also prohibited.
5. Legal Enforcement
Violation of these terms may constitute copyright infringement and could result in civil or criminal penalties under intellectual property laws. By using this pattern, you agree to comply fully with these terms.
6. Questions & Permissions
For questions about these terms or for permission to use or share patterns outside of these rules, please contact MJ’s Off The Hook Designs Inc. in writing.
Thank you for respecting our work and supporting MJ’s Off The Hook Designs.
Yes! You may sell finished items made from MJ’s patterns, but please credit:
“Pattern by MJ’s Off The Hook Designs Inc.”
Pattern Support is only available in our Facebook Community group and Video Tutorials.
No additional support is provided for modified patterns, alternate yarns, or changes to gauge.
Notes
The Mini Pop Cardigan pattern is worked from the top down in rows until the desired size is reached, providing 4-5.5″ of positive ease. Once this occurs, you will separate the sleeves and body by following our instructions. From there, you will continue to work the body in rows, finishing it off with a band and button-up collar.
Next, you’ll need to join back onto the sleeves and work them in the round, following our step-by-step instructions. We’ll show you how to finish off the sleeves with a beautiful cuff, providing you with a seamless and professional look.
Size Chart
Abbreviations
Blo – Back Loop Only
Ch – Chain
Dc – Double Crochet
Pm – Place Marker
Rep – Repeat
RS – Right Side
Sc – Single Crochet
Sk – Skip
Sl St – Slip Stitch
Sp(s) – Space(s)
St(s) – Stitch(es)
V St – dc, ch 1, dc in the same st
WS – Wrong Side
( ) – Work step in parentheses in indicated stitch
[ ] – Work step in brackets the number of times indicated
Pattern
0-3MTH (6-12MTH, 18-24MTH, 2/4, 6, 8, 10, 12)
Notes
The cardigan is worked from the top down in Rows. Follow the starting stitch count for the size you are working on. Continue working the yoke until the desired size is reached. The pattern is written for the smallest size, with the larger sizes in parentheses ( ). If there is only 1 number, it applies to all sizes—a step-by-step video tutorial is provided on YouTube for size 6-12mth.
Yoke
Setup Row:
With the larger hook, ch 40 (44, 52, 56, 64, 68, 76, 80), 1 sc in the back bump of the 2nd ch from hook and in each ch across, turn—39 (43, 51, 55, 63, 67, 75, 79) sts.
Row 1:
Ch 3 (counts as 1 dc), work 3 dc in the first st, sk next st (front panel), V st (dc, ch 1, dc) in the next st, ch 1, sk st, *dc in each of the next 3 sts, ch 1, sk st; rep from * [1 (1, 2, 2, 3, 3, 4, 4) more times] (sleeve), V st next st, ch 1, sk st, *dc in each of the next 3 sts, ch 1, sk st; rep from * [2 (3, 3, 4, 4, 5, 5, 6 more times] (back), V st next st, ch 1, sk st, *dc in each of the next 3 sts, ch 1, sk st; rep from * [1 (1, 2, 2, 3, 3, 4, 4) more times] (sleeve), V st next st, ch 1, sk st, 4 dc in the last st, turn—9 (10, 12, 13, 15, 16, 18, 19) clusters, 4 V sts.
Row 2 (Front panel Incr.):
Ch 3, work 3 dc in the sp between the first and second dc, ch 1, 3 dc in next ch-1 sp, ch 1, V st in the ch-1 sp of V st, ch 1, *3 dc in next ch-1 sp, ch 1; rep from * across to the next V st, V st in the ch-1 sp of V st, ch 1, *3 dc in next ch-1 sp, ch 1; rep from * across to the next V st, V st in the ch-1 sp of V st, ch 1, *3 dc in next ch-1 sp, ch 1; rep from * across to the next V st, V st in the ch-1 sp of V st, ch 1, 3 dc in next ch-1 sp, ch 1, 4 dc in sp between the third dc and turning ch, turn—14 (15, 17, 18, 20, 21, 23, 24) clusters, 4 V sts.
Row 3:
Ch 4 (counts as 1 dc, ch 1), *3 dc in next ch-1 sp, ch 1; rep from * across to the next V st, V st in the ch-1 sp of V st, ch 1, *3 dc in next ch-1 sp, ch 1; rep from * across to the next V st, V st in the ch-1 sp of V st, ch 1, *3 dc in next ch-1 sp, ch 1; rep from * across to the next V st, V st in the ch-1 sp of V st, ch 1, *3 dc in next ch-1 sp, ch 1; rep from * across to the next V st, V st in the ch-1 sp of V st, ch 1, *3 dc in next ch-1 sp, ch 1; rep from * across, 1 dc in turning ch, turn—17 (18, 20, 21, 23, 24, 26, 27) clusters, 4 V sts, 2 dc.
Row 4:
Ch 3, work 3 dc in the first ch-1 sp, ch 1, *3 dc in next ch-1 sp, ch 1; rep from * across to the next V st, V st in the ch-1 sp of V st, ch 1, *3 dc in next ch-1 sp, ch 1; rep from across to the next V st, V st in the ch-1 sp of V st, ch 1, *3 dc in next ch-1 sp, ch 1; rep from * across to the next V st, V st in the ch-1 sp of V st, ch 1, *3 dc in next ch-1 sp, ch 1; rep from across to the next V st, V st in the ch-1 sp of V st, ch 1, *3 dc in next ch-1 sp, ch 1; rep from * across to last ch-1 sp, 4 dc in ch-1 sp, turn—22 (23, 25, 26, 28, 29, 31, 32) clusters, 4 V sts.
0-3 MTH ONLY
Row 5:
Rep Row 3—25 clusters, 4 V sts, 2 dc.
Row 6:
Rep Row 4—30 clusters, 4 V sts.
Row 7:
Rep Row 3—33 clusters, 4 V sts, 2 dc.
ALL OTHER SIZES – 6-12MTH (18-24MTH, 2/4, 6, 8, 10, 12)
Row 5 (Front panel Incr.):
Ch 3, work 3 dc in the sp between the first and second dc, ch 1, *3 dc in next ch-1 sp, ch 1; rep from * across to V st, V st in the ch-1 sp of V st, ch 1, *3 dc in next ch-1 sp, ch 1; rep from across to the next V st, V st in the ch-1 sp of V st, ch 1, *3 dc in next ch-1 sp, ch 1; rep from * across to the next V st, V st in the ch-1 sp of V st, ch 1, *3 dc in next ch-1 sp, ch 1; rep from * across to the next V st, V st in the ch-1 sp of V st, ch 1, *3 dc in next ch-1 sp, ch 1, rep from * across to the last cluster, 4 dc in sp between the third dc and turning ch, turn—28 (30, 31, 33, 34, 36, 37) clusters, 4 V sts.
Row 6:
Rep Row 3—31 (33, 34, 36, 37, 39, 40) clusters, 4 V sts, 2 dc.
Row 7:
Rep Row 4—36 (38, 39, 41, 42, 44, 45) clusters, 4 V sts.
18-24 MTH ONLY
Row 8:
Rep Row 3—41 clusters, 4 V sts.
2/4 (6, 8, 10, 12)
Rows 8 – 9 (10, 10, 11, 11):
Rep Rows 5, 3, 4, 5, ending with—47 (54, 55, 62, 63) clusters, 4 V sts.
Separate Body and Sleeves
Body
Make the first Row the RS of your work.
0-3MTH (18-24 MTH, 2/4)
Row 1 (RS):
Ch 3, work 3 dc in the first ch-1 sp, ch 1, *3 dc in next ch-1 sp, ch 1; rep from * across to the next V st, sk V st, sk sleeve section and the next V st, *3 dc in next ch-1 sp, ch 1; rep from * across to the next V st, sk V st, sk sleeve section and the next V st, *3 dc in next ch-1 sp, ch 1; rep from * across to last ch-1 sp, 4 dc in ch-1 sp, turn—20 (24, 28) clusters.
Body
6-12MTH (6, 8, 10, 12)
Row 1 (RS):
Ch 4 (counts as 1 dc, ch 1), *3 dc in next ch-1 sp, ch 1; rep from * across to the next V st, sk V st, sk sleeve section and the next V st, *3 dc in next ch-1 sp, ch 1; rep from * across to the next V st, sk V st, sk sleeve section and the next V st, *3 dc in next ch-1 sp, ch 1; rep from * across, 1 dc in turning ch, turn—21 (29, 30, 33, 34) clusters.
The Fonts and Back are now worked continuously in rows until the desired length is reached.
0-3MTH (18-24 MTH, 2/4)
Row 2 (WS):
Ch 4 (counts as 1 dc, ch 1), *3 dc in next ch-1 sp, ch 1; rep from * across, 1 dc in turning ch, turn—19 (23, 27) clusters.
Row 3:
Ch 3, work 3 dc in the first ch-1 sp, ch 1, *3 dc in next ch-1 sp, ch 1; rep from * across to the last ch-1 sp, 4 dc in ch-1 sp, turn—20 (24, 28) clusters.
Rows 4-7 (13, 15):
Rep Row 2 & 3.
Row 8 (14, 16) (RS):
Ch 1, work 1 sc in the next dc and in each dc and ch-1 sp across, end with 1 sc in the turning ch, turn—80 (96, 112) sts.
6-12MTH (6, 8, 10, 12)
Row 2 (WS):
Ch 3, work 3 dc in the first ch-1 sp, ch 1, *3 dc in next ch-1 sp, ch 1; rep from * across to the last ch-1 sp, 4 dc in ch-1 sp, turn—22 (30, 31, 34, 35) clusters.
Row 3:
Ch 4 (counts as 1 dc, ch 1), *3 dc in next ch-1 sp, ch 1; rep from * across, 1 dc in turning ch, turn—21 (29, 30, 33, 34) clusters.
Rows 4- 10 (18, 20, 24, 26):
Rep Row 2 & 3 ending on Row 2.
Row 11 (19, 21, 25, 27)(RS):
Ch 1, work 1sc in the next dc and in each dc and ch-1 sp across, end with 1 sc in the turning ch, turn—88 (120, 124, 136, 140) sts.

Band
The band is joined as you go to the body edge.
Row 1:
With the smaller hook, ch 6 (6, 7, 8, 9, 10, 11, 11), 1 sc in the 2nd ch from hook and in each ch across, sk first st at the body edge, sl st in the next 2 sts (body edge), turn—5 (5, 6, 7, 8, 9, 10, 10) sts.
Row 2:
Sk sl sts, 1 sc in the blo of each st across, turn—5 (5, 6, 7, 8, 9, 10, 10) sts.
Row 3:
Ch 1, work 1 sc in the blo of each st across, sl st in next 2 sts (body edge), turn—5 (5, 6, 7, 8, 9, 10, 10) sts.
Rows 4-80 (88, 96, 112, 120, 124, 136, 140):
Rep Row 2 & 3 ending on Row 2. Fasten off and weave in ends.
Collar
The collar is joined as you go to the setup Row.
Setup Row (RS):
With RS facing and the smaller hook, put a slip knot on the hook, and join yarn to the bottom corner of the right front panel. Sc in each st across the band, 2 sc per each row across the right front, 1 sc in each st across the neck, 2 sc in each row across the left front, 1 sc in each st across the band, turn.
Mark Buttonholes
Watch the tutorial for directions.
With RS facing at the front left side, count 2 sts from the bottom edge, pm in the 3rd st, *count 8 sts, pm in the 9th st; rep from *making as many buttonholes as desired. The buttonhole will be 1-2 st.
Buttonhole Row:
Ch 1, work 1 sc in the blo 2 (2, 3, 3, 3, 3, 3, 3) sts, ch 2, sk 1 (1, 1, 1, 1, 2, 2, 2) st(s), 1 sc in the blo last 2 (2, 3, 3, 3, 3, 3, 3) sts.
Next Row:
Ch 1, work 1 sc in the blo 2 (2, 3, 3, 3, 3, 3, 3)sts, 1 (1, 1, 1, 1, 2, 2, 2) sc in ch-2 sp, 1 sc in the blo last 2 (2, 3, 3, 3, 3, 3, 3) sts.
As you are working the collar rows and come to a place marker, use these two rows in place to create the buttonhole.
Row 1:
With the smaller hook, ch 6 (6, 8, 8, 8, 9, 9, 9), 1 sc in 2nd ch from hook and in each ch across, sk first st at the edge, sl st in next 2 sts, turn—5 (5, 7, 7, 7, 8, 8, 8) sts.
Row 2:
Sk sl sts, 1 sc in the blo of each st across, turn—5 (5, 7, 7, 7, 8, 8, 8) sts.
Row 3:
Ch 1, work 1 sc in the blo of each st across, sl st in next 2 sts, turn—5 (5, 7, 7, 7, 8, 8, 8) sts.
Rep Row 2 & 3 for the entire edge of the cardigan working buttonhole row at each marked st. Fasten off and weave in tails.
Sew the buttons to the right side collar opposite buttonholes. Knot and trim tails.
Sleeves (Left & Right)
The PDF pattern includes instructions to decrease the sleeves if desired.
Round 1 (RS):
Put a slip knot on the larger hook (leave a long tail); at the underarm, work a sl st in the first V st (to the right), sl st in the next V st ( to the left), sl st in the next ch-1 sp, ch 3, 2 dc in ch-1 sp, ch 1, *3 dc in next ch-1 sp, ch 1; rep from *around, sl st in ch 3 to join, TURN—9 (9, 11, 12, 13, 14, 16, 16) clusters. Use the starting tail to stitch closed the hole under the arm.
Round 2 (WS):
Ch 3, 2 dc in the first ch-1 sp, ch 1, *3 dc in next ch-1 sp, ch 1; rep from * around, sl st in ch 3 to join, turn—9 (9, 11, 12, 13, 14, 16, 16) clusters.
Rounds 3-7 (9, 11, 13, 15, 19, 21, 23):
Rep Round 2. Crochet the sleeves to the desired length. The cuff will add an additional 1-2″ to the sleeve length. Last round, don’t turn.
Round 8 (10, 12, 14, 16, 20, 22, 24) (RS):
Ch 1, work 1 sc in the 2nd dc of the 3 dc cluster, work 1 sc in each ch-1 sp and the 2nd dc of the 3 dc cluster around, sl st in the first sc to join—18 (18, 22, 24,26, 28, 32) sts.
Cuff
The cuff is joined as you go to the sleeve edge.
Row 1:
With the smaller hook, ch 6 (6, 7, 8, 9, 10, 11, 11), 1 sc in the 2nd ch from hook and in each ch across, sk first st at the sleeve edge, sl st in the next 2 sts (sleeve edge), turn—5 (5, 6, 7, 8, 9, 10, 10) sts.
Row 2:
Sk sl sts, 1 sc in the blo of each st across, turn—5 (5, 6, 7, 8, 9, 10, 10) sts.
Row 3:
Ch 1, work 1 sc in the blo of each st across, sl st in next 2 sts (sleeve edge), turn—5 (5, 6, 7, 8, 9, 10, 10) sts.
Rows 4-18 (18, 22, 24,26, 28, 32):
Rep Row 2 & 3 ending on Row 2. Last Row, ch 1, with RS facing sl st cuff together, fasten off and weave in ends.
Finishing
For a professional finish and to prevent the ribbing from curling, I recommend lightly steaming the cardigan and ribbing. Gently use a steamer to release any wrinkles and flatten the ribbing. Be cautious not to hold the steamer too close to the garment to avoid any damage.
Washing Instructions
Handwashing or gentle machine washing:
To clean your cardigan, handwashing is highly recommended. Fill a basin or sink with lukewarm water and add a mild detergent suitable for delicate fabrics. Gently immerse the garment and agitate it softly to cleanse. Avoid excessive squeezing or wringing to prevent stretching or misshaping. Rinse thoroughly with clean water.
Alternatively, if you prefer to use a washing machine, place the garment inside a garment bag or pillowcase to protect it. Use a gentle cycle with cool water and mild detergent. Avoid harsh spin cycles or high temperatures that can damage the fibres.
Drying:
After washing, gently remove excess water without wringing the garment. Lay it flat on a clean, absorbent towel, arranging it into shape. Roll up the towel and gently press to remove more moisture. Then, let the garment air dry, avoiding direct sunlight or heat sources that could cause fading or shrinking.

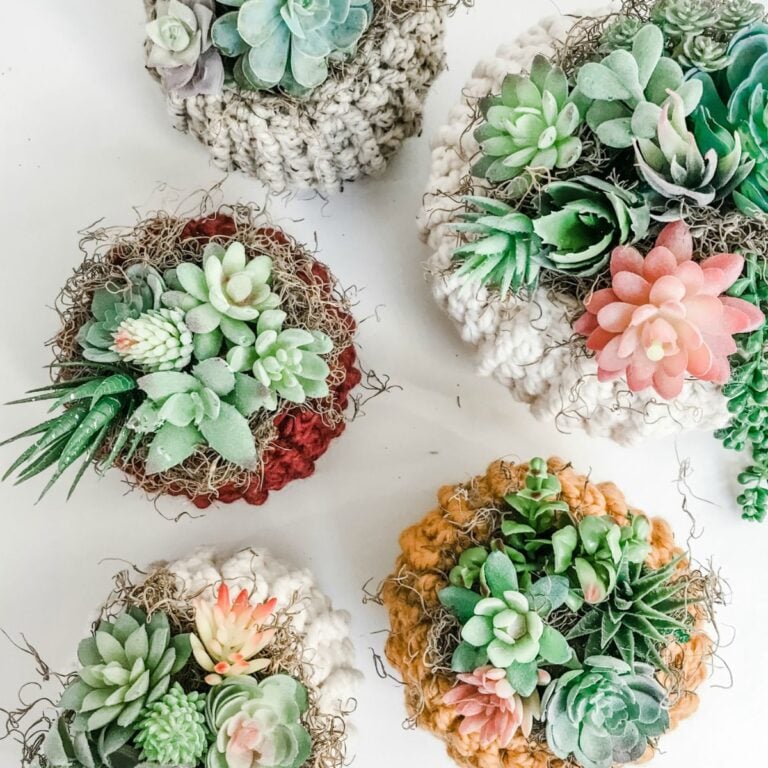
You May Also Love These Patterns:
This pattern is designed by Michelle Moore of MJ’s Off The Hook Designs Inc based in Lakefield Ontario Canada. Your go to source for modern easy crochet patterns. Published on July 25th, 2023.
Thank you for visiting MJ’s Off The Hook Designs I hope you enjoyed this pattern and feel inspired to pick up your hook and start creating.
You can find even more crochet patterns in our Ravelry and Etsy shops.
For daily inspiration and behind the scenes peeks join me over on Facebook or Instagram or join our YouTube Membership for exclusive content!
You’ve got questions, we’ve got a community!
Crocheting is better with friends! Join our group to post pictures and ask all your pattern support questions.