*This post may contain affiliate links to support the cost of this blog. At no cost to you, I may make a small commission if you purchase through these links. Read our Privacy Policy HERE
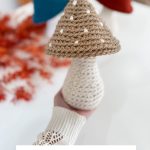


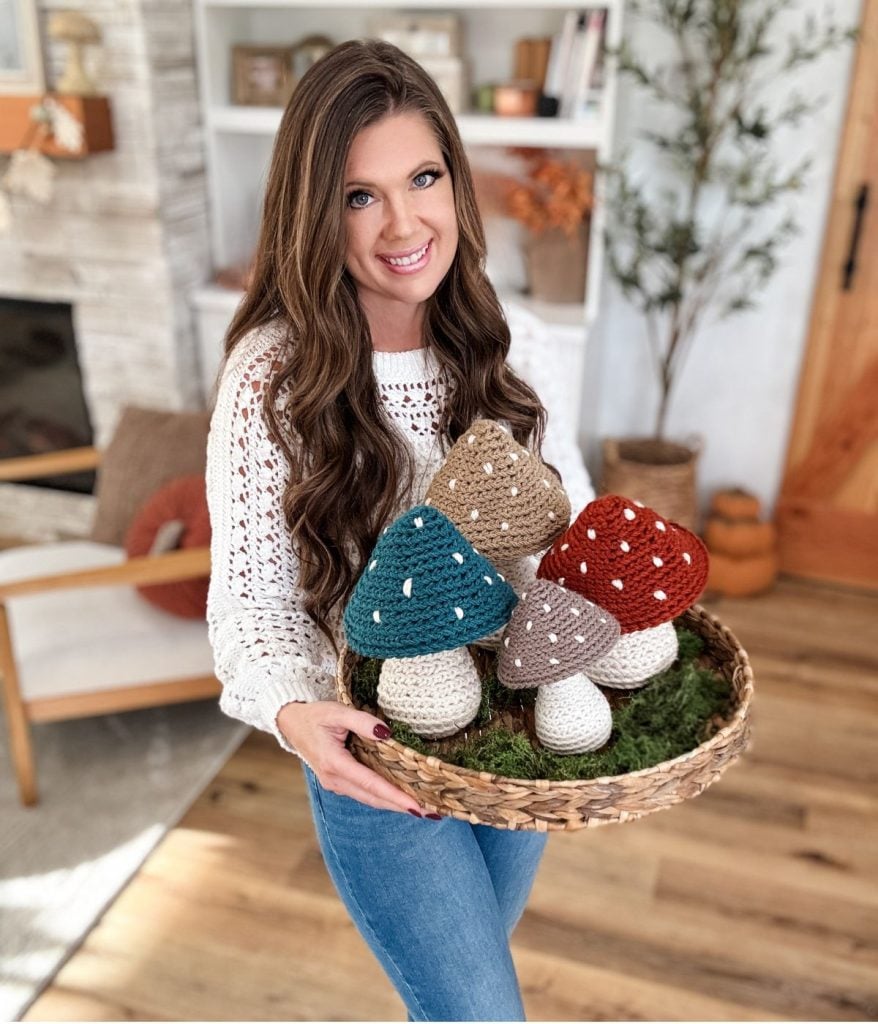
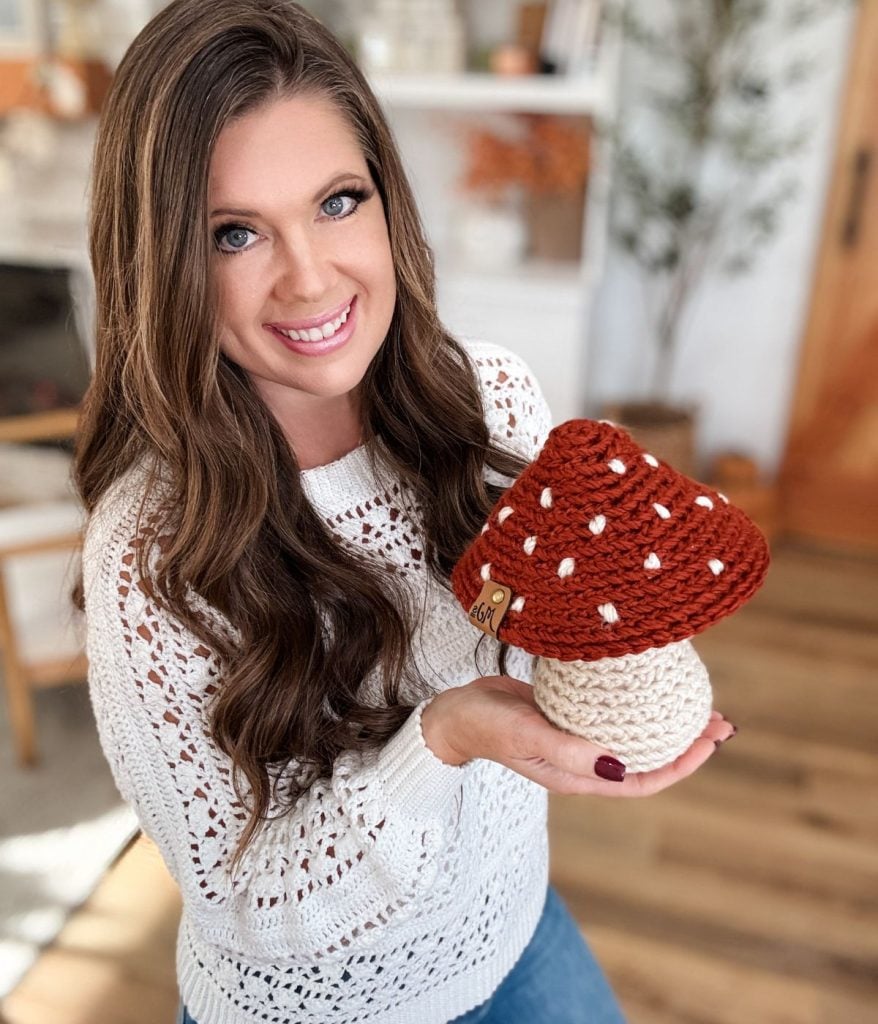
The Rustic Farmhouse Crochet Mushrooms are a cozy and beginner-friendly crochet mushroom pattern that’s quick to make and perfect for fall home décor.
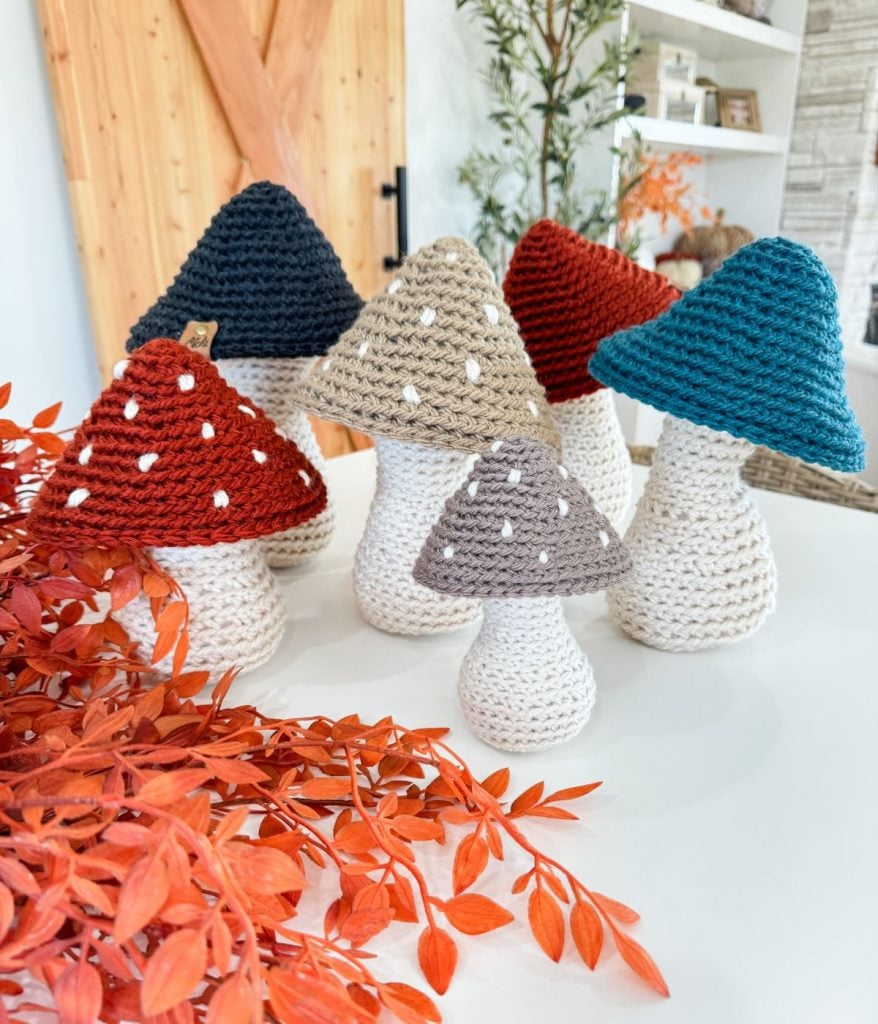
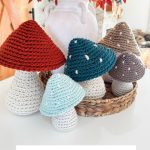
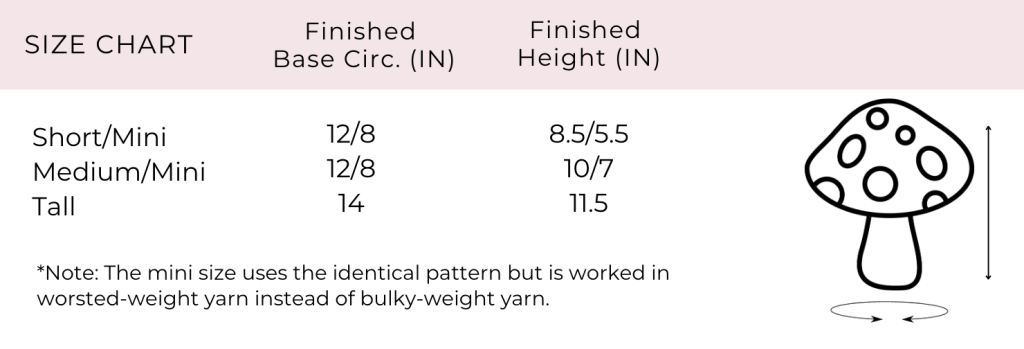
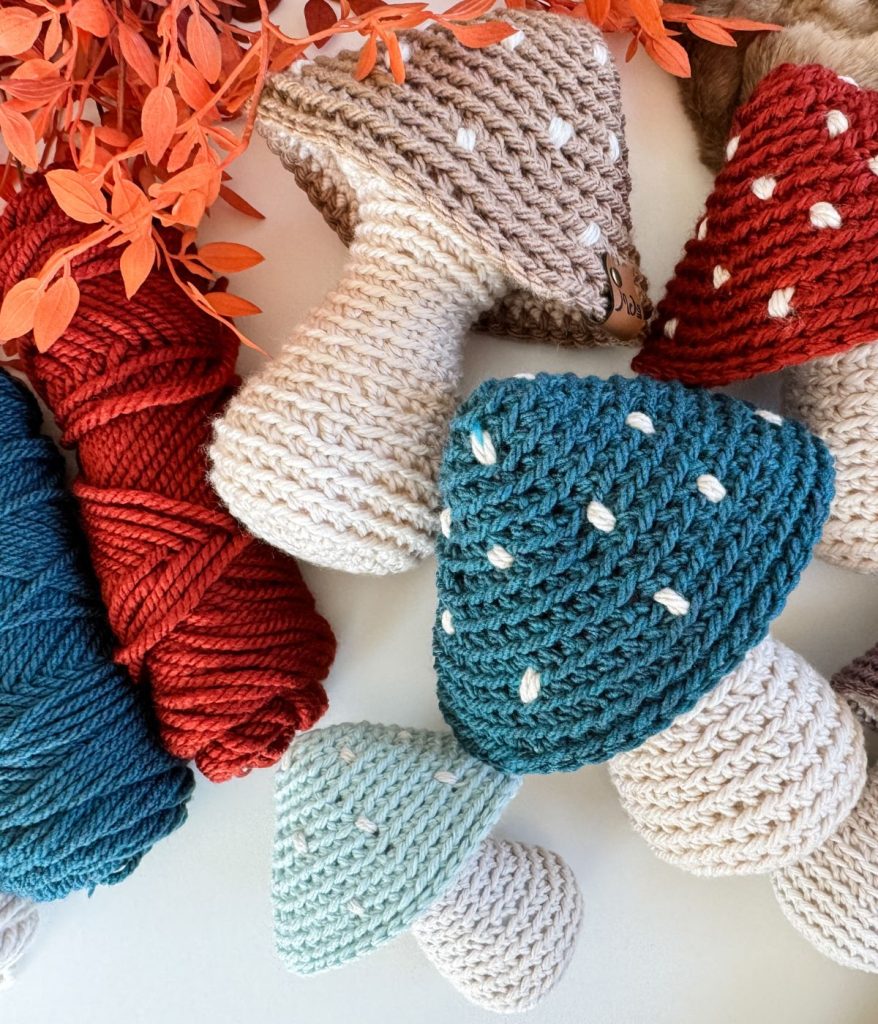
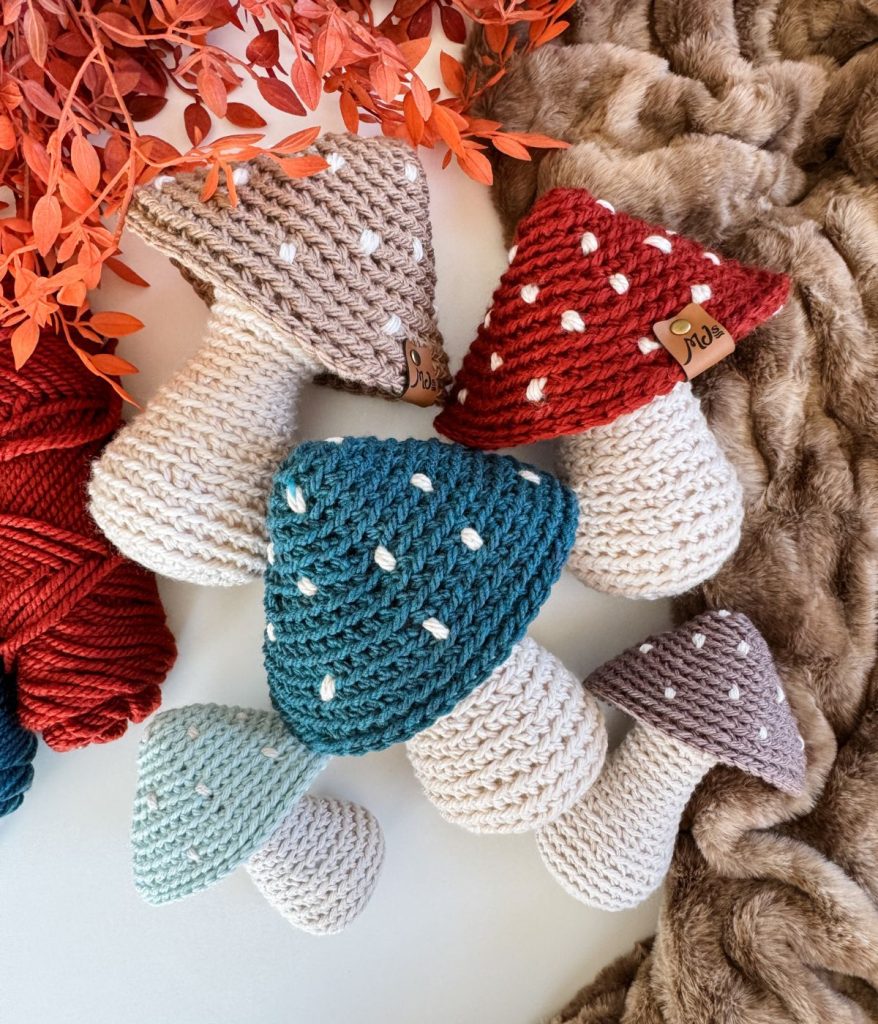
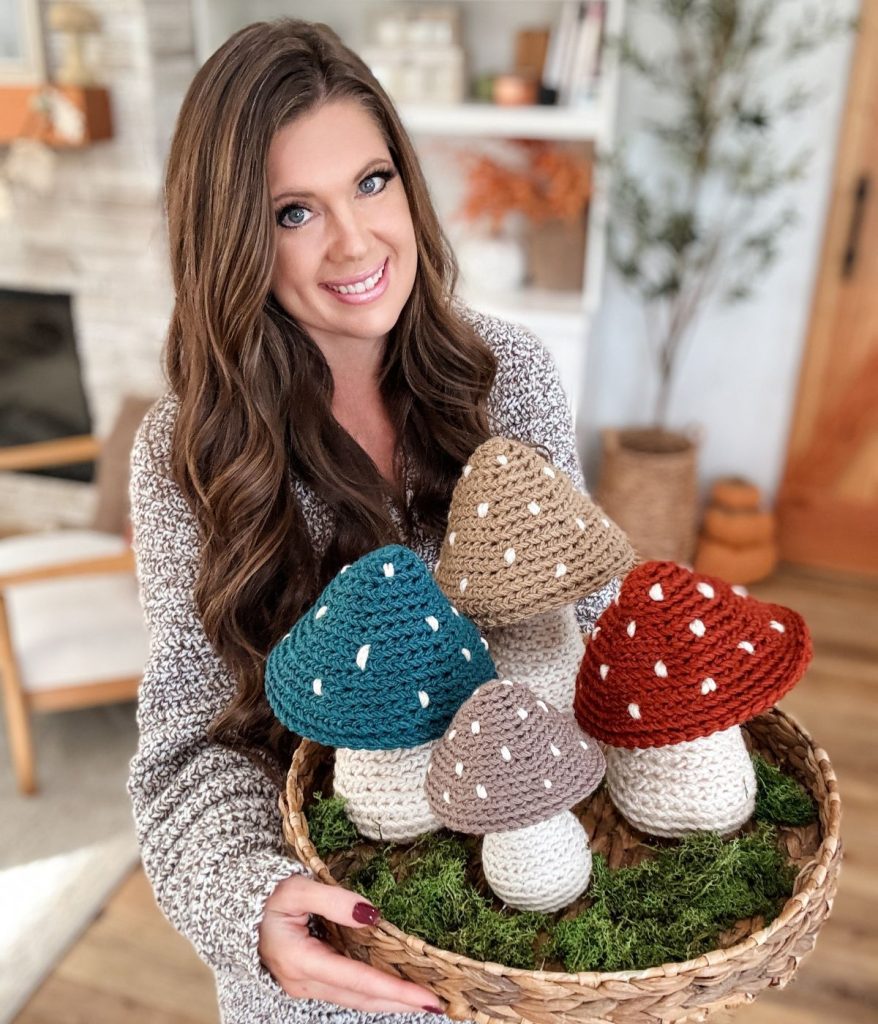
Worked in Titan Bulky yarn from Mary Maxim, this no-sew project works up fast with chunky stitches and a rustic, farmhouse-inspired look. The pattern includes three sizes plus instructions for mini mushrooms using worsted weight yarn, giving you endless options for creating a whimsical set.
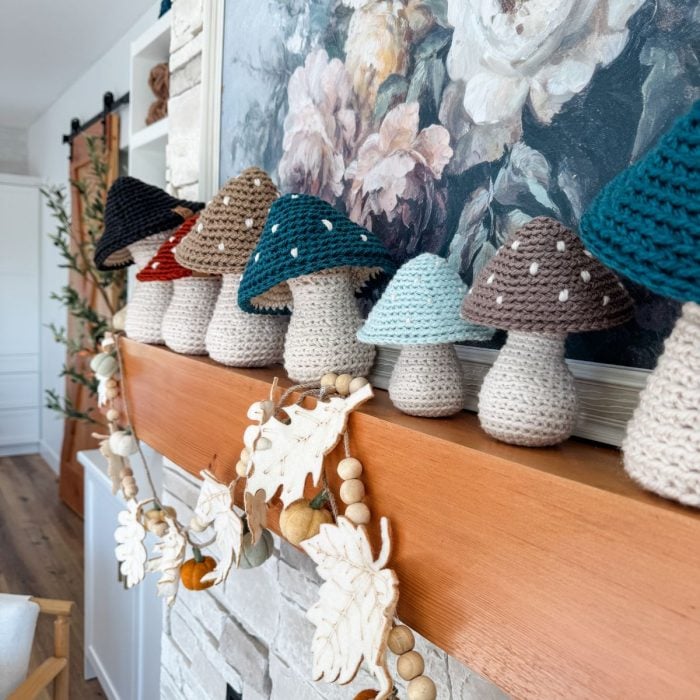
These bulky yarn crochet mushrooms are ideal for styling around the home to bring a woodsy, outdoorsy vibe. Place them on shelves, add them to tiered trays, or display them in a rustic centrepiece. They also make thoughtful handmade gifts and are a great seller at craft markets. A step-by-step crochet mushroom tutorial is available on YouTube, making this pattern easy to follow for all skill levels.
Whether you’re decorating for autumn, adding rustic charm to your home, or making unique gifts, the Rustic Farmhouse Mushrooms are a fun and versatile project you’ll want to crochet again and again.
Key Takeaways
- The Crochet Mushroom pattern is beginner-friendly and quick to make, ideal for fall home décor.
- Made with Titan Bulky yarn, this no-sew project includes sizes and instructions for mini mushrooms using worsted weight yarn.
- Crochet mushrooms bring a rustic charm; they can be used in various displays or given as handmade gifts.
- A video tutorial is available on YouTube, guiding users step-by-step through the process.
- This pattern supports yarn substitutions and encourages creativity with different yarn weights and colours.
If you love our Mushroom pattern, you may also love our Rustic Farmhouse Acorn pattern! If you love this design style, you may enjoy our Holiday Gnome, Rustic Farmhouse Bunny and our Rustic Farmhouse Snowman pattern!
Video Tutorial For The Crochet Mushroom
Watch the tutorial here https://youtu.be/60HjHbdnDC0?si=TA4mxbZjbTxxVaxz
This step-by-step tutorial will guide you through crocheting the medium-sized mushroom from start to finish. You will begin by working the base and stem, then continue with the cap. Instructions include how to add stuffing for structure, incorporate a sandbag for stability, and finish with decorative details such as the cap spots.
Watch the Tutorial Now
In this video, we’ll guide you through each step of the pattern, allowing you to create these adorable crochet mushrooms!
Yarn Requirments
Titan Bulky Weight Yarn #5 (cdn site)
100% Acrylic 80 yards / 85 grams
Base (MC) Shown in Cottonwood
Cap (CC) Shown in Russet, Teal Heather, Dark Grey, and Taupe
Short (Medium, Tall)
MC: 1 (1, 1) Ball or 50 (55, 80) Yards
CC: 1 (1, 1) Ball or 40 (40, 50) Yards
A small amount of Starlette Worsted (Cdn) in desired colours for mini mushrooms
Sizes
Skill Level
Gauge
5 sts and 5 rows equal to 2″ in sc blo with 6.5mm hook
Substituting Yarn
Before beginning your project, it is highly recommended to create a gauge swatch. This step ensures that your stitch tension aligns with the pattern’s specifications—especially important if you are substituting yarn or the recommended yarn is unavailable.
For this type of project, the exact size is not critical. However, you will want a firm, tight stitch so the stuffing does not show through the fabric. Choose a hook size that works best with your yarn and personal tension to achieve a dense fabric.
To make the Mini Mushroom, use Starlette Worsted Weight Yarn from Mary Maxim with a 5 mm crochet hook (or the hook size required to achieve a tight stitch).
Have fun experimenting with different yarn weights and colours to create a variety of mushrooms in unique sizes and styles.
We’ve provided a list of suitable yarn substitutes on the following page. Additionally, you can create a bulky weight yarn by holding two strands of worsted-weight yarn together. This method provides flexibility in colour matching, and it’s also a fantastic way to use up your yarn stash.
Suitable Yarn Substitutes for Titan Bulky
Brava Bulky 136yds/100g
PREMIER BASIX CHUNKY YARN CDN) – 117yds/100g
Crochet Hooks Required
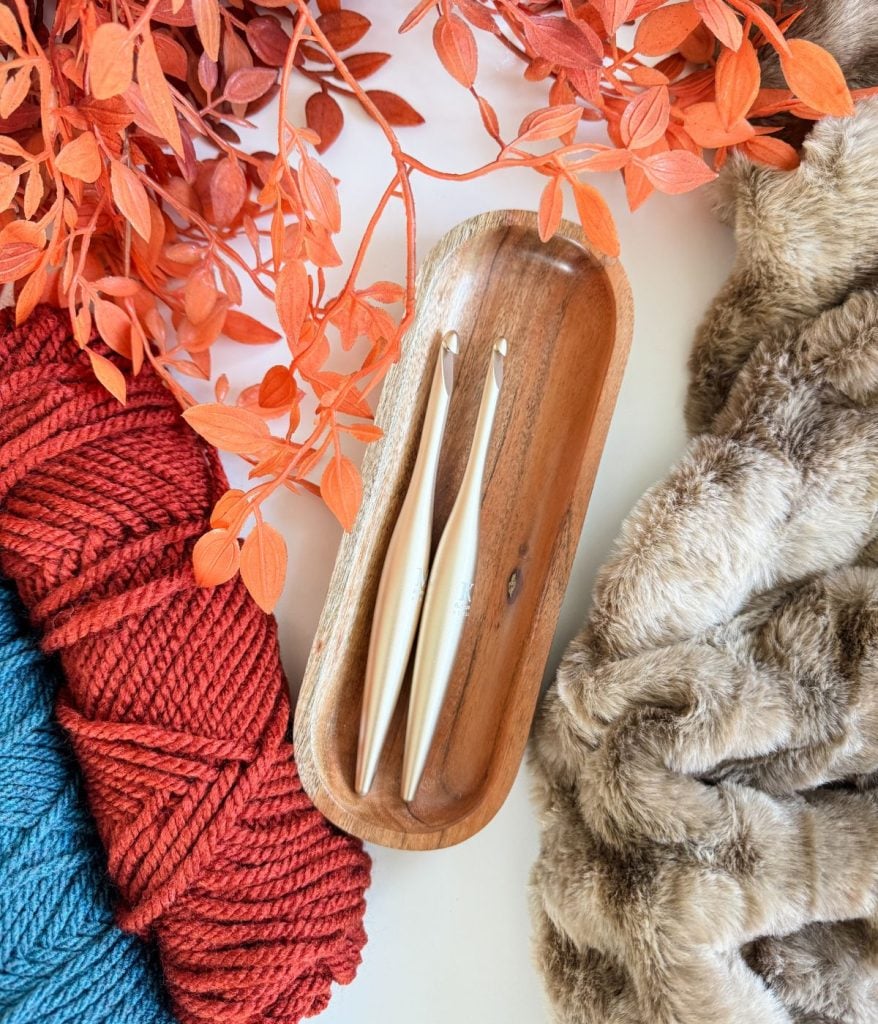
Materials Needed
Craft Sand and Plastic Bags
Helpful Resources
- Join our Facebook Crochet Community for pattern support and inspiration
- Subscribe on YouTube for hundreds of free tutorials
- Sign up for our newsletter and receive 40% off your first Ravelry purchase!
- Sign up for our YouTube Membership
Abbreviations
Ch – Chain
Inv Sc2tog – Single Crochet Decrease
Rep – Repeat
Sc – Single Crochet
Sl St – Slip Stitch
Sp(s) – Space(s)
St(s) – Stitch(es)
Inv Sc2tog – Invisible Single Crochet 2 together – Insert hook through the blo of next 2 sts, YO (Yarn Over), pull through 2 loops on the hook twice.
FAQ & Terms
This pattern requires a beginner skill level.
This pattern is professionally written in technical writing and tech edited for accuracy.
1. Affiliate Links & Ad Support
This post may contain affiliate links. At no extra cost to you, purchases made through these links may earn MJ’s Off The Hook Designs a small commission. The content on this site is supported by advertisements. By using this site, you agree not to circumvent, block, or tamper with these ads.
2. Copyright & Intellectual Property
All content on this blog, including free crochet patterns, instructions, charts, photos, videos, and written materials, is the property of MJ’s Off The Hook Designs Inc. and is protected under copyright and other intellectual property laws.
3. Personal Viewing & Use Only
Free patterns published on this site are provided for viewing only on this blog. You may not:
• Copy, download, print, take screenshots, or redistribute the pattern in any form (digital or physical) outside this blog.
• Post the pattern or instructions elsewhere online or share it publicly without written consent.
Even for “personal use,” the pattern must only be used while viewing this blog post with the ads intact. Tampering with, hiding, or removing ads while accessing the pattern is strictly prohibited.
4. Screenshots & Unauthorized Sharing
Screenshots or any other method of copying the pattern for offline use or redistribution is prohibited. Sharing patterns in forums, social media groups, or private messages without permission is also prohibited.
5. Legal Enforcement
Violation of these terms may constitute copyright infringement and could result in civil or criminal penalties under intellectual property laws. By using this pattern, you agree to comply fully with these terms.
6. Questions & Permissions
For questions about these terms or for permission to use or share patterns outside of these rules, please contact MJ’s Off The Hook Designs Inc. in writing.
Thank you for respecting our work and supporting MJ’s Off The Hook Designs.
Yes! You may sell finished items made from MJ’s patterns, but please credit:
“Pattern by MJ’s Off The Hook Designs Inc.”
Pattern Support is only available in our Facebook Community group and Video Tutorials.
No additional support is provided for modified patterns, alternate yarns, or changes to gauge.
Pattern
Notes: The mushroom is worked in continuous rounds. The base is crocheted from the bottom up, and the cap is crocheted from the top down. Use a stitch marker to indicate the first stitch of each round.
Mini Size: To make a mini mushroom, follow the same pattern using worsted weight yarn and a 5mm crochet hook.
Short
Base/Stem
Round 1:
Magic Ring, ch 1, work 6 sc in the ring, pull ring tight (don’t join)—6 sts.
Round 2 (Incr):
2 sc in each st around—12 sts.
Round 3 (Incr):
1 sc first st, 2 sc next st, *1 sc next st, 2 sc next st; rep from * around—18 sts.
Round 4 (Incr):
1 sc first 2 sts, 2 sc next st, *1 sc next 2 sts, 2 sc next st; rep from * around—24 sts.
Round 5 (incr):
1 sc first 3 sts, 2 sc next st, *1 sc next 3 sts, 2 sc next st; rep from * around—30 sts.
Rounds 6-8:
1 sc blo of each st around—30 sts.
Round 9 (decr):
1 sc blo first 3 sts, inv sc2tog blo across next 2 sts, *1 sc blo next 3 sts, inv sc2tog blo across next 2 sts; rep from * around—24 sts.
Round 10:
1 sc blo of each st around—24 sts.
Round 11 (decr):
1 sc blo first 2 sts, inv sc2tog blo across next 2 sts, *1 sc blo next 2 sts, inv sc2tog blo across next 2 sts; rep from * around—18 sts.
Round 12:
1 sc blo of each st around—18 sts.
Round 13 (decr):
1 sc blo first 7 sts, inv sc2tog blo across next 2 sts, 1 sc blo next 7 sts, inv sc2tog blo across next 2 sts—16 sts.
Round 14:
1 sc blo of each st around—16 sts.
Round 15 (Incr):
1 sc blo first 7 sts, 2 sc blo next st, 1 sc blo next 7 sts, 2 sc blo next st—18 sts.
Round 16 (Incr):
1 sc blo first 8 sts, 2 sc blo next st, 1 sc blo next 8 sts, 2 sc blo next st—20 sts.
Round 17 (Incr):
1 sc blo first 9 sts, 2 sc blo next st, 1 sc blo next 9 sts, 2 sc blo next st—22 sts.
Round 18 (Incr):
1 sc blo first 10 sts, 2 sc blo next st, 1 sc blo next 10 sts, 2 sc blo next st—24 sts.
Gill
Round 19 (Incr):
1 sc blo first st, 2 sc blo next st, *1 sc blo next st, 2 sc blo next st; rep from * around—36 sts.
Round 20:
1 sc in each st around—36 sts.
Round 21 (Incr):
1 sc first 2 sts, 2 sc next st, *1 sc next 2 sts, 2 sc next st; rep from * around—48 sts.
Rounds 22-24:
1 sc in each st around—48 sts. For the last round, fasten off and finish with a seamless join.
Medium
Base/Stem
Round 1:
Magic Ring, ch 1, work 6 sc in the ring, pull ring tight (don’t join)—6 sts.
Round 2 (Incr):
2 sc in each st around—12 sts.
Round 3 (Incr):
1 sc first st, 2 sc next st, *1 sc next st, 2 sc next st; rep from * around—18 sts.
Round 4 (Incr):
1 sc first 2 sts, 2 sc next st, *1 sc next 2 sts, 2 sc next st; rep from * around—24 sts.
Round 5 (incr):
1 sc first 3 sts, 2 sc next st, *1 sc next 3 sts, 2 sc next st; rep from * around—30 sts.
Rounds 6-8:
1 sc blo of each st around—30 sts.
Round 9 (decr):
1 sc blo first 3 sts, inv sc2tog blo across next 2 sts, *1 sc blo next 3 sts, inv sc2tog blo across next 2 sts; rep from * around—24 sts.
Round 10:
1 sc blo of each st around—24 sts.
Round 11 (decr):
1 sc blo first 2 sts, inv sc2tog blo across next 2 sts, *1 sc blo next 2 sts, inv sc2tog blo across next 2 sts; rep from * around—18 sts.
Rounds 12-13:
1 sc blo of each st around—18 sts.
Round 14 (decr):
1 sc blo first 7 sts, inv sc2tog blo across next 2 sts, 1 sc blo next 7 sts, inv sc2tog blo across next 2 sts—16 sts.
Rounds 15-17:
1 sc blo of each st around—16 sts.
Round 18 (Incr):
1 sc blo first 7 sts, 2 sc blo next st, 1 sc blo next 7 sts, 2 sc blo next st—18 sts.
Round 19 (Incr):
1 sc blo first 8 sts, 2 sc blo next st, 1 sc blo next 8 sts, 2 sc blo next st—20 sts.
Round 20 (Incr):
1 sc blo first 9 sts, 2 sc blo next st, 1 sc blo next 9 sts, 2 sc blo next st—22 sts.
Round 21 (Incr):
1 sc blo first 10 sts, 2 sc blo next st, 1 sc blo next 10 sts, 2 sc blo next st—24 sts.
Gill
Round 22 (Incr):
1 sc blo first st, 2 sc blo next st, *1 sc blo next st, 2 sc blo next st; rep from * around—36 sts.
Round 23:
1 sc in each st around—36 sts.
Round 24 (Incr):
1 sc first 2 sts, 2 sc next st, *1 sc next 2 sts, 2 sc next st; rep from *around—48 sts.
Rounds 25-27:
1 sc in each st around—48 sts. For the last round, fasten off and finish with a seamless join.
Tall
Base/Stem
Round 1:
Magic Ring, ch 1, work 6 sc in the ring, pull ring tight (don’t join)—6 sts.
Round 2 (Incr):
2 sc in each st around—12 sts.
Round 3 (Incr):
1 sc first st, 2 sc next st, *1 sc next st, 2 sc next st; rep from * around—18 sts.
Round 4 (Incr):
1 sc first 2 sts, 2 sc next st, *1 sc next 2 sts, 2 sc next st; rep from * around—24 sts.
Round 5 (incr):
1 sc first 3 sts, 2 sc next st, *1 sc next 3 sts, 2 sc next st; rep from * around—30 sts.
Round 6 (incr):
1 sc first 4 sts, 2 sc next st, *1 sc next 4 sts, 2 sc next st; rep from * around—36 sts.
Rounds 7-10:
1 sc blo of each st around—36 sts.
Round 11 (decr):
1 sc blo first 4 sts, inv sc2tog blo across next 2 sts, *1 sc blo next 4 sts, inv sc2tog blo across next 2 sts; rep from * around—30 sts.
Round 12:
1 sc blo of each st around—30 sts.
Round 13 (decr):
1 sc blo first 3 sts, inv sc2tog blo across next 2 sts, *1 sc blo next 3 sts, inv sc2tog blo across next 2 sts; rep from * around—24 sts.
Round 14:
1 sc blo of each st around—24 sts.
Round 15 (decr):
1 sc blo first 2 sts, inv sc2tog blo across next 2 sts, *1 sc blo next 2 sts, inv sc2tog blo across next 2 sts; rep from * around—18 sts.
Rounds 16-19:
1 sc blo of each st around—18 sts.
Round 20 (Incr):
1 sc blo first 8 sts, 2 sc blo next st, 1 sc blo next 8 sts, 2 sc blo next st—20 sts.
Round 21:
1 sc blo of each st around—20 sts.
Round 22 (Incr):
1 sc blo first 9 sts, 2 sc blo next st, 1 sc blo next 9 sts, 2 sc blo next st—22 sts.
Round 23 (Incr):
1 sc blo first 10 sts, 2 sc blo next st, 1 sc blo next 10 sts, 2 sc blo next st—24 sts.
Gill
Round 24 (Incr):
1 sc blo first st, 2 sc blo next st, *1 sc blo next st, 2 sc blo next st; rep from * around—36 sts.
Round 25-26:
1 sc in each st around—36 sts.
Round 27 (Incr):
1 sc first st, 2 sc next st, *1 sc next st, 2 sc next st; rep from *around—54 sts.
Rounds 28-30:
1 sc in each st around—54 sts. For the last round, fasten off and finish with a seamless join.
Short/Medium
Cap
Round 1:
Magic Ring, ch 1, work 6 sc in the ring, pull ring tight (don’t join)—6 sts.
Round 2 (Incr):
2 sc blo in each st around—12 sts.
Round 3 (Incr):
1 sc blo first st, 2 sc blo next st, *1 sc blo next st, 2 sc blo next st; rep from * around—18 sts.
Round 4 (Incr):
1 sc blo first 2 sts, 2 sc blo next st, *1 sc blo next 2 sts, 2 sc blo next st; rep from * around—24 sts.
Round 5:
1 sc blo of each st around—24 sts.
Round 6 (incr):
1 sc blo first 3 sts, 2 sc blo next st, *1 sc blo next 3 sts, 2 sc blo next st; rep from * around—30 sts.
Round 7 (incr):
1 sc blo first 4 sts, 2 sc blo next st, *1 sc blo next 4 sts, 2 sc blo next st; rep from * around—36 sts.
Round 8:
1 sc blo of each st around—36 sts.
Round 9 (incr):
1 sc blo first 5 sts, 2 sc blo next st, *1 sc blo next 5 sts, 2 sc blo next st; rep from * around—42 sts.
Round 10:
1 sc blo of each st around—42 sts.
Round 11 (incr):
1 sc blo first 6 sts, 2 sc blo next st, *1 sc blo next 6 sts, 2 sc blo next st; rep from * around—48 sts.
Round 12-13:
1 sc blo of each st around—48 sts. Don’t fasten off. Continue to assembly.
Tall
Cap
Round 1:
Magic Ring, ch 1, work 6 sc in the ring, pull ring tight (don’t join)—6 sts.
Round 2 (Incr):
2 sc blo in each st around—12 sts.
Round 3 (Incr):
1 sc blo first st, 2 sc blo next st, *1 sc blo next st, 2 sc blo next st; rep from * around—18 sts.
Round 4 (Incr):
1 sc blo first 2 sts, 2 sc blo next st, *1 sc blo next 2 sts, 2 sc blo next st; rep from * around—24 sts.
Round 5:
1 sc blo of each st around—24 sts.
Round 6 (incr):
1 sc blo first 3 sts, 2 sc blo next st, *1 sc blo next 3 sts, 2 sc blo next st; rep from * around—30 sts.
Round 7 (incr):
1 sc blo first 4 sts, 2 sc blo next st, *1 sc blo next 4 sts, 2 sc blo next st; rep from * around—36 sts.
Round 8:
1 sc blo of each st around—36 sts.
Round 9 (incr):
1 sc blo first 5 sts, 2 sc blo next st, *1 sc blo next 5 sts, 2 sc blo next st; rep from * around—42 sts.
Round 10:
1 sc blo of each st around—42 sts.
Round 11 (incr):
1 sc blo first 6 sts, 2 sc blo next st, *1 sc blo next 6 sts, 2 sc blo next st; rep from * around—48 sts.
Round 12:
1 sc blo of each st around—48 sts.
Round 13 (incr):
1 sc blo first 7 sts, 2 sc blo next st, *1 sc blo next 7 sts, 2 sc blo next st; rep from * around—54 sts.
Rounds 14-15:
1 sc blo of each st around—54 sts. Don’t fasten off. Continue to assembly.
Assembly Instructions
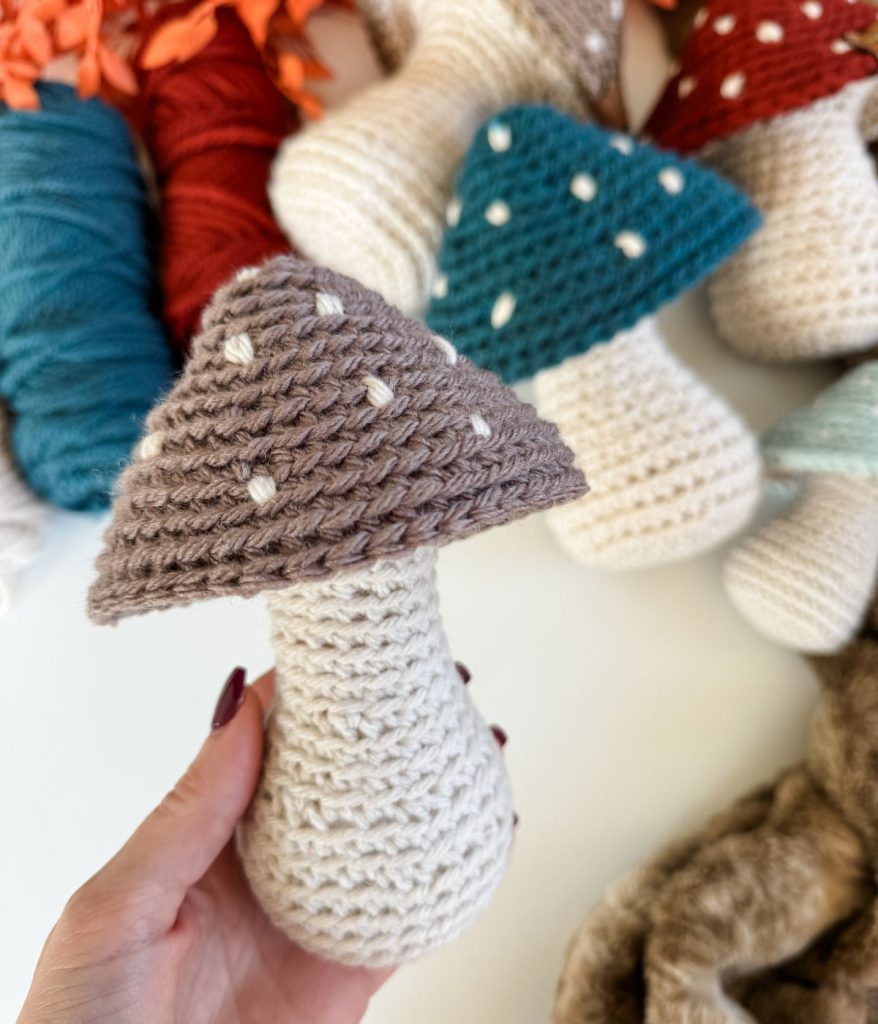
- Using a yarn needle and MC yarn, weave through the cap of the mushroom. Push the needle up through the cap and then back down to form a small loop. Repeat directly beside the first loop to create a spot. Continue weaving spots randomly around the cap. Knot the tails together on the underside and trim.
- Fill a small plastic bag with sand or beads to add weight. Place the bag at the bottom of the mushroom base, then stuff the stem with polyester fibrefill to the top.
- Add a small amount of stuffing to the mushroom cap. Position the cap on top of the gill.
- With the working yarn from the cap, work single crochet stitches through the back loop only of the cap and the full stitch of the gill, joining the two pieces together. Continue around until the cap is securely attached.
- Fasten off and finish with a seamless join.
- Add a personalized tag if desired.
- Finished mushrooms are flexible and can be gently shaped to your preference.
You May Also Love These Patterns
This pattern is designed by Michelle Moore of MJ’s Off The Hook Designs Inc based in Lakefield Ontario Canada. Your go to source for modern easy crochet patterns. Published on September 9th, 2025.
Thank you for visiting MJ’s Off The Hook Designs I hope you enjoyed this pattern and feel inspired to pick up your hook and start creating.
You can find even more crochet patterns in our Ravelry and Etsy shops.
For daily inspiration and behind the scenes peeks join me over on Facebook or Instagram or join our YouTube Membership for exclusive content!
You’ve got questions, we’ve got a community!
Crocheting is better with friends! Join our group to post pictures and ask all your pattern support questions.