*This post may contain affiliate links to support the cost of this blog. At no cost to you, I may make a small commission if you purchase through these links. Read our Privacy Policy HERE


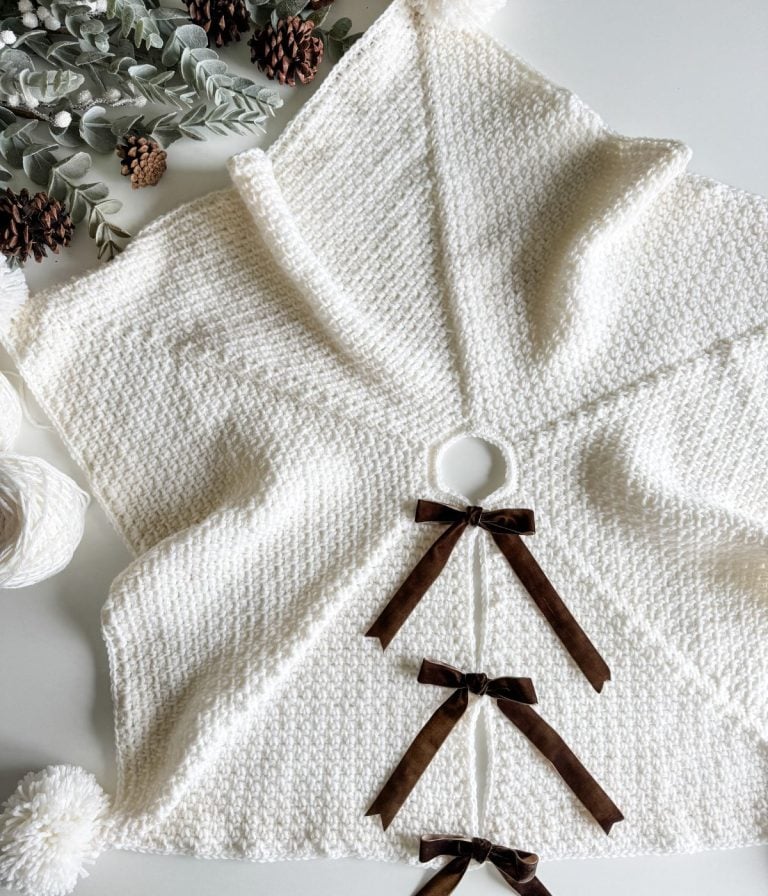
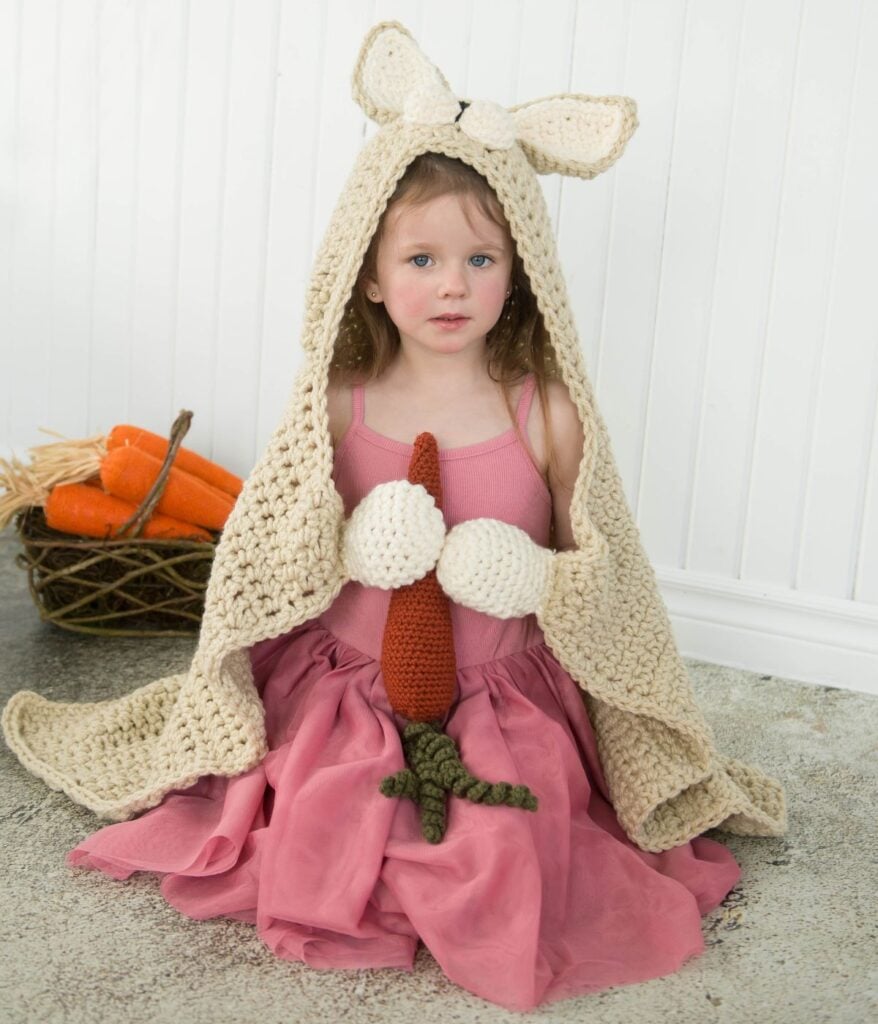
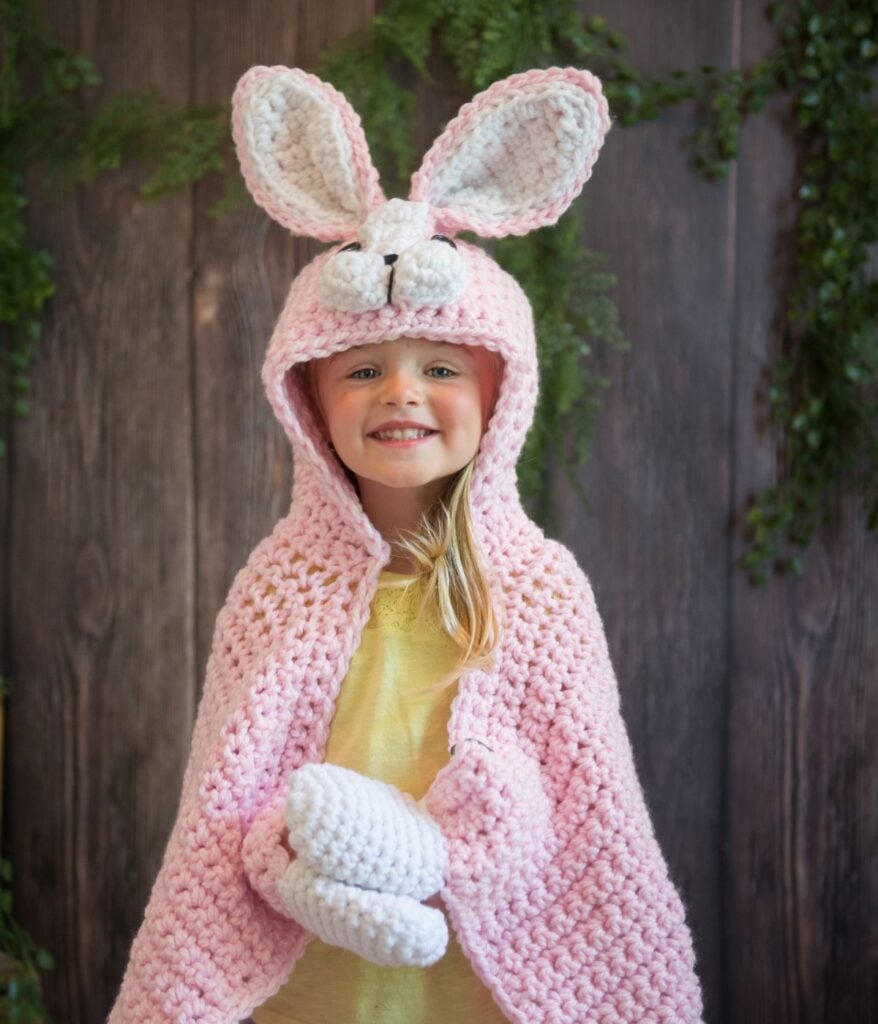
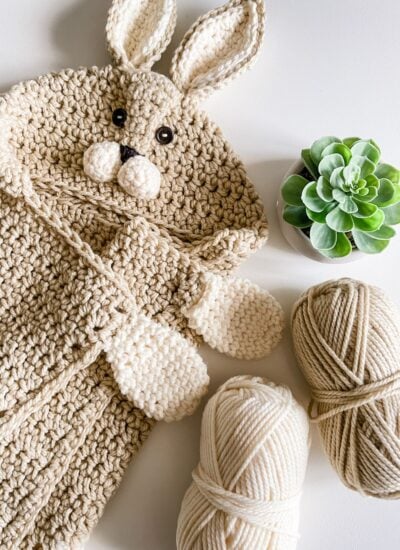
Introducing our adorable Crochet Bunny Blanket pattern! Stay cozy and stylish with this charming hooded blanket design, perfect for snuggling, playtime, and even display as a cute decor piece. This versatile pattern caters to all ages, with sizes available for toddlers, children, and adults—all accessible for free on our blog.
Whether you’re creating a cherished gift, crafting a unique cozy piece for yourself, or simply looking to add a touch of whimsy to your crochet collection, this Bunny Blanket pattern is the perfect choice.
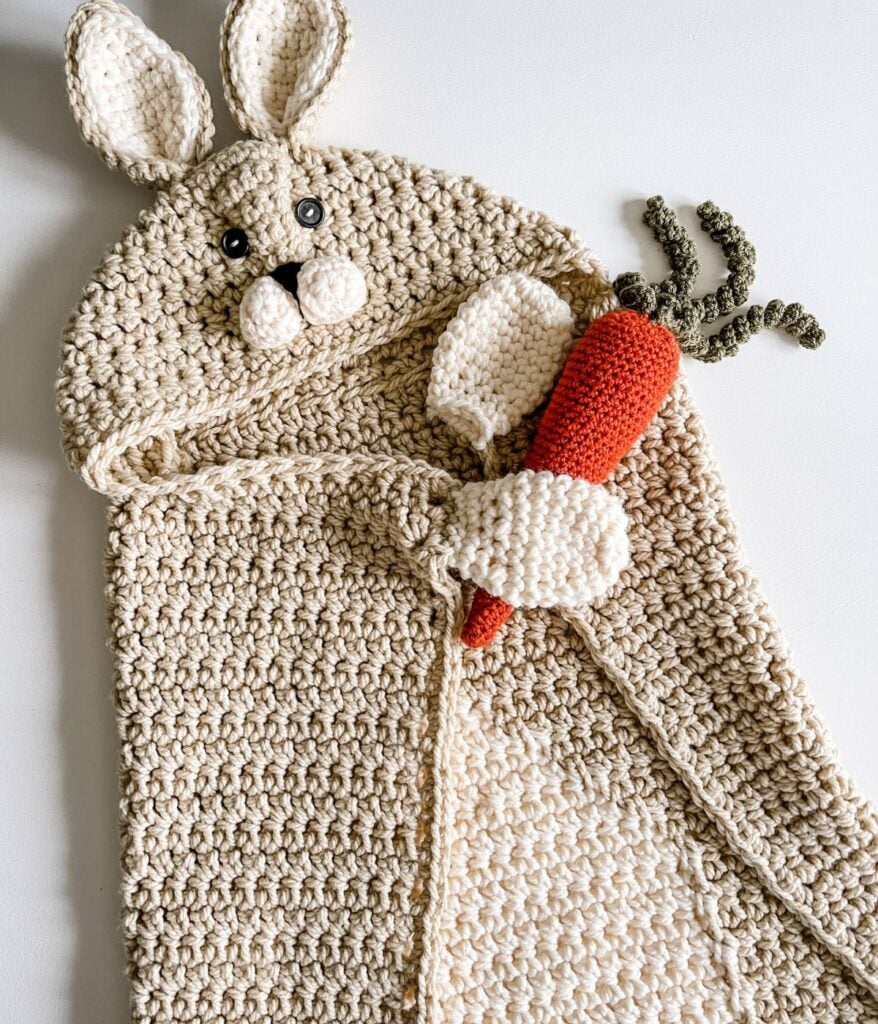
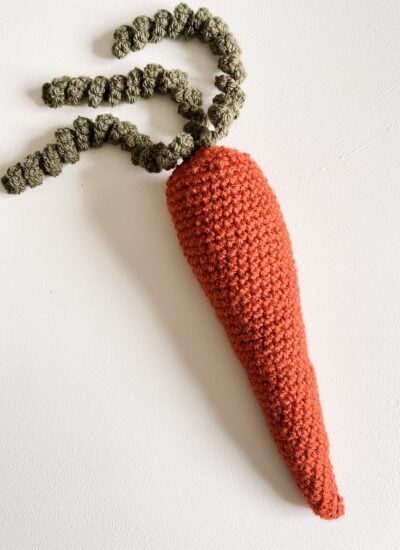
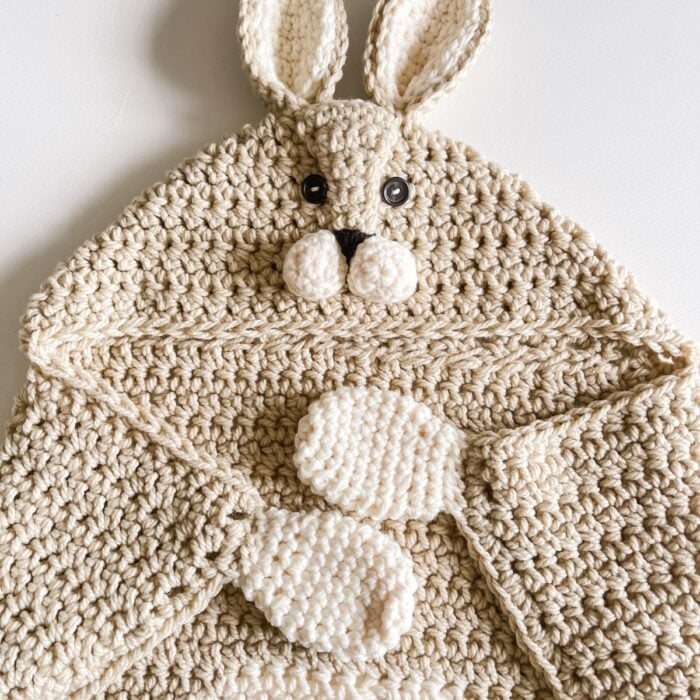
Our crochet bunny blanket pattern features a tail graphed into the back of the blanket, mittens, and a detailed face attached to the hood. There is also a bonus carrot pattern at the end of the pattern. Check out my Free Rustic Farmhouse Carrot pattern for another carrot pattern option!
For detailed guidance, the hooded crochet bunny pattern includes a step-by-step tutorial available on our YouTube channel.
Get Started
Below, you will find everything you need to make this crochet bunny blanket, including the yarn, hook, materials, free written pattern for blog subscribers, pictures and a video tutorial. If you love this free crochet bunny pattern, please share!
Looking to add a sprinkle of cuteness to your Easter or springtime festivities? Try out our adorable crochet bunny blanket! Perfect for snuggling up on chilly spring evenings or adding a touch of charm to any nursery, this cozy creation is sure to delight both little ones and the young at heart.
With its soft yarn and easy-to-follow pattern, crocheting this bunny blanket will be a breeze, making it an ideal project for crocheters of all skill levels. Whether you’re gifting it to a special little one or simply adding a seasonal flair to your home decor, this bunny blanket is guaranteed to bring joy and warmth wherever it goes.
So hop to it and crochet your way to a springtime filled with smiles and snuggles!
Disclaimer
This post contains affiliate links for the items I used to crochet this pattern and clothing articles I have modelled at no cost to you. I make a small commission if you purchase through these links. This blog post also displays ads. The revenue I receive from Ads and affiliate links allows me to post this crochet pattern for free on my blog. I do so in good faith that you will not copy and paste this pattern or distribute it in any way. This free pattern is only available for viewing; you cannot print it off. If you prefer not to view the pattern on the blog, you may purchase an AD-FREE digital PDF pattern in one of my pattern shops for a small fee. Whether you purchase this pattern or view the pattern on my blog, I greatly appreciate your support and readership.
Crochet Easter Decor
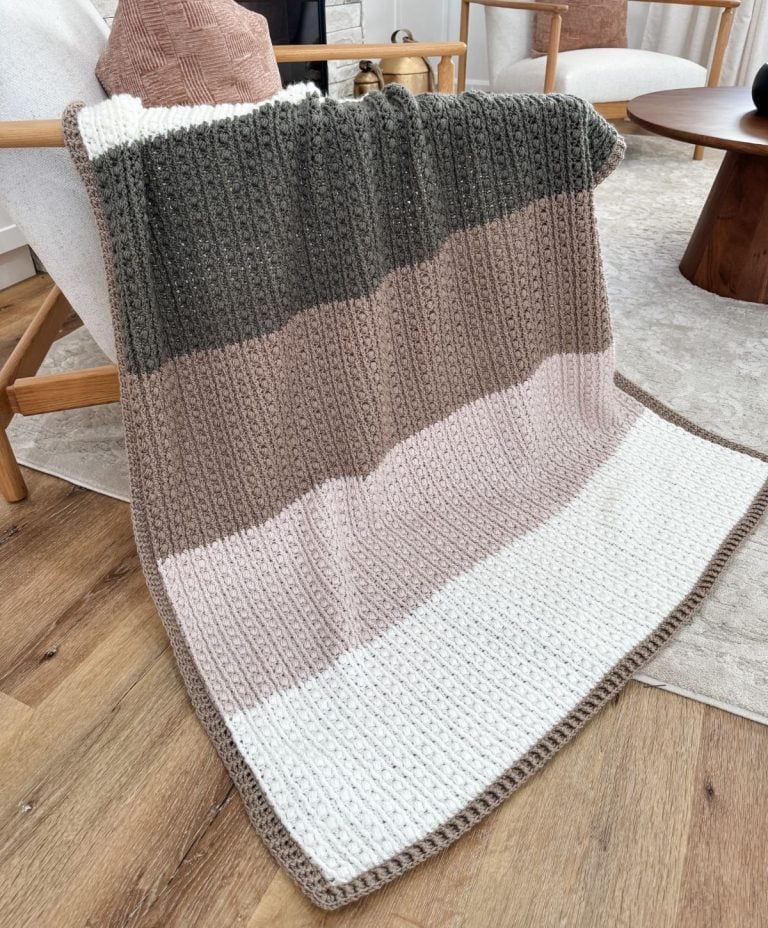
Do you love seasonal decor as much as I do? If so, you won’t be able to resist my quick and easy Bunny Crochet Pattern. This Pattern is perfect for stash-busting. To make different sizes, you can use three strands of worsted-weight yarn, one strand of bulky yarn, or anything in between!
And, of course, no bunny can go without the easiest crochet carrot!

Yarn Requirments
100% Acrylic (3.5oz/100g/108yds/99m)
Toddler (Child, adult)
Linen (MC) – 5 (8, 11) skeins
Natural (A) – 2 (3, 4) skeins
A small amount of black yarn for the nose
Yarn Requirements for the Bonus Carrot Pattern
Sizes included for the Crochet Bunny Blanket
Toddler (Child, adult)
Skill Level
Intermediate, written in standard American terms.

Substituting Yarn
When substituting yarn, it’s advisable to select a yarn with a weight comparable to the one recommended in the pattern for the exact sizing.
Also, before you begin your project, creating a gauge swatch is highly recommended. This simple step will help you verify that your tension and stitch count align with the pattern’s requirements, ensuring a finished blanket of the same size. You may need to adjust your hook size until you obtain the correct gauge.
Suitable Yarn Substitutes
Lion Brand Wool-Ease Thick & Quick

Materials
US N/15 (10mm)
US K/10.5 (6.5mm)
or size need to obtain gauge
US 7 (4.5mm) – Carrot
Use code MJS15 for 15% off Furls Crochet
Polyester fibrefill for snout & carrots
Crochet Bunny Blanket Construction
The blanket and hood are worked using a 10mm crochet hook and 1 strand of super bulky yarn; you may substitute with worsted weight yarn by holding 2 strands together, double the yardage required. The hood pieces are made using a 6.5mm crochet hook. The blanket is worked from the bottom up.
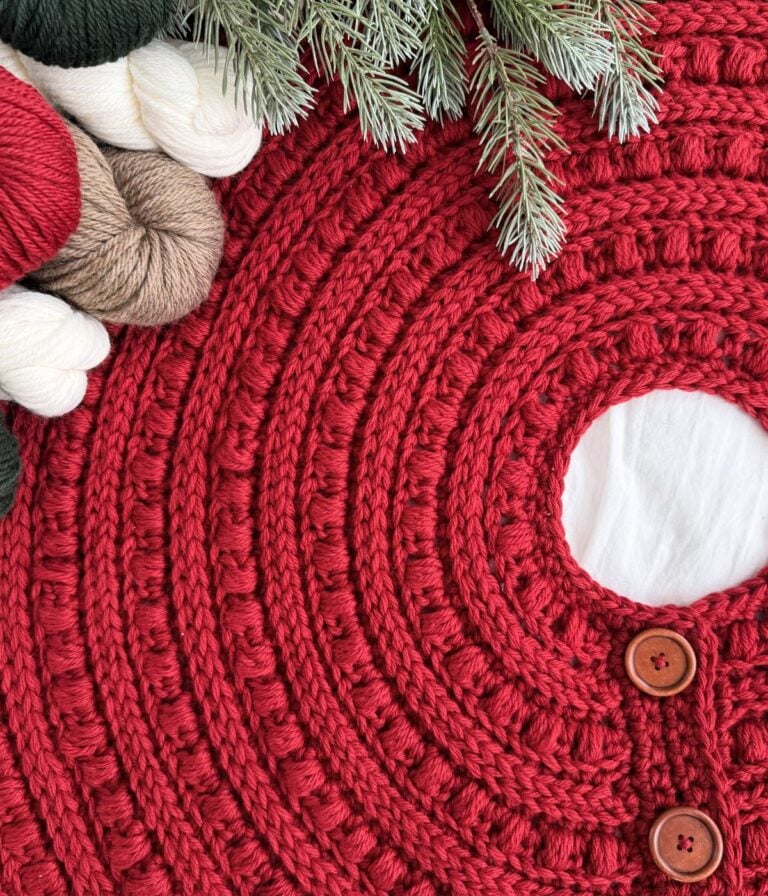
The rabbit tail is graphed into the back of the blanket. Each colour change is worked from a separate ball to avoid carrying yarn. The Hood is worked separately, then centred and sewn to the top of the blanket.
Turning ch doesn’t count as a stitch. Video tutorial is included in toddler size on YouTube.

Gauge
6 sts and 6 rows equal to 4″ in esc with 10mm crochet hook
Obtaining the correct gauge is fundamental to having correct sizing. You may need to adjust your hook size to meet the pattern gauge.
Abbreviations
Blo – Back Loop Only
Ch – Chain
Esc – Extended Single Crochet
Hdc – Half Double Crochet
MC – Main Color
Rep – Repeat
RS – Right Side
Sc – Single Crochet
Sc2tog – Single Crochet Decrease
Sk – Skip
Sl St – Slip Stitch
Sp(s) – Space(s)
St(s) – Stitch(es)
WS – Wrong Side
) – Work step in parentheses in indicated stitch
[ ] – Work step in brackets the number of times indicated
Techniques
Magic Ring – See Video Tutorial – https://youtu.be/QMZpO5-19hQ
Working on the opposite side of the chain tutorial – https://youtu.be/zGQ6KB2nVvA
Video for the Hooded Bunny Blanket Crochet Pattern
Watch our tutorial on creating a cozy and adorable Hooded Bunny Blanket! In this video, we will guide you through the steps to make this charming blanket that will surely become a favourite for kids and adults alike.
Throughout the video, we will cover everything you need to know – from the types of yarn and hooks required to crochet the blanket to seamlessly changing yarn colours for the bunny tail design. You’ll also learn how to crochet the hood, create hood attachments, sew the hood securely onto the blanket, and finish the look with cute paw mittens.
Whether you’re a seasoned crocheter or just starting out, this pattern is perfect for adding a whimsy and warmth to your crafting repertoire. Join us as we dive into the world of hooded bunny blankets and let your creativity soar! Happy crocheting!
Remember to like, subscribe, and hit the notification bell so you never miss any of our upcoming crochet tutorials. Get your yarn ready, and let’s get started!

Hooded Bunny/Rabbit Crochet Blanket Tutorial
Join me and follow along to this detailed tutorial to complete this Crochet Bunny Blanket.

Purchase the Beautifully Designed AD-FREE PDF Download
The PDF includes a size chart with detailed measurements and charts for the tail.
Love Hooded Animal Blankets? Grab a copy of my Woodland Blanket Bundle

Bunny Blanket Crochet Pattern
COPYRIGHT
The Bunny Blanket Crochet Pattern and its contents are fully owned and copyrighted by MJ’s Off The Hook Designs Inc., and all rights are reserved. This pattern is protected by copyright and other intellectual property laws and may not be reproduced, distributed, or transmitted in any form or by any means, including photocopying, recording, screenshots, printing or other electronic or mechanical methods, without the prior written consent of the author, except in the case of permitted sharing on social media platforms.
Any unauthorized distribution or reproduction of this pattern or elements of the instructions is strictly prohibited and may result in civil or criminal penalties. This free crochet pattern is intended for personal viewing on the blog only. By accessing this pattern, you acknowledge and agree to comply with these copyright terms and conditions.
If you have any questions regarding this copyright notice or the use of the pattern outlined within, please contact MJ’s Off The Hook Designs Inc. in writing.
Thank you for respecting the author’s intellectual property and hard work!
Pattern Support
Additionally, please note that the only pattern support offered for this pattern is available on our Facebook community group and through the YouTube tutorial. The modifications given in the PDF are the only ones included, so if you choose to modify the pattern or use a different yarn weight, you will need to figure out the modifications on your own.
We appreciate your understanding and hope that you have a fantastic experience creating this pattern. Please feel free to lend support to fellow members of the community group as we work together to create beautiful crochet projects.
To unlock Exclusive Content on my Blog, all you need to do is click the box below and the Grow.me app will pop up, allowing you to enter your email and create a password. Once you’ve created an account, every time you see Exclusive Content on my blog, simply login to your Grow account. Be sure to switch to the login screen to enter your login credentials.
If you forget your password, click the “forgot password” link and follow the prompts. Please note that I’m unable to assist with resetting Grow passwords or accessing your Grow account, so be sure to save your login information in a safe place.
To make things even easier, I’ve created a video for both desktop and mobile users that offer additional assistance. You can access this video by visiting my FAQs page HERE or by watching the video below.
Thank you for subscribing and for joining me on my crochet journey. I hope you enjoy the exclusive content available to our subscribers and create beautiful crochet projects using the resources you discover.
Ears: Make 2
Backing:
Row 1:
With MC and 6.5mm hook, ch 3, work 1 sc in 2nd ch from hook and in next ch, turn—2 sts.
Row 2:
Ch 1, work 2 sc in each of next 2 sts, turn—4 sts.
Row 3:
Ch 1, work 1 sc in each st across, turn—4 sts.
Row 4:
Ch 1, work 2 sc in first st, work 1 sc in each of next 2 sts, work 2 sc in last st, turn—6 sts.
Row 5:
Ch 1, work 1 sc in each st across, turn—6 sts.
Row 6:
Ch 1, work 2 sc in first st, work 1 sc in each of next 4 sts, work 2 sc in last st, turn—8 sts.
Rows 7-12:
Ch 1, work 1 sc in each st across, turn—8 sts.
Row 13:
Ch 1, work 1 sc2tog next 2 sts, work 1 sc in each of next 4 sts, work 1 sc2tog next 2 sts, turn—6 sts.
Row 14:
Ch 1, work 1 sc in each st across, add 2 sc in final st and continue to sc in each sp around the ear adding 2 sc in the top corner, add 1 sc in the same corner as starting sc, sl st in the first sc of Row 14 to join. Fasten off leaving a tail for sewing.

Inside piece of Ears:
Row 1:
With A and 6.5mm hook, ch 3, work 1 sc in 2nd ch from hook and in next ch, turn—2 sts.
Row 2:
Ch 1, work 2 sc in first st, work 1 sc next st, turn—3 sts.
Row 3:
Ch 1, work 2 sc in first st, work 1 sc in each of next 2 sts, turn—4 sts.
Row 4:
Ch 1, work 2 sc in first st, work 1 sc in each of next 3 sts, turn—5 sts.
Row 5:
Ch 1, work 2 sc in first st, work 1 sc in each of next 4 sts, turn—6 sts.
Rows 6-10:
Ch 1, work 1 sc in each st across, turn—6 sts.
Row 11:
Ch 1, work 1 sc2tog next 2 sts, work 1 sc in each of next 2 sts, work 1 sc2tog next 2 sts, turn—4 sts.
Row 12:
Ch 1, work 1 sc in each st across, add 2 sc in the final st and continue to sc in each sp around the ear adding 2 sc in the top corner, add 1 sc in the same corner as the starting sc, sl st in first sc of Row 12 to join. Fasten off leaving a tail for sewing.
Sew to the inside of the backing. Pinch the ear and sew the bottom of the ear together.
Sew ears to the top of the hood after the face marking is sewn in place. Sew the ears to each side of the face marking. Don’t weave in ends until you are sure the ears are positioned correctly, then weave in ends.
Snout: Make 2
Round 1:
With A and 6.5mm hook, Magic Ring, ch 1 (1, 2), work 6 sc (sc, hdc) in ring, pull ring tight, sl st in first sc (sc, hdc) to join—6 sts.
Round 2:
Ch 1, work 2 sc (sc, hdc) in each st around, sl st in first sc (sc, hdc) to join—12 sts.
Round 3:
Ch 1, work 1 sc (sc, hdc) in each st around, sl st in first sc (sc, hdc) to join—12 sts.
Fasten off leaving a tail for sewing. Sew snout pieces together (approx. 4 sts). Sew snout to the hood, centre on the front of hood 1 row above the hood edge.
Face Marking:
Row 1:
With MC and 6.5mm hook, Ch 3, work 1 sc in 2nd ch from hook and in next ch across, turn—2 sts.
Rows 2-3:
Ch 1, work 1 sc in each st across, turn—2 sts.
Row 4:
Ch 1, work 2 sc in first st, work 1 sc in next st, turn—3 sts.
Rows 5-6:
Ch 1, work 1 sc in each st across, turn—3 sts.
Row 7:
Ch 1, work 2 sc in first st, work 1 sc in each of next 2 sts, turn—4 sts.
Row 8:
Ch 1, work 2 sc in first st, work 1 sc in each of next 3 sts, turn—5 sts.
Row 9:
Ch 1, work 2 sc in first st, work 1 sc in each of next 4 sts, turn—6 sts.
Row 10:
Ch 1, work 2 sc in first st, work 1 sc in each of next 5 sts, turn—7 sts.
Row 11:
Ch 1, work 1 sc in each st across, turn—7 sts.
Adult Only
Row 12:
Ch 1, work 2 sc in first st, work 1 sc in each of next 6 sts, turn—8 sts.
Row 13:
Ch 1, work 1 sc in each st across, turn—8 sts.
Fasten off leaving a long tail for sewing on the hood. The Face marking is placed with the narrowest piece on the middle of the snout and the widest piece at the top of the hood. Sew in place.
Embroider a nose at the face marking between the snout in a triangular shape. Use a needle and a small amount of yarn in black. Sew line from nose to the bottom of the snout. Knot tails and trim.

Whiskers: Optional
Use white embroidery thread to make whiskers. Separate embroidery thread then tie several whiskers in a knot to each side of the snout. Use wax to stiffen.
Eyes:
Use a yarn needle and a small amount of worsted weight yarn to sew buttons to the hood on either side of the face marking.
Hood Attachment:
Position the hood evenly in the center of the blanket at the top (first row), leaving approximately 8.5 (12.5, 16.5)” on either side of the hood. With RS facing, sew the hood to the blanket with MC yarn.

Edging:
With MC and the larger hook, join back to the blanket working yarn with RS facing. Ch 1, sc across the top of the blanket, and the hood continue to work sc sts evenly around the blanket adding 3 sc sts in corners, sl st in starting sc to join. Fasten off and weave in ends.
Paws: Make 2
Round 1:
With A and smaller hook, Magic Ring, work 8 (9, 10) sc in ring, pull ring tight, sl st to first sc to join—8 (9, 10) sts.
Round 2:
Ch 1, work 2 sc in each st around, sl st to first sc to join—16 (18, 20) sts.
Round 3:
Ch 1, work 1 sc in each st around, sl st to first sc to join—16 (18, 20) sts.
Rounds 4-8 (12, 16):
Rep Round 3.
Round 9 (13, 17):
Ch 1, work 1 sc in first st, work 1 sc2tog next 2 sts, * work 1 sc in next st, work 1 sc2tog next 2 sts; rep from * around, toddler end with 1 sc, adult end with 2 sc, sl st in the first sc to join—11 (12, 14) sts.
Rounds 10-11 (14-16, 18-20):
Ch 1, work 1 sc in each st around, sl st in the first sc to join—11 (12, 14) sts. After the final round fasten off leaving a long tail for sewing to the blanket. With RS facing sew the paws to the top rows of the blanket.

Pillow:
When your blanket is not in use, simply tuck it neatly into the hood to transform it into a delightful pillow! To do this, start by folding in both sides of the blanket, then fold it up and tuck it snugly into the hood.
This clever design ensures that your hooded animal blanket not only keeps you warm but also doubles up as a charming and space-saving pillow for display or storage. Enjoy the versatility and practicality of this fun crochet creation! ️

Bonus Carrot Pattern: Make 3
Stuff with polyester fiberfill as you go
Round 1:
With orange yarn and 4.5mm hook, Magic Ring, work 6 sc in ring, pull ring tight, sl st in first sc to join— 6 sts.
Rounds 2-4:
Ch 1, work 1 sc in each st around, sl st in first sc to join— 6 sts.
Round 5:
Ch 1, work 1 sc in first st, work 2 sc in next st, *work 1 sc in next st, work 2 sc in next st; rep from * around, sl st in first sc to join—9 sts.
Rounds 6-8:
Ch 1, work 1 sc in each st around, sl st in first sc in join— 9 sts.
Round 9:
Ch 1, work 1 sc in first 2 sts, work 2 sc in next st, *work 1 sc in each of next 2 sts, work 2 sc in next st; rep from * around, sl st in first sc to join—12 sts.
Rounds 10-12:
Ch 1, work 1 sc in each st around, sl st in first sc to join—12 sts.
Continue to increase the carrot size by working 1 increase round [working 1 more sc each round before working 2 sc in next st] then 3 non-increase rounds until the carrot is 30 sts around. Work 7 more non-increase rounds at 30 sts.
Decrease Rounds:
Round 1:
Ch 1, work 1 sc in first st, work 1 sc2tog next 2 sts, *work 1 sc next st work 1 sc2tog next 2 sts; rep from * around, sl st in first sc to join—20 sts.
Round 2:
Ch 1, work 1 sc in first st, work 1 sc2tog next 2 sts, *work 1 sc next st work 1 sc2tog next 2 sts; rep from * around, end with 1 sc in last 2 sts, sl st in first sc to join—14 sts.
Round 3:
Ch 1, work 1 sc in first st, work 1 sc2tog next 2 sts, *work 1 sc next st work 1 sc2tog next 2 sts; rep from * around, end with 1 sc in last 2 sts, sl st to first sc to join—10 sts.
Fasten off. With yarn needle, weave through the front loop only of each st around. Pull carrot closed. Weave in ends.
Carrot Greens: Make 3 per carrot
Row 1:
With green yarn and 4.5mm crochet hook, sl st to top of the carrot, ch 50, work 3 sc in 2nd ch from hook, work 1 sc in next ch, * work 3 sc in next ch, work 1 sc in next ch; rep from * across until reaching the base of carrot. Cut yarn and knot using the beginning and end pieces of yarn. Weave in ends. Repeat for each green.

Looking for Pattern Support?
Head over to my Facebook Community Group to ask any questions about this pattern, share photos of your MJ’s Designs, and cheer on fellow crocheters!
Our group has a vibrant and supportive community of experienced crocheters who have made various MJ patterns. They are always eager to offer guidance and share their experiences, so don’t hesitate to reach out and connect with them.
Thank you for joining our community, and happy crocheting!
You might also love these crochet patterns if you love this pattern!


For more crochet patterns by MJ’s Off The Hook Designs see our Ravelry, Etsy, LoveCrafts, WeCrochet or Ribblr Shop. Check out our Facebook and Instagram for daily inspiration!
You’ve got questions, we’ve got a community!
Crocheting is better with friends! Join our group to post pictures and ask all your pattern support questions.