*This post may contain affiliate links to support the cost of this blog. At no cost to you, I may make a small commission if you purchase through these links. Read our Privacy Policy HERE


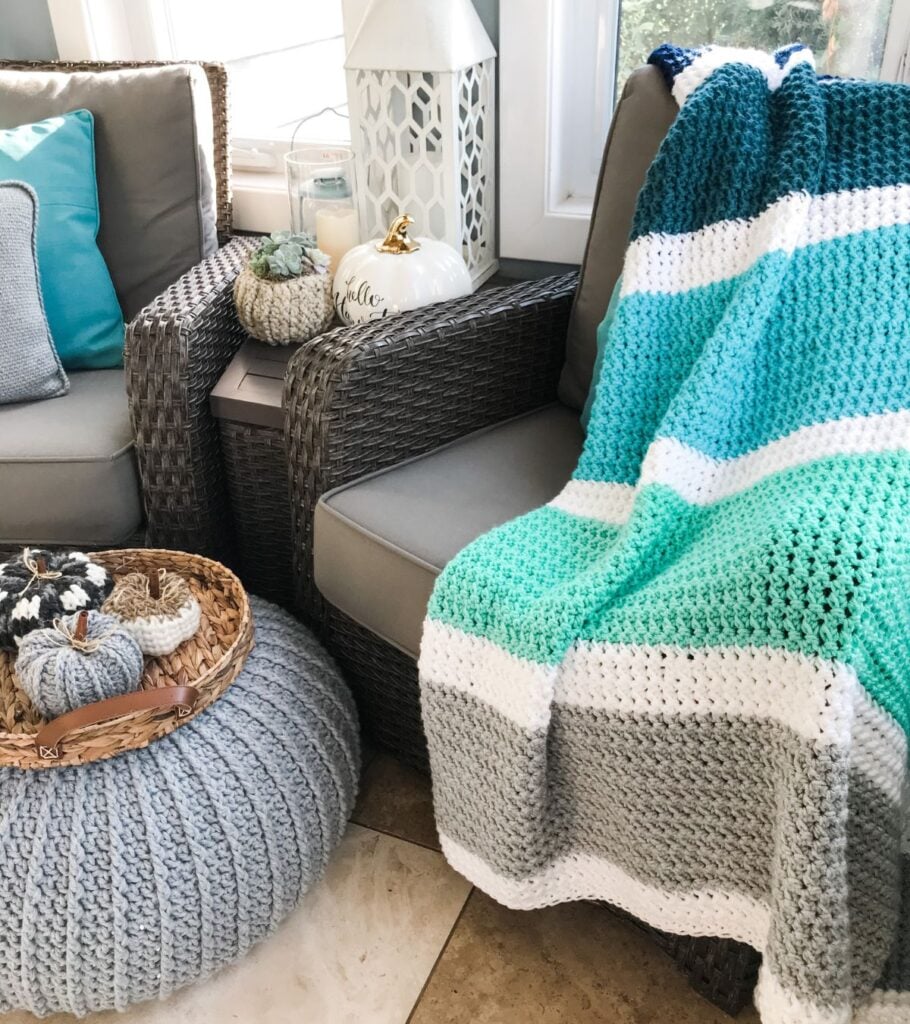
You will love this Free crochet Floor Pouf Tutorial!
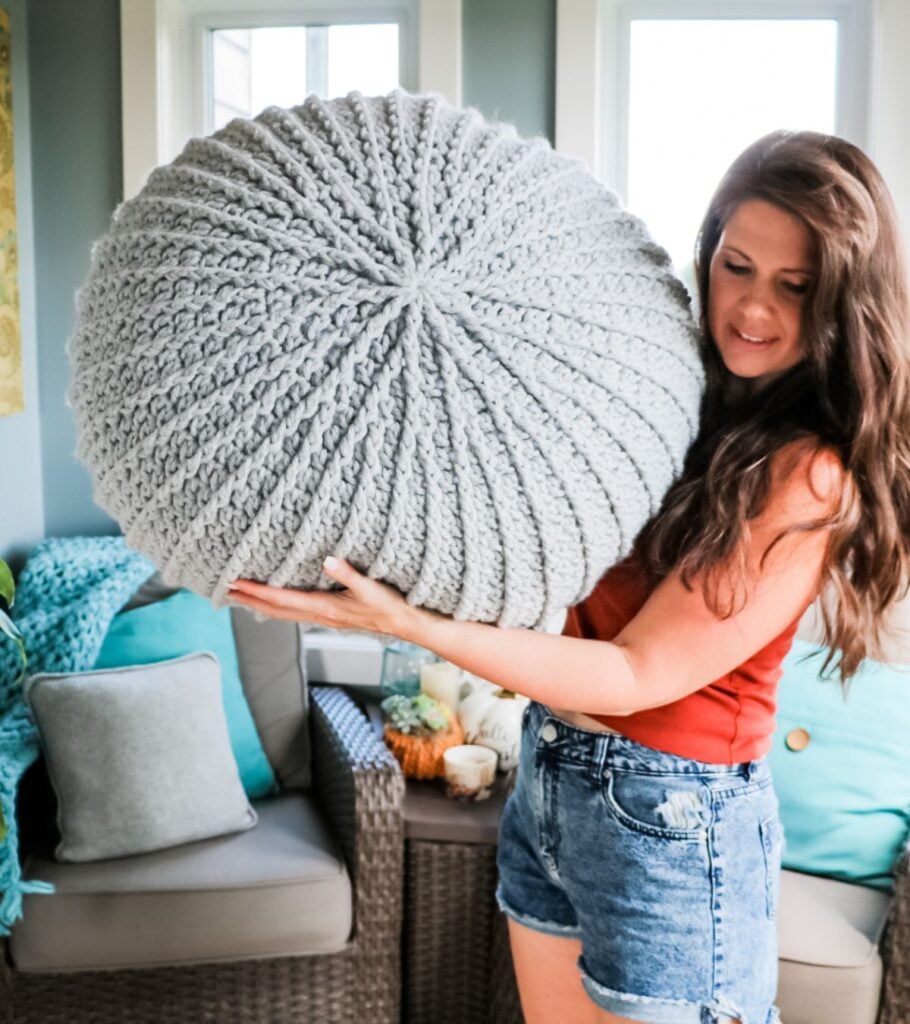
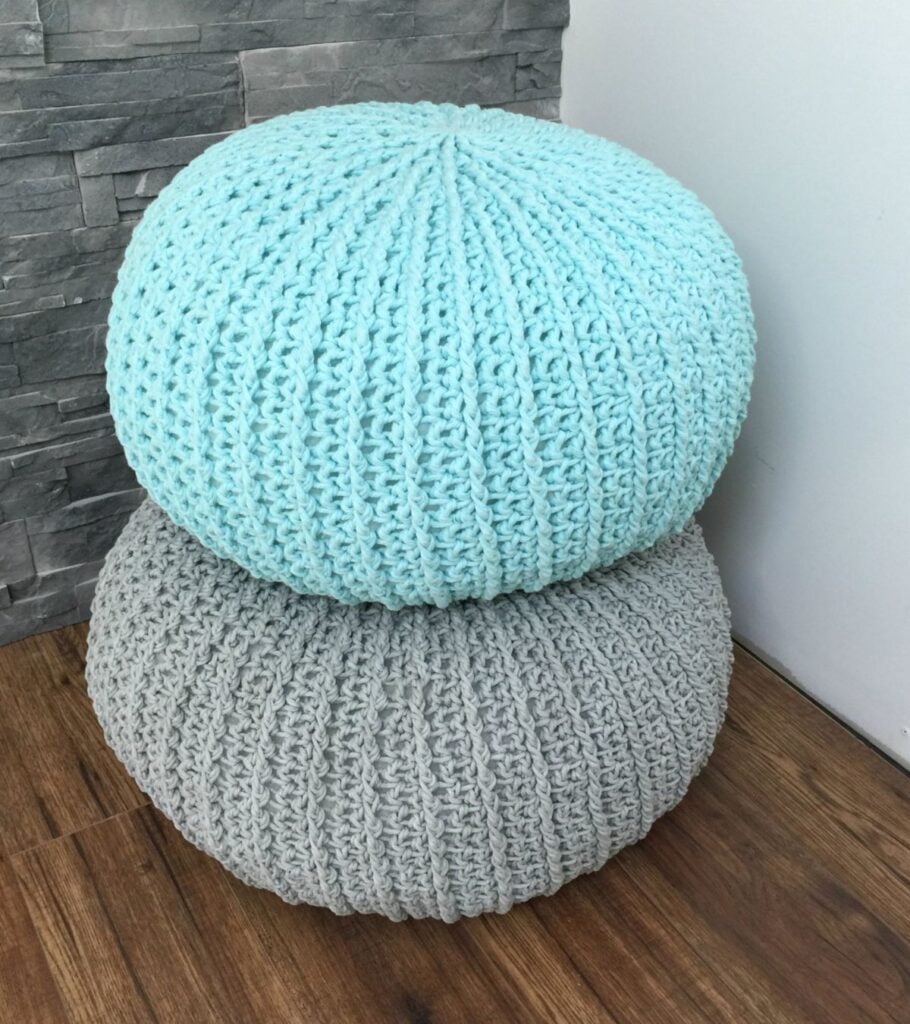
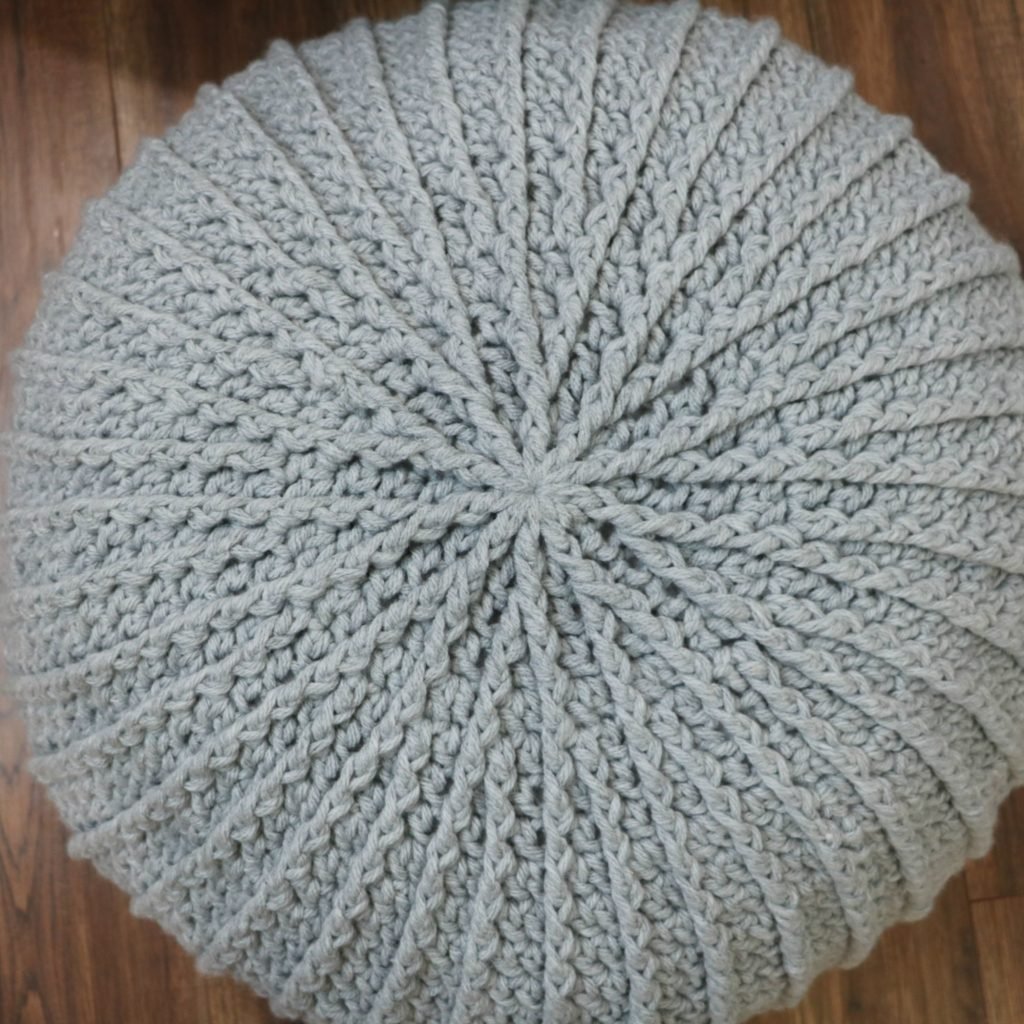
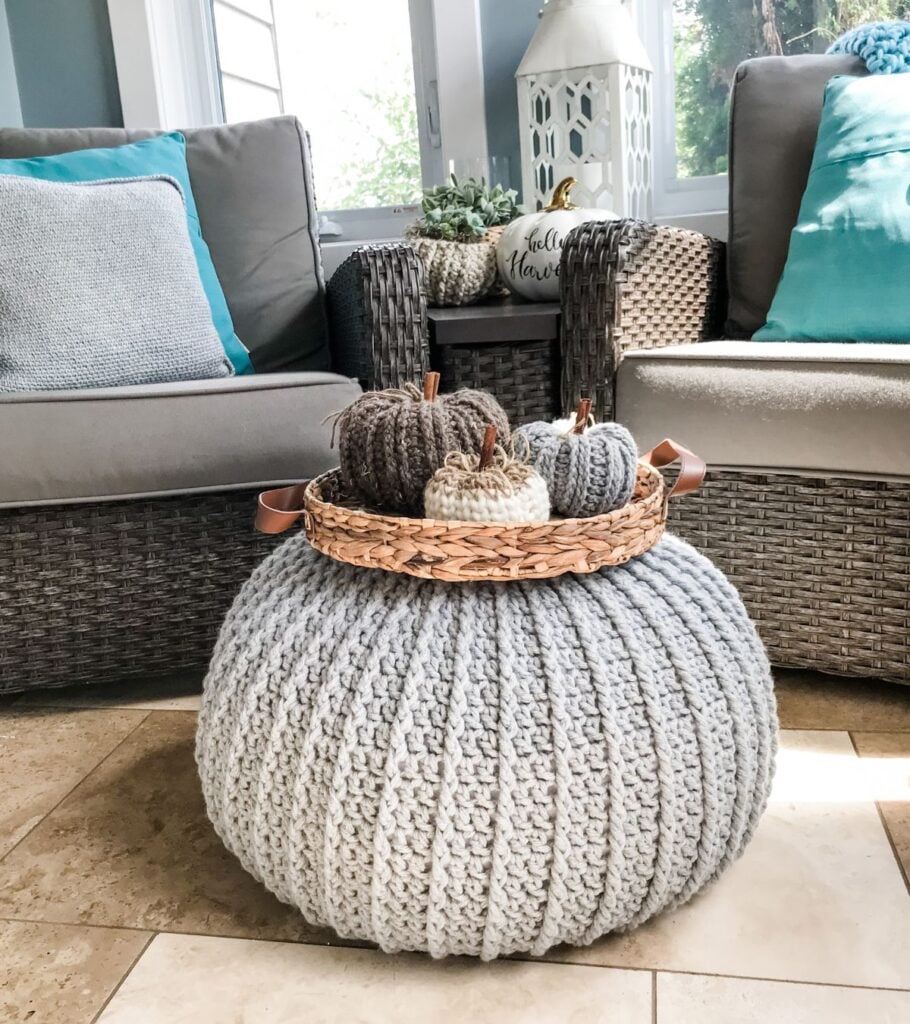
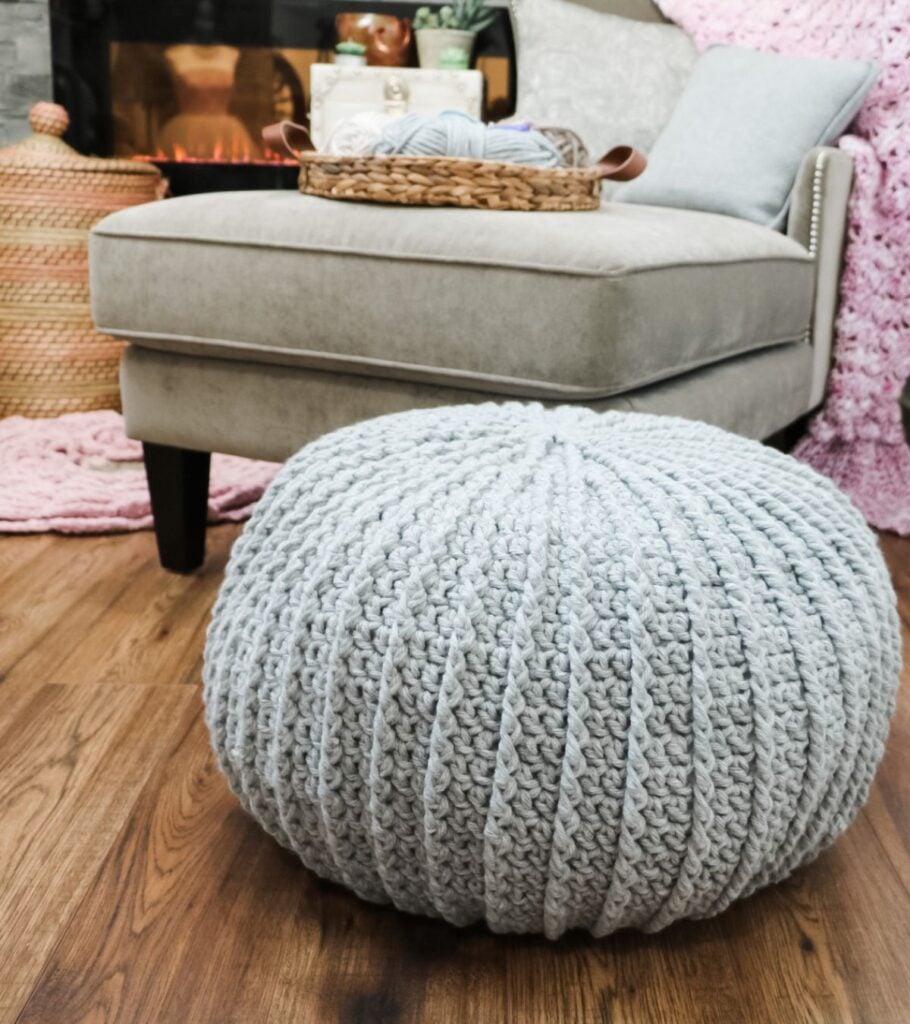
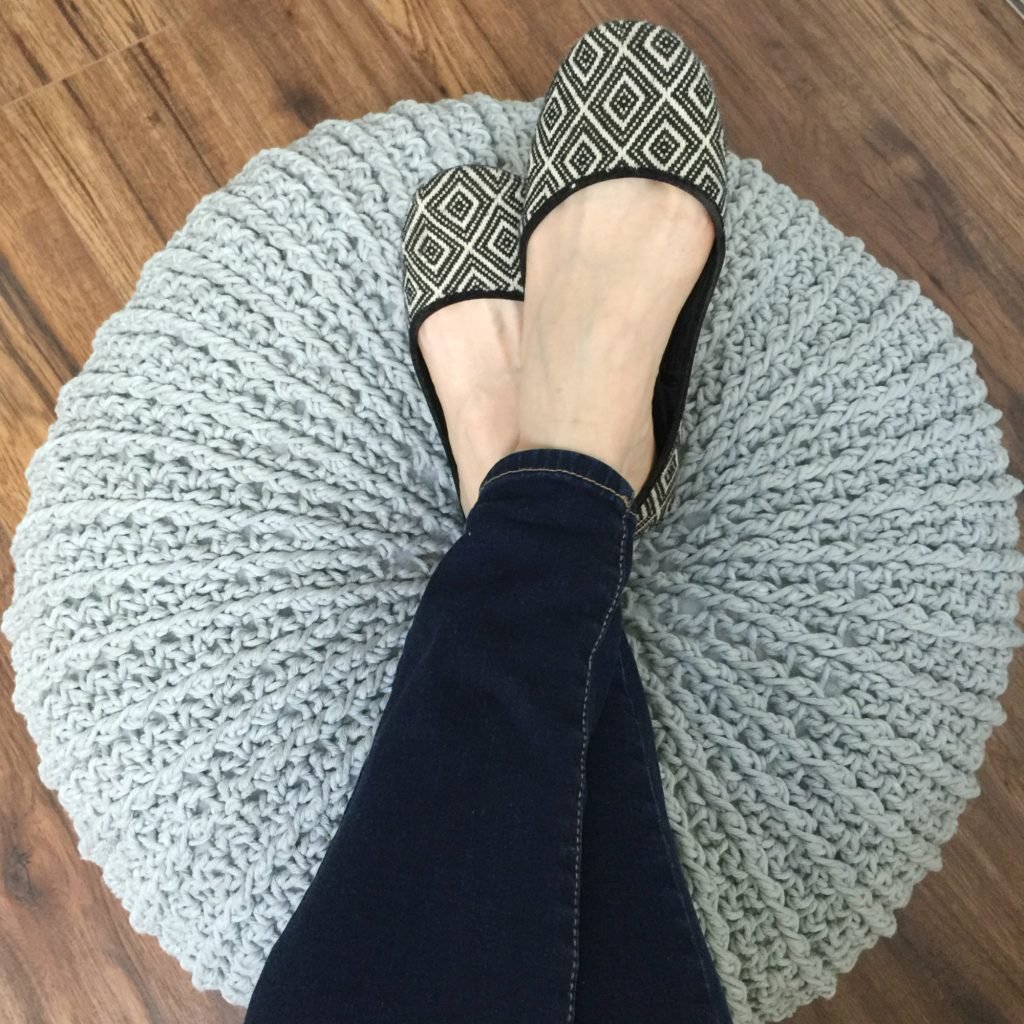
MJ’s Textured Floor Pouf is an easy ribbed stitch crochet pattern. The ribbed texture is crocheted by working front post double crochet stitches. The pattern is worked in the round from the top down. An easy liner tutorial is included in the pattern to hold the stuffing or bean bag fill. Permanently close the pouf or choose the drawstring closing option. Video tutorial included on YouTube
Below you will find everything you need to crochet the Textured Floor Poof, including the yarn, hook, materials, free written pattern for blog subscribers, pictures and a video tutorial. If you like this Crochet Floor Poof Tutorial, please share!
Disclaimer
This post contains affiliate links for the items I used to crochet this pattern and clothing articles I have modelled at no cost to you. I make a small commission if you purchase through these links. This blog post also displays ads. The revenue I receive from Ads, and affiliate links, allows me to post this crochet pattern for free on my blog. I do so in good faith that you will not copy and paste this pattern or distribute it in any way. If you prefer not to view the pattern on the blog, you may purchase an AD-FREE digital PDF pattern in one of my pattern shops for a small fee. Whether you purchase this pattern or view the pattern on my blog, I greatly appreciate your support and readership.
It’s been a while since I offered a free crochet pattern, so I designed a crochet floor pouf tutorial. It’s my little thank you to all my amazing followers! Thanks so much for following and liking all my creations.
Quick and Easy with Loads of Texture!
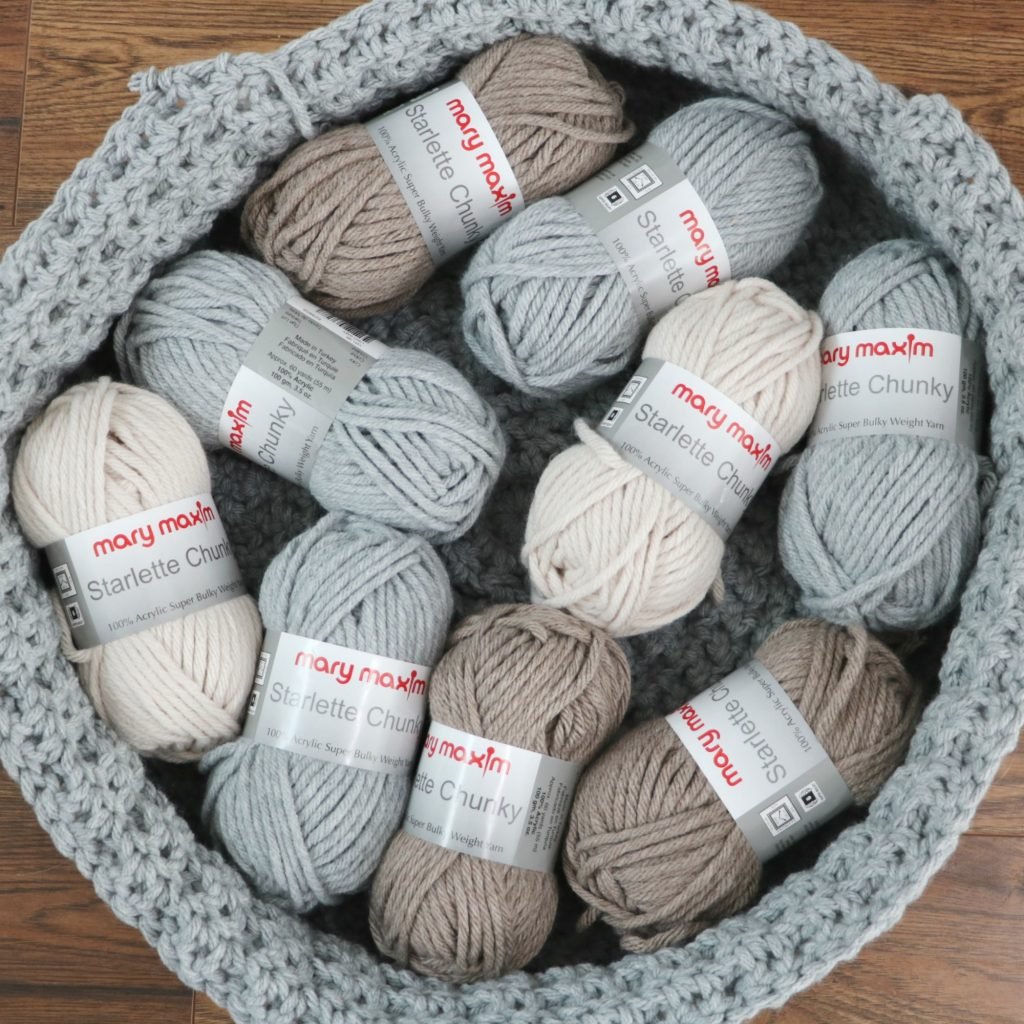
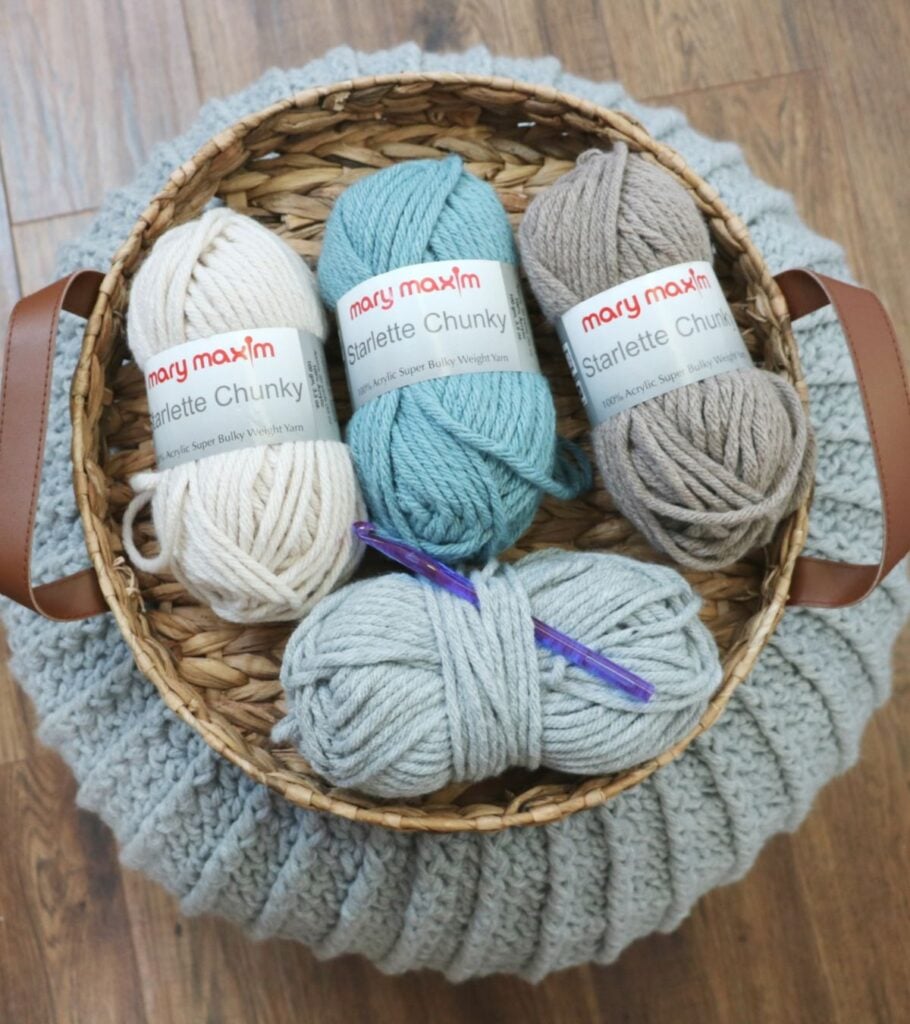
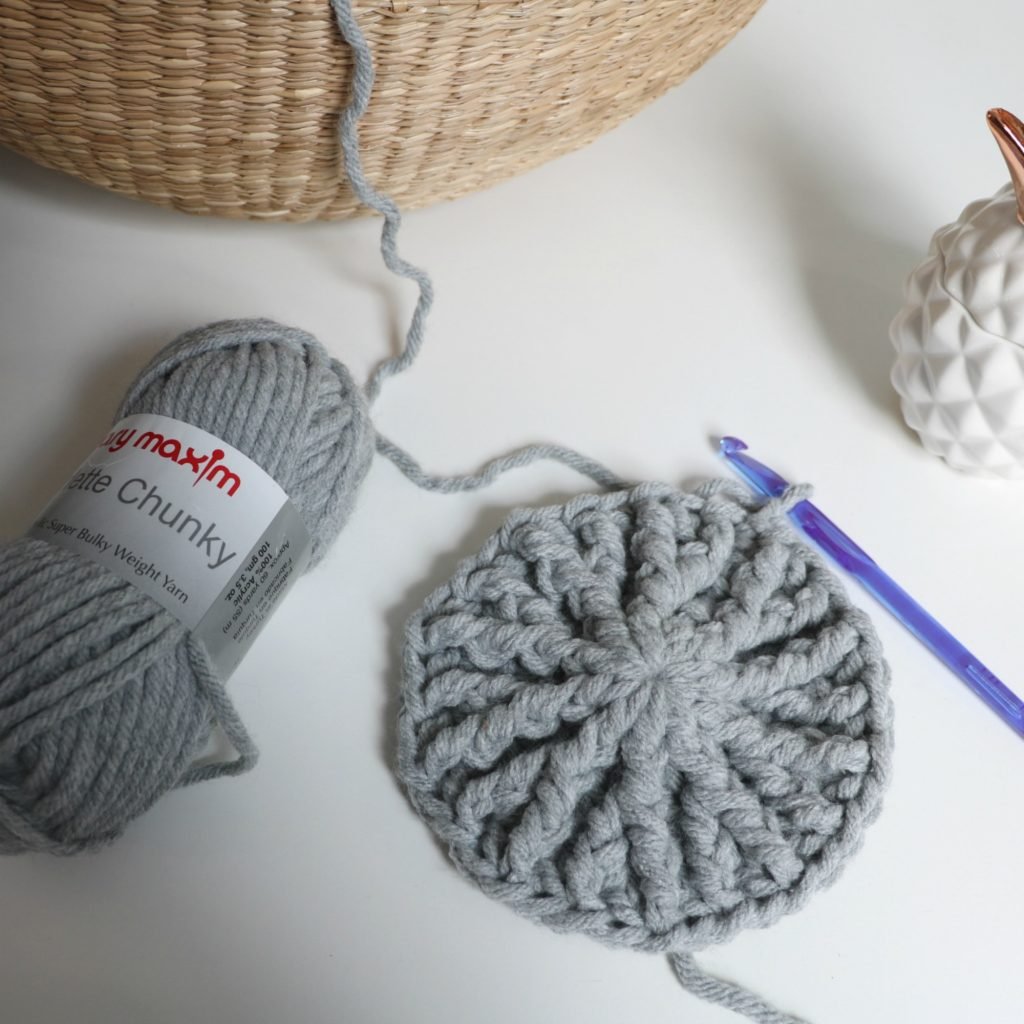
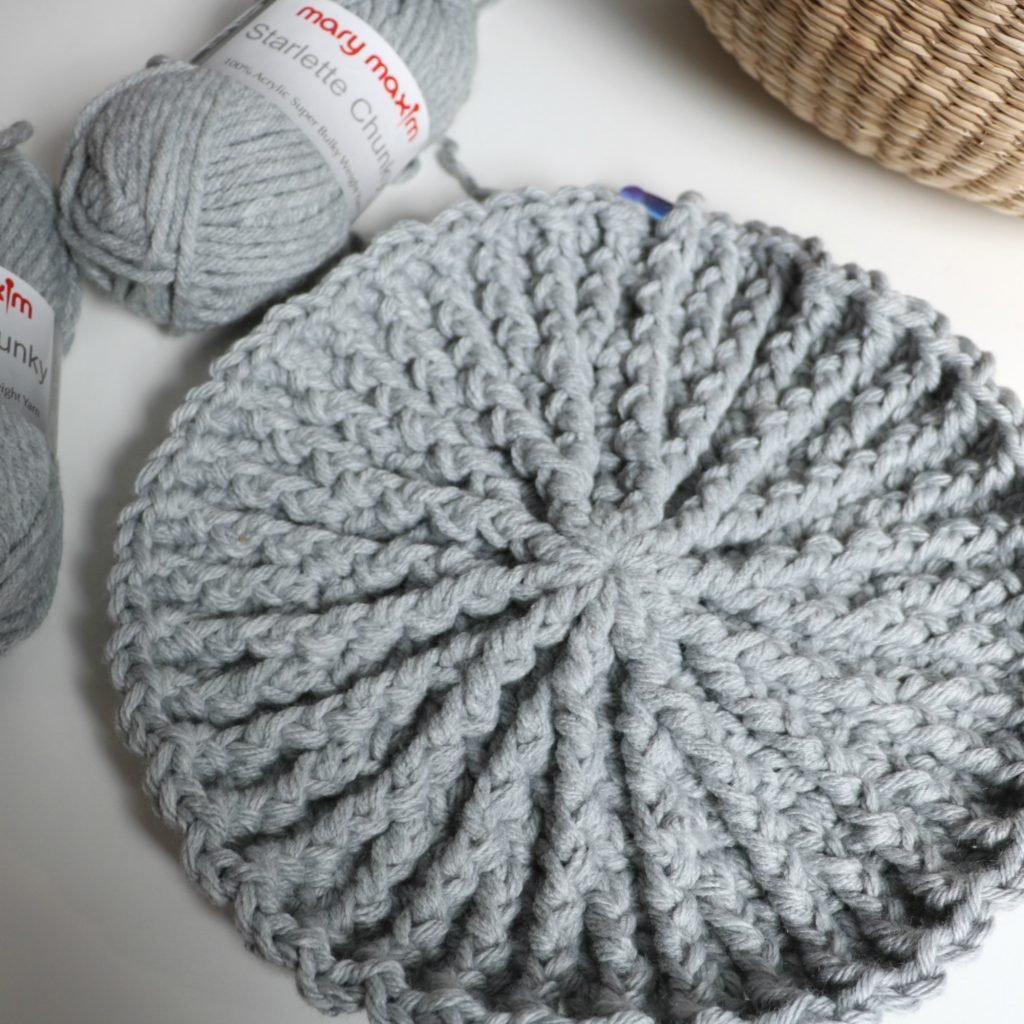
I love the ribbed look; Bernat Chunky Cotten gives the floor poof a nice stiff rope-like texture. Unfortunately, this yarn was only available for a limited time. I have been searching for the perfect substitution and finally found it! Starlette Chunky from Mary Maxim gives the same feel and look but without any gaps.
It’s the perfect thickness and texture, giving the perfect sturdy floor poof. It’s also soft, making it great on the hands to work with. I love the gorgeous range of colours they offer. Check them all out through the links below!
The crochet flour pouf is one of those patterns you’ll want to keep making repeatedly!
Yarn Requirements
Mary Maxim Starlette Chunky #6 Super Bulky– 100% Acrylic (60yards/55m, 100g/3.5oz)
Balls Needed 12
Purchase the Kit from Mary Maxim!
Yarn Substitutes
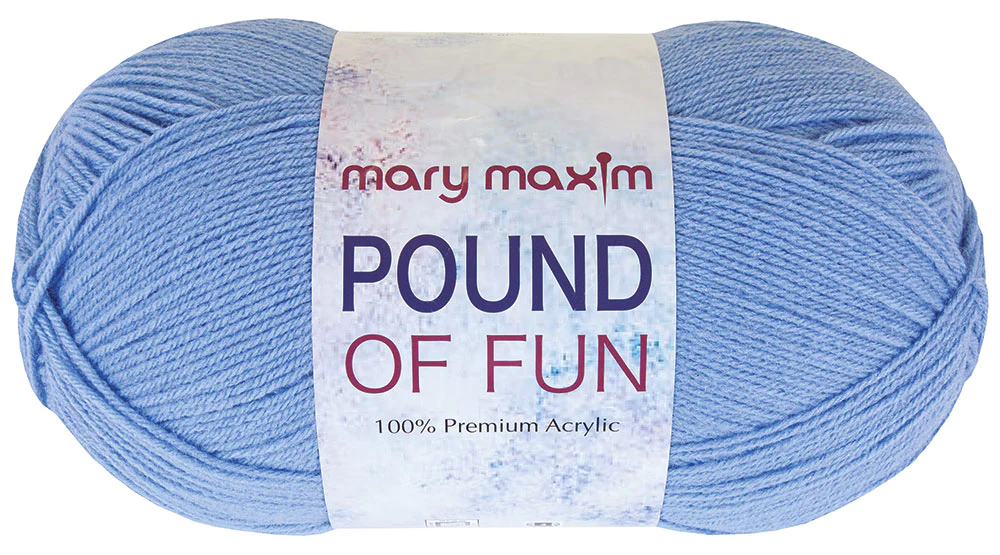
Lion Brand Wool-Ease Thick & Quick

If you prefer to use worsted weight use can use 3 strands. You will need 720 yards per strand for a total of 2160 yards. Remember to go a little extra to make sure you have enough. Use any yarn from your stash or here are some of my favourites;

Crochet Hooks Needed
or size needed to obtain gauge
You can purchase them HERE with code MJS15. Hook case available Here
Materials
1 large bag of polyester stuffing 64 oz
2 standard Pillow Cases
Needle and Thread (use a sewing machine if possible)
Find more supplies I love below!
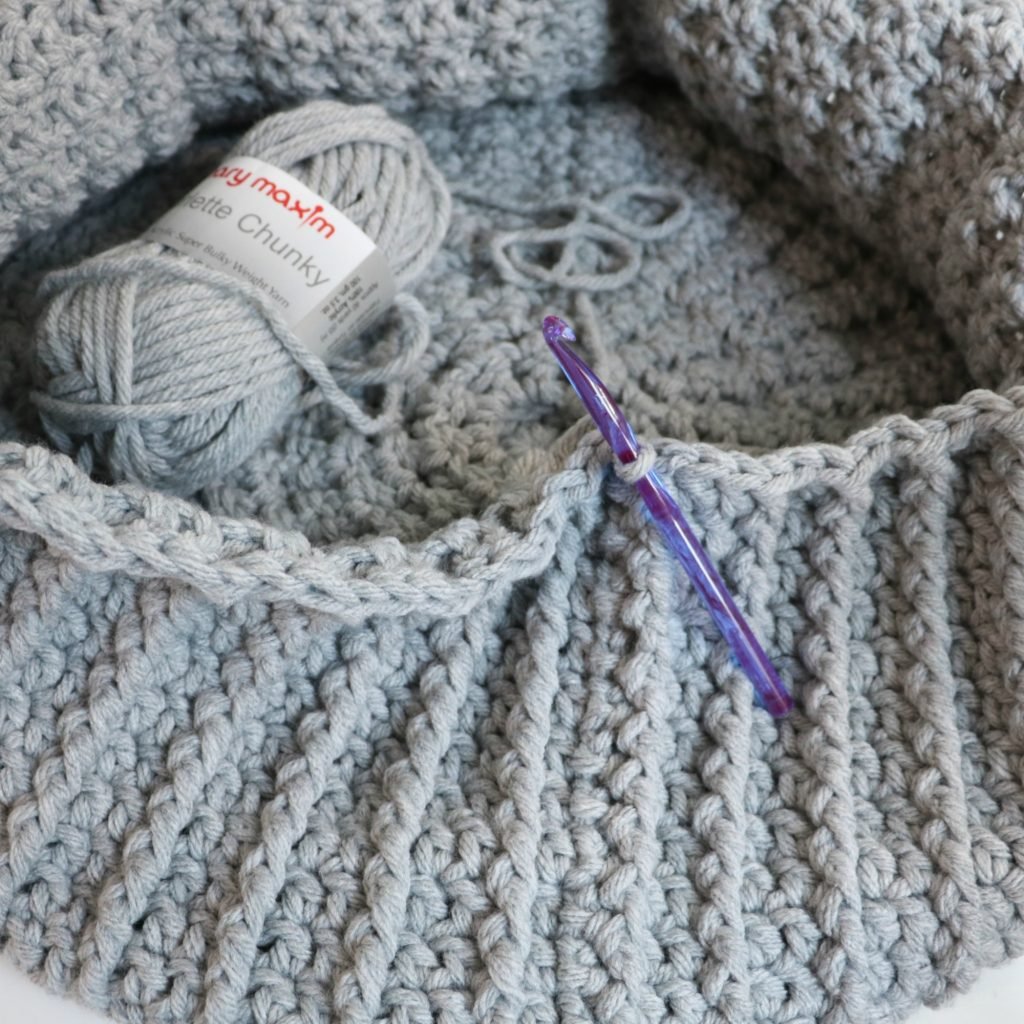
Construction
The Pouf is worked using 1 strand of super bulky yarn. You may use a combination of 2 strands of any bulky yarn or 3 strands of worsted-weight yarn to make this pouf. For 1 strand, you will need Approx. 720 yards, 2 strands 1500 yards, and 3 strands 2250 yards. The pouf is worked from the top down. 2 pillowcases are used to make an insert. Stuff with 64 oz of polyester fiberfill, bean bag filling or glass microbeads. 2 options are given for closure; drawstring closure and permanent closure. Turning ch counts as a stitch unless otherwise indicated.
Special Stitches
Textured Floor Pouf
Fpdc – Front Post Double Crochet: Yo (Yarn Over), insert your hook from front to back to front around the post of the next stitch, yo, pull up a loop, yo, pull through 2 loops on your hook, yo, pull through remaining two loops on your hook.
Dc2tog – Double Crochet Decrease: Yo, Insert hook through indicated st and pull up a loop, Yo, pull through 2 loops on the hook, insert hook in next st, pull up a loop, Yo, pull through 2 loops, Yo pull through the last 3 loops on the hook.
Gauge
12 sts and 5 rounds equal to 4″ in pattern
Sizing
One Size
Diameter: 23″
Height: 14″
Watch the Step-by-step Video Tutorial

Crochet Floor Pouf Tutorial

Purchase the Beautifully Designed AD-FREE PDF
Copyright
This pattern is copyright protected and cannot be copied or reproduced in any way. You are welcome to sell your finished items from this pattern. I require a reference or link for my design. My photos are copyright protected and are not to be used to sell your items. This pattern is written in Standard American Terms.
Pattern
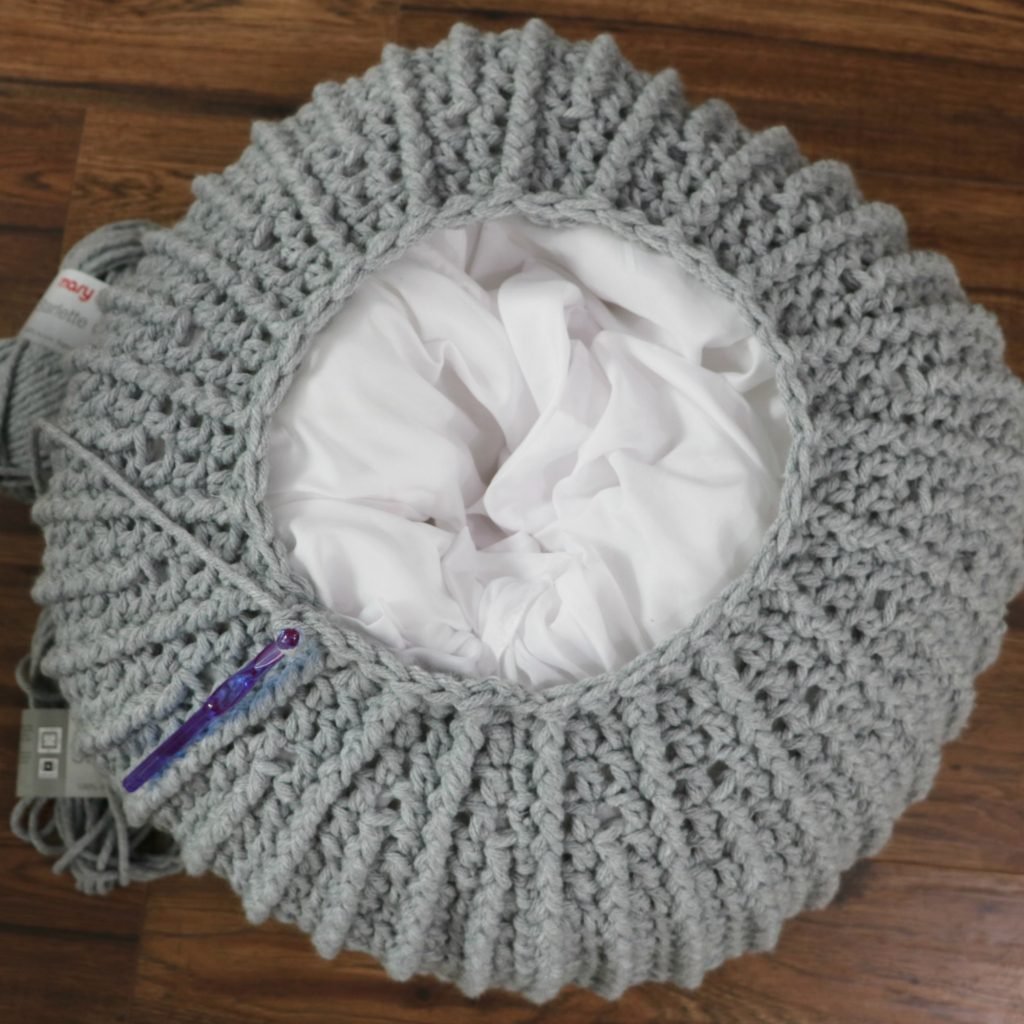
Insert
Insert: 2 standard pillowcases
*For bean bag filling or glass microbeads, use a sewing machine to seam.
Rip one side seam on each pillowcase. With RS facing, hand sew or use a sewing machine to sew pillowcases together, making a jumbo-size pillowcase. Leave the top hem of the pillowcase open for the drawstring. See the video tutorial for further clarification.
To Unlock Exclusive Subscriber content click the Box below! Grow will pop up so you can subscribe to my Blog. Enter your email and create a password. Every time you see Exclusive Content on my Blog, log in to your account!
Pouf
Increase Rounds
Round 1:
Magic Circle, ch 2 (does not count as st) work 10 dc in ring, pull ring tight, sl st in first dc to join—10 sts.
Round 2:
Ch 2 (counts as 1 dc here and throughout), work 1 fpdc around first st, * 1 dc in next fpdc, work 1 fpdc around same st; rep from * around, sl st in first fpdc to join—20 sts.
Round 3:
Ch 2, work 1 dc in ch sp, work 1 fpdc around next post, * work 2 dc in next st, work 1 fpdc around next post; rep from * around, sl st in first dc to join—30 sts.
Round 4:
Ch 2, work 1 fpdc in first dc, work 1 dc in next fpdc, work 1 fpdc around same st, *work 1 dc in next dc, work 1 fpdc around same st, work 1 dc in next st, work 1 fpdc around next post; rep from * around, sl st in first fpdc to join—40 sts.
Crochet Pouf Pattern
Round 5:
Ch 2, work 1 dc in ch sp, work 1 fpdc in next post, * work 2 dc in next st, work 1 fpdc in next post; rep from * around, sl st in first dc to join—60 sts.
Round 6:
Ch 2, work 1 dc in first st, work 1 fpdc in next post, * work 1 dc in each of next 2 sts, work 1 fpdc in next post; rep from * around, sl st in first dc to join—60 sts.
Round 7:
Ch 2, work 1 fpdc in first dc, work 1 dc in next fpdc, work 1 fpdc around same st, *work 1 dc in next dc, work 1 fpdc around same st, work 1 dc in next st, work 1 fpdc around next post; rep from * around, sl st in first fpdc to join—80 sts.
Round 8:
Ch 2, work 1 fpdc in first post, * work 1 dc in next st, work 1 fpdc in next post; rep from * around, sl st in first fpdc to join—80 sts.
Round 9:
Ch 2, work 1 dc in ch sp, work 1 fpdc in next post, * work 2 dc in next st, work 1 fpdc in next post; rep from * around, sl st in first dc to join—120 sts.

Body
Rounds 10-27 (18 rounds):
Ch 2, work 1 dc in first st, work 1 fpdc in next post, * work 1 dc in each of next 2 sts, work 1 fpdc in next post; rep from * around, sl st in the first dc to join— 120 sts.
Decrease Rounds:
Round 28:
Ch 2, sk first st, work 1 fpdc in next post, *work 1 dc2tog next 2 sts, work 1 fpdc in next post; rep from * around, sl st in first fpdc to join—80 sts
Round 29:
Ch 2, work 1 fpdc in first post, * work 1 dc in next st, work 1 fpdc in next post; rep from * around, sl st in first fpdc to join—80 sts.
Round 30:
Ch 2, sk first fpdc, work 1 dc in next st, work 1 fpdc in next post, * work 1 dc in next st, sk next fpdc, work 1 dc in next st, work 1 fpdc in next post; rep from * around, sl st in the first dc to join—60 sts. Proceed to the drawstring or permanent closure.
Drawstring Closure:
Rounds 31-32:
Ch 2, work 1 dc in first st, work 1 fpdc in next post, * work 1 dc in each of next 2 sts, work 1 fpdc in next post; rep from * around, sl st in first dc to join—60 sts.
* Flip the pouf inside out and weave in the ends. Place the pillowcase insert in the pouf and add half a bag of stuffing (32oz).
Round 33:
Ch 2, sk st, work 1 fpdc in first post, *work 1 dc2tog next 2 sts, work 1 fpdc in next post; rep from * around, sl st in first fpdc to join—40 sts.
Rounds 34-35:
Ch 2, work 1 fpdc in the first post, * work 1 dc in next st, work 1 fpdc in next post; rep from * around, sl st in first fpdc to join—40 sts. At the end of Round 35, fasten off and weave in the end.
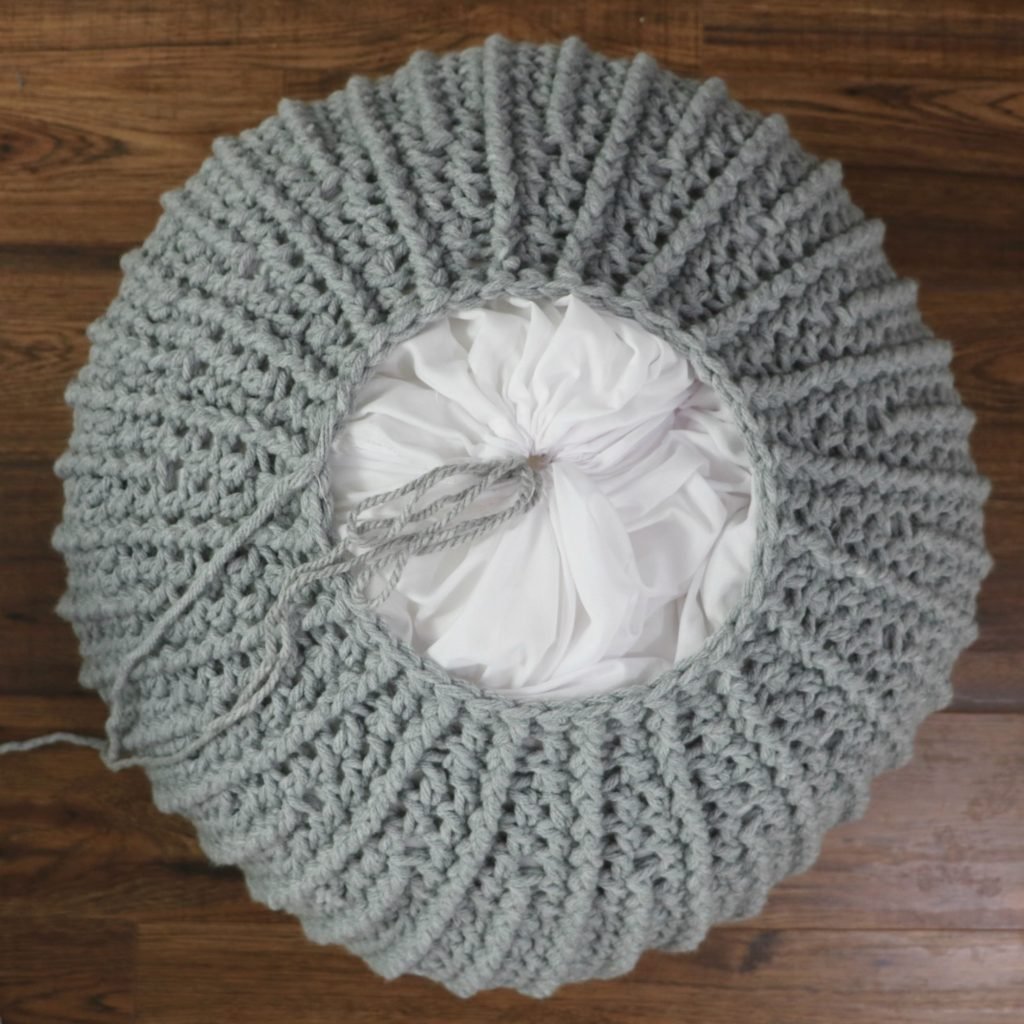
*Finish filling the crochet pouf with the remaining stuffing. Use a yarn needle and a long strand of bulky yarn. Weave yarn through the top hem of the pillowcase insert. Pull the drawstring closed and tie.
Drawstring
Cut a long strand of yarn. With a threading needle, draw through the front loop of each stitch around the final round of pouf. Pull the string so that ends are even. Pull the pouf closed and tie.

Permanent Closure:
Round 31:
Ch 2, work 1 dc in first st, work 1 fpdc in next post, * work 1 dc in each of next 2 sts, work 1 fpdc in next post; rep from * around, sl st in the first dc to join—60 sts.
* Flip the pouf inside out and weave in the end. Place the pillowcase insert in the pouf and add a half bag of stuffing.
Round 32:
Ch 2, sk st, work 1 fpdc in the first post, *work 1 dc decrease next 2 sts, work 1 fpdc in next post; rep from * around, sl st in first fpdc to join—40sts.
Round 33:
Ch 2, sk first fpdc, work 1 dc in next st, work 1 fpdc in next post, * work 1 dc in next st, sk next fpdc, work 1 dc in next st, work 1 fpdc in next post; rep from * around, sl st in the first dc to join—30 sts.
Round 34:
Ch 2, sk st, work 1 fpdc in the first post, *work 1 dc decrease next 2 sts, work 1 fpdc in next post; rep from * around, sl st in first fpdc to join—20sts.
*Finish filling the pouf with remaining stuffing. Use a yarn needle and a long strand of bulky yarn. Weave yarn through the top hem of the pillowcase insert. Pull the drawstring closed and tie.
Round 35:
Ch 2, work 1 fpdc in the first post, *sk st, work 1 fpdc in next post; rep from * around, sl st in first fpdc to join—10 sts.
Fasten off, leaving a long tail. Weave the tail through the front loop only of each st around, pulling hole closed. Knot and weave in ends. Flip the pouf so that decreased rounds are on the bottom.
You might also love our Easy DIY Succulent Pumpkin Cozies
For the Home, you’ll love our Rustic Farmhouse Baskets
For more crochet patterns by MJ’s Off The Hook Designs see our Ravelry, Etsy, LoveCrafts, WeCrochet or Ribblr Shop. Check out our Facebook and Instagram accounts for daily inspiration!


*This post contains affiliate links at no cost to you!
You’ve got questions, we’ve got a community!
Crocheting is better with friends! Join our group to post pictures and ask all your pattern support questions.