*This post may contain affiliate links to support the cost of this blog. At no cost to you, I may make a small commission if you purchase through these links. Read our Privacy Policy HERE


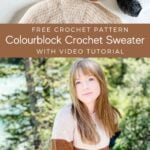


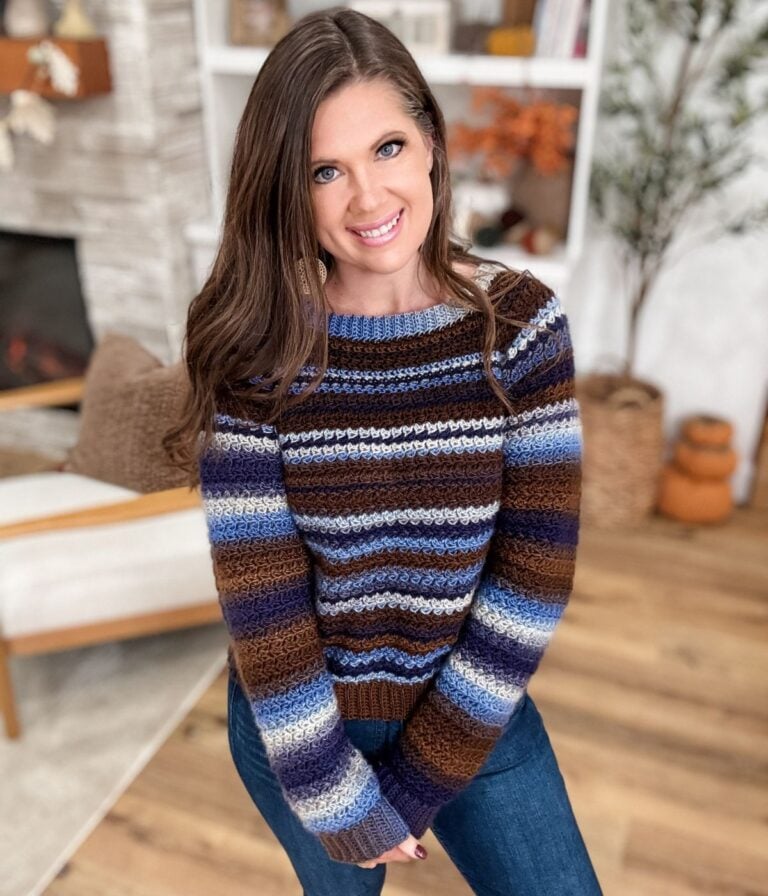
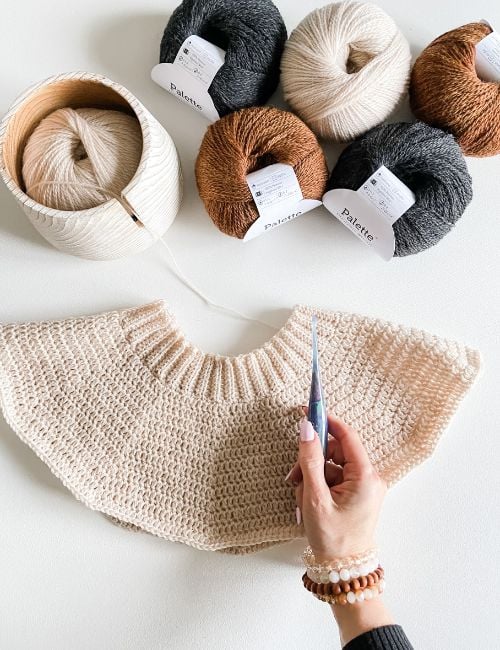
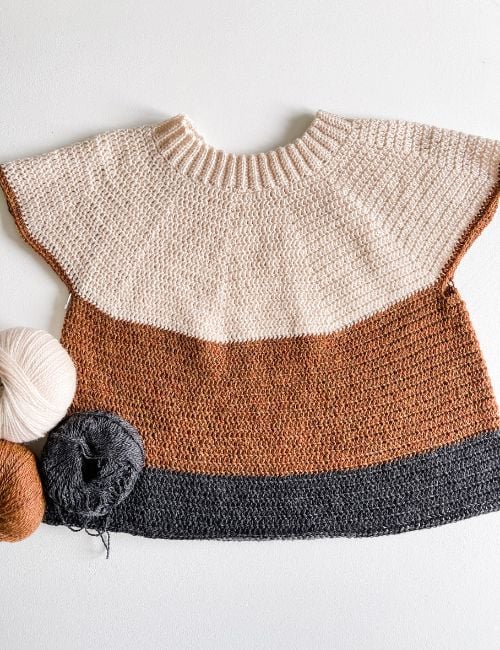
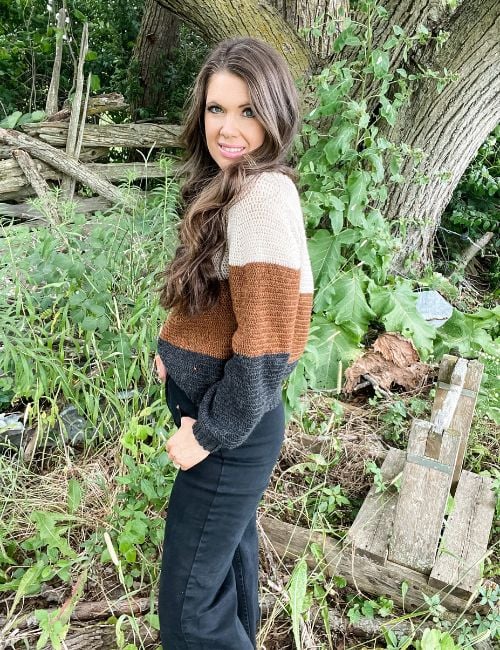
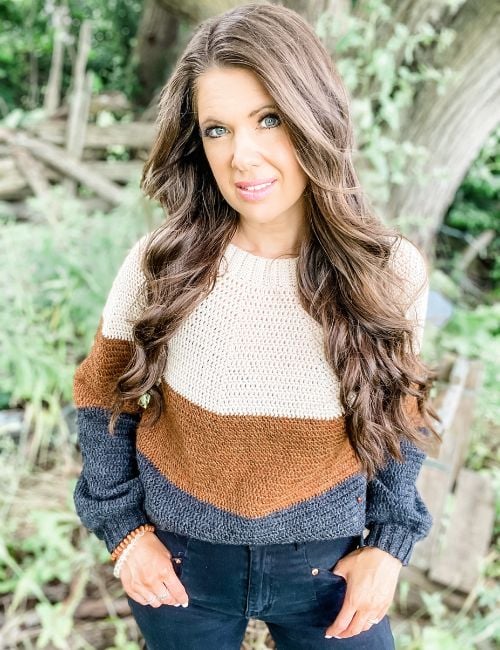
The Rocky Mountain Colourblock Crochet Sweater is worked in one piece in simple double crochet stitches, making it a great beginner crochet sweater pattern. The pullover can easily be modified to any length, and the crochet pattern works up quickly with no seaming. This cozy and modern sweater is made in Knit Picks/WeCrochet Palette fingering weight yarn and includes a step-by-step tutorial for size small on YouTube. Keep scrolling for the free crochet sweater pattern for beginners.
Below you will find everything you need to crochet the Rocky Mountain Colourblock Sweater, including the yarn, hook, materials, free written pattern for blog subscribers, pictures and a video tutorial. If you like this Crochet Sweater Pattern, please share!

Key Takeaways
- The Rocky Mountain Colourblock Crochet Sweater is a beginner-friendly pattern using simple double crochet stitches.
- This cozy pullover features a circular yoke design and comes with a YouTube tutorial for guidance.
- It includes a free written pattern, yarn requirements, and tips for customization, like adjusting the sleeve length.
- Inspired by the Canadian Rockies, it uses natural, earthy colours reminiscent of autumn.
- You can purchase an ad-free PDF version of the pattern on platforms like Ravelry and Etsy.
Project Overview
The Rocky Mountain Colourblock Crochet Sweater is a beginner friendly sweater worked seamlessly from the top down in simple double crochet stitches. Crocheted in fingering weight yarn, this modern colour block design works up quickly with no seaming and can easily be customized to any length. A step by step video tutorial for size small is available on YouTube.
Skill level: Easy
Sizes: XS-5XL
Yarn Weight: Fingering Weight
Yarn: Palette Fingering Weight
Hook Sizes: US 6/G (4mm and a US 7/G+ (4.5mm)
Construction: Worked in the round, in one piece from the top down
Video Tutorial: https://youtu.be/3sW6o9FLAso
Fall 2022 Collection
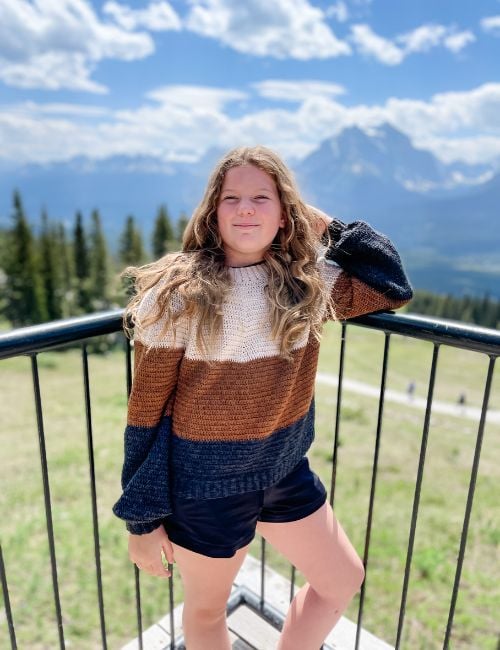
The Rocky Mountain Colourblock crochet sweater is part of my Rocky Mountain Fall 2022 collection. These crochet patterns are inspired by nature and the beauty of the great Canadian Rocky Mountains.
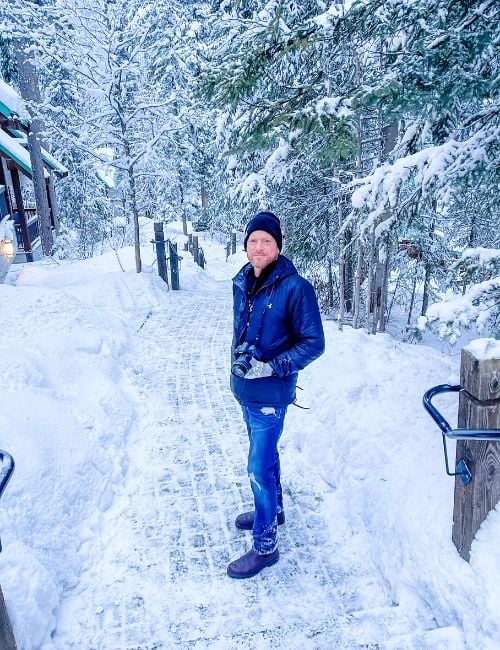
It was an adventure to travel with my family this summer to photograph this collection. Each of my children contributed to making these designs extra special, and it was incredible to photograph each piece in the places that inspired them.
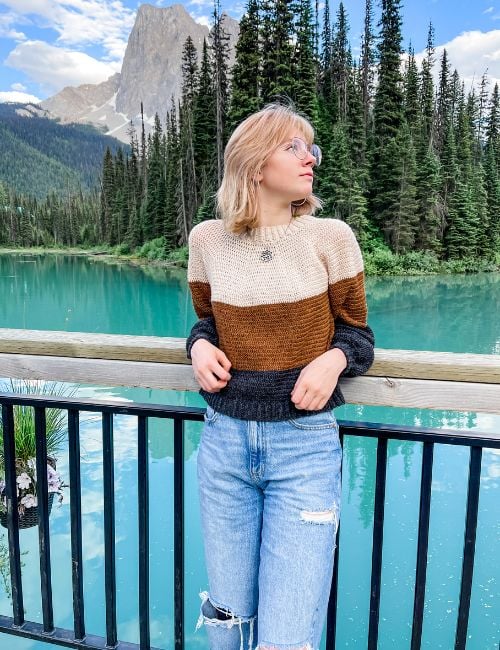
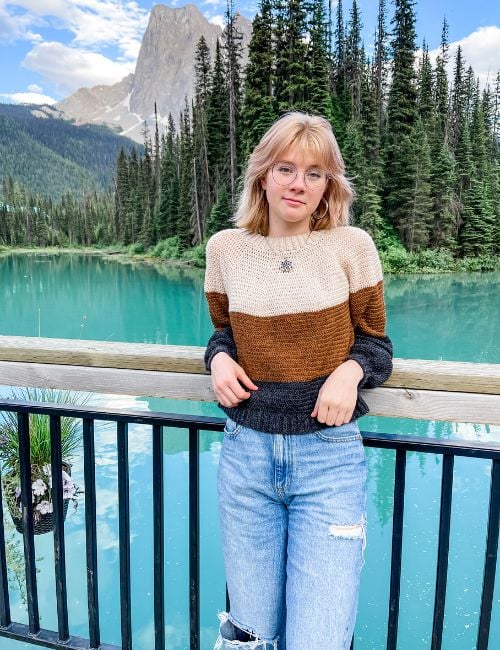
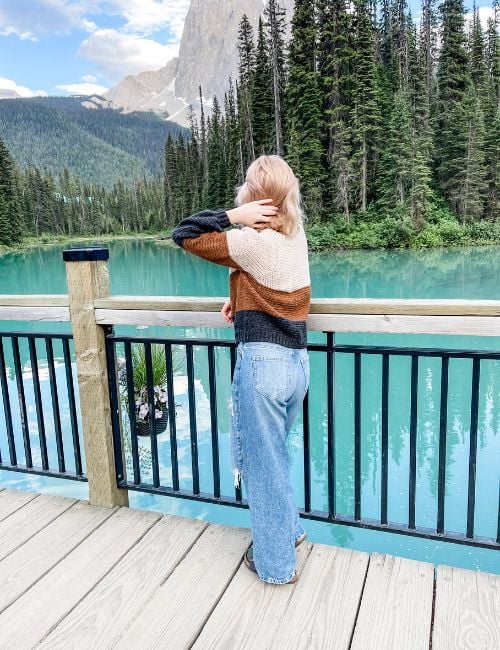
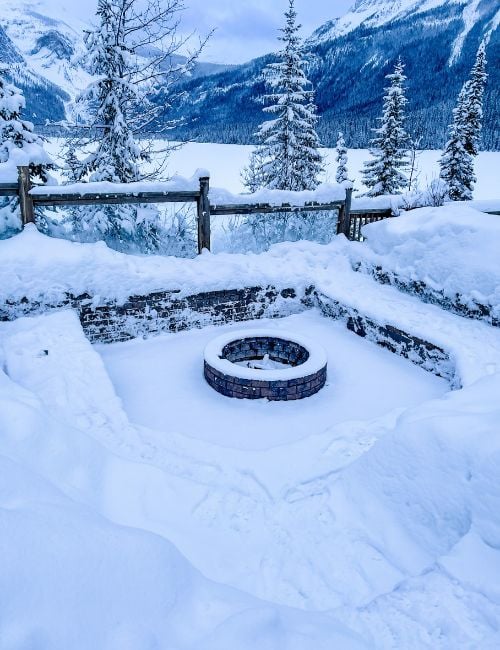
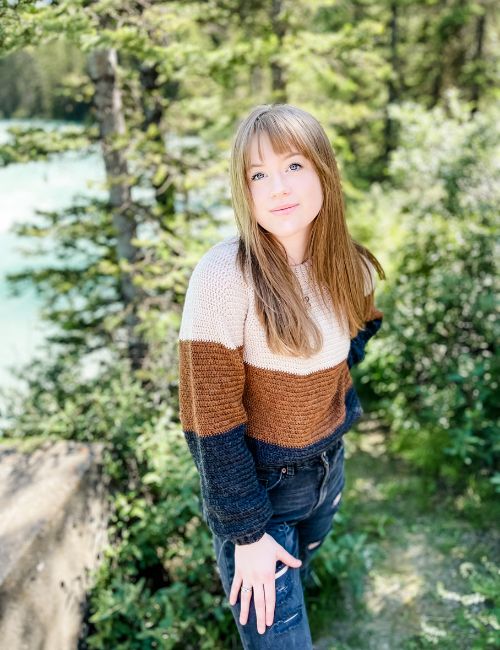
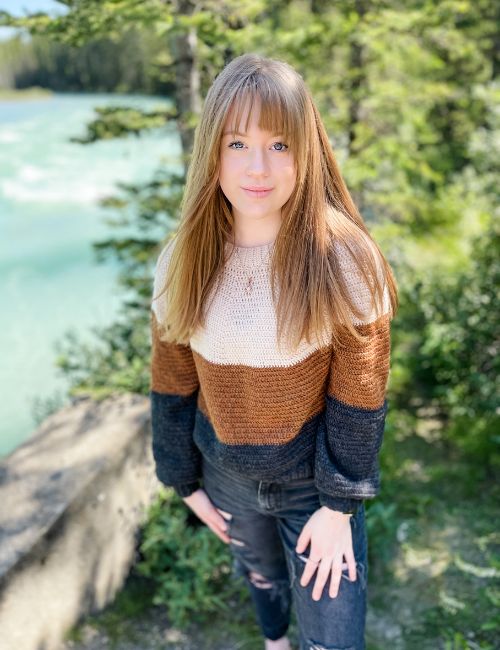
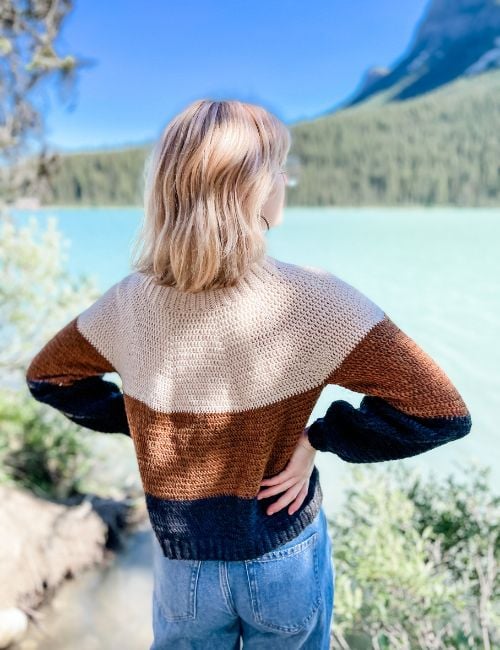
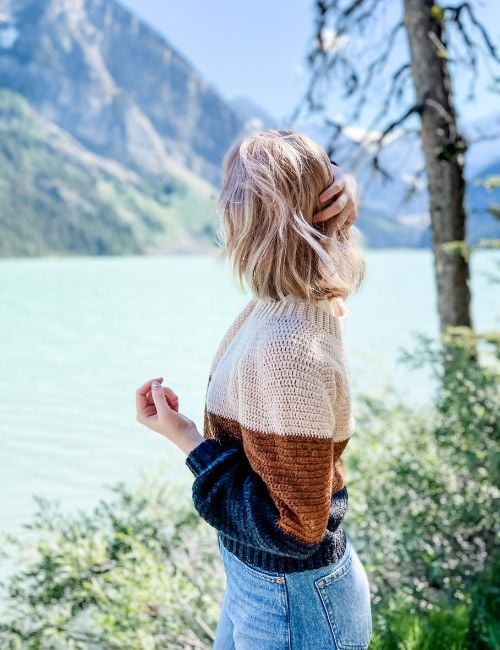
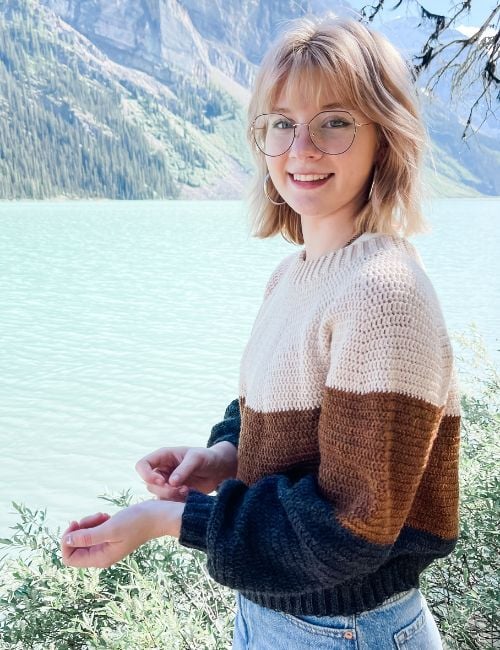
The Rocky Mountain Colourblock Crochet Sweater pictures are taken at Emerald Lake in Yoho National Park, British Columbia. This has become a favourite spot for us to visit and one of the most beautiful lakes in the Rocky Mountains. You can read more about Emerald Lake on the Banff blog HERE

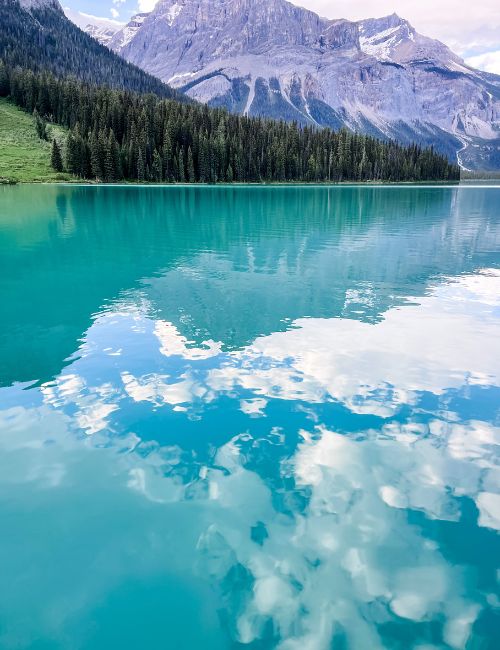
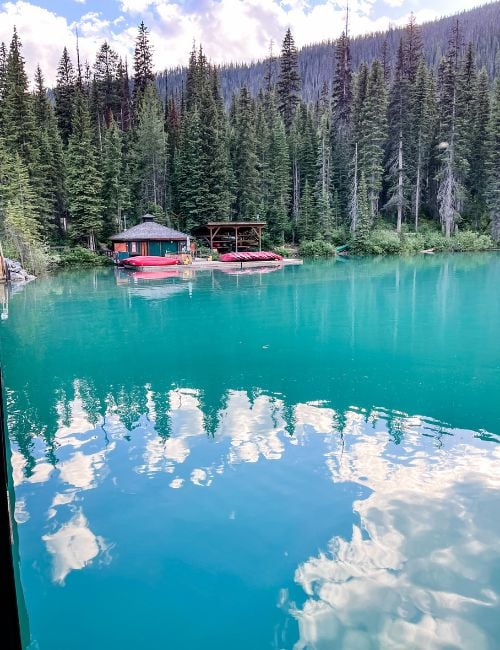
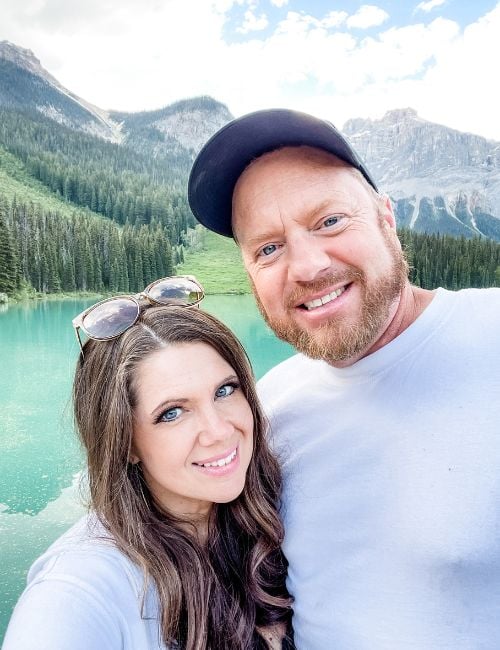
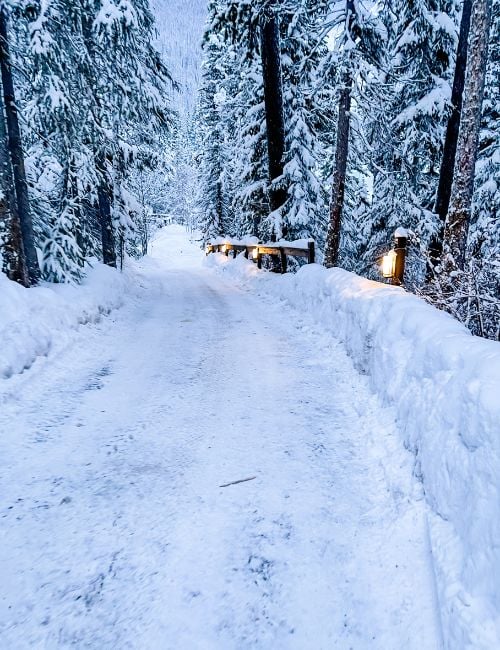
My husband and I fell in love with Emerald Lake when we visited in December 2021, we knew we had to come back to see this Lake in its full glory. There are beautiful hiking trails around the Lake and canoe rentals. You can stay at Emerald Lake Lodge and enjoy cozy cabins nestled in the trees along the waterfront.
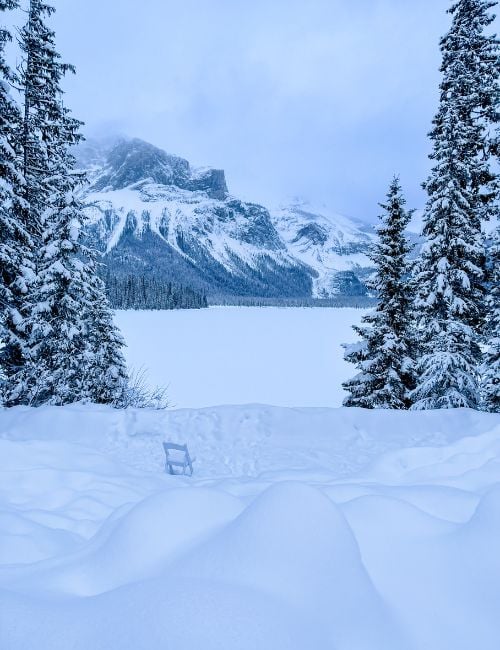
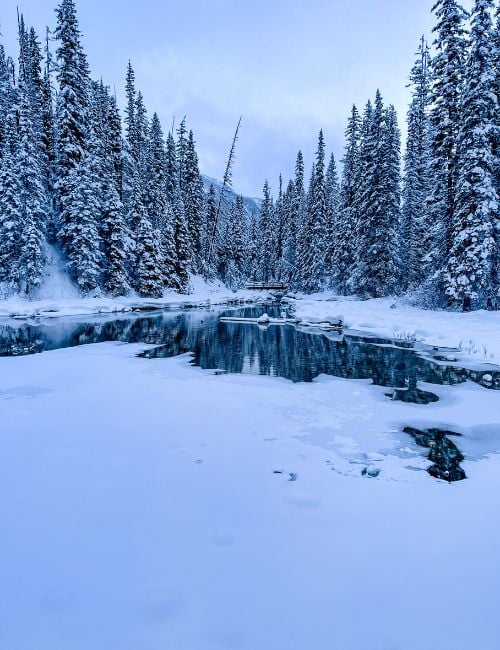
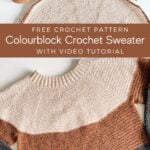
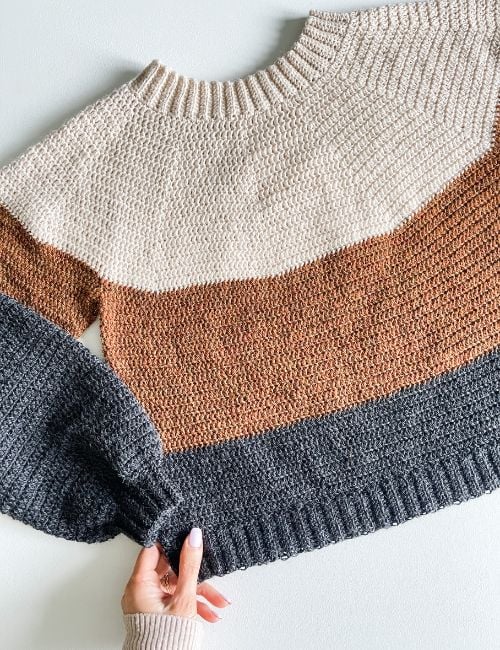
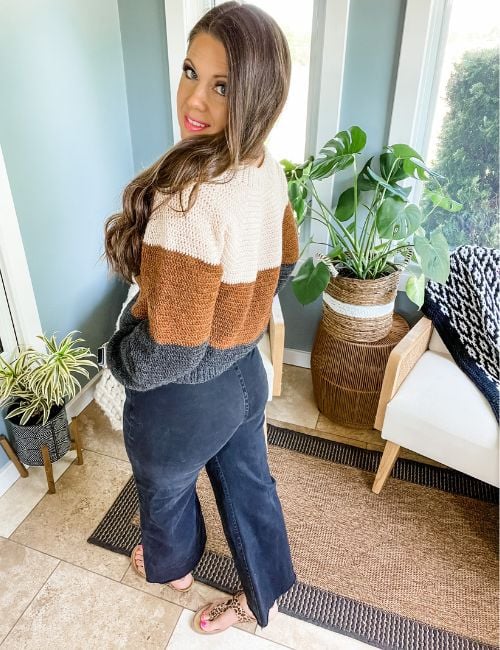
The colour block in this design represents the layers to be found in the mountains. When looking at a mountain, I’m first drawn to the peak, the majestic rocky summit, so I’ve started this pullover in the lightest shade to draw your eye to the top. But as you admire this natural wonder, there is so much more to it than just the peak, the lush forest below, and then the valley, often with a beautiful lake as pictured here. I’ve never seen water so beautiful.
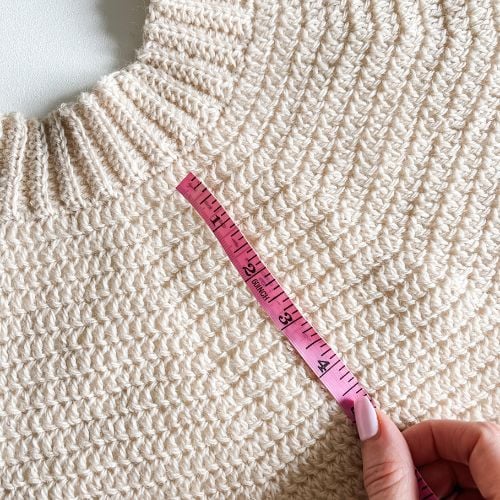
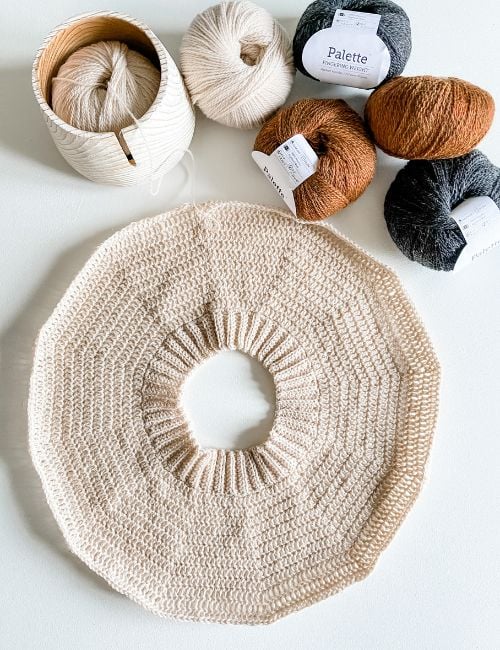
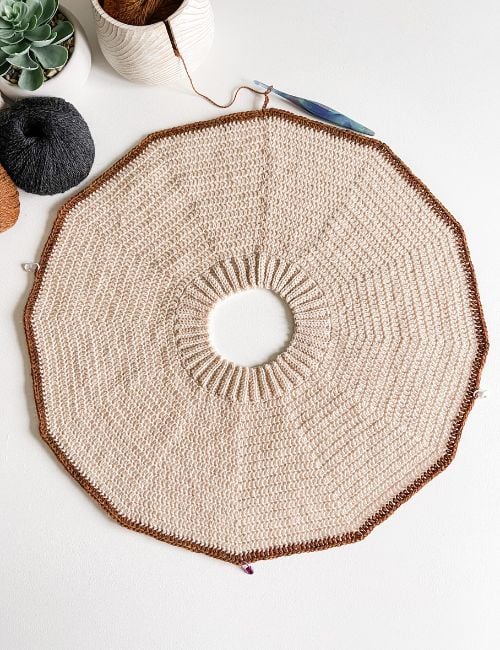
Why is my Sweater Fanning out?
Don’t worry; it’s completely normal for your pullover to fan out as you crochet. As you progress and add the band, this issue will naturally resolve itself. It’s important to understand that this sweater features a circular yoke design. When you try it on, you may notice some ruffling at the back, which might raise concerns. Because you’re essentially putting a circle around your body, it’s not going to lay perfectly flat, especially at the back. However, this will sort itself out as you continue working on the body and add the band.

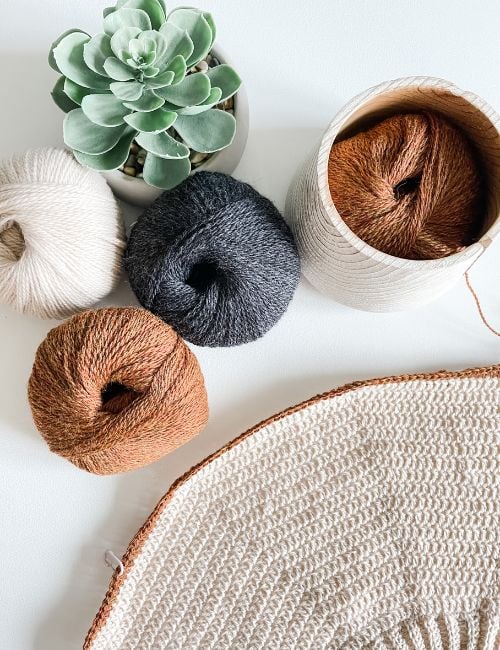
Colour Inspiration
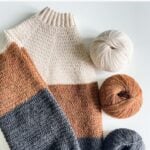
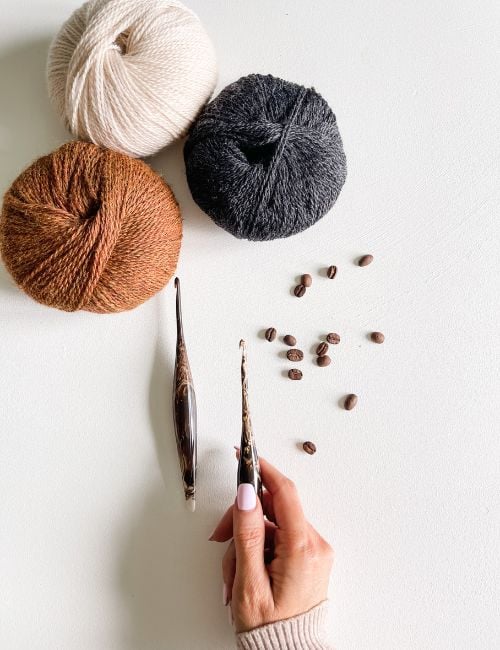
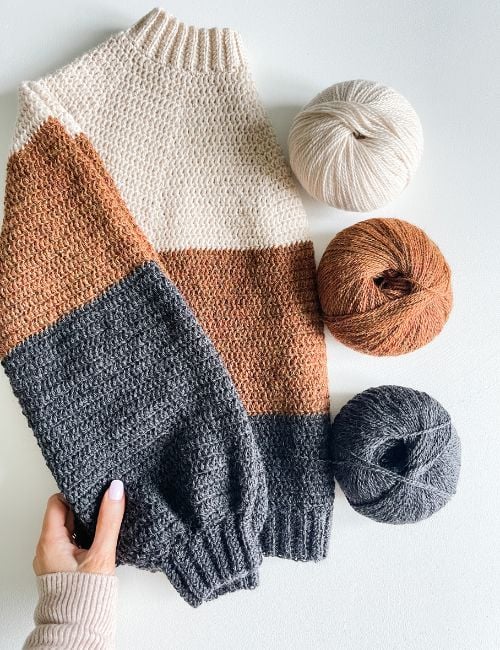
The colours I chose for the Rocky Mountain Colourblock Crochet Sweater have a natural and earthy feel. The warm tones remind me of Fall with a creamy cup of coffee or a pumpkin spiced Latte, just like nature I find these colours to be soft and calming.
Video Tutorial

Yarn Requirements
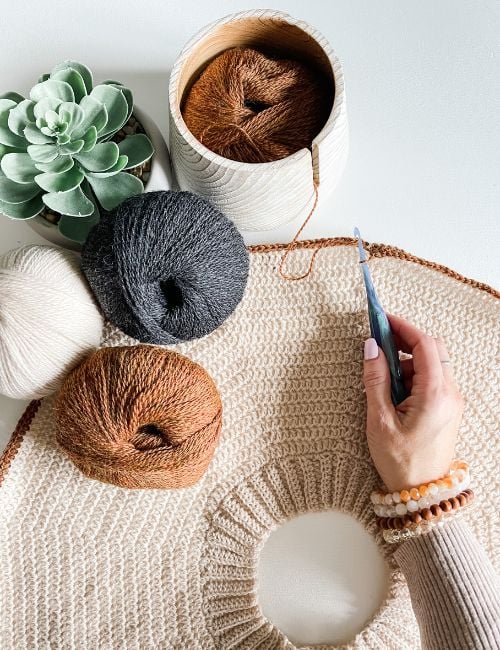
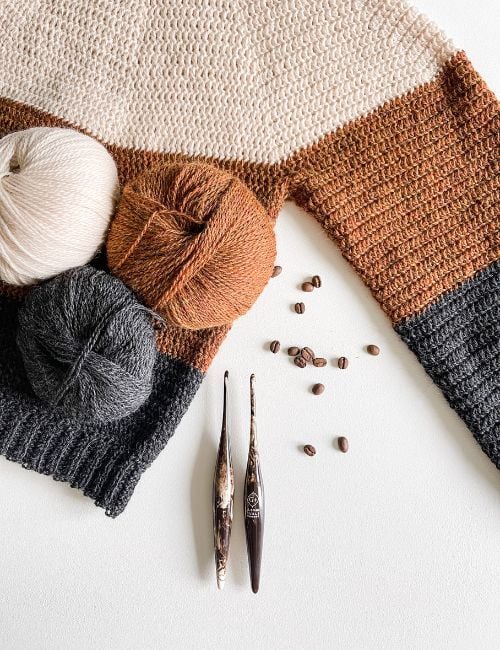
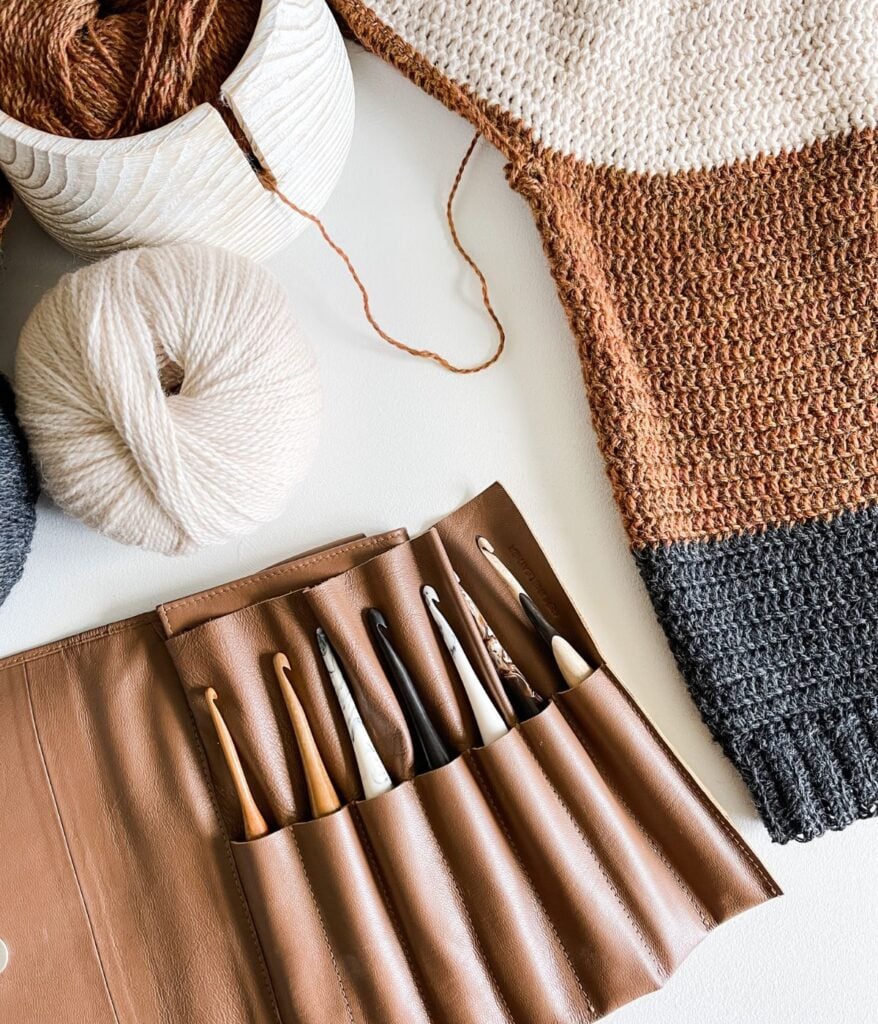
I designed the Rocky Mountain crochet sweater in Palette fingering weight yarn in Oyster Heather, Brindle Heather and Asphalt Heather. I know fingering weight yarn might be intimidating, but give it a try! You’ll be surprised at how quickly this crochet sweater works up. I chose to use double crochet stitches to keep the pattern beginner-friendly, plus it was enjoyable to breeze through the pattern so fast. It’s worked all in one piece with no seaming involved!
Palette Fingering Weight- 100% Peruvian Highland Wool (231 yds/50g Shown in Oyster heather, Brindle and Asphalt Heather
Yarn Substitutes:
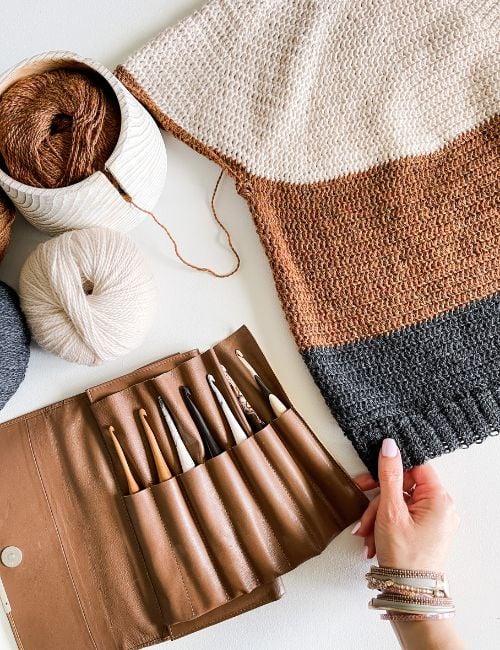
Crochet Hooks Needed
The Rocky Mountain Colourblock crochet sweater pattern calls for a US 6/G (4mm and a US 7/G+ (4.5mm) or size needed to obtain gauge.
The Furls Odyssey crochet hook has a large handle so that it makes working with fingering weight yarn a breeze. Hook case available HERE
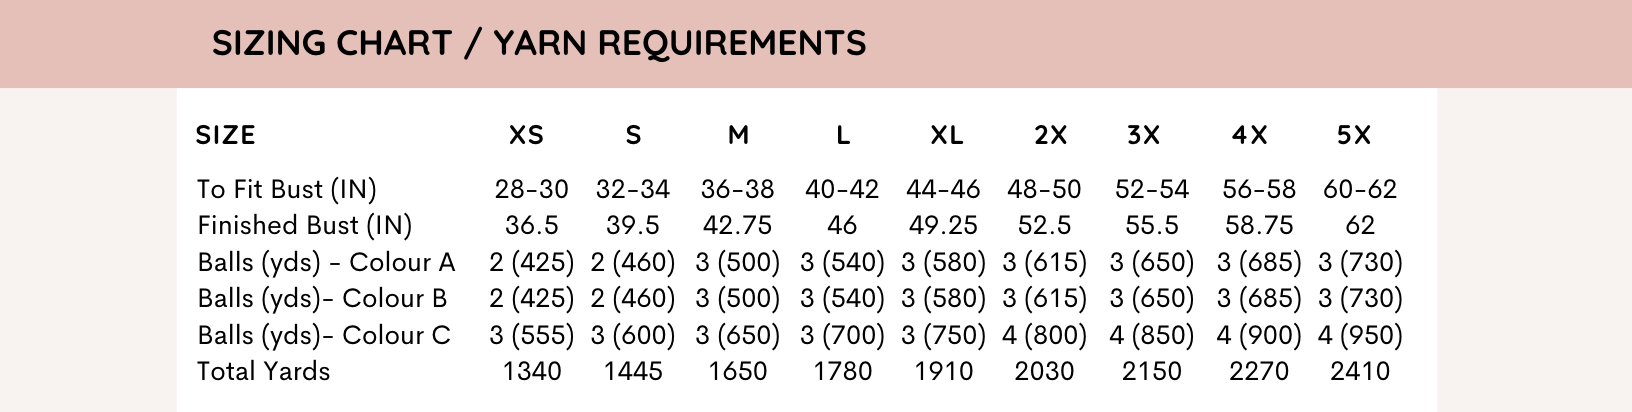
Yarn Requirements Rocky Mountain Colourblock Crochet Sweater:
Palette Fingering Weight- 100% Peruvian Highland Wool (231 yds/50g Shown in Oyster heather, Brindle and Asphalt Heather
Size Chart

Crochet Hook Requirements:
US 6/G (4mm)
US 7/G+ (4.5mm) or size needed to obtain gauge
Additional Supplies:
Helpful Resources
- Join our Facebook Crochet Community for pattern support and inspiration
- Subscribe on YouTube for hundreds of free tutorials
- Sign up for our newsletter and receive 40% off your first Ravelry purchase!
- Sign up for our YouTube Membership
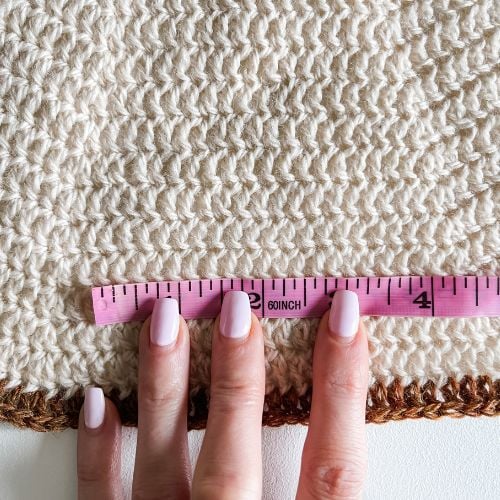
Gauge:
20 sts and 10 rows equal to 4″ in dc with 4.5mm hook
7 sts and 3 rows equal to 1″ in ribbed pattern with 4mm hook
Schematic Included in the PDF
Construction
The Rocky Mountain Colourblock Crochet Sweater is worked in the round, in one piece from the top down. Once the yoke is completed, mark off the sleeves and continue working the body in the round. Join back to the underarm and work each sleeve in the round, finishing with a join-as-you-go cuff. The pattern is written for the smallest size with larger sizes in parentheses ( ). If there is only 1 number, it applies to all sizes. Step by step video tutorial is provided on our YouTube channel for size small.
Special Stitches
Reverse Sl St: Go through the stitch back to front, Keep working yarn to the front, YU (Yarn Under) pulling through the loop on the hook.
Rocky Mountain Colourblock Crochet Sweater Pattern
Upgrade to the Premium PDF Pattern!
Digital PDF Download
Digital pattern only. No physical item will be shipped.
PATTERN
Notes
The pullover is worked from the top down in the round. The collar is completed first by working in rows. It is then slip-stitched together, and the pullover begins by working around the collar’s edge.
All sizes have the same size collar and neck opening. Work pullover in rounds until the required size is reached. When changing colours, work the last yarn over the last stitch with the next colour. The underarm chain stitches are added to increase bust and arm width.
The pattern is written for the smallest size with the larger sizes in parentheses ( ). If there is only 1 number, it applies to all sizes—a step-by-step video tutorial is provided on YouTube for size small.
The Colour pattern may be altered as desired. For plus sizes, you may want to change to colour B before the final round of the yoke for a more proportionate look. Or increase the length of the pullover by adding additional rounds of colours B and C.
Signup HERE to get the colourblock worksheets for FREE to create your own colour combination or purchase the PDF.

FAQ & Terms
This post may contain affiliate links. Purchases made through these links may earn MJ’s Off The Hook Designs Inc. a small commission at no extra cost to you. Content on this site is supported by ads—please do not block or remove them.
Copyright
All patterns, photos, and written content are the property of MJ’s Off The Hook Designs Inc. and protected by copyright law.
Usage
Free patterns are for viewing only on this blog. You may not copy, download, print, screenshot, or redistribute any part of the pattern. Access must remain through this page with ads visible. Use of ad blockers, reader view, or any similar tools that remove or hide ads and site content is strictly prohibited.
Legal Notice
Unauthorized reproduction or distribution may result in copyright infringement penalties.
By accessing this post, you agree to these terms and conditions.
Yes! You may sell finished items made from MJ’s patterns, but please credit:
“Pattern by MJ’s Off The Hook Designs Inc.”
Pattern Support is only available in our Facebook Community group and Video Tutorials.
No additional support is provided for modified patterns, alternate yarns, or changes to gauge.
Having trouble unlocking the pattern?
If you’re seeing the message “Email subscription failed, please try again”, don’t worry — it’s usually an easy fix! Here are a few quick things to try:
First, double-check your login details. Make sure you’re signing in with the same email you originally used to create your Grow account. If you’re not sure, click “Forgot Password” to reset your login. Once you’ve updated it, return to my site and try again.
Next, clear your browser’s cache and cookies. Sometimes the login just gets stuck. You can also try opening the page in a private or incognito window, or switching to another browser like Chrome, Safari, or Firefox to see if that does the trick.
It also helps to make sure you’re logged into Grow directly. Visit https://grow.me and sign in there first. Once you’re logged in, come back to my site and refresh the page — your pattern should unlock automatically.
If you’re still having trouble, check your browser’s privacy settings. Grow needs cookies to verify your account, so make sure cookies and cross-site tracking are allowed. On iPhone, go to Settings → Safari → Privacy & Security, then turn off “Prevent Cross-Site Tracking” and “Block All Cookies.” On Android or Chrome, go to Settings → Site Settings → Cookies and select “Allow all cookies.”
Lastly, ad blockers or browser extensions can sometimes block the login pop-up. Try turning them off temporarily while you sign in. If nothing seems to work, log out of Grow completely by going to https://grow.me, selecting your profile icon, and choosing Log Out. Then come back to my site and try logging in again.
If you’re still stuck after trying all of this, please reach out through my Contact Page and let me know what device and browser you’re using (and include a screenshot if you can).
To unlock Exclusive Content on my Blog, all you need to do is click the box below and the Grow.me app will pop up, allowing you to enter your email and create a password. Once you’ve created an account, every time you see Exclusive Content on my blog, simply login to your Grow account. Be sure to switch to the login screen to enter your login credentials.
If you forget your password, click the “forgot password” link and follow the prompts. Please note that I’m unable to assist with resetting Grow passwords or accessing your Grow account, so be sure to save your login information in a safe place.
To make things even easier, I’ve created a video for both desktop and mobile users that offer additional assistance. You can access this video by visiting my FAQs page HERE or by watching the video below.
Thank you for subscribing and for joining me on my crochet journey. I hope you enjoy the exclusive content available to our subscribers and create beautiful crochet projects using the resources you discover.
Collar
XS (S, M, L, XL, 2X, 3X, 4X, 5X)
Row 1 (WS): With smaller hook and colour A, ch 12, 1 hdc in 3rd ch from hook, 1 hdc in each ch across, turn—10 sts.
Row 2 (RS): Ch 1 (not included as a st here and throughout), 1 hdc in the blo of each st across, turn—10 sts.
Rows 3-80: Rep Row 2. After the final Row, ch 1, fold collar rs facing and sl st together.
Flip the collar so that the seam is to the inside.
Yoke
Setup Round: Ch 1, work sc sts evenly around the collar ( 3 sts/2 rows), sl st in the first sc to join—120 sts. Change to the larger hook.
Round 1: With larger hook, ch 2 (not included as a st here and throughout), work 1 dc in each st around, rev sl st in the first dc to join—120 sts.
Increase pattern begins – Continue increasing the yoke for the size you are working on.
Round 2:
Ch 2, work 1 dc in first 9 sts, 2 dc in next st, * 1 dc in next 9 sts, 2 dc in next; rep from * around, rev sl st in the first dc to join—132 sts.
Round 3:
Ch 2, work 1 dc in first 10 sts, 2 dc in next st, * 1 dc in next 10 sts, 2 dc in next; rep from * around, rev sl st in the first dc to join—144 sts.
Round 4:
Ch 2, work 1 dc in first 11 sts, 2 dc in next st, * 1 dc in next 11 sts, 2 dc in next; rep from * around, rev sl st in the first dc to join—156 sts.
Round 5:
Ch 2, work 1 dc in first 12 sts, 2 dc in next st, * 1 dc in next 12 sts, 2 dc in next; rep from * around, rev sl st in the first dc to join—168 sts.
Round 6:
Ch 2, work 1 dc in first 13 sts, 2 dc in next st, * 1 dc in next 13 sts, 2 dc in next; rep from * around, rev sl st in the first dc to join—180 sts.
Round 7:
Ch 2, work 1 dc in first 14 sts, 2 dc in next st, * 1 dc in next 14 sts, 2 dc in next; rep from * around, rev sl st in the first dc to join—192 sts.
Round 8:
Ch 2, work 1 dc in first 15 sts, 2 dc in next st, * 1 dc in next 15 sts, 2 dc in next; rep from * around, rev sl st in the first dc to join—204 sts.
Round 9:
Ch 2, work 1 dc in first 16 sts, 2 dc in next st, * 1 dc in next 16 sts, 2 dc in next; rep from * around, rev sl st in the first dc to join—216 sts.
Round 10:
Ch 2, work 1 dc in first 17 sts, 2 dc in next st, * 1 dc in next 17 sts, 2 dc in next; rep from * around, rev sl st in the first dc to join—228 sts.
Round 11:
Ch 2, work 1 dc in first 18 sts, 2 dc in next st, * 1 dc in next 18 sts, 2 dc in next; rep from * around, rev sl st in the first dc to join—240 sts.
Round 12:
Ch 2, work 1 dc in first 19 sts, 2 dc in next st, * 1 dc in next 19 sts, 2 dc in next; rep from * around, rev sl st in the first dc to join—252 sts.
Round 13:
Ch 2, work 1 dc in first 20 sts, 2 dc in next st, * 1 dc in next 20 sts, 2 dc in next; rep from * around, rev sl st in the first dc to join—264 sts.
Round 14:
Ch 2, work 1 dc in first 21 sts, 2 dc in next st, * 1 dc in next 21 sts, 2 dc in next; rep from * around, rev sl st in the first dc to join—276 sts.
Round 15:
Ch 2, work 1 dc in first 22 sts, 2 dc in next st, * 1 dc in next 22 sts, 2 dc in next; rep from * around, rev sl st in the first dc to join—288 sts. XS STOP and proceed to the last increase round.
S (M, L, XL, 2X, 3X, 4X, 5X)
Round 16: Ch 2, work 1 dc in first 23 sts, 2 dc in next st, * 1 dc in next 23 sts, 2 dc in next; rep from * around, rev sl st in the first dc to join—300 sts.
Round 17: Ch 2, work 1 dc in first 24 sts, 2 dc in next st, * 1 dc in next 24 sts, 2 dc in next; rep from * around, rev sl st in the first dc to join—312 sts. S STOP and proceed to the last increase round.
M (L, XL, 2X, 3X, 4X, 5X)
Round 18: Ch 2, work 1 dc in first 25 sts, 2 dc in next st, * 1 dc in next 25 sts, 2 dc in next; rep from * around, rev sl st in the first dc to join—324 sts.
Round 19: Ch 2, work 1 dc in first 26 sts, 2 dc in next st, * 1 dc in next 26 sts, 2 dc in next; rep from * around, rev sl st in the first dc to join—336 sts. M STOP and proceed to the last increase round.
L (XL, 2X, 3X, 4X, 5X)
Round 20: Ch 2, work 1 dc in first 27 sts, 2 dc in next st, * 1 dc in next 27 sts, 2 dc in next; rep from * around, rev sl st in the first dc to join—348 sts.
Round 21: Ch 2, work 1 dc in first 28 sts, 2 dc in next st, * 1 dc in next 28 sts, 2 dc in next; rep from * around, rev sl st in the first dc to join—360 sts. L STOP and proceed to the last increase round.
XL (2X, 3X, 4X, 5X)
Round 22: Ch 2, work 1 dc in first 29 sts, 2 dc in next st, * 1 dc in next 29 sts, 2 dc in next; rep from * around, rev sl st in the first dc to join—372 sts.
Round 23: Ch 2, work 1 dc in first 30 sts, 2 dc in next st, * 1 dc in next 30 sts, 2 dc in next; rep from * around, rev sl st in the first dc to join—384 sts. XL STOP and proceed to the last increase round.
2X (3X, 4X, 5X)
Round 24: Ch 2, work 1 dc in first 31 sts, 2 dc in next st, * 1 dc in next 31 sts, 2 dc in next; rep from * around, rev sl st in the first dc to join—396 sts.
Round 25: Ch 2, work 1 dc in first 32 sts, 2 dc in next st, * 1 dc in next 32 sts, 2 dc in next; rep from * around, rev sl st in the first dc to join—408 sts. 2X STOP and proceed to the last increase round.
3X (4X, 5X)
Round 26: Ch 2, work 1 dc in first 33 sts, 2 dc in next st, * 1 dc in next 33 sts, 2 dc in next; rep from * around, rev sl st in the first dc to join—420 sts.
Round 27: Ch 2, work 1 dc in first 34 sts, 2 dc in next st, * 1 dc in next 34 sts, 2 dc in next; rep from * around, rev sl st in the first dc to join—432 sts. 3X STOP and proceed to the last increase round.
4X (5X)
Round 28: Ch 2, work 1 dc in first 35 sts, 2 dc in next st, * 1 dc in next 35 sts, 2 dc in next; rep from * around, rev sl st in the first dc to join—444 sts.
Round 29: Ch 2, work 1 dc in first 36 sts, 2 dc in next st, * 1 dc in next 36 sts, 2 dc in next; rep from * around, rev sl st in the first dc to join—456 sts. 4X STOP and proceed to the last increase round.
5X
Round 30: Ch 2, work 1 dc in first 37 sts, 2 dc in next st, * 1 dc in next 37 sts, 2 dc in next; rep from * around, rev sl st in the first dc to join—468 sts.
Round 31: Ch 2, work 1 dc in first 38 sts, 2 dc in next st, * 1 dc in next 38 sts, 2 dc in next; rep from * around, rev sl st in the first dc to join—480 sts.
Last Increase Round:
With Colour B, ch 2, work in the established increase pattern finishing with—300 (324, 348, 372, 396, 420, 444, 468, 492) sts. Steam block before proceeding to the next step. This helps prevent curling.
Get the FREE Colourblock Worksheets PDF HERE
Separate Body and Sleeves
Customization tip: If you would like more stitches around the chest, work fewer sts on the back body and more to the front body. The arm stitch count and chains remain the same.
With stitch markers, mark off the sleeve and body sections. From sl st join count over 65 (69, 73, 77, 81, 85, 89, 93, 97) pm in the last st (this marks the sleeve), count over 85 (93, 101, 109, 117, 125, 133, 141, 149) pm in the last st (this marks the front), count over 65 (69, 73, 77, 81, 85, 89, 93, 97) pm in the last st (this marks the 2nd sleeve), sts remaining to the join should be 85 (93, 101, 109, 117, 125, 133, 141, 149) sts (this marks the back).

Body
Round 1:
Ch 6 (underarm ch) fold the yoke in half, sk over the next 65 (69, 73, 77, 81, 85, 89, 93, 97) sl st in the next st from marker, dc in the same st, dc across to the next marker, 85 (93, 101, 109, 117, 125, 133, 141, 149) sts, ch 6 (underarm ch), sk over the next 65 (69, 73, 77, 81, 85, 89, 93, 97) sl st in the next st from marker, dc in the same st, dc in the remaining sts across, sl st in the first ch to join, fasten off and weave in tails—182 (198, 214, 230, 246, 262, 278, 294, 310) sts (incl chs).
Round 2:
Sk over the first 3 chs, join yarn in the 4th ch, ch 2, work 1 dc in the same ch and next 2 chs, work 1 dc in each st across, work 1 dc in each of the next 6 chs, work 1 dc in each st across, work 1 dc in the last 3 chs, rev sl st in the first dc to join—182 (198, 214, 230, 246, 262, 278, 294, 310) sts.
Round 3:
Ch 2, work 1 dc in each st around, rev sl st in the first dc to join—182 (198, 214, 230, 246, 262, 278, 294, 310) sts.
Rounds 4-15: Rep Round 3 in colour B.
Rounds 16-23: Rep Round 3 in colour C, ending with —182 (198, 214, 230, 246, 262, 278, 294, 310) sts.
*As desired, increase rounds of colours B and C for a longer pullover. To change the number of rows per colour, see the colour worksheets at the end of the pattern.
Band
The band is joined as you go to the body edge.
Row 1:
With C and smaller hook, ch 12, 1 hdc in 3rd ch from hook and in each ch across, sk first st at the body edge, sl st in next 3 sts (body edge), turn—10 sts.
Row 2:
Sk sl sts, 1 hdc in the BLO of each st across, turn—10 sts.
Row 3:
Ch 1, work 1 hdc in the BLO of each st across, sl st in next 3 sts (body edge), turn—10 sts.
Rows 4- 122 (132, 142, 154, 164, 174, 186, 196, 206): Rep Row 2 & 3 ending on Row 2. The last Row ch 1, with RS facing sl st band together, fasten off and weave in ends.
Sleeves
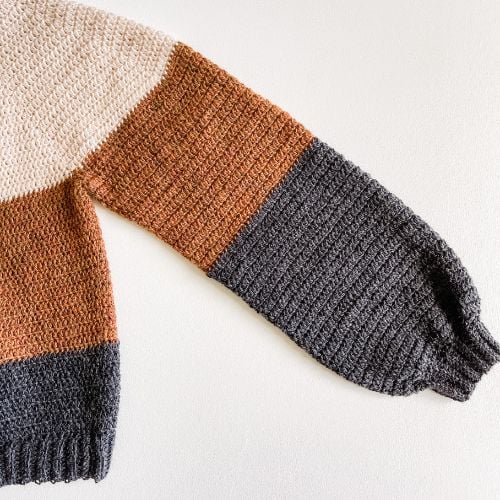
To alter the sleeve length, reduce or increase rounds of colour C. The sleeve length is 16.5″. Work the same number of rounds of colour B as worked for the body.
Round 1: With colour B and larger hook, sk over the first 3 chs, join yarn in the 4th ch, ch 2, work 1 dc in the same ch and next 2 chs, work 1 dc in each st around, work 1 dc in the last 3 chs, rev sl st in the first dc to join—71 (75, 79, 83, 87, 91, 95, 99, 103) sts.
Round 2: Ch 2, work 1 dc in each st around, rev sl st in the first dc to join—71 (75, 79, 83, 87, 91, 95, 99, 103) sts.
Rounds 3-15: Rep Round 2 in colour B.
Rounds 16-27: Rep Round 2 in colour C, ending with —71 (75, 79, 83, 87, 91, 95, 99, 103) sts.
Round 28: Ch 1, work 1 sc in the first st, *sk st, work 1 sc in the next st; rep from * around, sl st in the first sc to join—35 (37, 39, 41, 43, 45, 47, 49, 51) sts.
Cuff
The band is joined as you go to the sleeve edge.
Row 1:
With C and smaller hook, ch 12, 1 hdc in 3rd ch from hook and in each ch across, sk first st at the body edge, sl st in next 3 sts (sleeve edge), turn—10 sts.
Row 2:
Sk sl sts, 1 hdc in the BLO of each st across, turn—10 sts.
Row 3:
Ch 1, work 1 hdc in the BLO of each st across, sl st in next 3 sts (sleeve edge), turn—10 sts.
Rows 4- 24 (24, 26, 28, 28, 30, 32, 32, 34): Rep Row 2 & 3 ending on Row 2. The last Row ch 1, with RS facing sl st band together, fasten off and weave in ends.
Blocking:
Steam block to measurements, or if you prefer, wet the entire garment in lukewarm water with a small amount of dish soap or woolwash. Allow soaking for around 30 min. Squeeze out as much water as possible. Wrap the garment in a towel to press out the excess water. Lay the garment out on blocking mats and pin it to measurements. Allow the garment to dry thoroughly.
Get the FREE Colourblock Worksheets PDF HERE
BUY THE PDF
You May Also Love These Patterns
This pattern is designed by Michelle Moore of MJ’s Off The Hook Designs Inc based in Lakefield Ontario Canada. Your go to source for modern easy crochet patterns. Published on August 1st, 2022.
Thank you for visiting MJ’s Off The Hook Designs I hope you enjoyed this pattern and feel inspired to pick up your hook and start creating.
You can find even more crochet patterns in our Ravelry and Etsy shops.
For daily inspiration and behind the scenes peeks join me over on Facebook or Instagram or join our YouTube Membership for exclusive content!

*This post contains affiliate links at no cost to you!
You’ve got questions, we’ve got a community!
Crocheting is better with friends! Join our group to post pictures and ask all your pattern support questions.