*This post may contain affiliate links to support the cost of this blog. At no cost to you, I may make a small commission if you purchase through these links. Read our Privacy Policy HERE


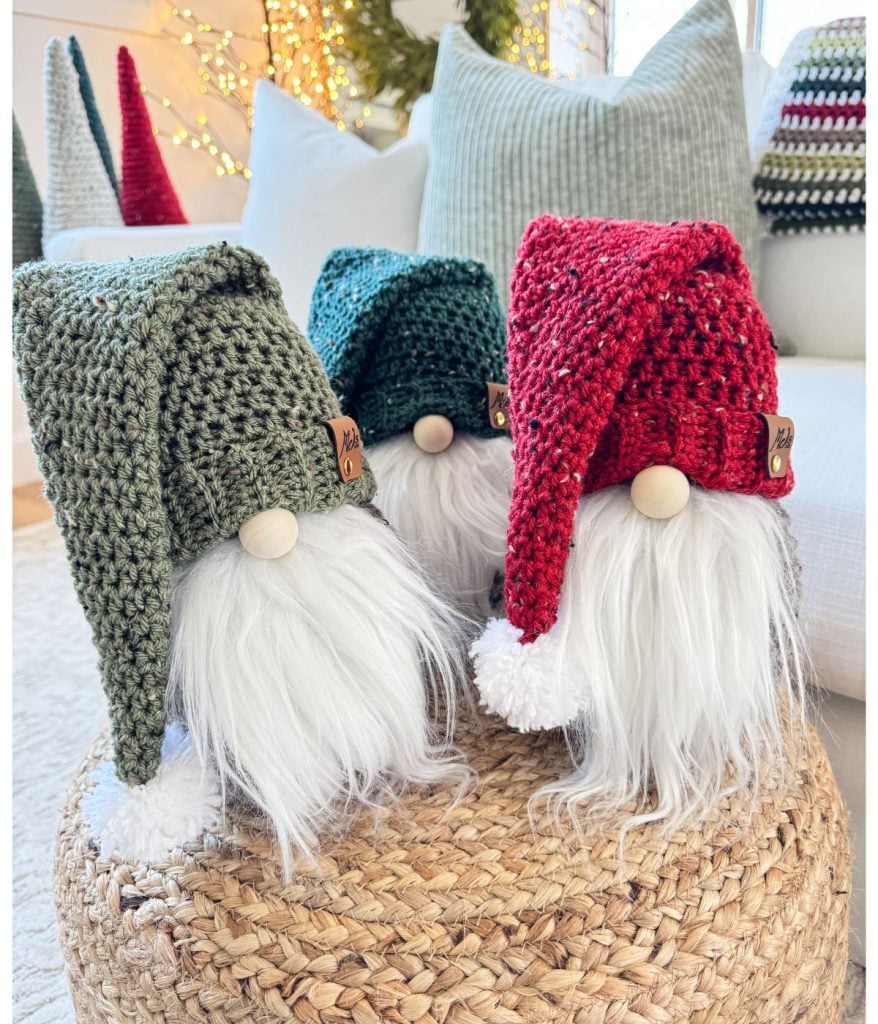
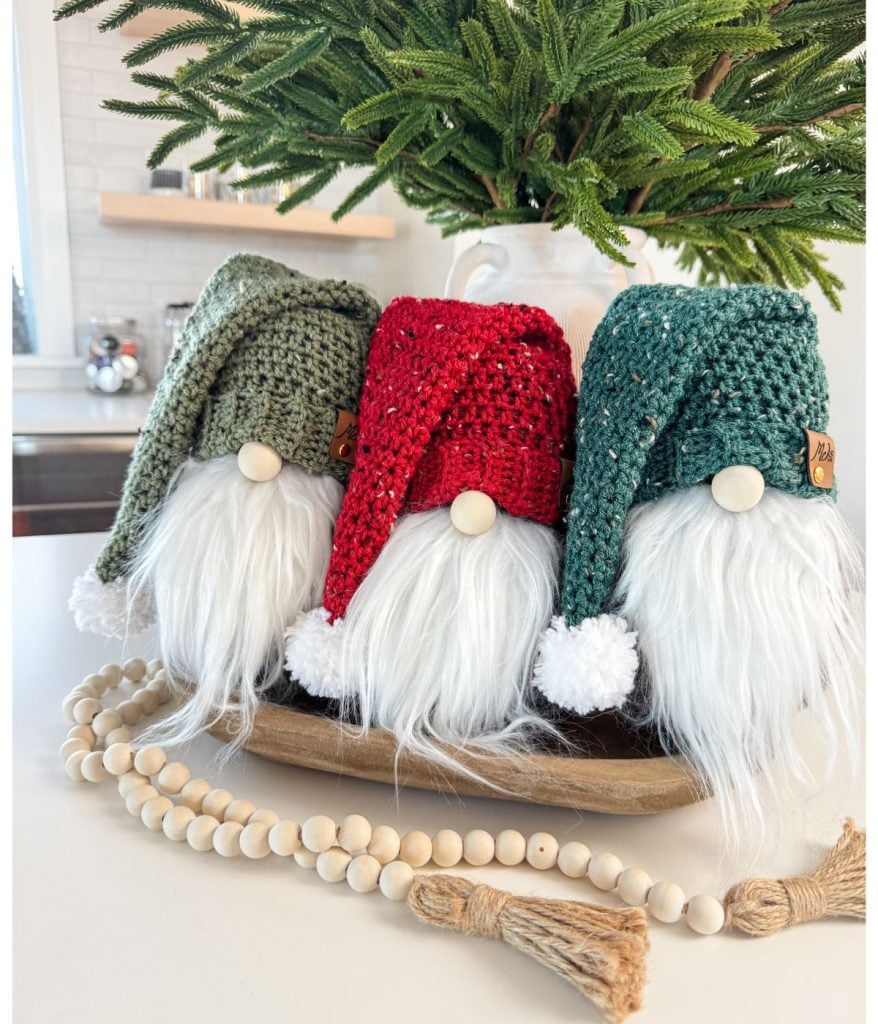
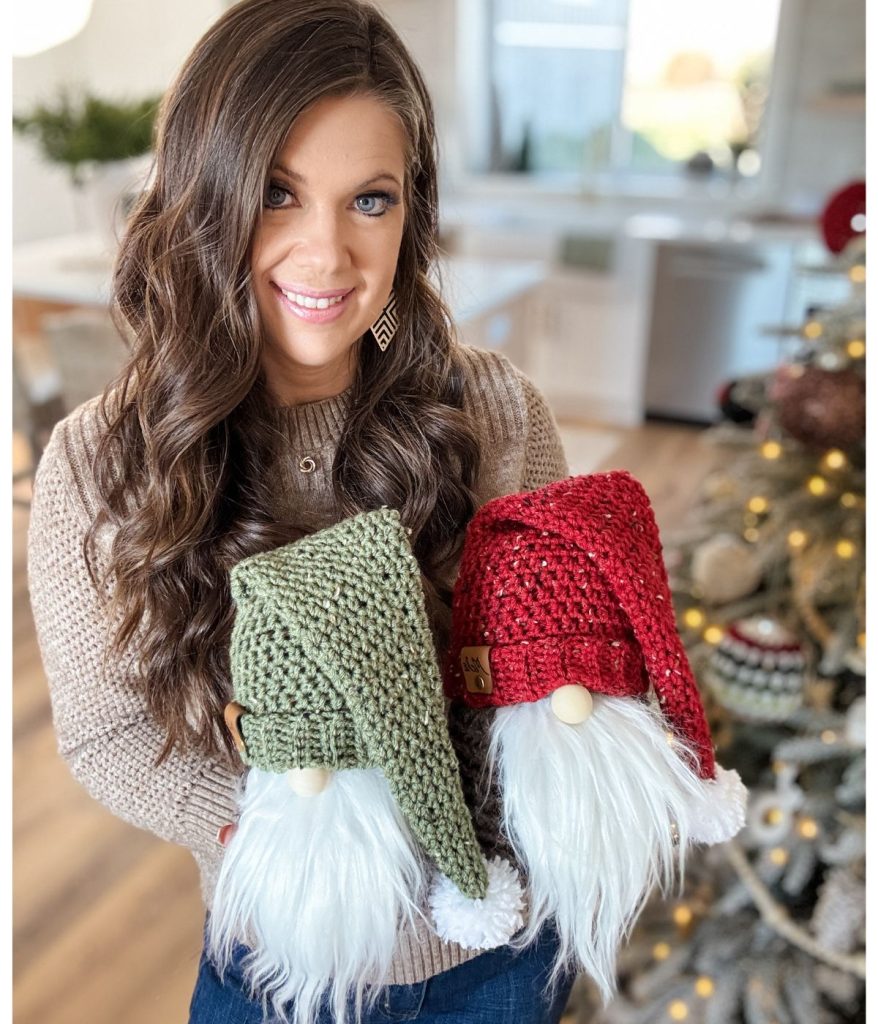
Introducing the Rustic Farmhouse Holiday Gnome – the ideal addition to your home decor!
Key Takeaways
- Create a delightful crochet gnome using the free crochet gnome pattern, designed for all skill levels.
- The gnome is crocheted with Brava Tweed yarn and features a quick, easy construction process.
- Watch the accompanying video tutorial for step-by-step guidance on making your crochet gnome.
- You can customize the gnome for Valentine’s Day with themed colours and patterns.
- Gather your materials like yarn, scissors, and crochet hooks, and start spreading holiday cheer!
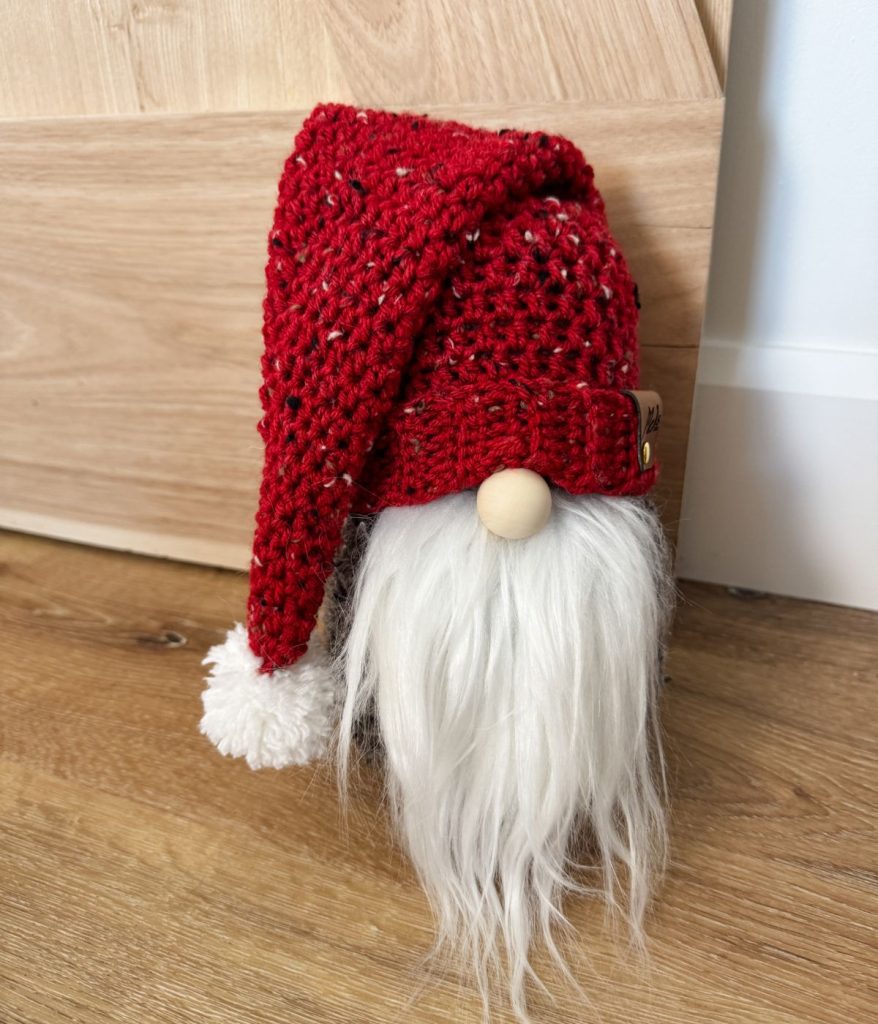
This charming gnome, crocheted using Brava Tweed from WeCrochet, is the perfect addition to your seasonal decor or a thoughtful gift for loved ones.
The gnome’s body is worked with the yarn tripled, making it a quick and easy project. Stuffed and weighted for stability, this design ensures your gnome stands proudly wherever you place it.
Designed for crocheters of all skill levels, our pattern includes an accompanying video tutorial that will guide you through each step, making it simple to follow along and bring your gnome to life.

Gather your yarn and hooks, and let’s spread some holiday cheer together with this fun and creative project!
Free Crochet Gnome Pattern
I’m sure you’re going to fall in love with this quick, easy, and absolutely adorable free crochet gnome pattern! Designed in the same unique style as my crochet bunny and crochet snowman patterns, this gnome is a delightful addition to any collection. I’ve never really been that into gnomes before, but after designing this one, I’m completely obsessed! I hope you enjoy making this pattern as much as I enjoyed creating it!

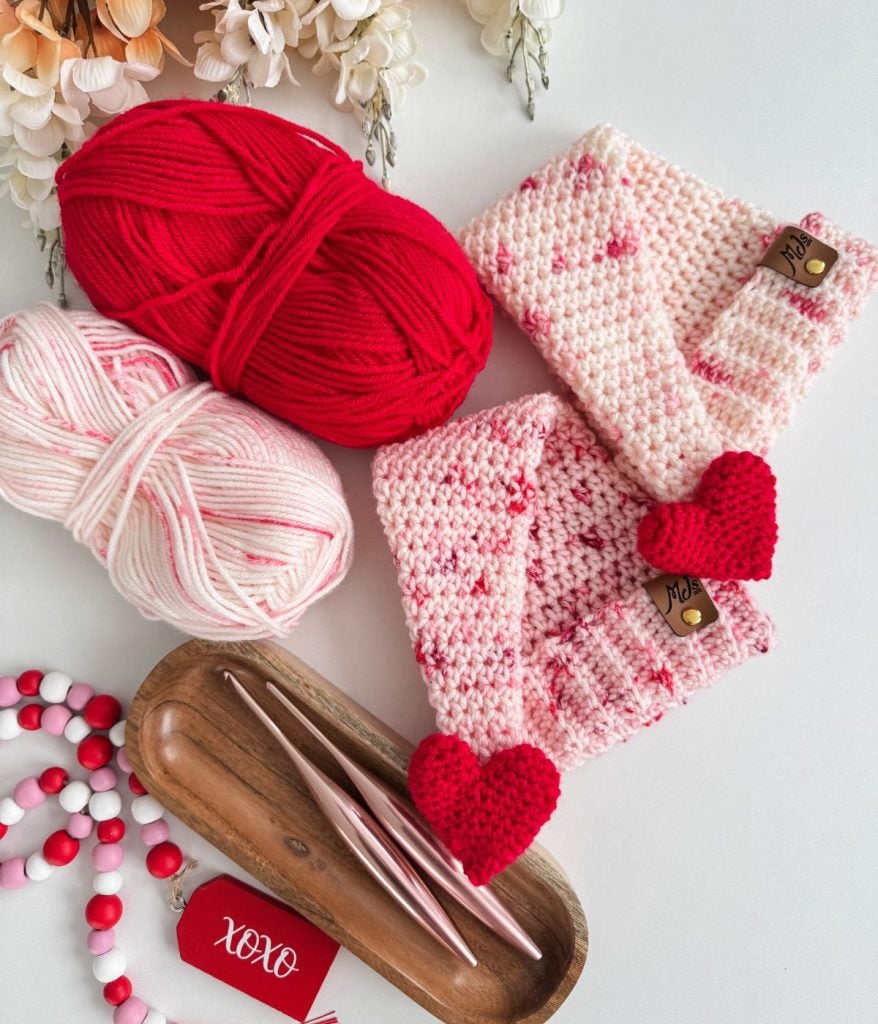
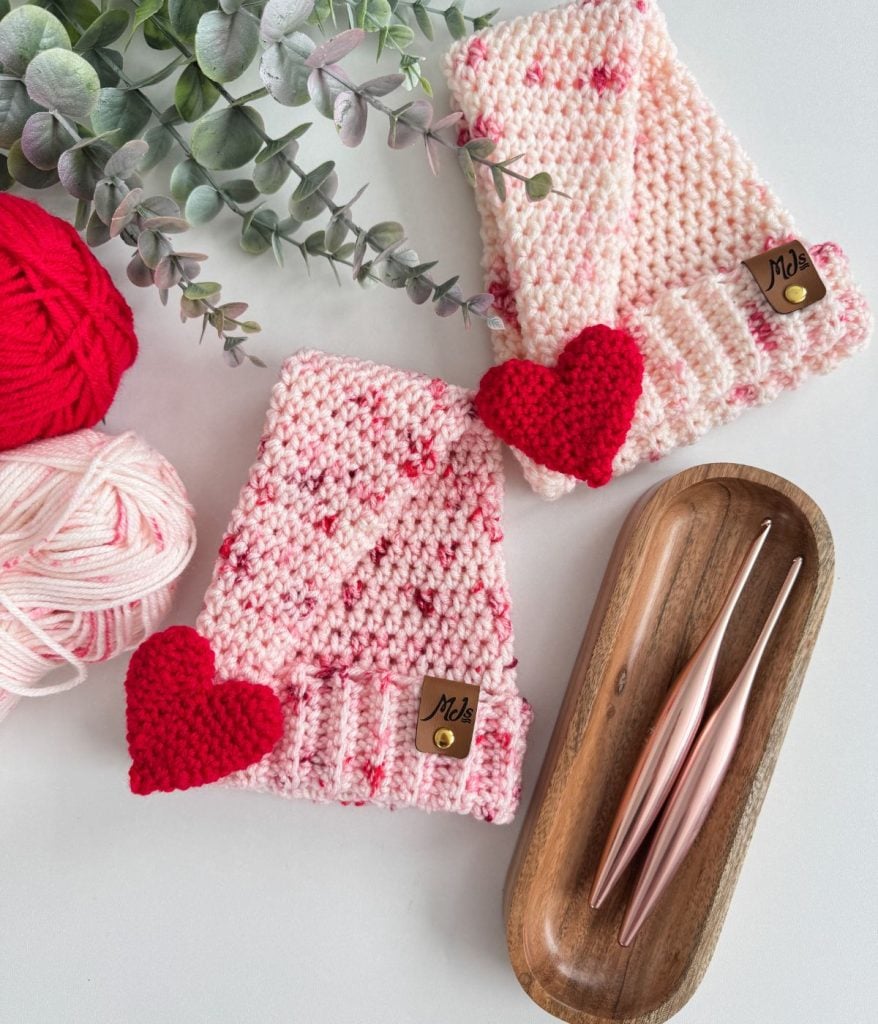
Valentines Gnome
You can now turn your Gnome into a Valentine’s Day Gnome! Dress your Gnome up with a pink hat and add the mini heart pattern! I used Cherry Speckle and Rosebud Speckle for the hats; the heart is Brava in Red.
Video for the Crochet Gnome
Yarn Requirements
Worsted Weight #4, 218yds/100g
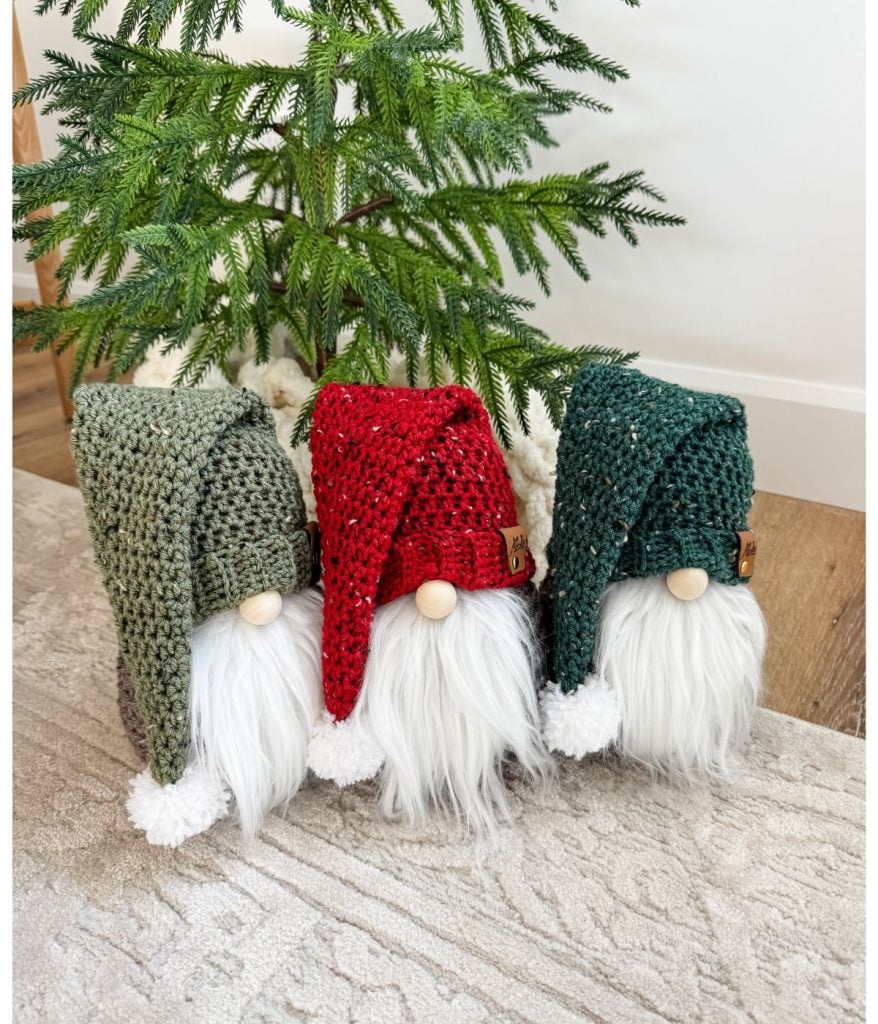
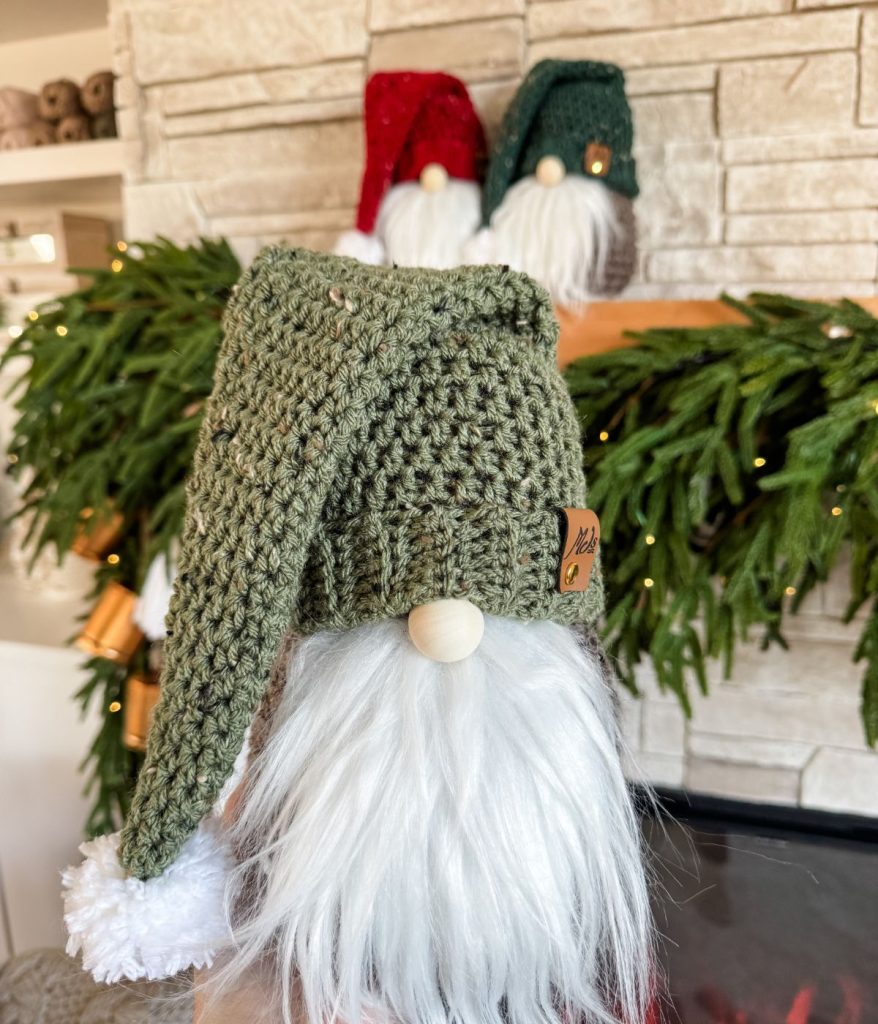
100% Acrylic – Body shown in Mink (MC), Hats Shown in Poinsettia, Wreath, and Wasabi (A), Brava White (B)
MC – 1 ball exactly
A – 50g or 1/2 ball exactly
B – Small amount for pompom
Valentine’s Gnome colours: Cherry Speckle and Rosebud Speckle for the hats; the heart is Brava in Red.
Crochet Gnome Size

Skill Level
Gauge
Suitable Yarn Substitutes
Premier Basix Tweed – 260 yards/140g
Wool Of The Andes Tweed – 110 yDS/50g
Berroco remix– 216 yds/100g
Crochet Hooks Required
Helpful Resources
- Join our Facebook Crochet Community for pattern support and inspiration
- Subscribe on YouTube for hundreds of free tutorials
- Sign up for our newsletter and receive 40% off your first Ravelry purchase!
- Sign up for our YouTube Membership
Abbreviations
Ch- Chain
Flo – Front Loop Only
Hdc – Half Double Crochet
Rep – Repeat
Sc – Single Crochet
Sc2tog – Single Crochet Decrease
Sp(s) – Space(s)
St(s) – Stitch(es)
( ) – Work step in parentheses in indicated stitch
Special Stitches
Reverse Sl St – Go through the stitch back to front, keep working yarn to the front, YU (Yarn Under) pulling through the loop on the hook.
Sc2tog – Single Crochet 2 together – Insert hook through indicated st and pull up a loop, insert hook in next st, pull up a loop, YO (Yarn Over), pull through 3 loops on the hook.
Construction
The Rustic Farmhouse Gnome is crocheted in a seamless, continuous round from the bottom up. Make sure to use a stitch marker to indicate the first stitch of each round for accurate tracking. Start by working on the base, then transition to decreasing stitches to shape the neck, and follow with increasing stitches for the head section. For added stability, place a rice bag in the base of the gnome. You can add stuffing progressively throughout the crocheting process. Finally, crochet the hat in the round and attach beard and nose.
Purchase the Beautifully Designed AD-FREE PDF Download
Rustic Farmhouse Holiday Crochet Gnome
FAQ & Terms
This pattern requires a beginner skill level.
This pattern is professionally written in technical writing and tech edited for accuracy.
1. Affiliate Links & Ad Support
This post may contain affiliate links. At no extra cost to you, purchases made through these links may earn MJ’s Off The Hook Designs a small commission. The content on this site is supported by advertisements. By using this site, you agree not to circumvent, block, or tamper with these ads.
2. Copyright & Intellectual Property
All content on this blog, including free crochet patterns, instructions, charts, photos, videos, and written materials, is the property of MJ’s Off The Hook Designs Inc. and is protected under copyright and other intellectual property laws.
3. Personal Viewing & Use Only
Free patterns published on this site are provided for viewing only on this blog. You may not:
• Copy, download, print, take screenshots, or redistribute the pattern in any form (digital or physical) outside this blog.
• Post the pattern or instructions elsewhere online or share it publicly without written consent.
Even for “personal use,” the pattern must only be used while viewing this blog post with the ads intact. Tampering with, hiding, or removing ads while accessing the pattern is strictly prohibited.
4. Screenshots & Unauthorized Sharing
Screenshots or any other method of copying the pattern for offline use or redistribution is prohibited. Sharing patterns in forums, social media groups, or private messages without permission is also prohibited.
5. Legal Enforcement
Violation of these terms may constitute copyright infringement and could result in civil or criminal penalties under intellectual property laws. By using this pattern, you agree to comply fully with these terms.
6. Questions & Permissions
For questions about these terms or for permission to use or share patterns outside of these rules, please contact MJ’s Off The Hook Designs Inc. in writing.
Thank you for respecting our work and supporting MJ’s Off The Hook Designs.
Yes! You may sell finished items made from MJ’s patterns, but please credit:
“Pattern by MJ’s Off The Hook Designs Inc.”
Pattern Support is only available in our Facebook Community group and Video Tutorials.
No additional support is provided for modified patterns, alternate yarns, or changes to gauge.
Pattern
Pattern tip: Change #4 Weight yarn to #6 Weight yarn from 1 skein – As shown in the diagram, position the yarn in a large S-shape. Bring the strands together and pull the working yarn through the loop created. Continue to pull the working yarn through the loop as you progress. For a visual guide, refer to the video tutorial.

Notes: The Gnome body is worked by holding together 3 strands of worsted-weight yarn. The Gnome Body is worked in a continuous round from the bottom up. Use a stitch marker to mark the first st of every round. The hat is worked with 1 strand only of worsted-weight yarn.
Hat
Band
Row 1:
With smaller hook and colour A, ch 11, 1 sc in 2nd ch from hook, 1 sc in each ch across, turn—10 sts.
Row 2:
Ch 1 (not included as a st here and throughout), 1 sc in the blo of each st across, turn—10 sts.
Rows 3-38:
Rep Row 2. After the final Row, turn, RS facing fold band together, ch 1, sl st band together.
Body
Setup Round:
Ch 1 (not included as a st here and throughout), 1 sc in each row around the band, rev sl st in the first sc to join—38 sts.
Rounds 1-3:
Ch 1, 1 hdc in each st around, sl st in first hdc to join—38 sts.
Round 4:
Ch 1, sk first st, 1 hdc in each st around, sl st in first hdc to join—37 sts.
Rounds 5-35:
Rep round 4 ending with 6 sts. Fasten off with a tail for seaming. Using a yarn needle and the finishing tail, weave through the flo of each stitch around. Pull the yarn tight and continue weaving through the last round to secure the closure. Trim end.
Pompom
Make a yarn pompom in B using a mini pompom maker in a 1.5″ size. Use a long tail when tying the pompom. With a yarn needle, use the yarn tails to knot the pompom to the tip of the hat. Trim tails.
Hat Finishing
Add a personalized tag to the hat brim for a personalized touch. (Shop Rivets)
Body
Base
Round 1:
With larger hook (triple the yarn), Magic Ring, ch 1, work 10 hdc in the ring, pull ring tight (don’t join)—10 sts.
Round 2:
2 sc in the blo of each st around—20 sts.
Round 3:
1 sc in the blo of first st, 2 sc in the blo of next st, *1 sc in the blo next st, 2 sc in the blo next st; rep from * around—30 sts.
Round 4:
1 sc in the blo of first 2 sts, 2 sc in the blo of next st, *1 sc in the blo next 2 sts, 2 sc in the blo of next st; rep from * around—40 sts.
Rounds 5-12:
1 sc in the blo of each st around—40 sts. Add a weighted rice bag and start stuffing with polyester fill.
Round 13 (Decr.):
1 sc in the blo first 2 sts, sc2tog in the blo across next 2 sts, *1 sc in the blo next 2 sts, sc2tog in the blo across next 2 sts; rep from * around—30 sts.
Round 14 (Decr.):
1 sc in the blo first st, sc2tog in the blo across next 2 sts, *1 sc in the blo next st, sc2tog in the blo across next 2 sts; rep from * around—20 sts.
Head *stuff as you go here and throughout the rest of the Gnome. See the size chart for accurate stuffing size
Round 15 (Incr.):
1 sc in the blo of first st, 2 sc in the blo of next st, *1 sc in the blo next st, 2 sc in the blo of next st; rep from * around—30 sts.
Rounds 16-21:
1 sc in the blo of each st around—30 sts.
Round 22 (Decr.):
1 sc in the blo first st, sc2tog in the blo across next 2 sts, *1 sc in the blo next st, sc2tog in the blo across next 2 sts; rep from * around—20 sts.
Round 23 (Decr.):
1 sc2tog in the blo across first 2 sts, *1 sc2tog in the blo across next 2 sts; rep from * around, sl st in first st to join—10 sts. Fasten off with a long tail for finishing.
Head Closure
Using a yarn needle and the finishing tail, weave through the flo of each stitch around. Pull the yarn tight and continue weaving through the last round to secure the closure. Trim end.
Finishing
Using a hot glue gun, attach the beard to the indented section of the gnome. Next, glue the nose, ensuring that it partially adheres to the body and hangs slightly over the beard. Finally, place the hat on the gnome’s head to complete the look.
I hope you love our crochet gnome pattern. You might also love these crochet patterns!

This pattern is designed by Michelle Moore of MJ’s Off The Hook Designs Inc., based in Lakefield, Ontario, Canada. Your go-to source for modern, easy crochet patterns. Published on November 28, 2024.
Thank you for visiting MJ’s Off The Hook Designs! I hope you enjoyed this pattern and feel inspired to pick up your hook and start creating.
You can find even more crochet patterns in our Ravelry and Etsy shops.
For daily inspiration and behind the scenes peeks join me over on Facebook or Instagram or join our YouTube Membership for exclusive content!
You’ve got questions, we’ve got a community!
Crocheting is better with friends! Join our group to post pictures and ask all your pattern support questions.