*This post may contain affiliate links to support the cost of this blog. At no cost to you, I may make a small commission if you purchase through these links. Read our Privacy Policy HERE
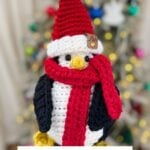


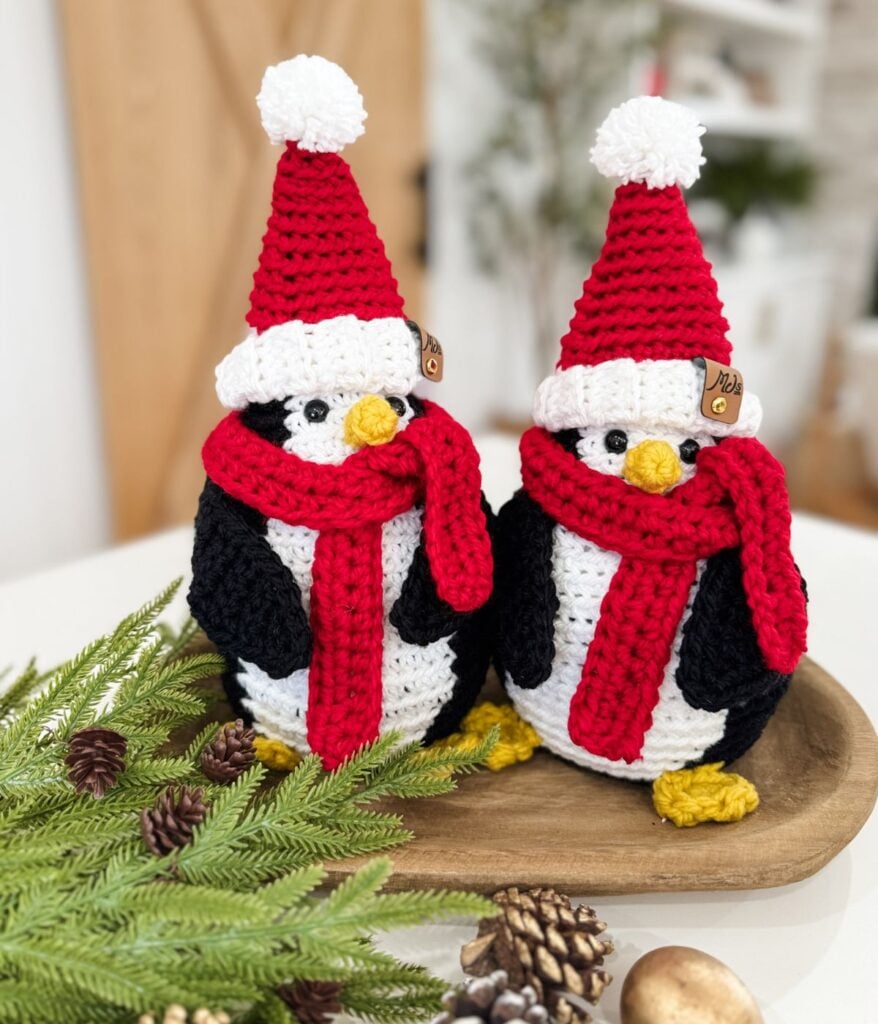
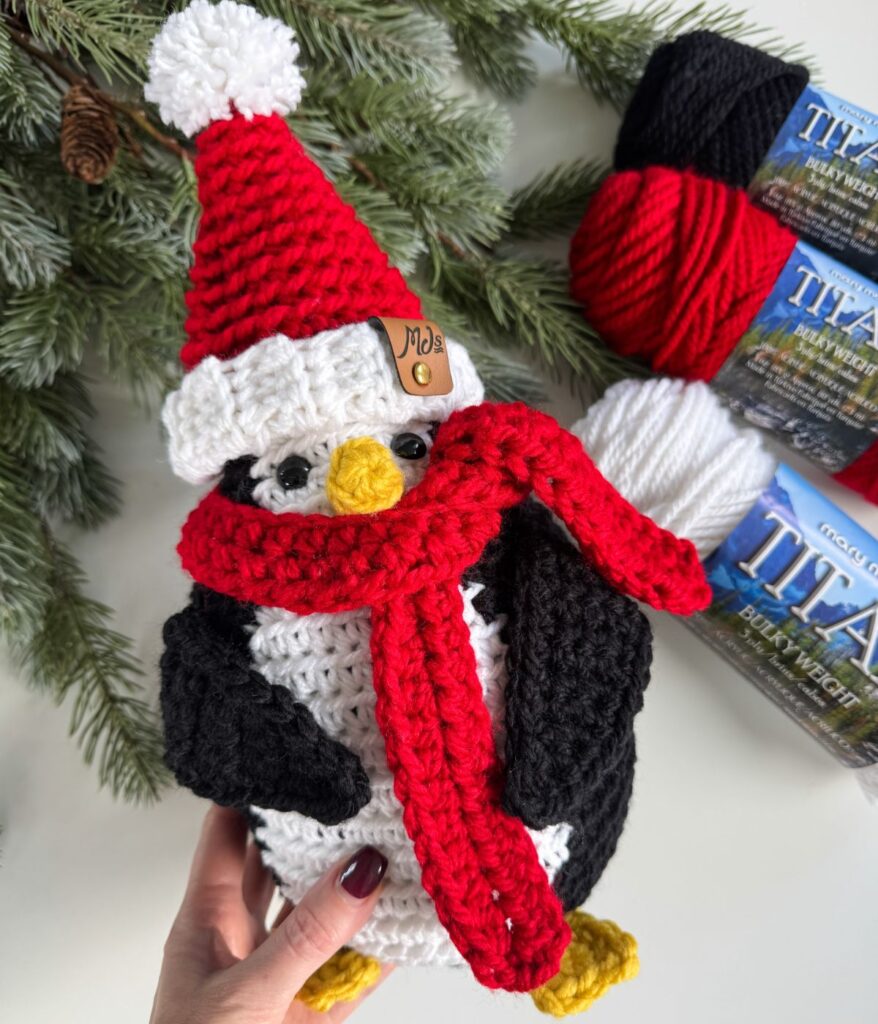
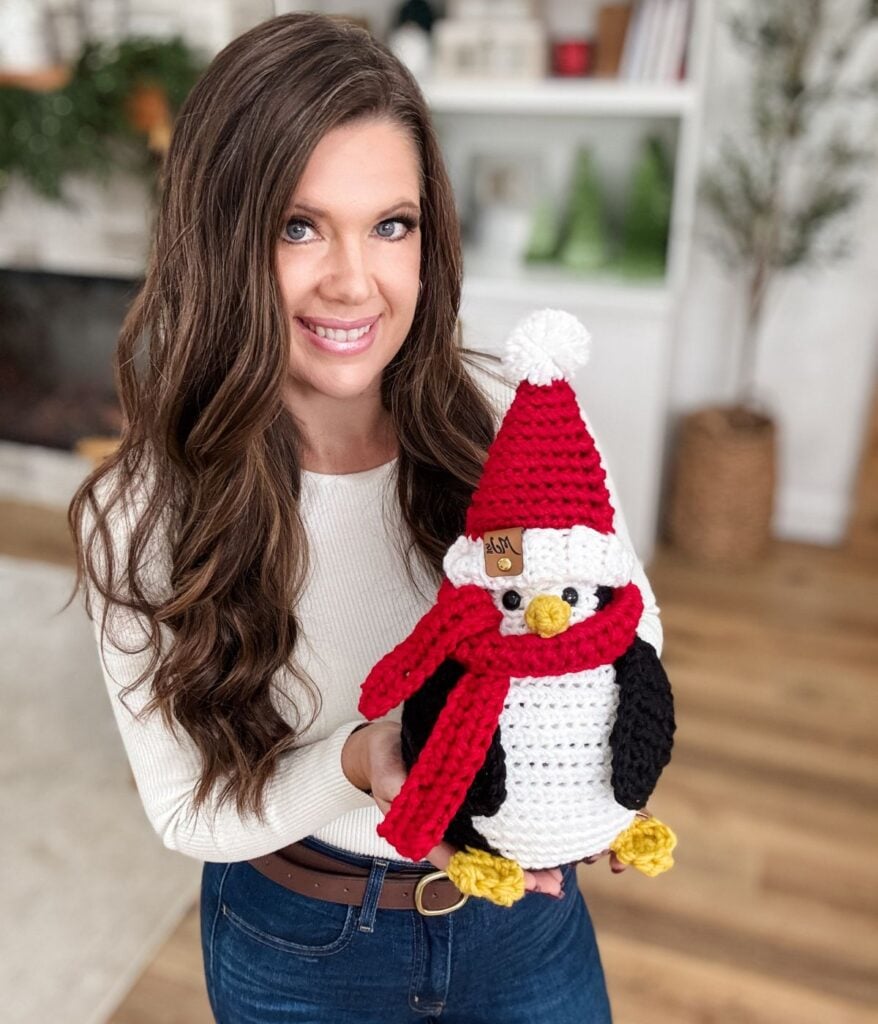
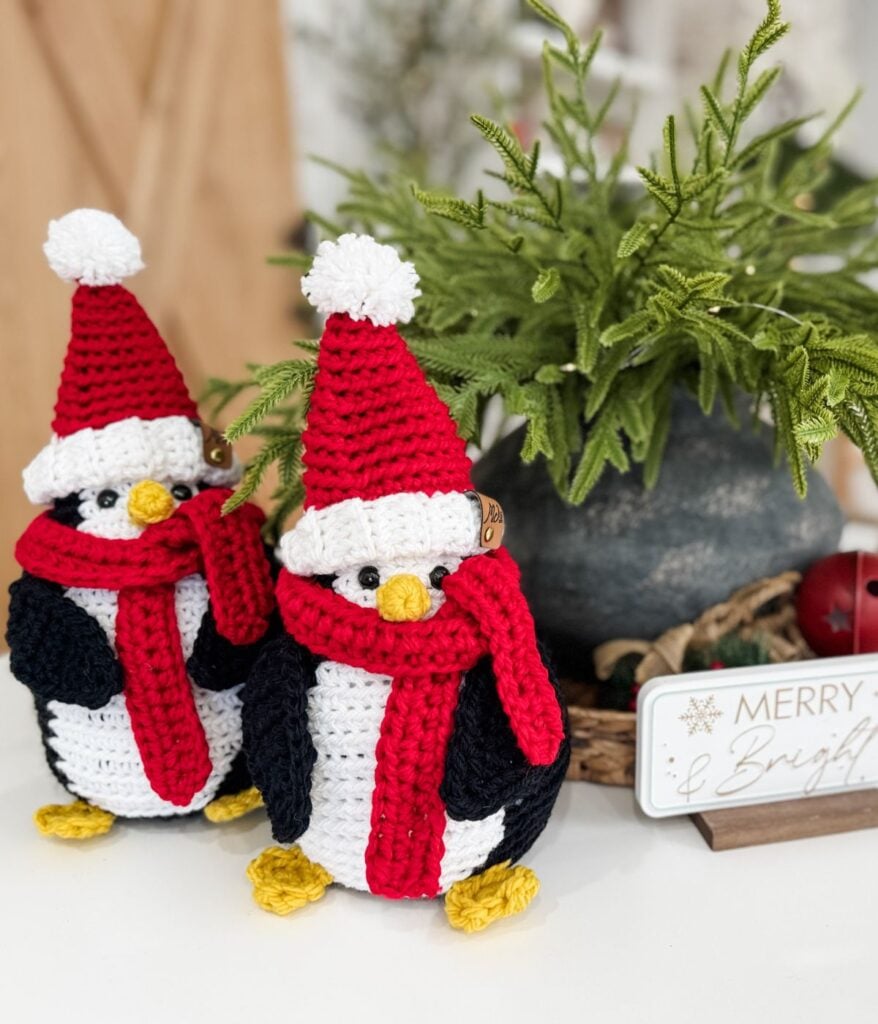
One of my favourite things about Christmas crochet is how one cute character can light up an entire room. The Merry and Bright Santa Penguin crochet pattern does exactly that. This happy little penguin is dressed in a classic Santa hat and scarf, ready to stand on your mantel, entry table, or tiered tray all season long.

Project Overview
The Christmas Penguin Crochet Pattern is a free, beginner-friendly amigurumi design of a penguin in a Santa hat and scarf, perfect for holiday décor. It’s made in one piece with simple stitches and includes a video tutorial.
Hook Sizes: US K/10.5 (6.5mm)
Construction: Easy construction worked in one piece from the bottom up
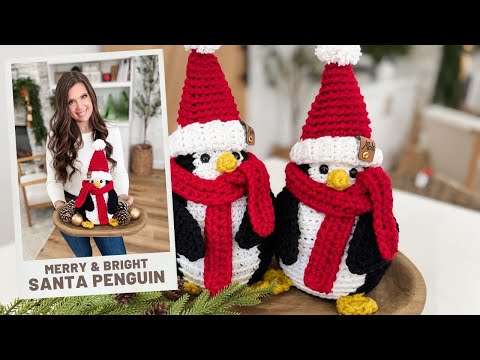
Video Tutorial: https://youtu.be/1lvUpVMag2Q?si=TxflUG_YDcZUpyDe
If you love quick festive makes, this Christmas penguin amigurumi will be one you come back to every year.
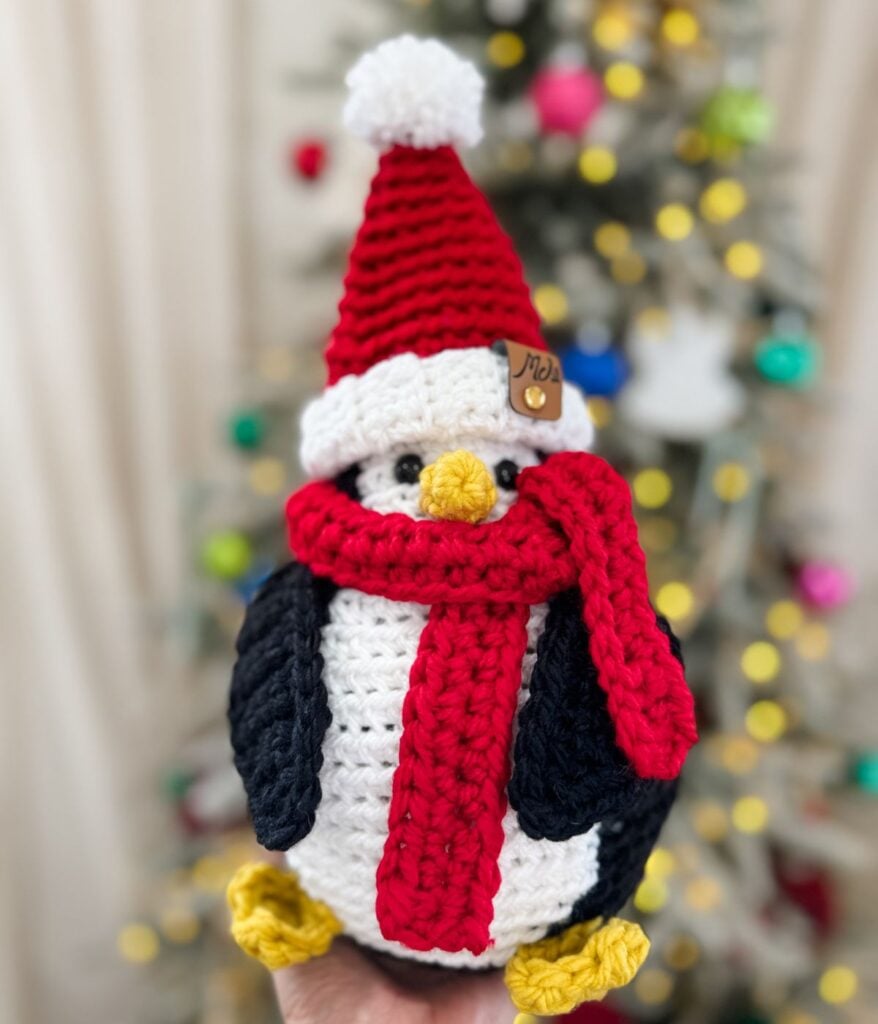
The Merry and Bright Santa Penguin is worked in one piece from the bottom up with simple single crochet stitches through the back loop. There is minimal seaming, the shaping is clean, and the colour changes are easy to follow. A small weighted pouch inside helps your penguin stand on its own, so it looks beautiful in any Christmas display.
Key Takeaways
- The Santa Penguin crochet pattern features a cute penguin in a Santa hat, perfect for Christmas decor.
- It’s beginner-friendly, using simple stitches and minimal seaming for easy assembly.
- A video tutorial is available on YouTube, guiding you through the entire crochet process.
- You can use chunky yarn to make this project quickly and enjoyably, enhancing your holiday spirit.
- The pattern includes materials needed, gauges, and helpful resources for support and inspiration.
Video Tutorial
Merry & Bright Santa Penguin Tutorial
Why You Will Love the Merry and Bright Santa Penguin Crochet Pattern
- Adorable Christmas penguin amigurumi that stands on its own
- Easy construction worked in one piece from the bottom up
- Simple colour changes for that classic tuxedo penguin belly
- Chunky yarn makes it a fast and satisfying holiday project
- Cosy Santa hat and matching scarf are worked separately and sewn on
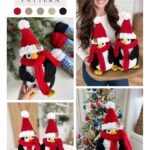
- Perfect for mantels, tiered trays, kids’ rooms, and festive shelves
- Great for gifts, holiday markets, or matching family décor
- Beginner-friendly with clear shaping and repeat rounds
- Step-by-step video tutorial available on YouTube
- Free crochet penguin pattern on the blog. plus an ad-free PDF upgrade
Yarn Needed To Make The Santa Penguin
Bulky Weight Yarn #5 , 100% Acrylic, 80yds/85g
1 ball each (A) Black 75 yds, (B) White 45 yds and (C) Cardinal 35yds.
Super Bulky Weight #6, 100% Acrylic, 108 yds/ 100g, a small amount in (D) Glowing Gold 12 yds

Yarn Substitutes
Here are a few yarns that can work well for this free Santa penguin crochet pattern. Always check gauge and adjust your hook size as needed.
- Bernat Softee Chunky CDN– 108 yds/100g
- Brava Bulky 136yds/100g
- PREMIER BASIX CHUNKY YARN CDN – 117yds/100g
- Lion Brand Hue + Me – 137 yds/100g
Materials Needed
- Yarn Needle
- Scissors
- Stitch Markers
- Measuring Tape
- Polyester Fill
- Pompom Maker
- Suffing Pellets (CAD) and a Plastic Bag
- 2 Safety Eyes 12mm (CAD)
- Personalized tag (Shop Rivets).
Gauge
6 sts and 6 rows equal to 2″ in sc blo with
6.5mm hook
It’s essential to match the pattern gauge and adjust your hook size as needed. You want a firm, dense fabric so the stuffing and pellets stay hidden and the penguin keeps its shape. If your stitches look loose or you notice gaps, switch to a smaller hook. If the fabric feels too stiff or difficult to work with, try going up a hook size.

Construction
The Merry & Bright Santa Penguin is crocheted in one piece from the bottom up, with smooth colour changes worked in continuous rounds. The Santa hat is made top down, and the scarf is worked side to side; both are attached after assembly. The feet and beak are crocheted separately and sewn to the body and head, while the wings are crocheted in rows and seamed to the sides. A small weighted bag is placed inside for balance, helping the penguin stand upright.
Size Chart
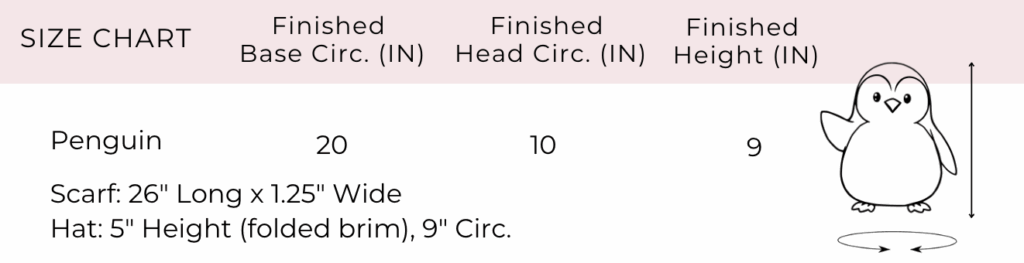
Abbreviations
Blo – Back Loop Only
Ch – Chain
Dc – Double Crochet
Hdc – Half Double Crochet
Rep – Repeat
RS – Right Side
Sc – Single Crochet
Sc2tog – Single Crochet Decrease
Sk – Skip
Sl St – Slip Stitch
Sp(s) – Space(s)
St(s) – Stitch(es)
WS – Wrong Side
Sc2tog – Single Crochet 2 together – Insert hook through indicated st and pull up a loop, insert hook in next st, pull up a loop, YO (Yarn Over), pull through 3 loops on the hook.
Helpful Resources
Sign up for our YouTube Membership
Join our Facebook Crochet Community for pattern support and inspiration
Subscribe on YouTube for hundreds of free tutorials
Sign up for our newsletter and receive 40% off your first Ravelry purchase!
Let’s Crochet Together on YouTube
Join our crochet community on YouTube, with hundreds of free tutorials for every skill level!

Upgrade to the Premium PDF Pattern
Digital PDF Download
Digital pattern only. No physical item will be shipped.
FAQ & Terms
This pattern requires a beginner skill level.
This pattern is professionally written in technical writing and tech edited for accuracy.
1. Affiliate Links & Ad Support
This post may contain affiliate links. At no extra cost to you, purchases made through these links may earn MJ’s Off The Hook Designs a small commission. The content on this site is supported by advertisements. By using this site, you agree not to circumvent, block, or tamper with these ads.
2. Copyright & Intellectual Property
All content on this blog, including free crochet patterns, instructions, charts, photos, videos, and written materials, is the property of MJ’s Off The Hook Designs Inc. and is protected under copyright and other intellectual property laws.
3. Personal Viewing & Use Only
Free patterns published on this site are provided for viewing only on this blog. You may not:
• Copy, download, print, take screenshots, or redistribute the pattern in any form (digital or physical) outside this blog.
• Post the pattern or instructions elsewhere online or share it publicly without written consent.
Even for “personal use,” the pattern must only be used while viewing this blog post with the ads intact. Tampering with, hiding, or removing ads while accessing the pattern is strictly prohibited.
4. Screenshots & Unauthorized Sharing
Screenshots or any other method of copying the pattern for offline use or redistribution is prohibited. Sharing patterns in forums, social media groups, or private messages without permission is also prohibited.
5. Legal Enforcement
Violation of these terms may constitute copyright infringement and could result in civil or criminal penalties under intellectual property laws. By using this pattern, you agree to comply fully with these terms.
6. Questions & Permissions
For questions about these terms or for permission to use or share patterns outside of these rules, please contact MJ’s Off The Hook Designs Inc. in writing.
Thank you for respecting our work and supporting MJ’s Off The Hook Designs.
Yes! You may sell finished items made from MJ’s patterns, but please credit:
“Pattern by MJ’s Off The Hook Designs Inc.”
Pattern Support is only available in our Facebook Community group and Video Tutorials.
No additional support is provided for modified patterns, alternate yarns, or changes to gauge.
Santa Penguin Crochet Pattern
Notes: The penguin is worked in continuous rounds from the bottom up. Use a stitch marker to mark the first stitch of each round. For colour changes, work the last yarn over of the stitch with the new colour. Drop the unused colours, do not cut the yarn or crochet over the tails. Floats will carry along the inside of the body; ensure they sit loosely so they don’t pull the fabric out of shape. See the video tutorial for a full demonstration of colour changes and float management.
Body
Round 1:
With A, Magic Ring, ch 1, work 10 hdc in the ring, pull ring tight (don’t join)—10 sts.
Round 2:
2 sc in the blo of each st around—20 sts.
Round 3:
1 sc in the blo of first st, 2 sc in the blo of next st, *1 sc in the blo next st, 2 sc in the blo next st; rep from * around—30 sts.
Round 4:
1 sc in the blo of first 2 sts, 2 sc in the blo of next st, *1 sc in the blo next 2 sts, 2 sc in the blo of next st; rep from * around—40 sts.
Round 5:
1 sc in the blo of first 3 sts, 2 sc in the blo of next st, *1 sc in the blo next 3 sts, 2 sc in the blo of next st; rep from * around—50 sts.
Rounds 6:
1 sc in the blo of each st around—50 sts.
Round 7:
1 sc in the blo next 21 sts, change to B, 1 sc in the blo next 8 sts, change to A, 1 sc in the blo next 21 sts—50 sts.
Round 8:
1 sc in the blo next 20 sts, change to B, 1 sc in the blo next 10 sts, change to A, 1 sc in the blo next 20 sts—50 sts.
Round 9:
1 sc in the blo next 19 sts, change to B, 1 sc in the blo next 12 sts, change to A, 1 sc in the blo next 19 sts—50 sts.
Round 10:
1 sc in the blo next 18 sts, change to B, 1 sc in the blo next 14 sts, change to A, 1 sc in the blo next 18 sts—50 sts.
Rounds 11-16:
Rep Round 10.
Round 17 (Decr.):
1 sc in the blo of each of the next 18 sts, change to B, sc2tog in the blo across next 2 sts, 1 sc in the blo next 10 sts, sc2tog in the blo across next 2 sts, change to A, 1 sc in the blo next 18 sts—48 sts.
Round 18 (Decr.):
1 sc in the blo of each of the next 18 sts, change to B, sc2tog in the blo across next 2 sts, 1 sc in the blo next 8 sts, sc2tog in the blo across next 2 sts, change to A, 1 sc in the blo next 18 sts—46 sts.
Round 19 (Decr.):
1 sc in the blo of each of the next 18 sts, change to B, sc2tog in the blo across next 2 sts, 1 sc in the blo next 6 sts, sc2tog in the blo across next 2 sts, change to A, 1 sc in the blo next 18 sts—44 sts.
Round 20 (Decr.):
1 sc in the blo first 2 sts, *sc2tog in the blo across next 2 sts, 1 sc in the blo next 2 sts*; rep from * to * 3 more times, change to B, 1 sc in the blo next 8 sts, change to A, 1 sc in the blo next 2 sts, rep from * to * 4 times—36 sts.
Round 21 (Decr.):
1 sc in the blo first st, *sc2tog in the blo across next 2 sts, 1 sc in the blo next st*; rep from * to * 3 more times, 1 sc in the blo next st, change to B, 1 sc in the blo next 8 sts, change to A, 1 sc in the blo next 2 sts, rep from * to * 4 times—28 sts.
Round 22:
1 sc in the blo next 10 sts, change to B, 1 sc in the blo next 8 sts, change to A, 1 sc in the blo next 10 sts—28 sts.
Round 23 (Decr.):
1 sc in the blo first st, *sc2tog in the blo across next 2 sts, 1 sc in the blo next st*; rep from * to * 2 more times, change to B, 1 sc in the blo next 8 sts, change to A, 1 sc in the blo next st, rep from * to * 3 times—22 sts.
Round 24:
1 sc in the blo next 7 sts, change to B, 1 sc in the blo next 8 sts, change to A, 1 sc in the blo next 7 sts—22 sts. Cut B.
Add a weighted bag to the body and stuff with polyester fill as you go, here and throughout the rest of the penguin. Mould the shape with your hands to form a smooth, rounded body and defined head. See the video tutorial for a demonstration of stuffing placement.
Round 25:
1 sc in the blo next 22 sts—22 sts
Rounds 26-27:
Rep Round 25.
Add the 12 mm safety eyes to Round 23 of the white section, positioning them approximately 1–2 stitches inward from the edge of the white area, or adjust the placement as needed.
Round 28:
Sc2tog in the blo across first 2 sts, *sc2tog in the blo across next 2 sts; rep from * around. Fasten off and finish stuffing the head. Using a yarn needle and the yarn tail, weave through the front loop only of each stitch around the top and pull gently to close the opening. Weave in all yarn tails securely and shape the head with your hands for a smooth, even finish.
Santa Hat
Notes: The hat is worked from the top down in continuous rounds. Use a stitch marker to indicate the first stitch of each round.
Round 1 (RS):
With C, Magic Ring, ch 1, work 6 sc in the ring, pull ring tight, don’t join—6 sts.
Increase Rounds
Round 2:
1 sc blo in first 2 sts, 2 sc blo in next st, 1 sc blo next 2 sts, 2 sc blo last st—8 sts.
Round 3:
1 sc blo in first 3 sts, 2 sc blo in next st, 1 sc blo next 3 sts, 2 sc blo last st—10 sts.
Round 4:
1 sc blo in first 4 sts, 2 sc blo in next st, 1 sc blo next 4 sts, 2 sc blo last st—12 sts.
Round 5:
1 sc blo in first 5 sts, 2 sc blo in next st, 1 sc blo next 5 sts, 2 sc blo last st—14 sts.
Round 6:
1 sc blo in first 6 sts, 2 sc blo in next st, 1 sc blo next 6 sts, 2 sc blo last st—16 sts.
Round 6:
1 sc blo in first 7 sts, 2 sc blo in next st, 1 sc blo next 7 sts, 2 sc blo last st—18 sts.
Round 7:
1 sc blo in first 8 sts, 2 sc blo in next st, 1 sc blo next 8 sts, 2 sc blo last st—20 sts.
Round 8:
1 sc blo in first 9 sts, 2 sc blo in next st, 1 sc blo next 9 sts, 2 sc blo last st—22 sts.
Round 9:
1 sc blo in first 10 sts, 2 sc blo in next st, 1 sc blo next 10 sts, 2 sc blo last st, sl st in the blo of next st, change to B —24 sts.
Round 10:
With B, 1 sc in the blo of each st around, sl st in first sc to join—24 sts.
Join-as-you-go Band
Row 1:
Ch 7, sc in the 2nd ch from hook and in each ch across, sk first st at the hat edge, sl st in the next 2 sts (edge), turn—6 sts.
Row 2:
Sk sl sts, sc in the blo of each st across, turn—6 sts.
Row 3:
Ch 1, sc in the blo of each st across, sl st in next 2 sts (edge), turn—6 sts.
Rows 4-24:
Rep Rows 2-3, ending after completion of Row 2 repeat. To join the band, ch 1, sl st the last row to row 1, working through the blo of each st across. Fasten off and weave in ends. Fold over the brim to finish.
Pompom
Make a yarn pompom in B using a mini pompom maker in a 1.5″ size. Use a long tail when tying the pompom. With a yarn needle, use the yarn tails to knot the pompom to the tip of the hat. Trim tails.
Hat Finishing
Add a personalized tag to the hat brim for a personalized touch. Set aside.
Scarf
Notes: The scarf is worked from side to side.
Row 1:
With C, loosely ch 61, 1 hdc in the back bump of the 2nd ch from hook and in each ch across, turn—60 sts
Row 2:
Ch 1, 1 hdc in each st across, fasten off and weave in ends. Set aside.
Beak
Round 1:
With D, Magic Ring, ch 1, work 6 sc in the ring, pull ring tight, sl st in first sc to join—6 sts.
Round 2:
Ch 1, 1 sc in each st around, sl st in first sc to join—6 sts. Fasten off, leaving a tail for sewing. Position the beak centred just below the eyes on Round 22 and sew securely in place. Weave in the yarn tail to finish.
Flippers (Feet) – Make 2
Row 1:
With D, ch 4, 1 sc in the back bump of the 2nd ch from hook and in each ch across, turn—3 sts.
Row 2:
Ch 2, 1 dc in first st, ch 1, sl st in next st, ch 1, 1 dc in last st, ch 2, sl st to last st. Fasten off, leaving a tail for sewing, and weave in the starting tail. Position the feet on each side of the white belly, aligning them around Rounds 5–6. Sew securely in place, ensuring the feet sit slightly under the body and lay flat against the surface so the penguin stands evenly.
Wings – Make 2
Left Wing
Row 1 (WS):
With A, ch 2, 1 sc in the 2nd ch from hook, turn—1 sts.
Row 2 (RS):
Ch 1, 2 sc in st, turn—2 sts.
Row 3:
Ch 1, 2 sc in first st, 1 sc in next st, turn—3 sts.
Row 4:
Ch 1, 1 sc in first 2 sts, 2 sc in last st, turn—4 sts. Proceed to row 5.
Right Wing
Row 1 (WS):
With A, ch 2, 1 sc in the 2nd ch from hook, turn—1 sts.
Row 2 (RS):
Ch 1, 2 sc in st, turn—2 sts.
Row 3:
Ch 1, 1 sc in first st, 2 sc in next st, turn—3 sts.
Row 4:
Ch 1, 2 sc in first, 1 sc in next 2 sts, turn—4 sts.
Rows 5-10:
Ch 1, 1 sc in each st across, turn—4 sts. On the last row, ch 1, then sc in each row across the side of the wing. Work 3 sc in the tip of the wing, then 1 sc down the other side. Continue to sc across the last row, sl st in the first sc to join, and fasten off, leaving a tail for sewing. Weave in the starting tail.
Position the wings on either side of the white belly, aligning them with the narrow section of the white area. Using a yarn needle, sew the wings securely in place and weave in all tails to finish.
Finishing
Tie the scarf around the penguin’s neck and place on the Santa hat to complete your Merry & Bright Santa Penguin.
If you enjoyed our Free Santa Penguin Crochet Pattern, you may also enjoy these patterns;
You’ve got questions, we’ve got a community!
Crocheting is better with friends! Join our group to post pictures and ask all your pattern support questions.