*This post may contain affiliate links to support the cost of this blog. At no cost to you, I may make a small commission if you purchase through these links. Read our Privacy Policy HERE
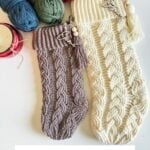
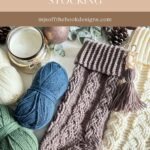
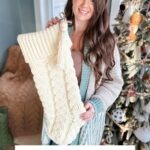
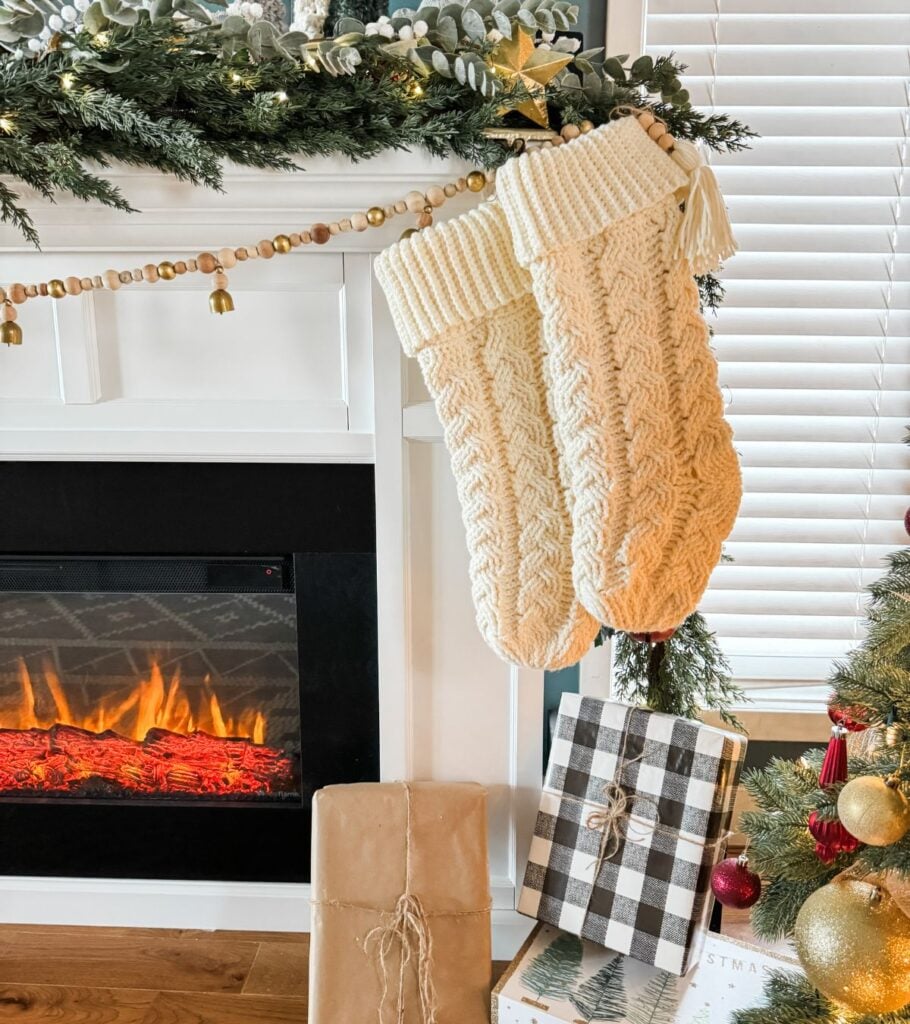
Introducing the Cozy Cottage Cable Stocking Crochet Pattern! This pattern is perfect for those who love intricate cable designs and cozy holiday decor. With two sizes to choose from, you can create a stocking that suits your preference.
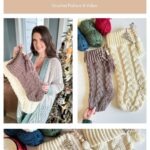
Featuring 5 cables in either a 6 or 9-stitch cable pattern, this pattern allows you to showcase your crochet skills while creating a stunning finished product. The stockings are worked from the toe up in the round, ensuring a seamless and professional-looking result.
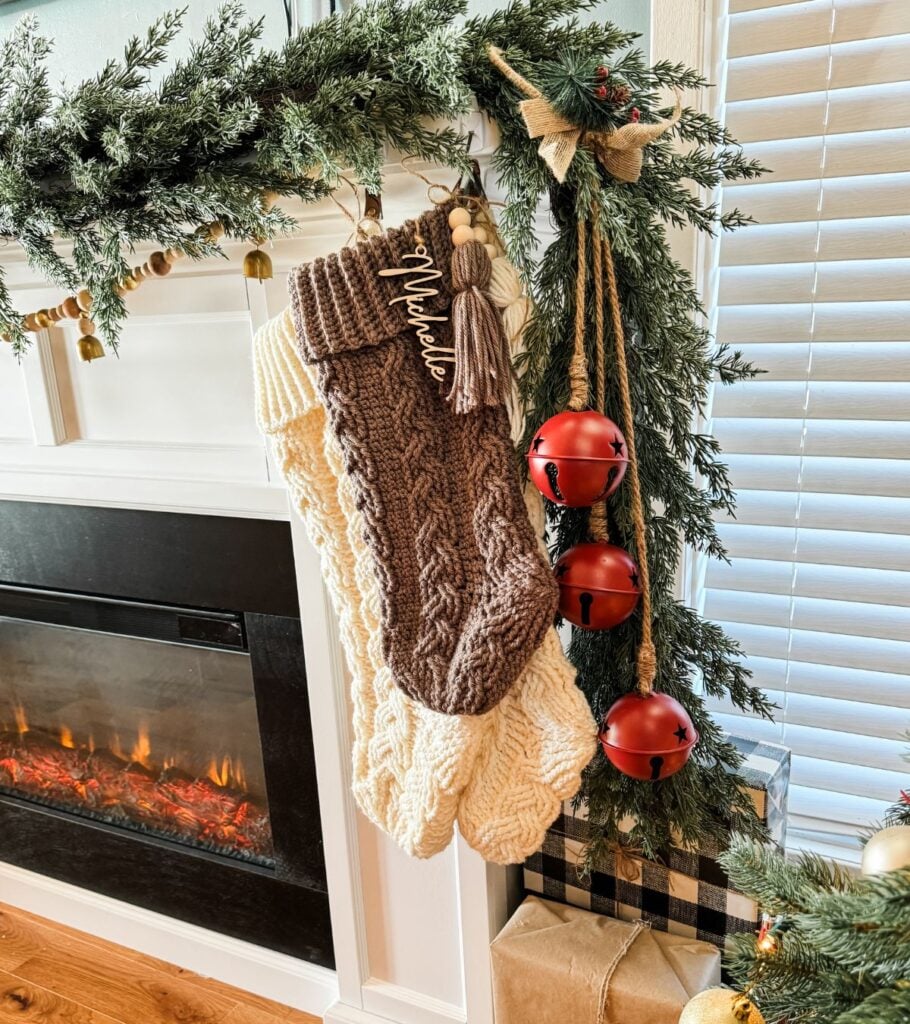
One of the highlights of this pattern is the fold-over ribbed cuff, adding an extra touch of charm and coziness to your stockings. Beaded tassels add a festive and whimsical touch to take your stockings to the next level.
To make the crochet process as easy as possible, this pattern includes detailed stitch diagrams and a helpful video tutorial. Whether you’re a visual learner or prefer written instructions, we’ve got you covered.
Designed specifically for Starlette worsted weight yarn from Mary Maxim, you can expect high-quality, soft, and durable stockings that will last for years to come. Get ready to elevate your holiday decor with the Cozy Cottage Cable Stocking Crochet Pattern!
Below, you will find everything you need to make this Crochet Christmas stocking, including the yarn, hook, materials, free written pattern for blog subscribers, pictures and a video tutorial. If you love this free crochet stocking pattern, please share!


Project Overview
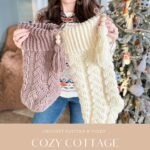
The Cozy Cottage Cabled Stocking is a festive crochet pattern featuring elegant cable stitches and a fold over ribbed cuff for a classic, cozy holiday look. Worked toe up in the round, the pattern includes two sizes, detailed diagrams, and a step by step video tutorial, making it ideal for crocheters who want to create a beautiful handmade stocking with textured cables.
Hook Sizes: US I/9 (5.5mm)
Video Tutorial: https://youtu.be/6NH2blgwSpI
Key Takeaways
- The Cabled Stocking crochet pattern features intricate cable designs with two sizes available for customization.
- This pattern includes detailed diagrams and video tutorials to assist both visual and written learners.
- Utilize Mary Maxim Starlette yarn for soft, durable stockings that enhance quality and design.
- The design incorporates a charming fold-over ribbed cuff and optional beaded tassels for festive flair.
- Join the supportive community for pattern support and additional crochet tips via social media platforms.
Create a Stunning Cabled Stocking
When it comes to holiday decorations, there’s something truly special about handmade creations. That’s why we believe crocheting your own cabled stocking is a marvellous idea! Not only do you get to indulge in the joy of creating something unique, but you also get to infuse the finished piece with your own personal touch and love. Our cozy Cottage Cabled Stocking crochet pattern offers a delightful way to add warmth and charm to your holiday festivities. Imagine hanging this beautiful stocking on your mantel, knowing that every stitch was crafted by your own hands. It’s a heartwarming display of creativity and craftsmanship that will surely become a cherished part of your holiday traditions. So why settle for a mass-produced stocking when you can pour your heart and soul into every stitch? Start crocheting today and create a treasured heirloom that will be enjoyed for years to come.
How do you Crochet a Cable?
Crocheting cables can seem daunting at first, but with the right stitches and techniques, you can achieve stunning results. When crafting our enchanting Cozy Cottage Cabled Stocking, we used a combination of special stitches to create intricate cables that truly elevate the design. See Special stitches for abbreviations.
- Back Post Double Crochet (bpdc)
- Front Post Double Crochet (fpdc)
- Front Post Treble Crochet (fptr)
By incorporating these cable stitches into your crochet projects, like our Cozy Cottage Cabled Stocking, you’ll add a touch of elegance and intricacy that will impress everyone who lays eyes on your creation. Don’t be afraid to experiment and explore the world of cables—the results can be truly breathtaking. You can always check out my step-by-step tutorial to guide you along the way.
Video
We invite you to check out our detailed video tutorial on crocheting the Large 9 stitch cable stocking on our YouTube channel. This tutorial is perfect for crocheters with intermediate to advanced skills who are eager to tackle an intricate cable pattern.
In this video, we will demonstrate how to start the stocking using the magic ring technique. You’ll learn how to increase the toe using front post double crochet stitches for a cozy look. We’ll also provide detailed instructions on crocheting the cable stitch, creating the heel opening, and completing the cable pattern for the leg of the stocking.
The tutorial will also cover working a join-as-you-go ribbed cuff using single crochet stitches in the back loop only, ensuring a cozy finish. We’ll show you how to finish the heel with front post double crochet stitches and guide you on decreasing the front post double crochet stitch while completing the heel.
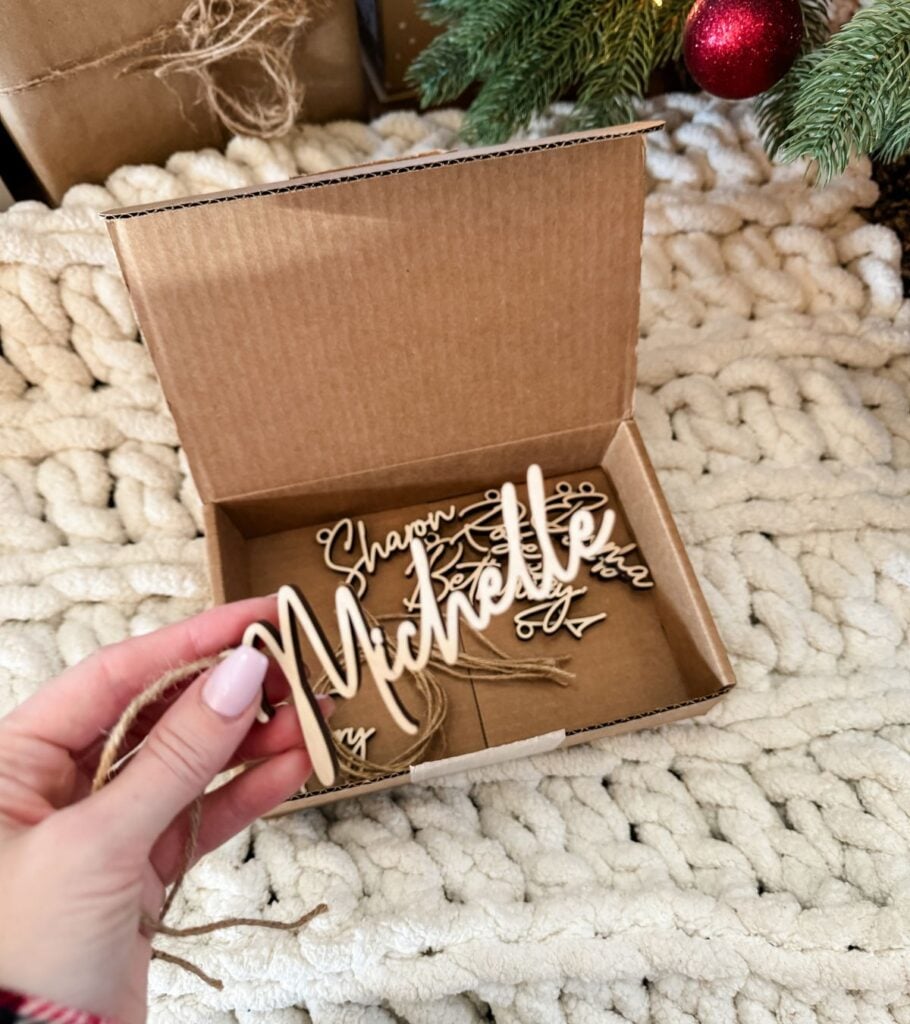
For those final festive touches, the video will demonstrate how to make a tassel and attach it to the stocking. We’ll also provide guidance on adding a tag for easy hanging and personalization. If you’re ready to take on this intermediate to advanced crochet pattern with its beautiful cable design, head to our YouTube channel and follow our step-by-step video tutorial.

Yarn Recommended for a Crochet Stocking
When it comes to crocheting a stocking, we highly recommend using Mary Maxim Starlette CDN Yarn. This soft and durable 100% acrylic yarn is perfect for creating our charming Cozy Cottage Cabled Stocking.
Mary Maxim Starlette CDN Worsted Weight Yarn is known for its excellent quality and reliability. It’s on the heavy side of a worsted, close to a bulky weight. It’s a classic standard that you can always count on for your crochet projects. With over 40 beautiful colours available, you can find the perfect shade to match your personal style and home decor.
This versatile yarn is suitable for a wide range of projects, including cozy sweaters, blankets, scarves, hats, and stockings. With its machine wash and dry care instructions, you can easily maintain the pristine condition of your finished creations.
Mary Maxim Starlette Worsted Weight Yarn provides great stitch definition and works up beautifully to showcase the intricate details of the Cozy Cottage Cabled Stocking.
Whether you’re an experienced crafter or just starting out, the affordable price and quality of Mary Maxim Starlette Worsted Weight Yarn make it an excellent choice for all your crochet needs. Don’t miss out on creating beautiful, long-lasting projects with this exceptional yarn. Order yours today and get ready to crochet your very own cozy cottage-cabled stocking that will be cherished for years to come!

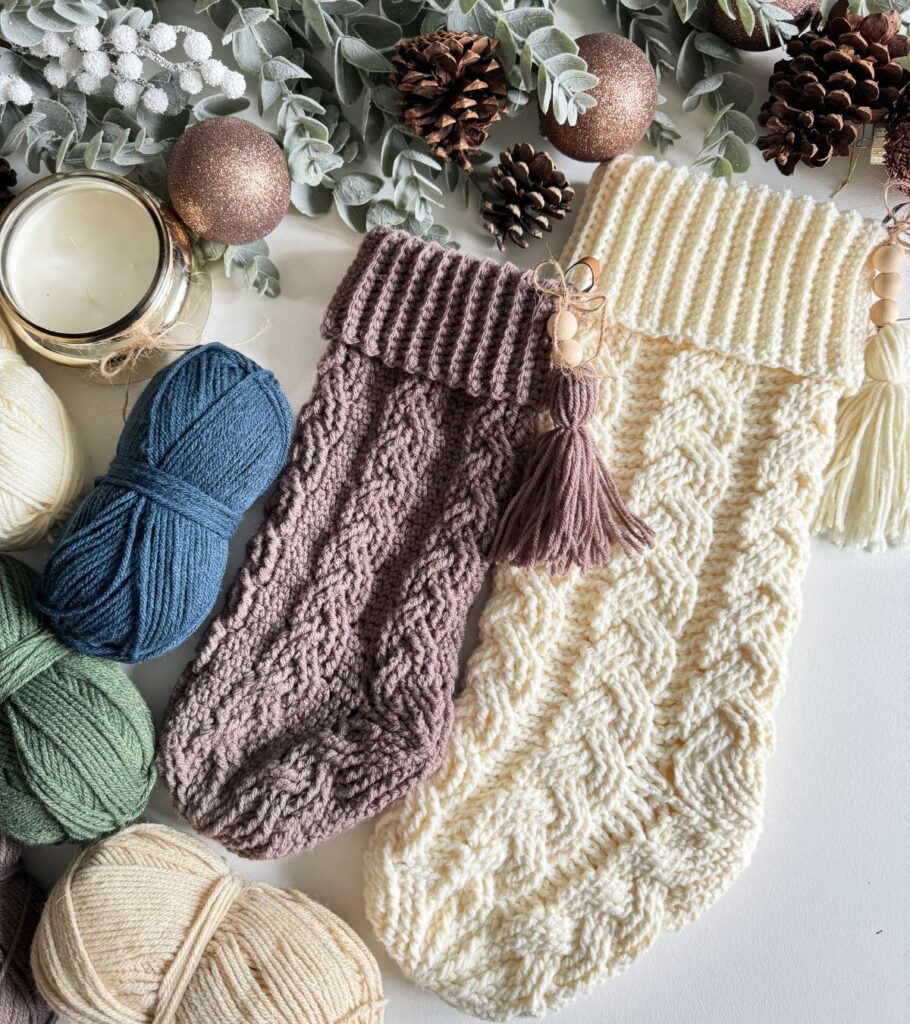
Crochet Cabled Stocking Yarn Requirements
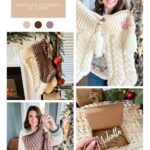
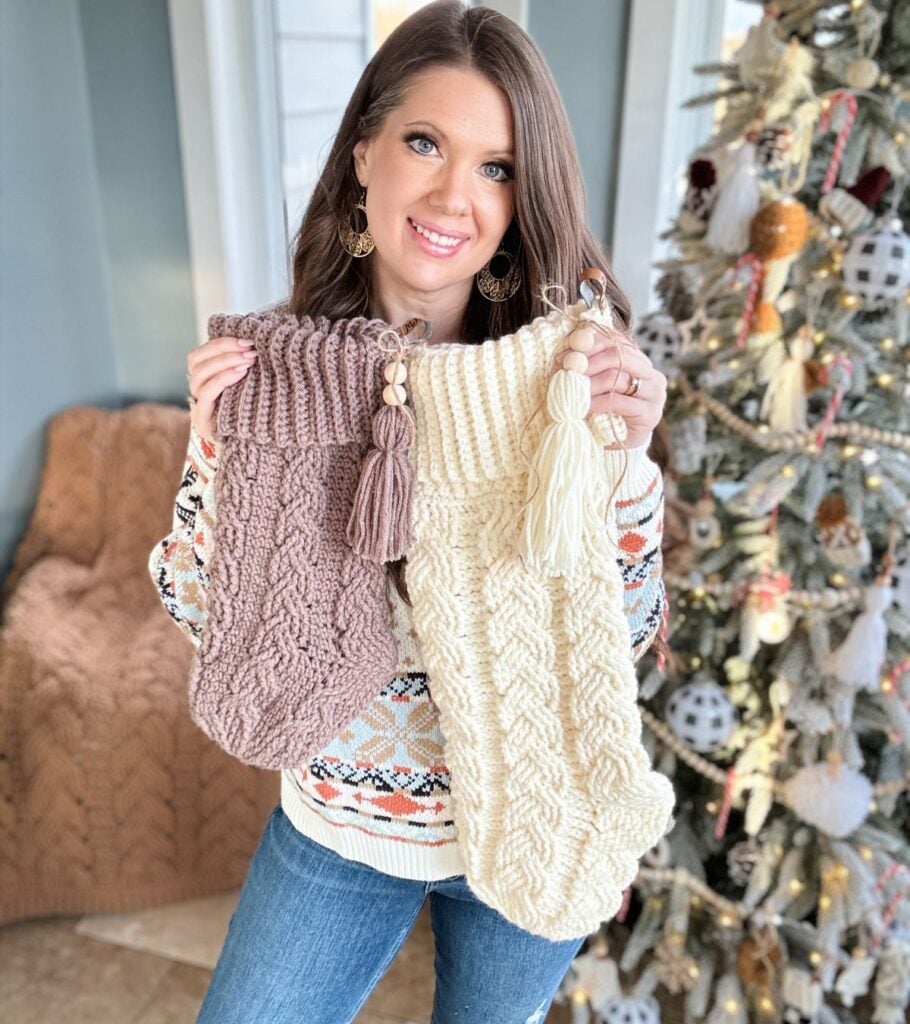
Worsted Weight #4 Shown in Natural & Warm Brown
100% Acrylic, 180yds/100g
Small (Large)
300 (585) Yds / 2 (4) Balls

Substituting Yarn
When it comes to yarn substitution for the Cozy Cottage Cabled Stocking pattern, you have plenty of flexibility to get creative and achieve different sizes and textures. Since the stocking is a decorative piece rather than a garment or accessory, feel free to have fun experimenting with different weight yarns.
If you wish to achieve a similar size as the pattern suggests, selecting a yarn with a similar weight to what’s recommended in the pattern is a good starting point. Additionally, making a gauge swatch before starting your project is always a good idea, as it helps ensure that your tension and stitch count match the pattern’s specifications.
Embrace the opportunity to explore different yarns and their unique textures to add your personal touch to the Cozy Cottage Cabled Stocking. Happy crocheting!
Yarn Substitutes
Brava Worsted or Brava Tweed 218yds/100g
Premier Anti-Pilling 180yds/100g CDN site
Mary Maxim Aran Irish Twist 205yds/100g CDN SITE
Heatherly worsted 218yds/100g
Crochet Hooks Needed
Use code MJS15 for 15% off Furls Crochet
Additional Supplies for the Crochet Stocking
Wooden Beads (20mm)
Helpful Resources
Sign up for our YouTube Membership
Join our Facebook Crochet Community for pattern support and inspiration
Subscribe on YouTube for hundreds of free tutorials
Sign up for our newsletter and receive 40% off your first Ravelry purchase!
Gauge
Small Stocking
1 Stitch repeat (9 sts) equal to 2.25″
1 Row repeat (4 rows) equal to 1.5″
Large Stocking
1 Stitch repeat (12 sts) equal to 2.75″
1 Row repeat (4 rows) equal to 1.5″
Upgrade to the premium pdf pattern!
Digital PDF Download
Digital pattern only. No physical item will be shipped.
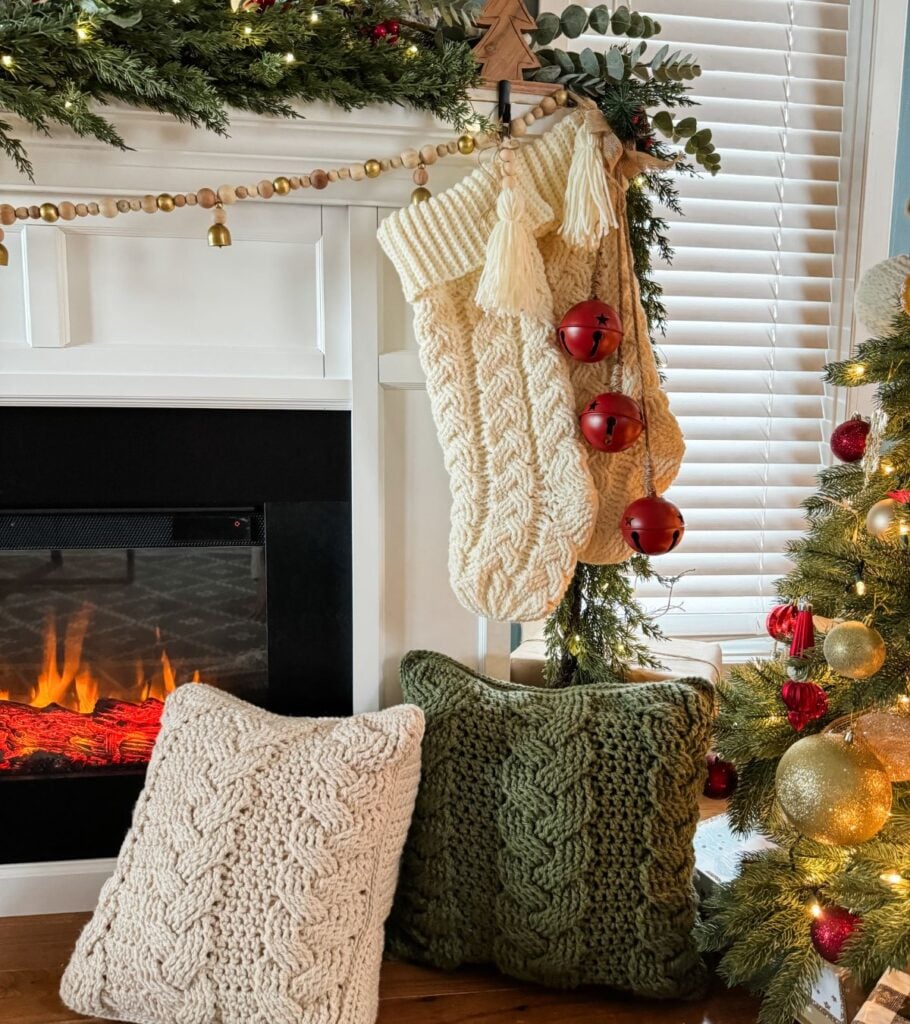
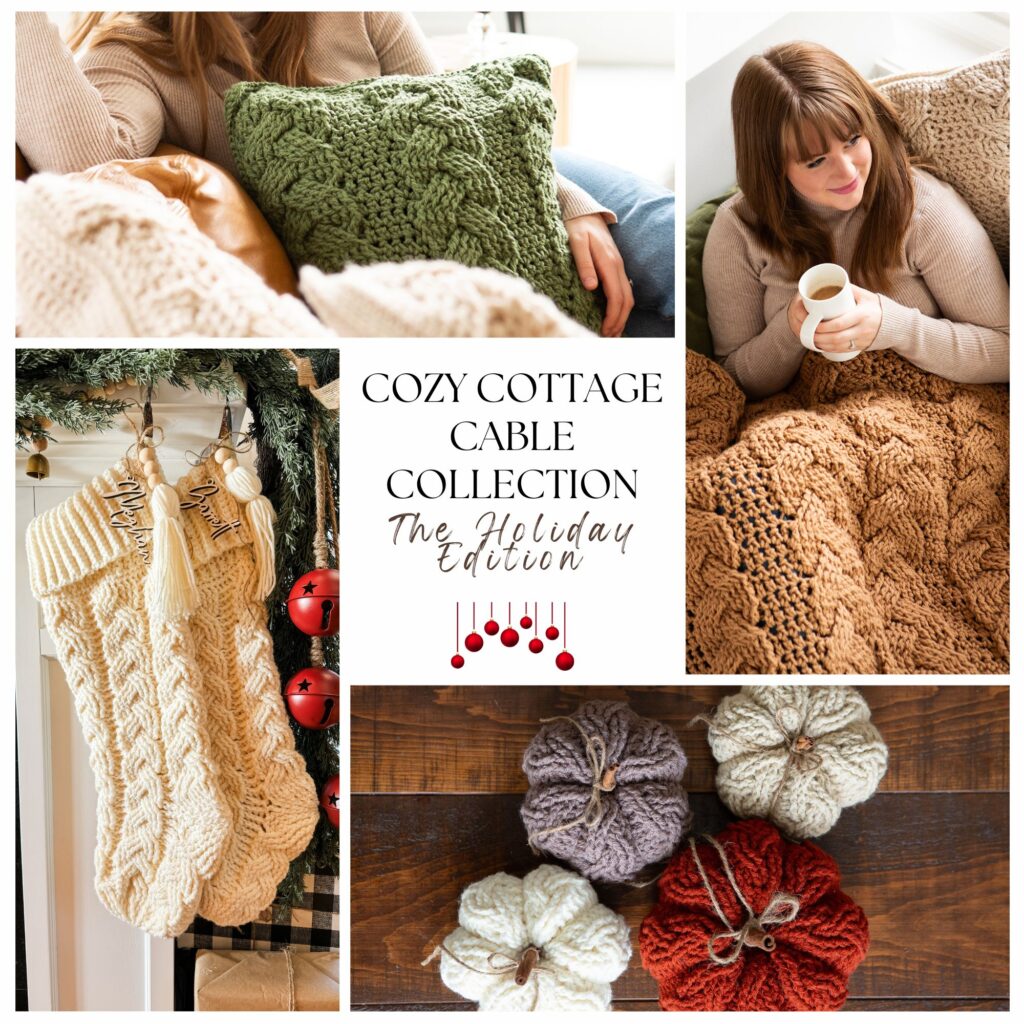
Cozy Cottage Cable Collection
Introducing the Cozy Cottage Cable Collection – The Holiday Edition Ebook! Inside, you’ll discover a wonderful assortment of cable crochet patterns that will add warmth and elegance to your home this Holiday Season.
The ebook features four patterns: the Cozy Cottage Cabled Throw, Cabled Pillow, Cabled Stocking, and Cabled Pumpkin. You’ll find easy-to-follow written instructions, stitch diagrams, and video tutorials to assist you at every step.
BUY NOW
Cozy Cottage Cabled Stocking
COPYRIGHT
FAQ & Terms
This pattern requires a beginner skill level.
This pattern is professionally written in technical writing and tech edited for accuracy.
1. Affiliate Links & Ad Support
This post may contain affiliate links. At no extra cost to you, purchases made through these links may earn MJ’s Off The Hook Designs a small commission. The content on this site is supported by advertisements. By using this site, you agree not to circumvent, block, or tamper with these ads.
2. Copyright & Intellectual Property
All content on this blog, including free crochet patterns, instructions, charts, photos, videos, and written materials, is the property of MJ’s Off The Hook Designs Inc. and is protected under copyright and other intellectual property laws.
3. Personal Viewing & Use Only
Free patterns published on this site are provided for viewing only on this blog. You may not:
• Copy, download, print, take screenshots, or redistribute the pattern in any form (digital or physical) outside this blog.
• Post the pattern or instructions elsewhere online or share it publicly without written consent.
Even for “personal use,” the pattern must only be used while viewing this blog post with the ads intact. Tampering with, hiding, or removing ads while accessing the pattern is strictly prohibited.
4. Screenshots & Unauthorized Sharing
Screenshots or any other method of copying the pattern for offline use or redistribution is prohibited. Sharing patterns in forums, social media groups, or private messages without permission is also prohibited.
5. Legal Enforcement
Violation of these terms may constitute copyright infringement and could result in civil or criminal penalties under intellectual property laws. By using this pattern, you agree to comply fully with these terms.
6. Questions & Permissions
For questions about these terms or for permission to use or share patterns outside of these rules, please contact MJ’s Off The Hook Designs Inc. in writing.
Thank you for respecting our work and supporting MJ’s Off The Hook Designs.
Yes! You may sell finished items made from MJ’s patterns, but please credit:
“Pattern by MJ’s Off The Hook Designs Inc.”
Pattern Support is only available in our Facebook Community group and Video Tutorials.
No additional support is provided for modified patterns, alternate yarns, or changes to gauge.
Abbreviations
Blo – Back Loop Only
Bpdc – Back Post Double Crochet
Ch – Chain
Dc – Double Crochet
Fpdc – Front Post Double Crochet
FPtr – Front Post Treble Crochet
Rep – Repeat
Sc – Single Crochet
Sk – Skip
Sl St – Slip Stitch
Sp(s) – Space(s)
St(s) – Stitch(es)
( ) – Work step in parentheses in indicated stitch
Special Stitches
Back Post Double Crochet (bpdc): Yo (Yarn Over), insert your hook from back to front to back around the post of the next stitch; yo, pull up a loop; yo, pull through 2 loops on your hook, yo, pull through remaining two loops on your hook.
Front Post Double Crochet (fpdc):
Yo, insert your hook from front to back to front around the post of the next stitch; yo, pull up a loop; yo, pull through 2 loops on your hook; yo, pull through the remaining two loops on your hook.
Front Post Double Crochet Decrease (fpdc2tog):
[Yo, insert your hook from front to back to front around the post of the next stitch; yo, pull up a loop; yo, pull through 2 loops on your hook] twice; yo, pull through the remaining three loops on your hook.
Front Post Treble Crochet (fptr):
Yo twice, insert your hook from front to back to front around the post of the next stitch; yo, pull up a loop; [yo, pull through 2 loops on your hook] twice; yo, pull through remaining two loops on your hook.
2(3)-over-2(3) left cross front post treble cable (2/2(3/3) L FPtr):
Skip next 2(3) stitches, FPtr around next 2(3) stitches, working in front FPtr just made, FPtr around first skipped stitch, and next skipped stitch.
2(3)-over-2(3) right cross front post treble cable (2/2(3/3) R FPtr):
Skip next 2(3) stitches, FPtr around next 2(3) stitches, working in behind FPtr just made, FPtr around first skipped stitch and next skipped stitch.
Pattern
Work in the round from the toe up. The Small stocking is shown substituting bpdc stitches for esc stitches.
Small Stocking
Toe
Round 1:
Magic ring, ch 2, 9 dc in the ring, pull ring tight, sl st in first dc to join—9 sts.
Increase
Round 2:
Ch 1 (not included as a st here and throughout), 2 fpdc around each st around, sl st in first fpdc to join—18 sts.
Round 3:
Ch 1, 1 fpdc on first st, 2 fpdc on next st, * 1 fpdc on next st, 2 fpdc on next st; rep from * around, sl st in first fpdc to join—27 sts.
Round 4:
Ch 1, 1 fpdc on first 2 sts, 2 fpdc on next st, * 1 fpdc on next 2 sts, 2 fpdc on next st; rep from * around, sl st in first fpdc to join—36 sts.
Round 5:
Ch 1, 1 fpdc on first 3 sts, 2 fpdc on next st, * 1 fpdc on next 3 sts, 2 fpdc on next st; rep from * around, sl st in first fpdc to join—45 sts.
Cable
Round 6:
Ch 1, *2/2 L FPtr, 1 fpdc on each of next 2 sts, 1 bpdc on each of next 3 sts; rep from * around, sl st in first fptr to join—45 sts.
Round 7:
Ch 1, *1 fpdc on each of next 6 sts, 1 bpdc on each of next 3 sts; rep from around, sl st in first fpdc to join—45 sts.
Round 8:
Ch 1, *1 fpdc on each of next 2 sts, 2/2 R FPtr, 1 bpdc on each of next 3 sts; rep from * around, sl st in first fpdc to join—45 sts.
Round 9:
Ch 1, *1 fpdc on each of next 6 sts, 1 bpdc on each of next 3 sts; rep from around, sl st in first fpdc to join—45 sts.
Rounds 10-13:
Rep Rounds 6-9. For a longer foot section, work additional repeats.
Heel Opening
Round 14:
Ch 15, sk 15 sts, 1 bpdc on each of next 3 sts, *2/2 L FPtr, 1 fpdc on each of next 2 sts, 1 bpdc on each of next 3 sts; rep from * around, sl st in first ch to join—45 sts.
Round 15:
Ch 1, 1 dc in each ch across, 1 bpdc on each of the next 3 sts, *1 fpdc on each of next 6 sts, 1 bpdc on each of next 3 sts; rep from * around, sl st in first dc to join—45 sts.
Round 16:
Ch 1, *1 fpdc on each of next 2 sts, 2/2 R FPtr, 1 bpdc on each of next 3 sts; rep from * around, sl st in first fpdc to join—45 sts.
Round 17:
Ch 1, *1 fpdc on each of next 6 sts, 1 bpdc on each of next 3 sts; rep from around, sl st in first fpdc to join—45 sts.
Rounds 18-37:
Rep Rounds 6-9.
Band:
The band is worked in rows and joined as you go to the setup round of the stocking.
Setup Round:
Ch 1, work 1 sc in each st around ending with 2 sc in last st, sl st in first sc to join—46 sts.
Row 1:
Ch 23, sc in the 2nd ch from hook and in each ch across, sk first st at the stocking edge, sl st in the next 2 sts (edge), turn—22 sts.
Row 2:
Sk sl sts, sc in the blo of each st across, turn—22 sts.
Row 3:
Ch 1, sc in the blo of each st across, sl st in next 2 sts (edge), turn—22 sts.
Rows 4-46:
Rep Rows 2-3, ending after completion of Row 2 repeat. To join the band, ch 1, sl st the last row to row 1, working through the blo of each st across. Fasten off and weave in ends.
Heel
Fold the stocking with the heel opening facing and toe down.
Round 1:
Join yarn in 2nd st of bpdc sts with a sl st, 1 fpdc in same st and in each st around, add 1 fpdc at each corner of heel (see video for tips on closing the gap), sl st in first fpdc to join—32 sts.
Round 2:
Ch 1, *1 fpdc on each of next 2 sts, fpdc2tog across next 2 sts; rep from * around, sl st in first fpdc to join—24 sts.
Round 3:
Ch 1, *1 fpdc on each of next 2 sts, fpdc2tog across next 2 sts; rep from * around, sl st in first fpdc to join—18 sts.
Round 4:
Ch 1, *1 fpdc on each of next 2 sts, fpdc2tog across next 2 sts; rep from * around, end with 1 fpdc on last 2 sts, sl st in first fpdc to join—14 sts.
Round 5:
Ch 1, *1 fpdc on next st, fpdc2tog across next 2 sts; rep from * around, end with 1 fpdc on last 2 sts, sl st in first fpdc to join—10 sts. Fasten off with a tail, with yarn needle, weave yarn through every other st around, pull tight and weave in ends.
Large Stocking
Toe
Round 1:
Magic ring, ch 2, 10 dc in the ring, pull ring tight, sl st in first dc to join—10 sts.
Increase
Round 2:
Ch 1 (not included as a st here and throughout), 2 fpdc around each st around, sl st in first fpdc to join—20 sts.
Round 3:
Ch 1, 1 fpdc on first st, 2 fpdc on next st, * 1 fpdc on next st, 2 fpdc on next st; rep from * around, sl st in first fpdc to join—30 sts.
Round 4:
Ch 1, 1 fpdc on first 2 sts, 2 fpdc on next st, * 1 fpdc on next 2 sts, 2 fpdc on next st; rep from * around, sl st in first fpdc to join—40 sts.
Round 5:
Ch 1, 1 fpdc on first 3 sts, 2 fpdc on next st, * 1 fpdc on next 3 sts, 2 fpdc on next st; rep from * around, sl st in first fpdc to join—50 sts.
Round 6:
Ch 1, 1 fpdc on first 4 sts, 2 fpdc on next st, * 1 fpdc on next 4 sts, 2 fpdc on next st; rep from * around, sl st in first fpdc to join—60 sts.
Cable
Round 7:
Ch 1, * 3/3 L FPtr, 1 fpdc on each of next 3 sts, 1 bpdc on each of next 3 sts; rep from * around, sl st in first fptr to join—60 sts.
Round 8:
Ch 1, * 1 fpdc on each of next 9 sts, 1 bpdc on each of next 3 sts; rep from around, sl st in first fpdc to join—60 sts.
Round 9:
Ch 1, * 1 fpdc on each of next 3 sts, 3/3 R FPtr, 1 bpdc on each of next 3 sts; rep from * around, sl st in first fpdc to join—60 sts.
Round 10:
Ch 1, * 1 fpdc on each of next 9 sts, 1 bpdc on each of next 3 sts; rep from around, sl st in first fpdc to join—60 sts.
Rounds 11-18:
Rep Rounds 7-10. For a longer foot section, work additional repeats.
Heel Opening
Round 19:
Ch 21, sk 21 sts, 1 bpdc on each of next 3 sts, * 3/3 L FPtr, 1 fpdc on each of next 3 sts, 1 bpdc on each of next 3 sts; rep from * around, sl st in first ch to join—60 sts.
Round 20:
Ch 1, 1 dc in each ch across, 1 bpdc on each of the next 3 sts, * 1 fpdc on each of next 9 sts, 1 bpdc on each of next 3 sts; rep from around, sl st in first dc to join—60 sts.
Round 21:
Ch 1, * 1 fpdc on each of next 3 sts, 3/3 R FPtr, 1 bpdc on each of next 3 sts; rep from * around, sl st in first fpdc to join—60 sts.
Round 22:
Ch 1, * 1 fpdc on each of next 9 sts, 1 bpdc on each of next 3 sts; rep from around, sl st in first fpdc to join—60 sts.
Rounds 23-46:
Rep Rounds 7-10.
Cuff:
The cuff is worked in rows and joined as you go to the setup round of the stocking.
Setup Round:
Ch 1, work 1 sc in each st around, sl st in first sc to join—60 sts.
Row 1:
Ch 31, sc in the 2nd ch from hook and in each ch across, sk first st at the stocking edge, sl st in the next 2 sts (edge), turn—30 sts.
Row 2:
Sk sl sts, sc in the blo of each st across, turn—30 sts.
Row 3:
Ch 1, sc in the blo of each st across, sl st in next 2 sts (edge), turn—30 sts.
Rows 4-60:
Rep Rows 2-3, ending after completion of Row 2 repeat. To join the band, ch 1, sl st the last row to row 1, working through the blo of each st across. Fasten off and weave in ends.
Heel
Fold the stocking with the heel opening facing and toe down.
Round 1:
Join yarn in 2nd st of bpdc sts with a sl st, 1 fpdc in same st and in each st around, add 1 fpdc at each corner of heel (see video for tips on closing the gap), sl st in first fpdc to join—44 sts.
Round 2:
Ch 1, * 1 fpdc on each of next 2 sts, fpdc2tog across next 2 sts; rep from * around, sl st in first fpdc to join—33 sts.
Round 3:
Ch 1, * 1 fpdc on each of next 2 sts, fpdc2tog across next 2 sts; rep from * around, end with 1 fpdc on last st, sl st in first fpdc to join—25 sts.
Round 4:
Ch 1, * 1 fpdc on each of next 2 sts, fpdc2tog across next 2 sts; rep from * around, end with 1 fpdc on last st, sl st in first fpdc to join—19 sts.
Round 5:
Ch 1, * 1 fpdc on each of next 2 sts, fpdc2tog across next 2 sts; rep from * around, end with 1 fpdc on last 3 sts, sl st in first fpdc to join—15 sts.
Round 6:
Ch 1, * 1 fpdc on next st, fpdc2tog across next 2 sts; rep from * around, sl st in first fpdc to join—10 sts. Fasten off with a tail, with yarn needle, weave yarn through every other st around, pull tight and weave in ends.
Tassels
Cut 30 yarn strands that are 14-16 inches long each. Cut one 20-inch length of yarn for the tassel ball and one 36-inch length of twine for tying to the stocking. Next, tie and knot the 30 strands together with the twine at the halfway point. Tie the 20-inch yarn length tightly around all the strands, creating a small ball shape. Knot and weave ends under the ball. Trim. If adding decorative wooden beads, thread them down the twine toward the tassel ball with a yarn needle. Finally, attach the tassel to the stocking by tying it securely with the twine. You can use twine or a faux leather tag to hang the stocking.
BUY THE PDF
You May Also Love These Patterns
This pattern is designed by Michelle Moore of MJ’s Off The Hook Designs Inc based in Lakefield Ontario Canada. Your go to source for modern easy crochet patterns. Published on November 20th, 2023.
Thank you for visiting MJ’s Off The Hook Designs I hope you enjoyed this pattern and feel inspired to pick up your hook and start creating.
You can find even more crochet patterns in our Ravelry and Etsy shops.
For daily inspiration and behind the scenes peeks join me over on Facebook or Instagram or join our YouTube Membership for exclusive content!
You’ve got questions, we’ve got a community!
Crocheting is better with friends! Join our group to post pictures and ask all your pattern support questions.