*This post may contain affiliate links to support the cost of this blog. At no cost to you, I may make a small commission if you purchase through these links. Read our Privacy Policy HERE
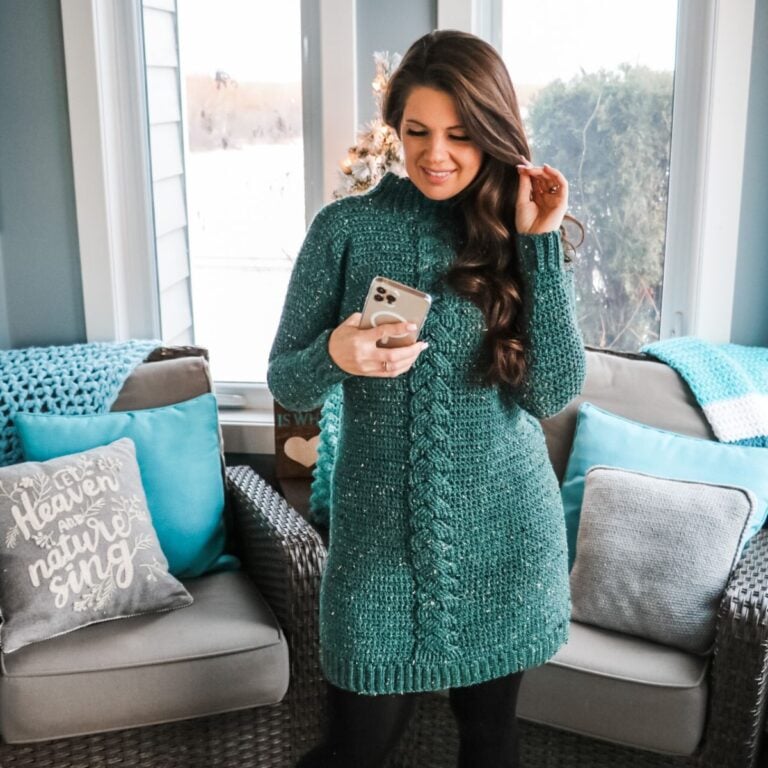
Just in time for Father’s Day we’ve released the Dapper Dad Pullover crochet pattern. The crochet cables add gorgeous texture to this crochet cabled sweater that looks knit! Find the free step-by-step tutorial for Medium size pictured on YouTube and keep scrolling for the free crochet sweater pattern.
Below you will find everything you need to crochet the Dapper Dad Pullover Crochet Pattern, including the yarn, hook, materials, free written pattern for blog subscribers, pictures and a video tutorial. If you like this Free Crochet Mens Sweater, please share!
Key Takeaways
- The Dapper Dad Pullover crochet pattern features crochet cables that resemble knit fabric, ideal for Father’s Day.
- The pattern includes a free written version, a video tutorial on YouTube, and yarn alternatives due to the original yarn being discontinued.
- To crochet the pullover, follow the bottom-up construction instructions, seaming pieces together as specified.
- Yarn and hook requirements are clearly listed, along with a size chart for different measurements.
- You can purchase an ad-free PDF version of the Dapper Dad Pullover pattern on Ravelry or Etsy.
The Dapper Dad Pullover crochet pattern is worked from the bottom up in pieces then seamed together. The collar is worked separately then seamed to the neck opening.
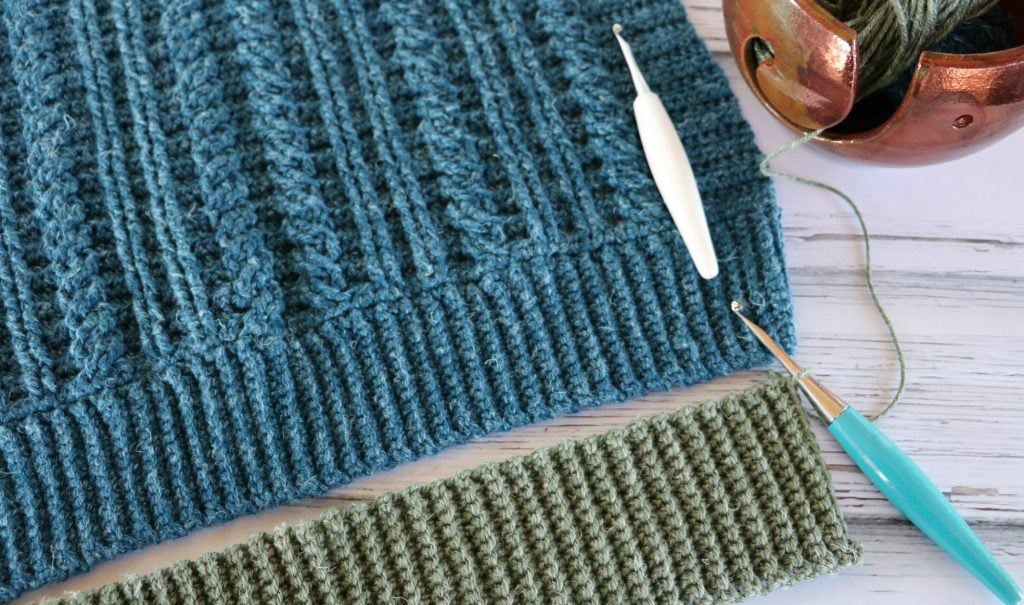
The gorgeous crochet cable stitch works up beautifully in a 2-row repeat. This masculine cozy crochet design is made in Sugar Bush Yarns Shanty, shown in Sea Glass. Unfortunately, this yarn has been discontinued but I have a list of alternative yarns you’ll love for this cabled crochet sweater pattern.
How to figure out yarn substitutions. See this BLOG POST
How to roll a hank into a cake. See this BLOG POST
Purchase the beautifully designed Ad-Free PDF on Ravelry or Etsy.
Watch the How to crochet a men’s cabled sweater video tutorial on YouTube. Pictured size Medium with finished Chest 44″
For a perfect finish, it’s recommended that you steam your garment. You can purchase the steamer we use HERE in Canada and HERE in the US.
Dapper Dad Pullover Crochet Pattern
Get the Ad-Free PDF on RAVELRY or ETSY
Pin it Here for later!
Size Chart: S (M, L, XL, 2X, 3X, 4X, 5X)
Chest Measurement:
inches 34-36 (38-40, 42-44, 46-48, 50-52, 54-56, 58-60, 62-64)
Finished Chest:
inches 40 (44, 49, 53, 57.5, 62, 66, 70)
Yarn Requirements:
Dapper Dad Pullover
Worsted Weight yarn #4 – The original yarn used is discontinued. Suggested alternatives.
Yards 1780 (1950, 2180, 2360, 2560, 2760, 2930, 3110)

Crochet Hook Requirements:
US G+/7 (4.5mm) crochet hook or size needed to obtain gauge
US H/8 (5mm) crochet hook or size needed to obtain gauge
FURLS crochet hooks HERE
Additional Supplies:
Yarn Needle
Stitch Markers
Helpful Resources
- Join our Facebook Crochet Community for pattern support and inspiration
- Subscribe on YouTube for hundreds of free tutorials
- Sign up for our newsletter and receive 40% off your first Ravelry purchase!
- Sign up for our YouTube Membership
Gauge:
15 sts and 11 rows equal to 4″ in hdc
9 sts and 9 rows equal to 2″ in sc blo
SPECIAL STITCHES
Fpdc – Front Post Double Crochet:
Yo (Yarn Over), insert your hook from front to back to front around the post of the next stitch, yo, pull up a loop, yo, pull through 2 loops on your hook, yo, pull through remaining two loops on your hook.
Fptr – Front Post Treble Crochet:
Yo (Yarn Over) twice, insert your hook from front to back to front around the post of the next stitch, yo, pull up a loop, yo, pull through 2 loops on your hook twice, yo, pull through remaining two loops on your hook.
Bpdc – Back Post Double Crochet:
Yo (Yarn Over), insert your hook from back to front to back around the post of the next stitch, yo, pull up a loop, yo, pull through 2 loops on your hook, yo, pull through the remaining two loops on your hook.
FAQ & Terms
This pattern requires an intermediate skill level.
This pattern is professionally written in technical writing and tech edited for accuracy. You need to be comfortable reading technical repeats.
Written in standard American terms.
This post may contain affiliate links. Purchases made through these links may earn MJ’s Off The Hook Designs Inc. a small commission at no extra cost to you. Content on this site is supported by ads—please do not block or remove them.
Copyright
All patterns, photos, and written content are the property of MJ’s Off The Hook Designs Inc. and protected by copyright law.
Usage
Free patterns are for viewing only on this blog. You may not copy, download, print, screenshot, or redistribute any part of the pattern. Access must remain through this page with ads visible. Use of ad blockers, reader view, or any similar tools that remove or hide ads and site content is strictly prohibited.
Legal Notice
Unauthorized reproduction or distribution may result in copyright infringement penalties.
By accessing this post, you agree to these terms and conditions.
Yes! You may sell finished items made from MJ’s patterns, but please credit:
“Pattern by MJ’s Off The Hook Designs Inc.”
Pattern Support is only available in our Facebook Community group and Video Tutorials.
No additional support is provided for modified patterns, alternate yarns, or changes to gauge.
If you’re seeing the message “Email subscription failed, please try again”, don’t worry — it’s usually an easy fix! Here are a few quick things to try:
First, double-check your login details. Make sure you’re signing in with the same email you originally used to create your Grow account. If you’re not sure, click “Forgot Password” to reset your login. Once you’ve updated it, return to my site and try again.
Next, clear your browser’s cache and cookies. Sometimes the login just gets stuck. You can also try opening the page in a private or incognito window, or switching to another browser like Chrome, Safari, or Firefox to see if that does the trick.
It also helps to make sure you’re logged into Grow directly. Visit https://grow.me and sign in there first. Once you’re logged in, come back to my site and refresh the page — your pattern should unlock automatically.
If you’re still having trouble, check your browser’s privacy settings. Grow needs cookies to verify your account, so make sure cookies and cross-site tracking are allowed. On iPhone, go to Settings → Safari → Privacy & Security, then turn off “Prevent Cross-Site Tracking” and “Block All Cookies.” On Android or Chrome, go to Settings → Site Settings → Cookies and select “Allow all cookies.”
Lastly, ad blockers or browser extensions can sometimes block the login pop-up. Try turning them off temporarily while you sign in. If nothing seems to work, log out of Grow completely by going to https://grow.me, selecting your profile icon, and choosing Log Out. Then come back to my site and try logging in again.
If you’re still stuck after trying all of this, please reach out through my Contact Page and let me know what device and browser you’re using (and include a screenshot if you can).
Instructions:
The pullover is worked from the bottom up. The Front, back and sleeves are worked separately, then seamed together. The collar is worked separately then seamed to the neck opening. The pattern is written for the smallest size with larger sizes in parentheses ( ). If there is only 1 number, it applies to all sizes. Step by Step Video tutorial is provided on our YouTube channel for size Medium.
To Unlock Exclusive Subscriber content click the Box below! The Grow.me App will pop up so you can subscribe. Enter your email and create a password. Every time you see Exclusive Content on my blog, log in to your Grow account. Make sure to switch to the login screen. If you’ve forgotten your password, click the forgot password link. I am not able to assist in resetting Grow passwords or accessing your Grow account. I have created a video for mobile and desktop to offer assistance. Find under FAQs HERE or watch the video below.
@mjsoffthehook How to view free patterns on my blog. Click link in my bio #exclusivecontent #freecrochetpatterns #grow #mediavine
♬ FEEL THE GROOVE – Queens Road, Fabian Graetz
I hope you enjoyed this pattern! For more designs by MJ’s Off The Hook Designs see our Ravelry, Etsy, LoveCrafts or WeCrochet Shop. Check out our Facebook and Instagram for daily inspiration!
If you enjoy this pattern, you may also like:
Thanks so much for supporting me with a pattern purchase! You can purchase the Dapper Dad Pullover HERE
This pattern is designed by Michelle Moore of MJ’s Off The Hook Designs Inc, based in Lakefield, Ontario, Canada. Your go-to source for modern, easy crochet patterns. Published on February 24th, 2022.
Thank you for visiting MJ’s Off The Hook Designs. I hope you enjoyed this pattern and feel inspired to pick up your hook and start creating.
You can find even more crochet patterns in our Ravelry and Etsy shops.
For daily inspiration and behind-the-scenes peeks, join me over on Facebook or Instagram, or join our YouTube Membership for exclusive content!


*This post contains affiliate links at no cost to you!
You’ve got questions, we’ve got a community!
Crocheting is better with friends! Join our group to post pictures and ask all your pattern support questions.


