*This post may contain affiliate links to support the cost of this blog. At no cost to you, I may make a small commission if you purchase through these links. Read our Privacy Policy HERE


Many crochet projects begin with a slip knot and a foundation chain, while others may begin with a ring worked in the round.
In this lesson, we’ll focus on the slip knot and chain, which form the foundation of most beginner projects.
These first steps may feel small, but they are incredibly important. A comfortable slip knot and an even chain make learning the rest of crochet much easier. In this lesson, we’ll slow everything down and focus on building a strong foundation before moving on to stitches.
Take your time here. This is where your hands start learning the movements that will carry you through every project you make.
What Is a Slip Knot?
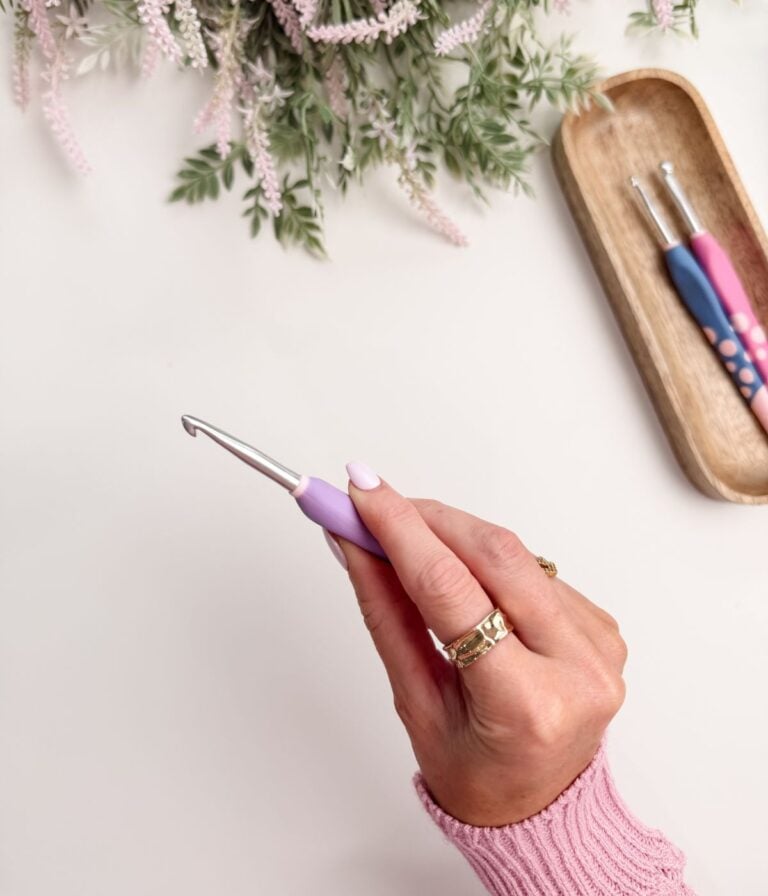
A slip knot is an adjustable loop that places your yarn onto the crochet hook. It tightens and loosens as needed, which allows the yarn to move smoothly while you crochet.
It is one of the most common ways to begin a crochet project, especially when working rows or starting with a foundation chain. Some projects that are worked in the round may begin differently, but the slip knot remains an essential skill for every crocheter to learn.
The slip knot should sit comfortably on your hook. It should not be pulled tight or squeezed down onto the shaft. A relaxed slip knot allows your hook to glide easily through the yarn as you work.
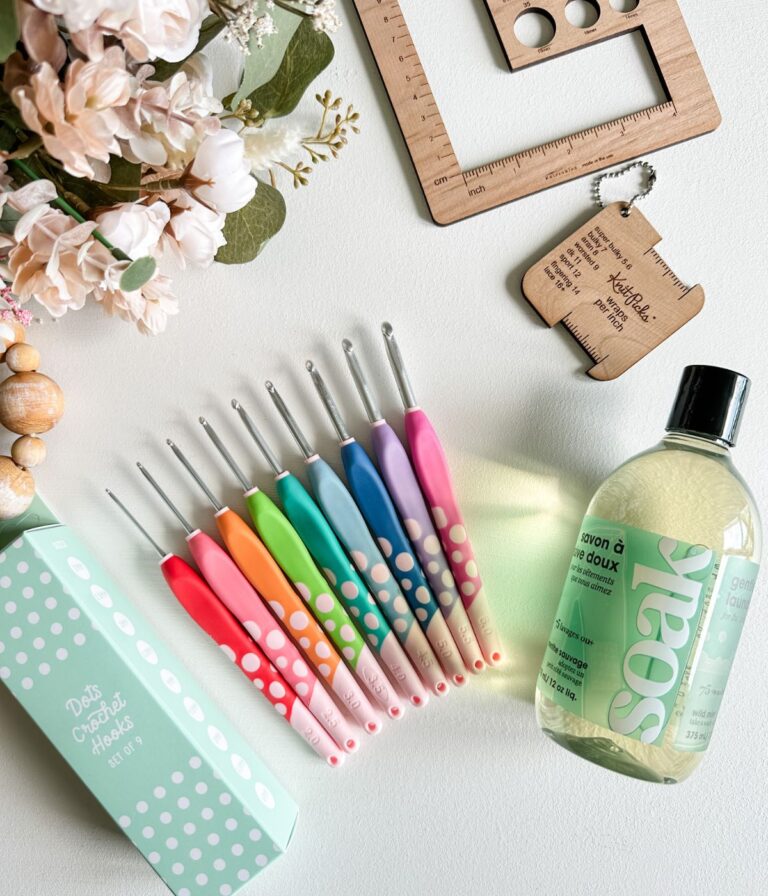
There are many ways to make a slip knot. The method shown in this lesson is beginner-friendly and easy to memorize.
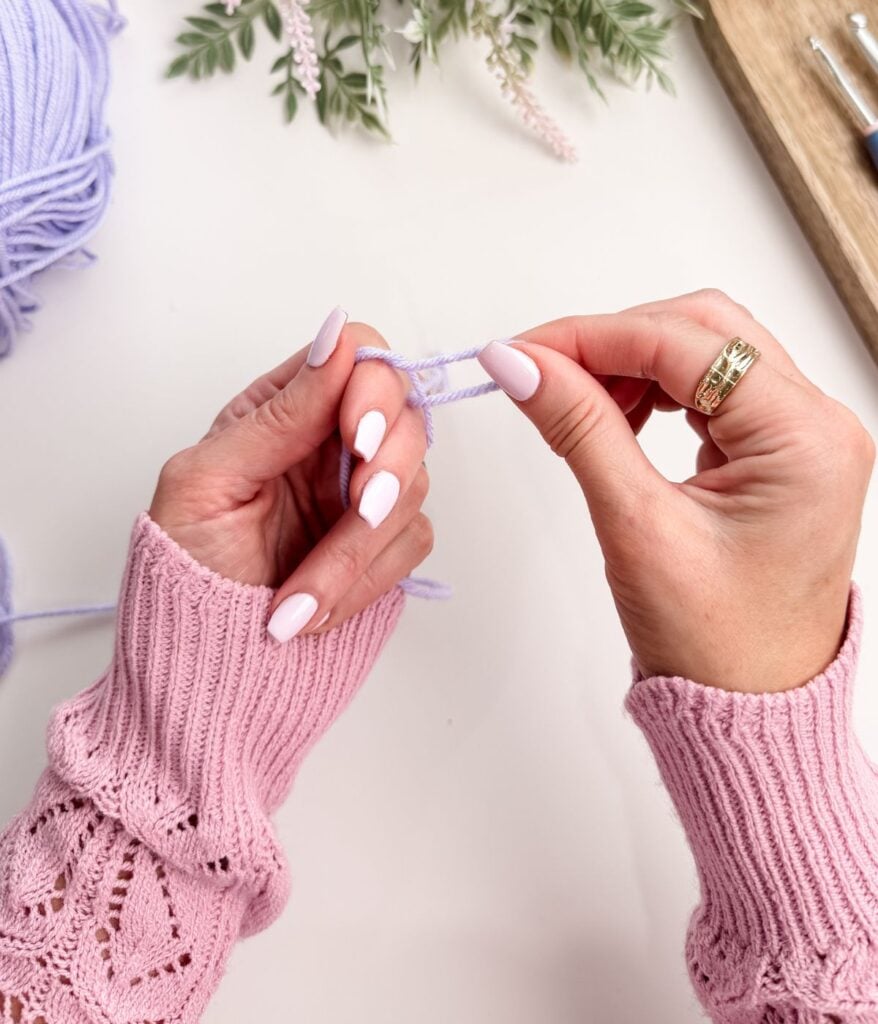
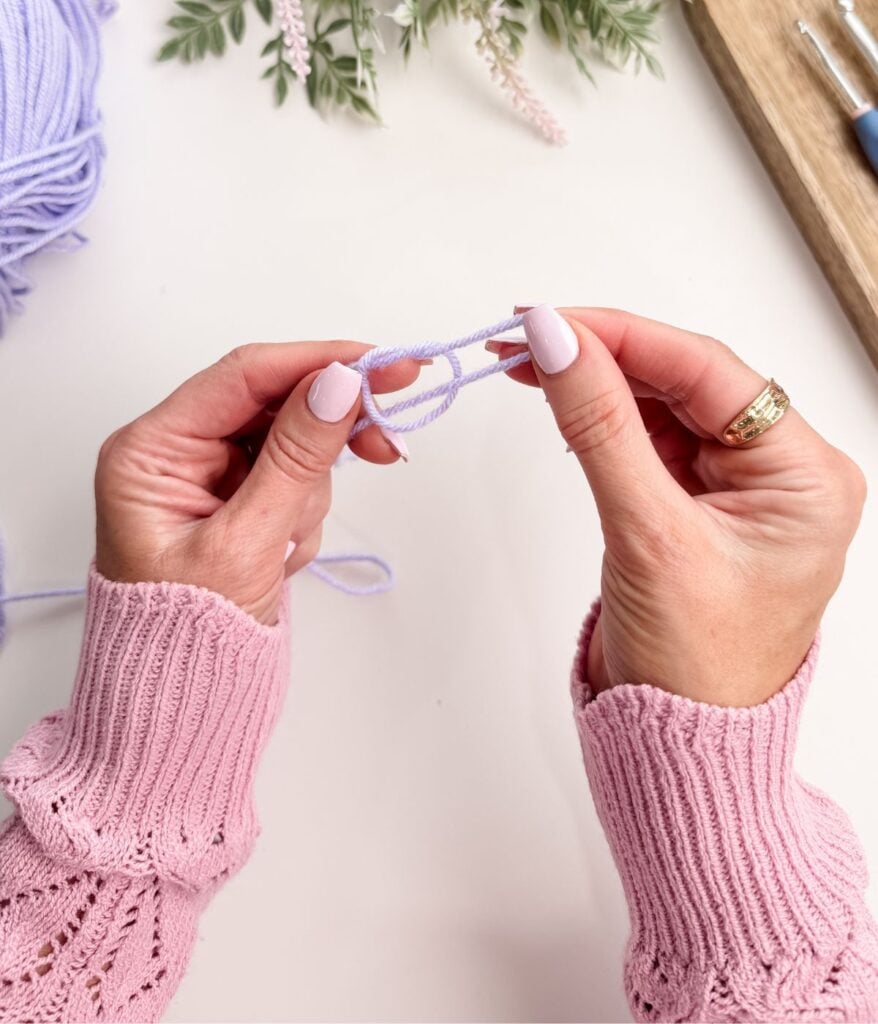
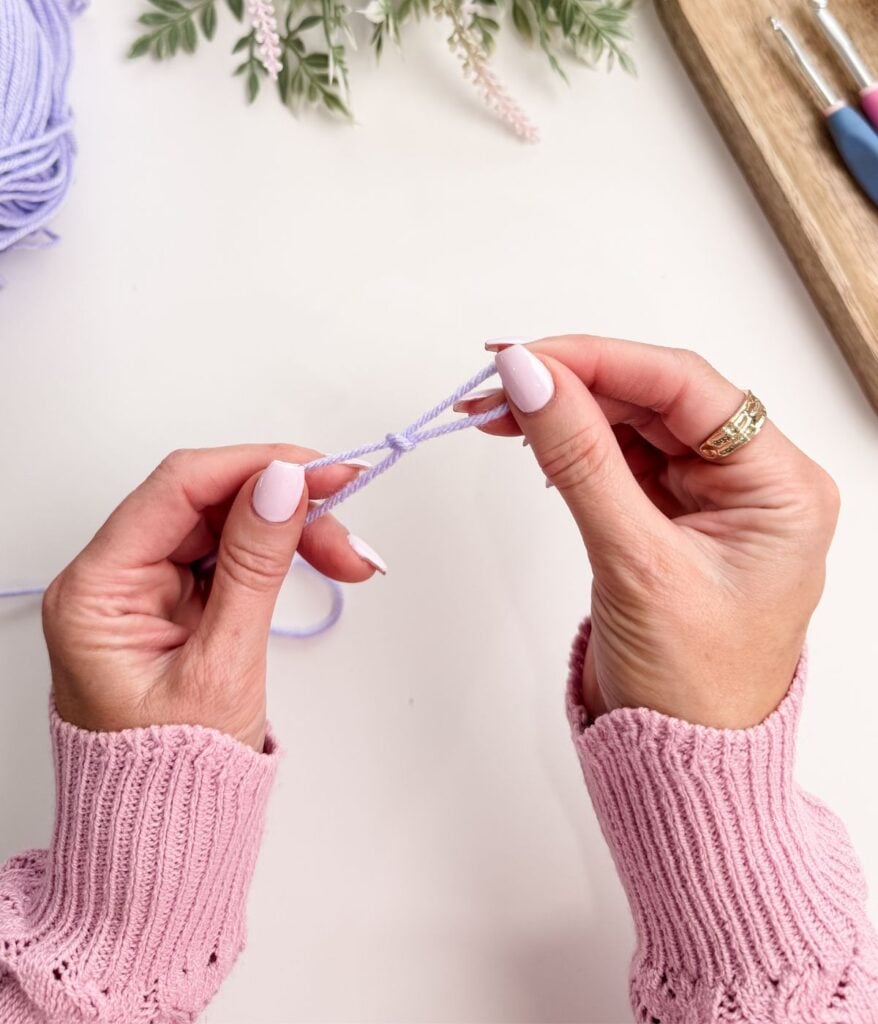
How to Make a Slip Knot
Follow these steps:
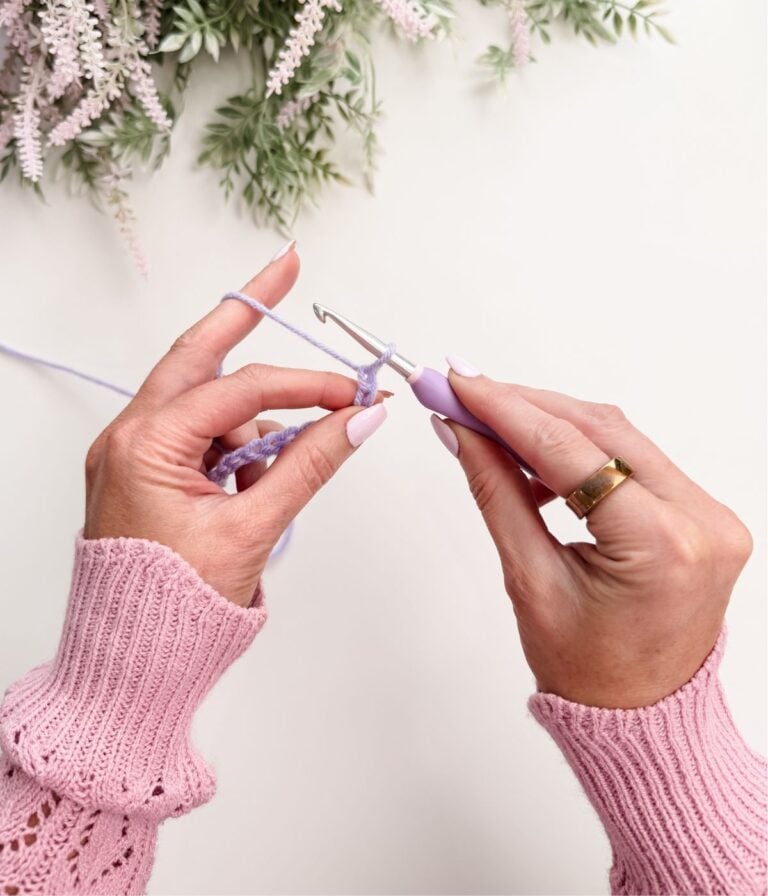
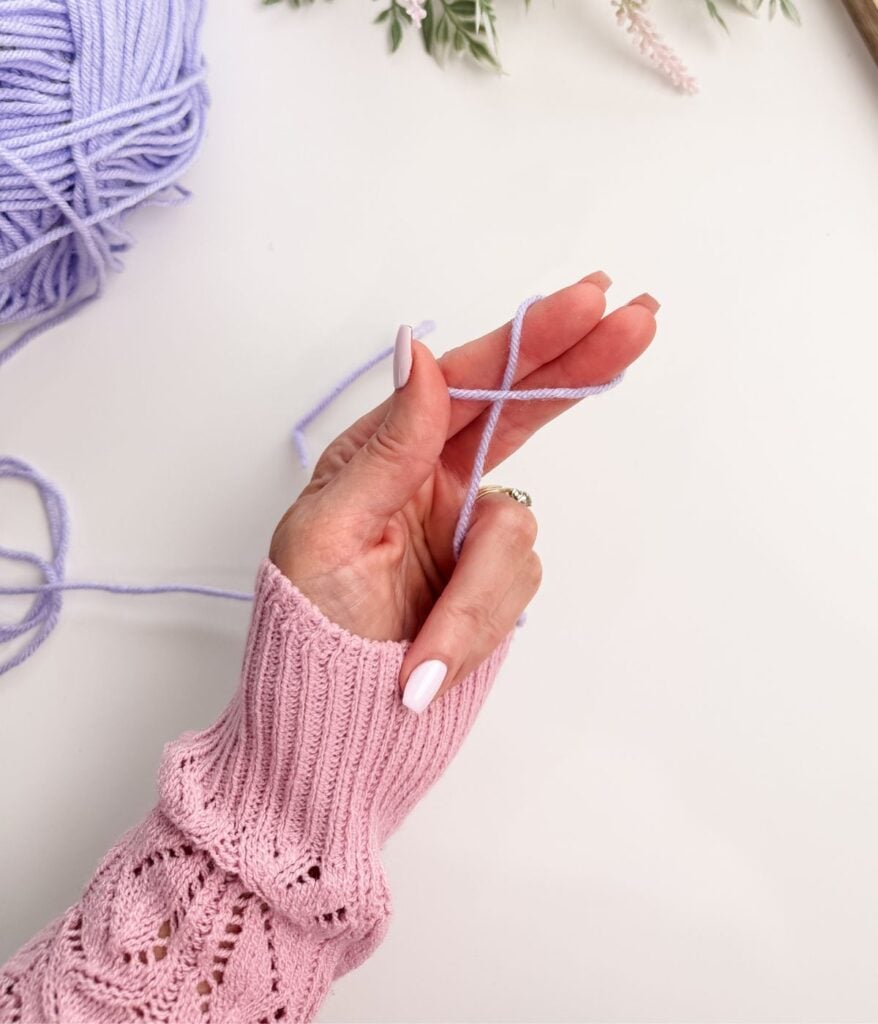
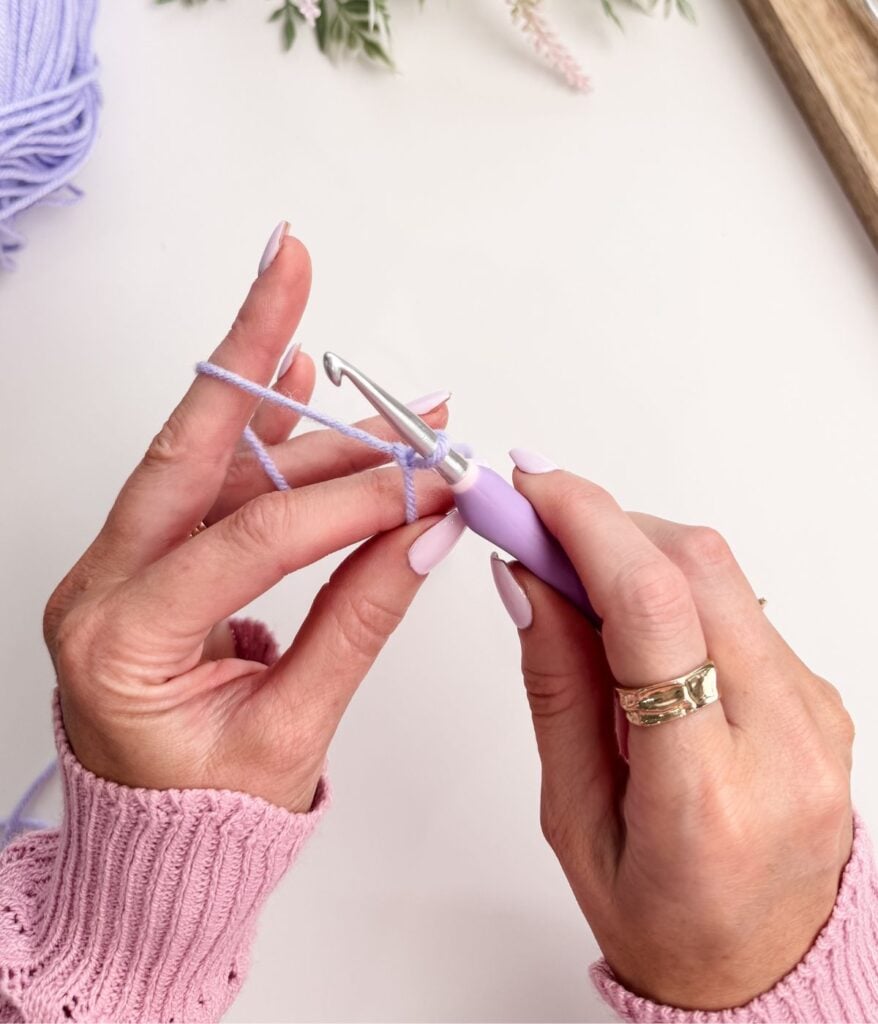
• Hold the yarn in your non-dominant hand with the tail end hanging down.
• Wrap the yarn around your index and middle finger once to form a loop. The working yarn should cross over the tail to create an X shape on your fingers.
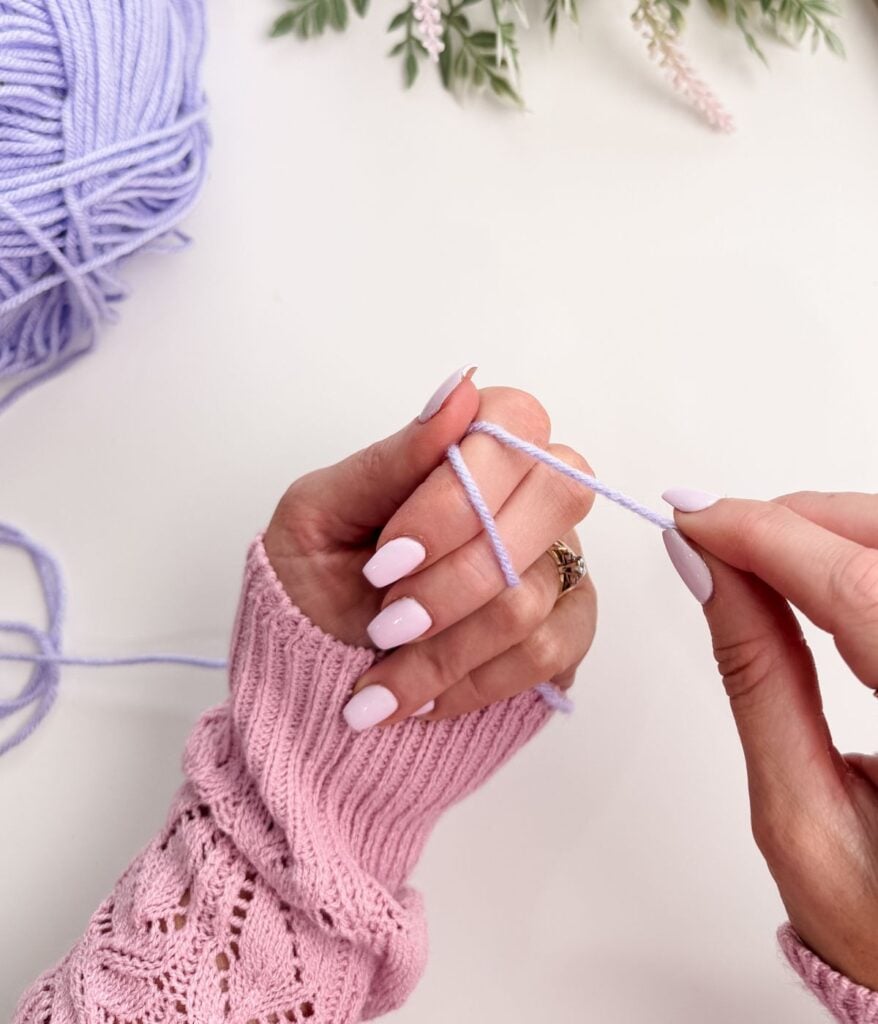
• Using your thumb and index finger, grab the strand of yarn closest to your fingertips and pull a loop up through the loop around your fingers.
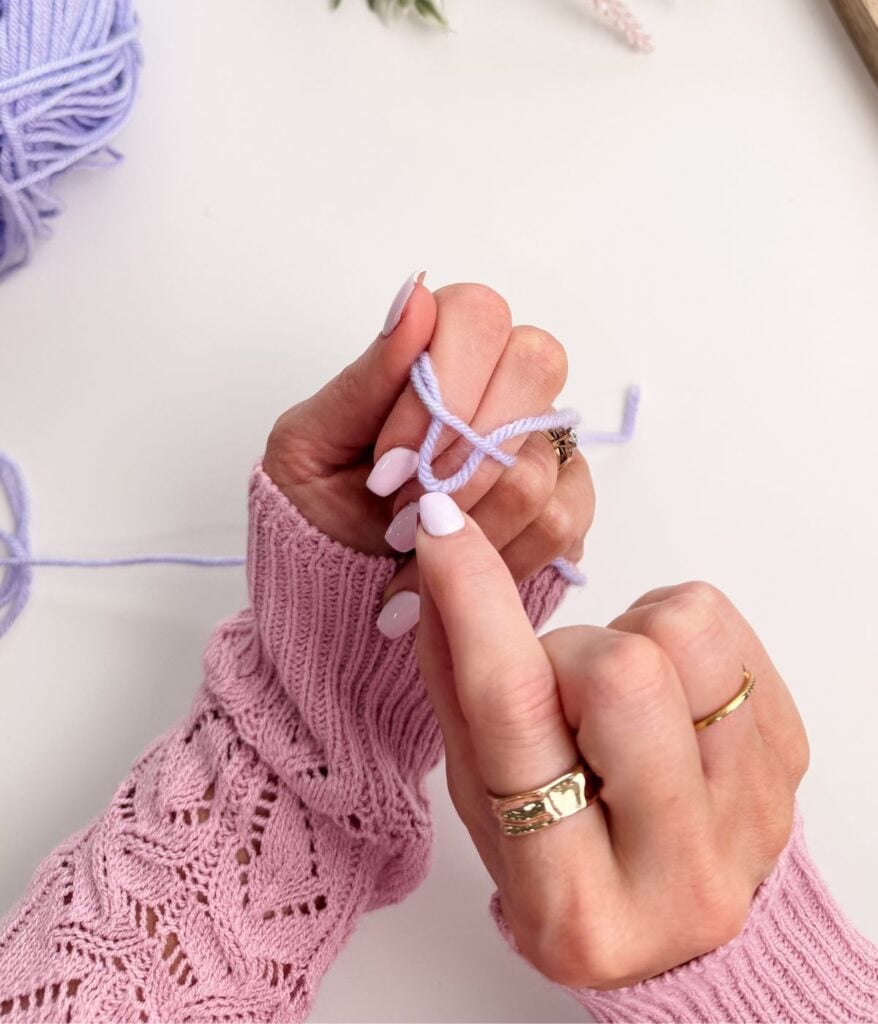
• Carefully slide your fingers out of the loop while holding onto the new loop you just pulled through.
• Gently pull on the tail and working yarn to tighten the knot at the base of the loop.
• Insert your crochet hook into the loop.
• Pull the working yarn to tighten the slipknot so it fits snugly on your hook. It should be secure but still able to slide smoothly along the hook.
Beginner Tip
Your slipknot should move freely on your hook without being tight. If it feels stiff or difficult to move, loosen it slightly by adjusting the working yarn.
What Is the Chain Stitch?
The chain stitch creates the foundation of your crochet work. It looks like a row of small “V” shapes and determines the width of your project.
Chains are often where beginners struggle, usually because they are made too tight. A tight chain can make it challenging to work your first row of stitches and can affect the overall look of your project.
Learning to chain comfortably now will make everything that follows much easier.
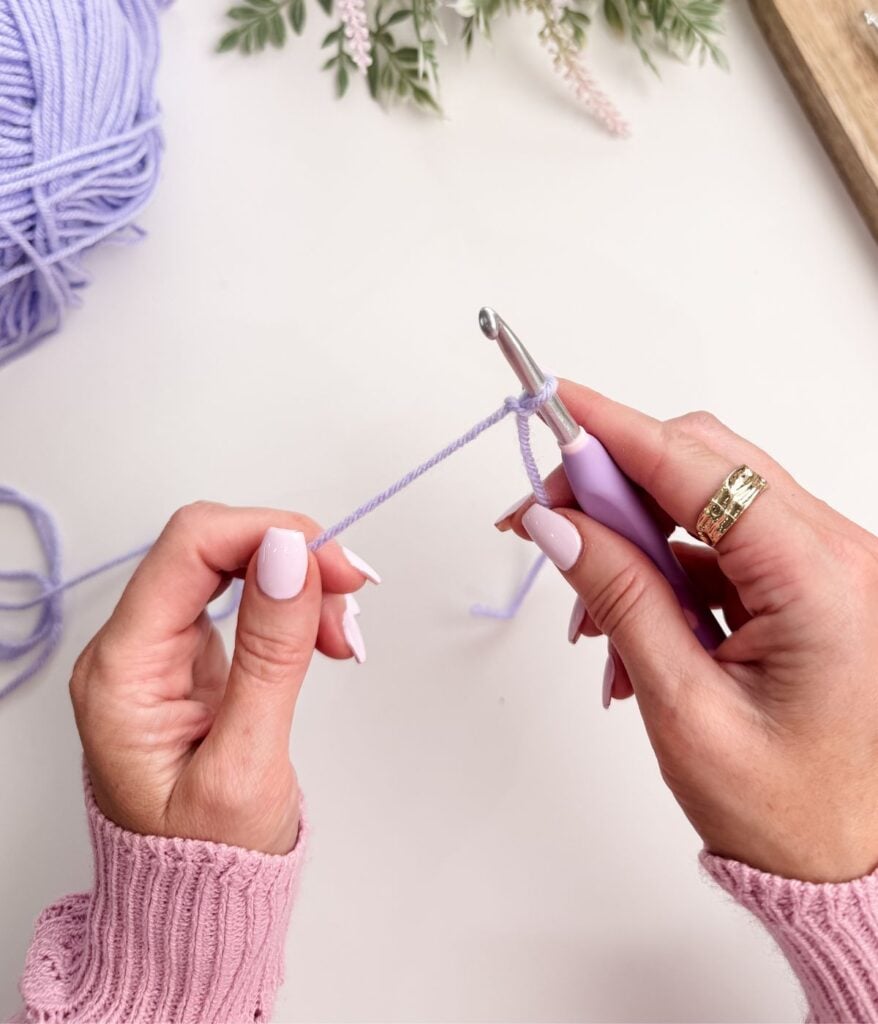
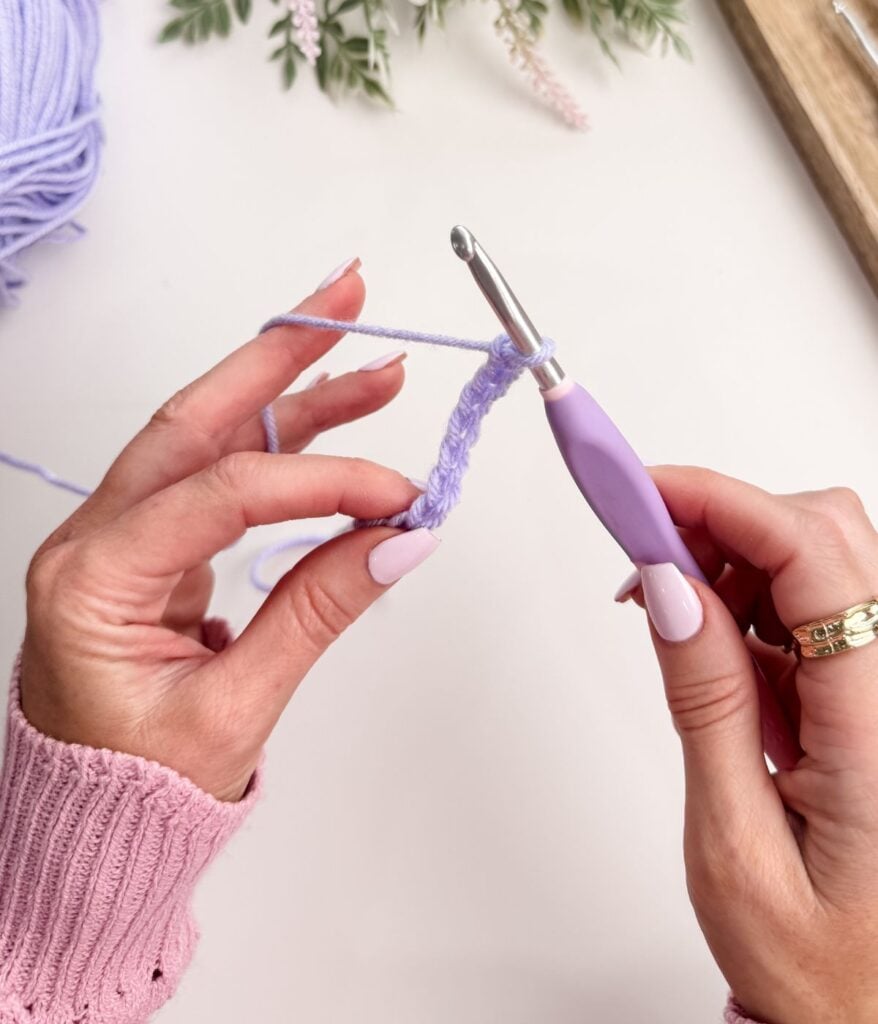
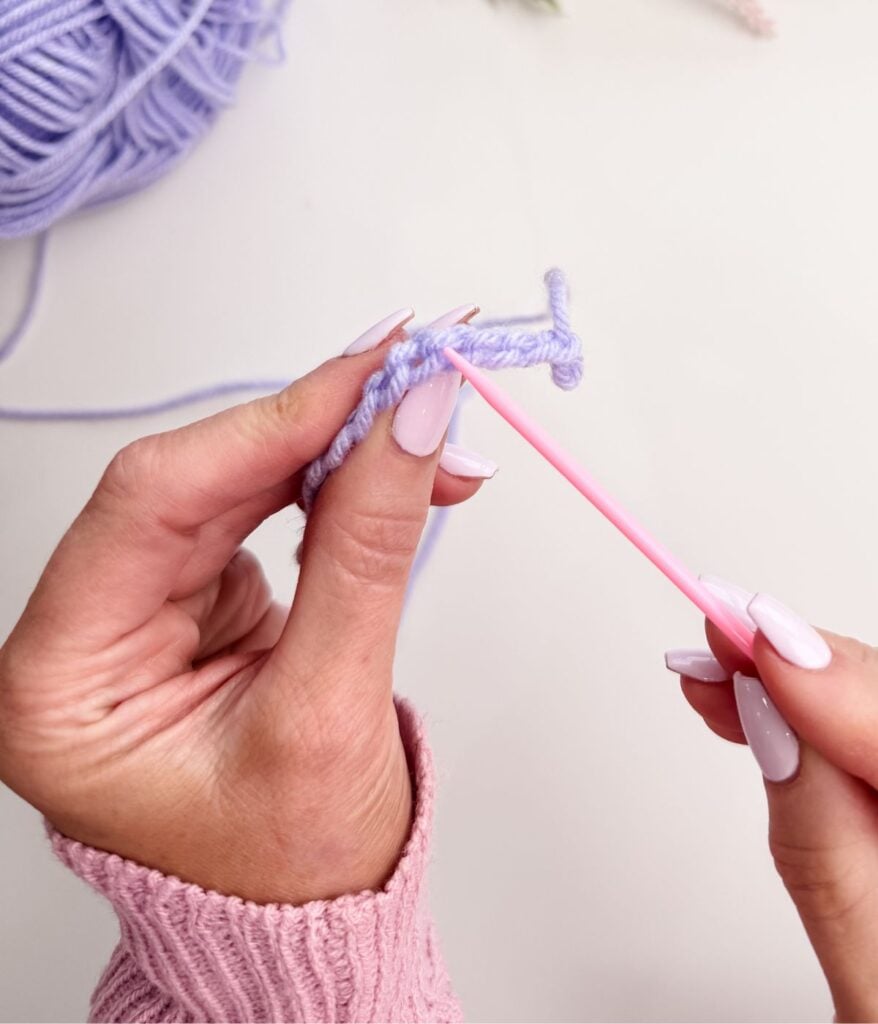
How to Make a Chain Stitch
To make a chain stitch:
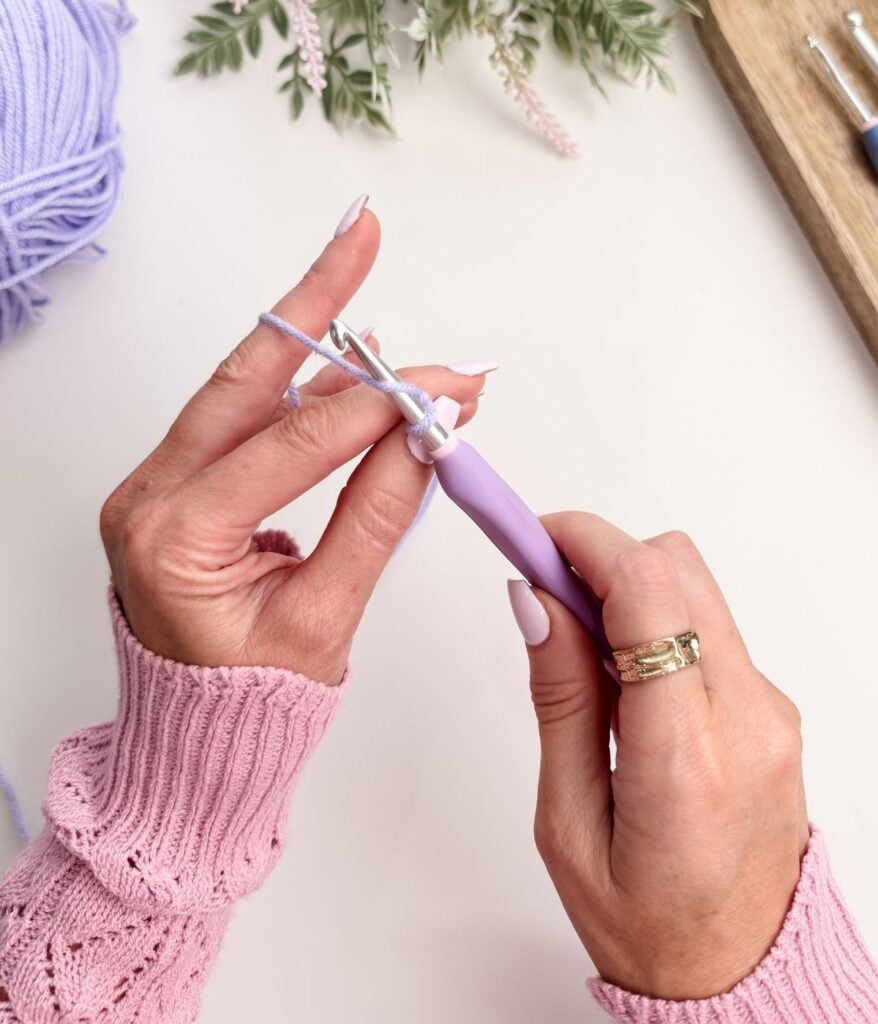
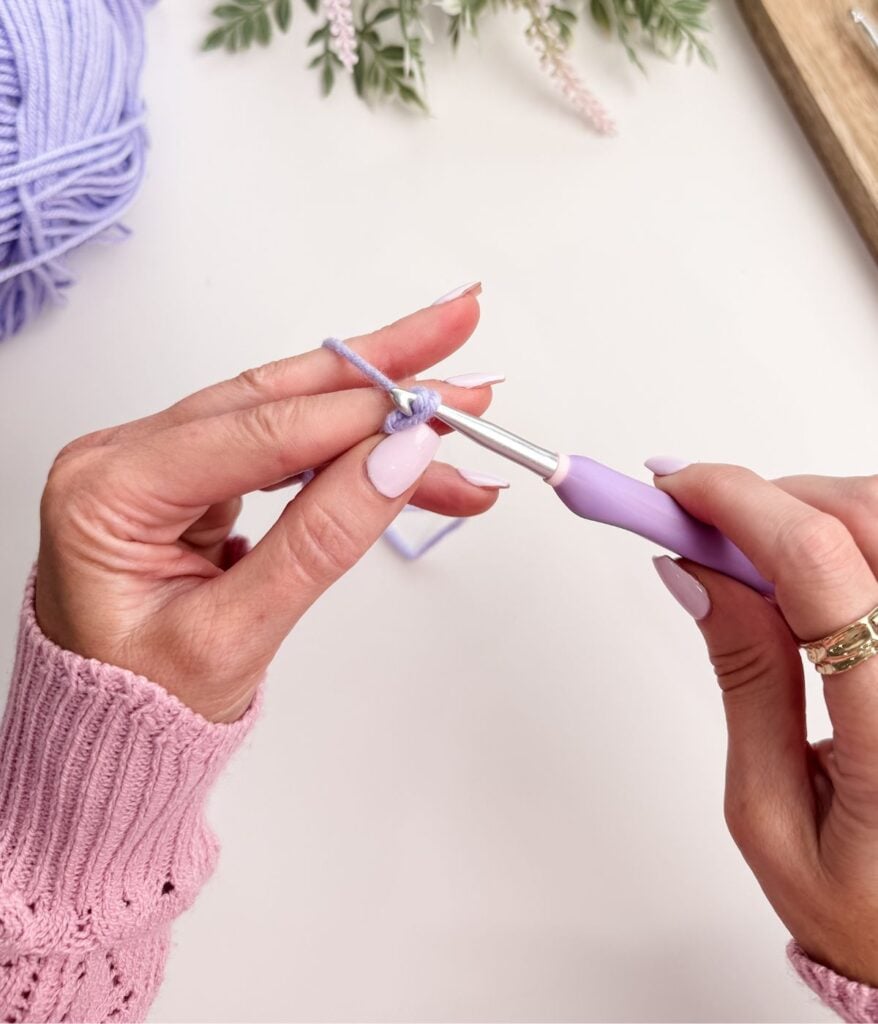
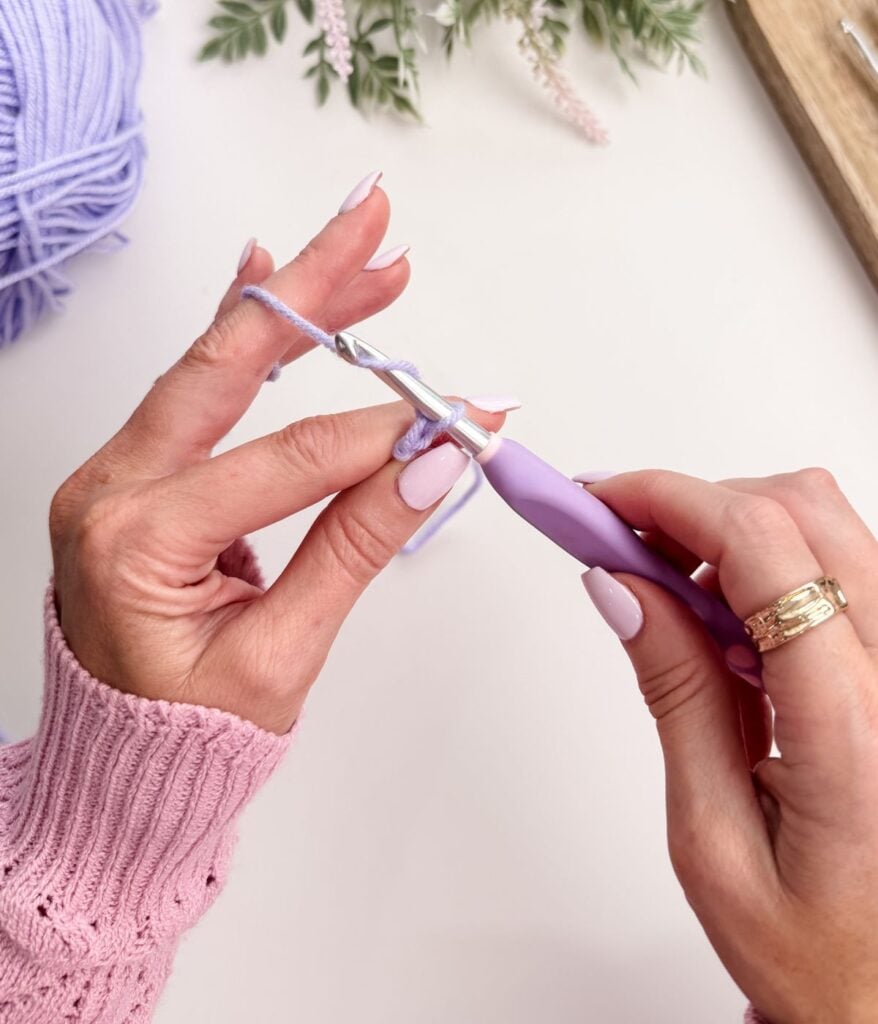
- Hold your hook with the slip knot on it
- Yarn over by wrapping the yarn from back to front over the hook
- Pull the yarn through the loop on your hook
- Repeat this motion to create additional chains
Try to keep your movements relaxed and consistent. Your chains should be even and flexible, not stiff or tight.

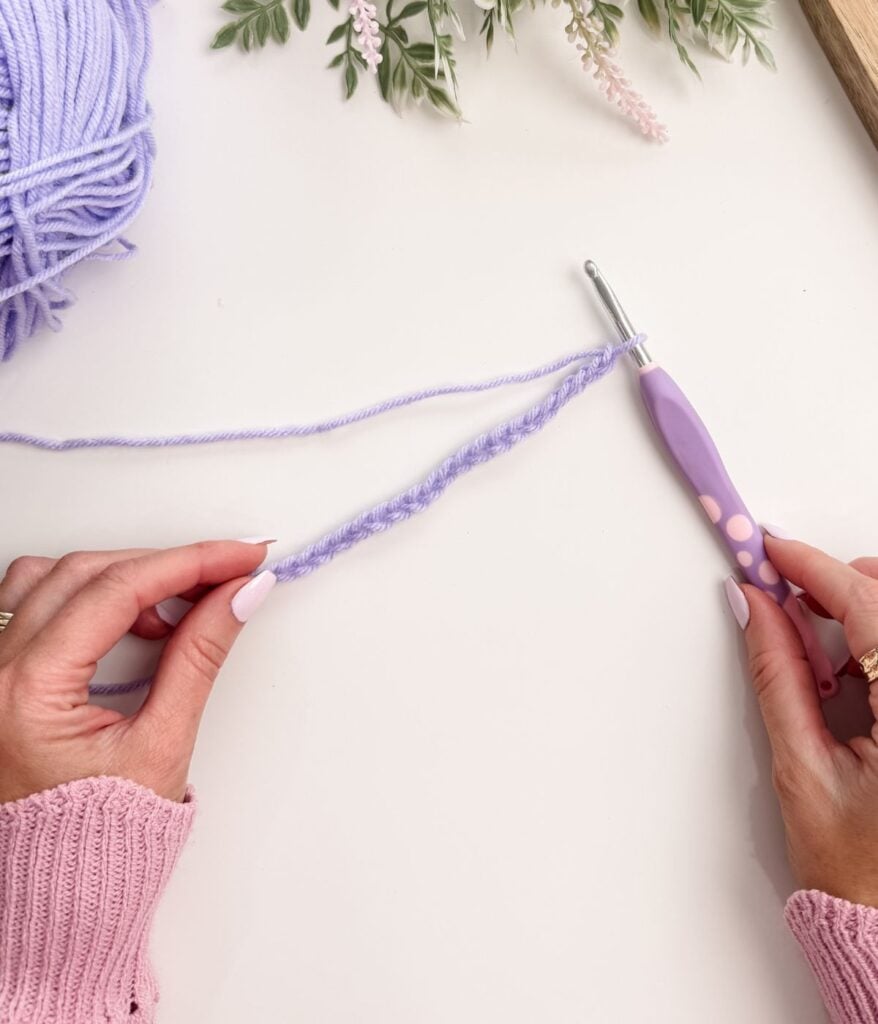
How Tight Should Your Chain Be?
This is one of the most common beginner questions.
Your chain should:
- Slide easily along the hook
- Not grip the hook tightly
- Bend naturally when you hold it
If you find it difficult to insert your hook into the chain later, that’s usually a sign that your chains are too tight. If that happens, pull back and try again using a lighter grip or a slightly larger hook.
How to Count Chains Correctly
Counting chains is an important skill that will come up often in crochet patterns.
When counting:
- Do not count the loop on your hook
- Count each “V” shape in the chain
- Start counting from the first completed chain
Accurate counting helps ensure your projects turn out the correct size and shape.
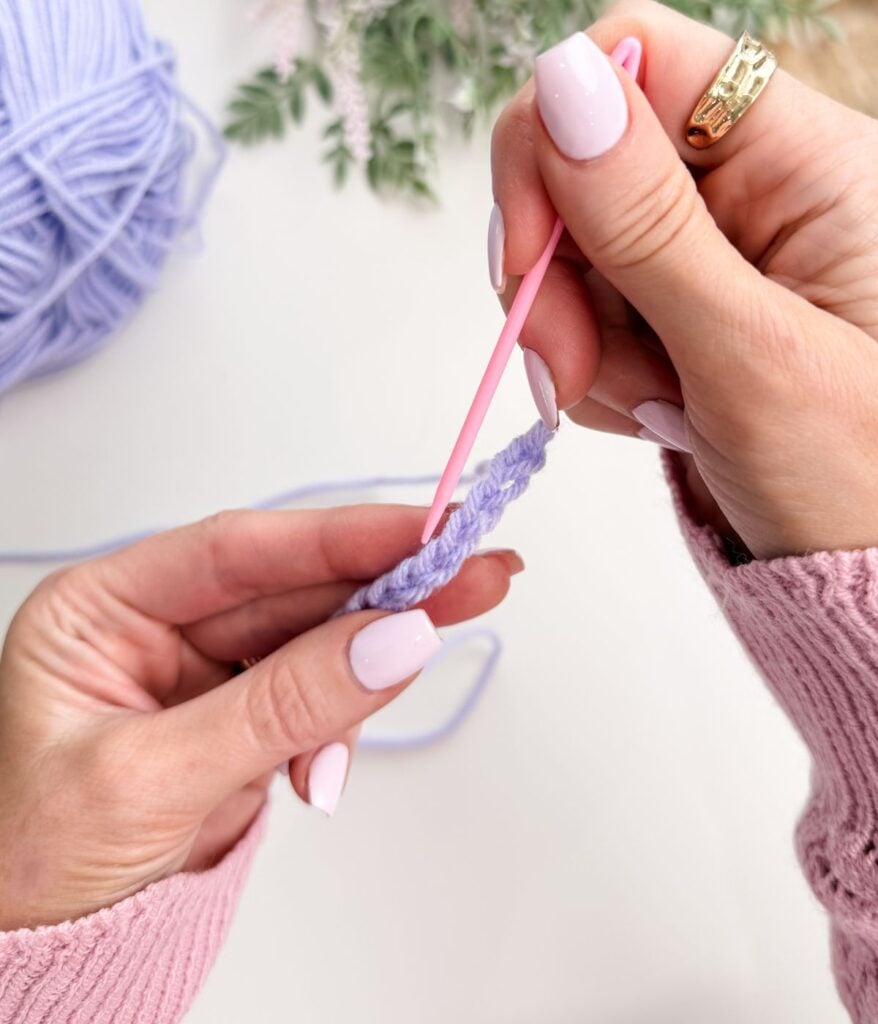
Anatomy of a Chain Stitch
Before we begin working into our chain, it’s important to understand what you’re actually looking at.
A chain stitch may look simple, but it has structure. Once you understand its anatomy, inserting your hook becomes much easier and far less confusing.
Every crochet stitch you make will be built on top of another stitch. Learning to see the structure now will make every future pattern easier to understand.
The Front of the Chain
When you look at your chain from the front, you will see a row of small “V” shapes.
Each “V” represents one chain stitch.
On the front of the chain:
• The strand closest to you is the front loop
• The strand furthest from you is the back loop
When working into a foundation chain, you may insert your hook under one strand or flip the chain and work into the back bump. Both methods are correct. What matters most is consistency.
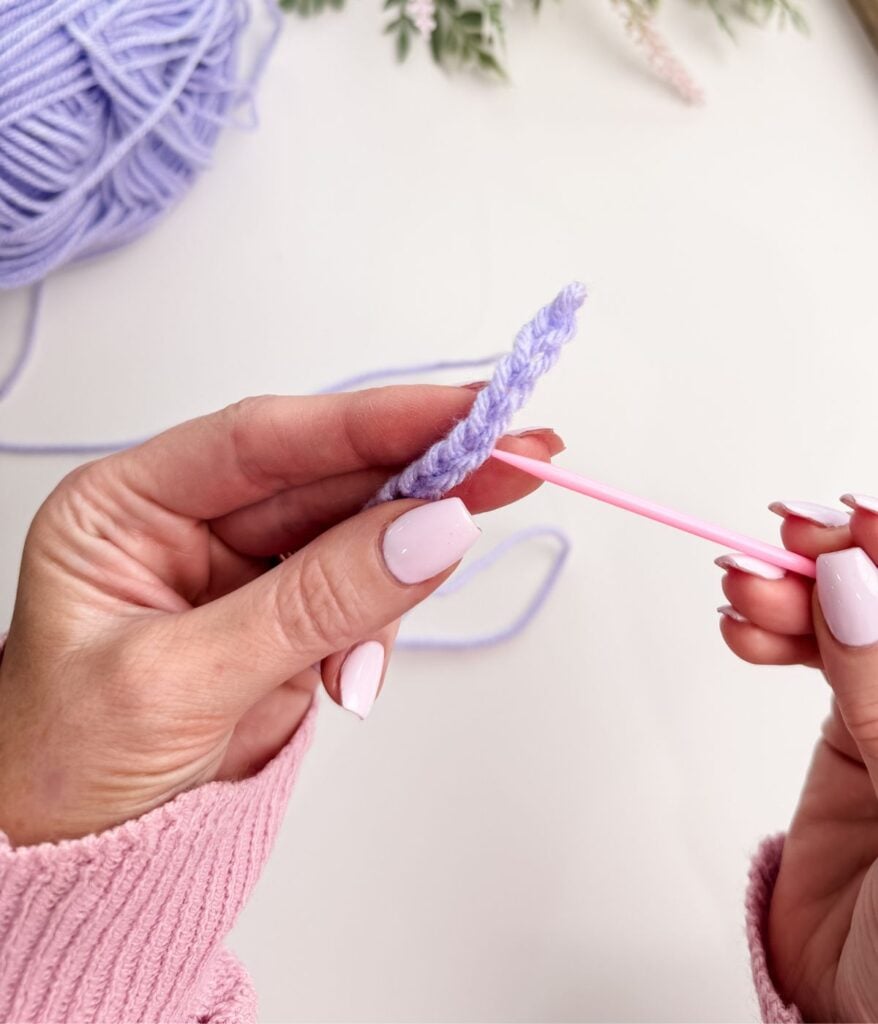
The Back of the Chain
If you flip your chain over, you will see a single horizontal strand running down the center of the back.
This strand is often called:
• The back bump
• The back bar
• The back leg
All of these terms refer to the same strand.
Working into the back bump creates a cleaner, more polished foundation edge. Many crocheters prefer this method once they are comfortable identifying the stitch anatomy.

Which One Should You Use?
There are two common methods when working into a foundation chain:
- Insert your hook into the back loop of each chain
- Flip the chain and insert into the back bump
Both methods are correct. For beginners, inserting into one strand on the front of the chain is often easier to see and understand.
As your skills develop, you may prefer working into the back bump for a cleaner, more polished foundation edge.
Why Understanding This Matters
When you understand the anatomy of your chain, you will:
• Insert your hook more confidently
• Avoid twisting your foundation row
• Create straighter edges
• Follow patterns more accurately
Take a moment to study your chain before moving on. That small pause will save you frustration later.
Common Beginner Mistakes
Here are a few common issues beginners experience at this stage:
- Chains pulled too tight
- Uneven chain tension
- Counting the loop on the hook as a stitch
- Forgetting how many chains were made
All of these are completely normal. Crochet is learned through repetition, and each attempt helps build muscle memory.
Practise Before Moving On
Before continuing to the next lesson, practise making:
- Several slip knots
- Multiple chain strips of different lengths
You do not need to save these swatches. Their purpose is to help your hands get comfortable with the motion.
Once chaining feels even and comfortable, continue to Lesson 2.2 where you’ll build on this foundation and learn your first crochet stitch: single crochet.
Video Tutorial
What’s Next
Now that you understand what crochet is and what’s possible, the next step is learning how crochet compares to knitting and why many beginners find crochet easier to learn.
In Lesson 2.2, we’ll build on your foundation chain and learn how to make your first crochet stitch: single crochet.
Helpful Resources
- Join our Facebook Crochet Community for pattern support and inspiration
- Subscribe on YouTube for hundreds of free tutorials
- Sign up for our newsletter and receive 40% off your first Ravelry purchase!
- Sign up for our YouTube Membership
This lesson is part of the Learn to Crochet course by Michelle Moore of MJ’s Off The Hook Designs Inc., a Canadian crochet designer based in Lakefield, Ontario.
Thank you for learning with me at MJ’s Off The Hook Designs. I hope this lesson encourages you to keep practising and enjoying the process of crochet.
You’ve got questions, we’ve got a community!
Crocheting is better with friends! Join our group to post pictures and ask all your pattern support questions.