*This post may contain affiliate links to support the cost of this blog. At no cost to you, I may make a small commission if you purchase through these links. Read our Privacy Policy HERE


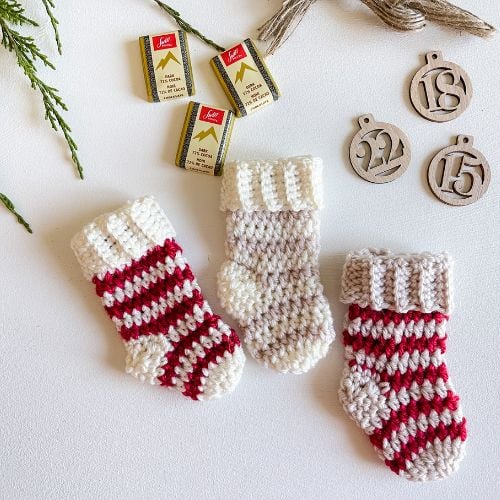
You’ll Love making this Mosaic Gift Card Cozy Free crochet pattern! Perfect for your Christmas tree this year!
Get the free Mosaic Gift Card Cozy Crochet Pattern down below! Prepare for the Holiday Season and get in the Christmas Spirit by crocheting simple and quick Crochet Christmas ornaments. Keep scrolling for the Free crochet pattern.
Below you will find everything you need to crochet the Mosaic Gift Card Cozy pattern, including the yarn, hook, materials, free written pattern for blog subscribers, pictures and a video tutorial. If you like this free crochet Mosaic gift card cozy pattern, please share!

DISSCALIMER
This post contains affiliate links for the items I used to crochet this pattern and clothing articles I have modelled at no cost to you. I make a small commission if you purchase through these links. This blog post also displays ads. The revenue I receive from Ads, and affiliate links, allows me to post this crochet pattern for free on my blog. I do so in good faith that you will not copy and paste this pattern or distribute it in any way. If you prefer not to view the pattern on the blog, you may purchase an AD-FREE digital PDF pattern in one of my pattern shops for a small fee. Whether you purchase this pattern or view the pattern on my blog, I greatly appreciate your support and readership.
Get involved by joining my Community Group on Facebook; you can post pictures, ask questions and help other community members!

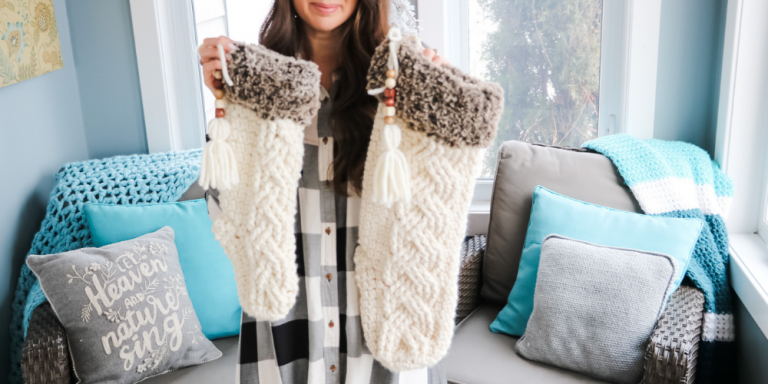
Find all the Christmas Crochet patterns in the Blog Post below!
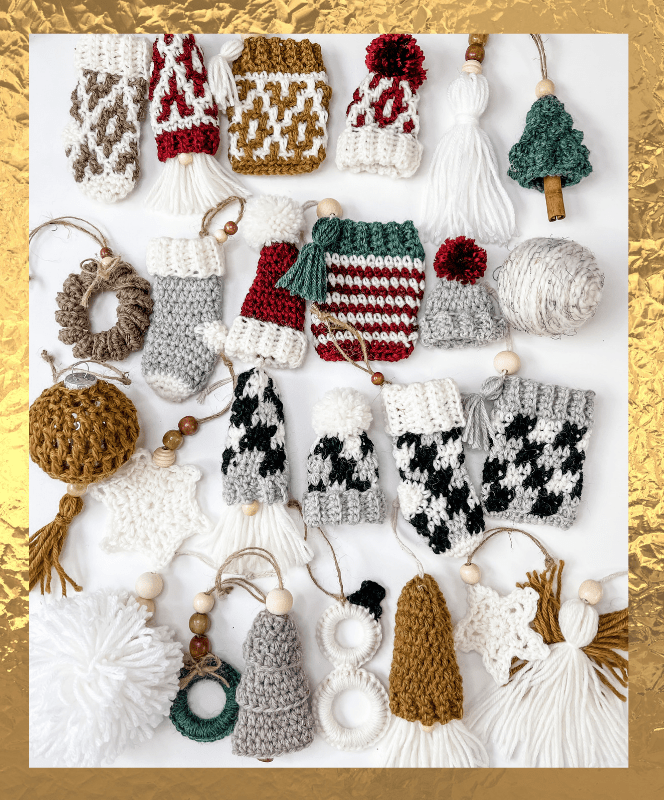
I have put together a beautiful Ebook with all 25 crochet ornaments! Each Christmas Crochet pattern includes a video tutorial on YouTube.
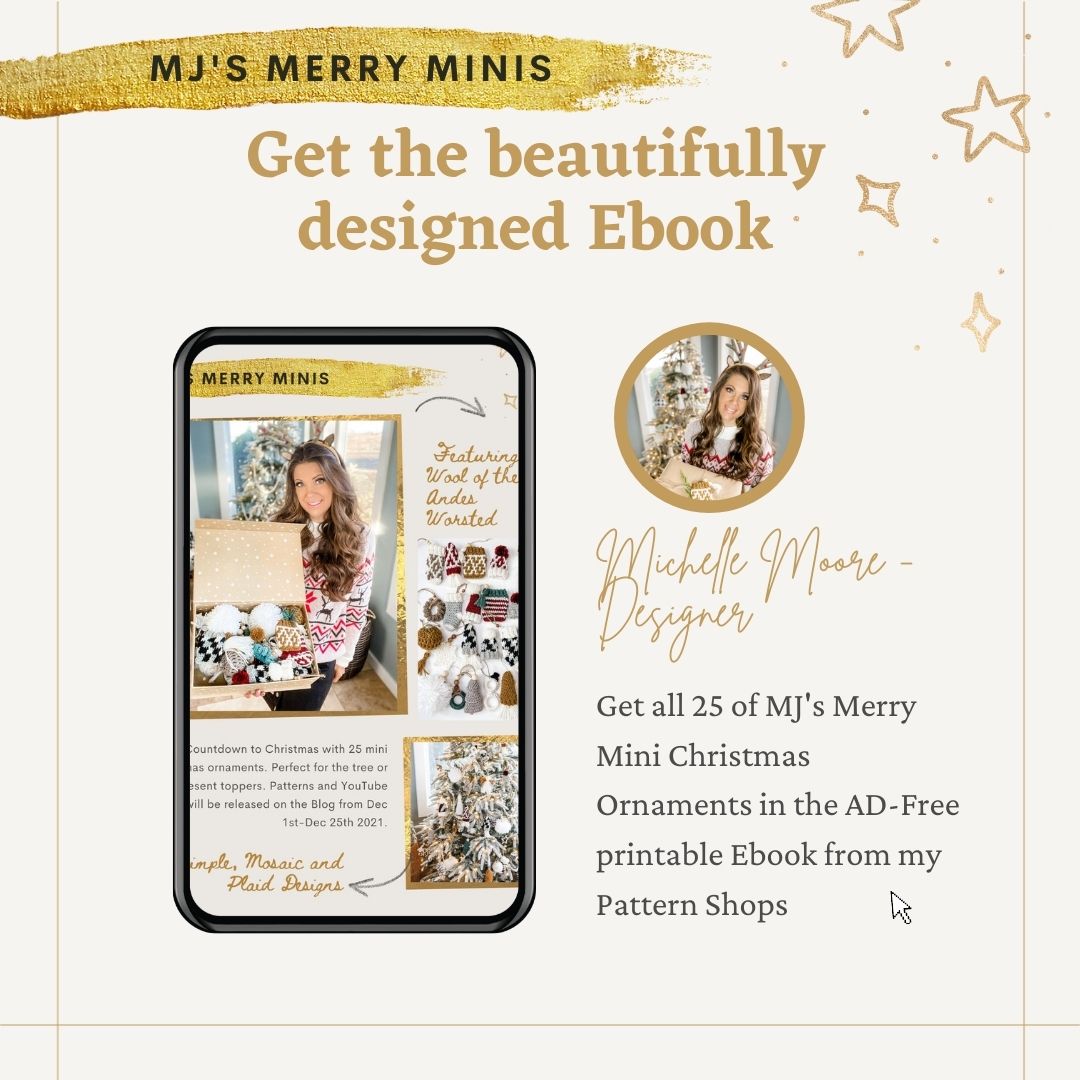
MJ’s Merry Minis
While my kids were growing up one of our favourite things to do around Christmas time was making homemade ornaments! We would make things like baked gingerbread man to put on the tree, popcorn garland, foam ornaments, decorate clear Christmas balls! Im sure your family has Christmas traditions too, and would have a great time making these Crochet Christmas Ornaments! There are even some patterns for the non-crocheters, such as the Mini Tassel Angle, Mini Ring Wreath, Boho Beaded Pompom, and the Scrappy Christmas Ball!
Mosaic Crochet is a fun and easy way to create beautiful colorwork patterns. Crochet this cute Mosaic Gift Card Cozy for your Christmas Tree or present topper. This Mosaic Gift Card Cozy crochet pattern is the perfect way to learn mosaic crochet for the beginner. The mosaic cozy is worked from the top-down, finishing with a mini tassel and bead.

“Some Christmas tree ornaments do more than glitter and glow, they represent a gift of love given a long time ago.”
– Tom Baker
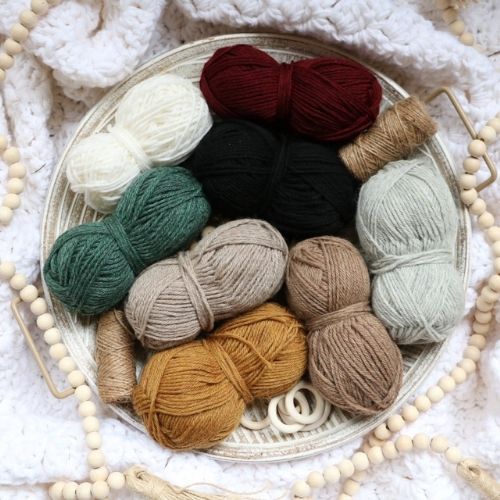
YARN
Wool of the Andes Worsted Weight by WeCrochet
100% Peruvian Highland Wool, 110yds/50g
A small amount of Yarn A/B
MATERIALS
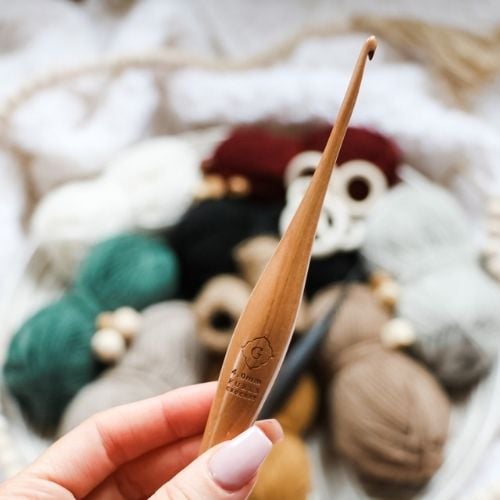
– 4mm/G Furls crochet hook – use code MJS15 for 15% off
– Tapestry Needle
– String
ABBREVIATIONS
blo – Back Loop Only, ch – Chain, dc – Double Crochet,
flo – Front Loop Only, rep – Repeat, sc – Single Crochet, sl – Slip, sp – Space, st(s) – Stitch(es)
GAUGE
Mosaic Pattern: 8 sts and 8 rows = 2″ in pattern
Band: 10 sts and 10 rows = 2″ in sc blo
VIDEO
A full video tutorial for the gift card cozy is available HERE

Mosaic Gift Card Cozy – Free Crochet Pattern
Get the Ebook HERE
CONSTRUCTION
The Mosaic Gift Card Cozy ornament is worked from the Top-Down. Begin working the band in rows from the side across. Join the band and work the mosaic pattern in rounds around the band. Sc together to seam the bottom of the cozy. Add a tassel and wooden bead on a string for hanging.
SPECIAL STITCHES
Drop-down Dc – Drop-Down Double Crochet – Work a double crochet in the front loop of stitch 2 rows below.
To Unlock Exclusive Subscriber content click the Box below! Grow will pop up so you can subscribe to my Blog. Enter your email and create a password. Every time you see Exclusive Content on my Blog, log in to your account!
How to read a Mosaic Crochet Chart:
The chart is read from right to left for each round. Rounds are worked in alternating colors, as indicated on the left column. The entire round is worked in the color stated. Ignore the colors displayed in each box; this shows how the pattern will look; you will not change color throughout a round. A blank box indicates you will work a sc in the blo. A box marked with an X indicates working a drop-down double crochet.
When working mosaic crochet in the round, don’t cut colors. Drop off the color at the end of the round and pick up new colour as you go. Color is changed at the sl st join in the blo. Always tighten yarn tails when joining at the end of each round; this will keep the join invisible.
Mosaic Chart

Mosaic Gift Card Cozy:
Cozy:
Band
Row 1 (WS):
With B, ch 5, 1 sc in the 2nd ch from the hook and in each ch across, turn—4 sts.
Row 2 (RS):
Ch 1, sc in the blo of each st across, turn—4 sts.
Rows 3-24:
Rep row 2. Last row ch 1. Fold the band in half with the RS facing, sl st the band together by working through the blo of the last row and starting ch of the first row. Flip seam to the inside of work.
Setup Round:
Ch 1, 1 sc st per row around the band, sl st in the first sc to join—24 sts. Change to A.
Mosaic Pattern Begins
Round 1:
With A, ch 1, sc in each st around, sl st in the blo of first sc to join—24 sts. Change to B.
Round 2:
With B, ch 1, 1 sc in the blo of each st around, sl st in the blo of first sc to join—24 sts. Change to A.
Round 3:
With A, ch 1, 1 sc in the blo of next 2 sts, 1 drop down dc in the flo of next st 2 rows below, *1 sc in the blo of next 2 sts, 1 drop down dc in the flo of next st 2 rows below; rep from * around, sl st in the blo of first sc to join—24 sts. Change to B.

Round 4:
With B, ch 1, 1 drop down dc in the first st flo of 2 rows below, 1 sc in the blo of each of next 3 sts, *1 drop down dc in the flo of next st 2 rows below, 1 sc in the blo of next st, 1 drop down dc in the flo of next st 2 rows below, 1 sc in the blo of each of next 3 sts; rep from * around to last 2 sts, 1 drop down dc in the flo of next st 2 rows below, 1 sc in the blo last st, sl st in the blo of first sc to join—24 sts. Change to A.
Round 5:
With A, ch 1, 1 sc in the blo of first st, 1 drop down dc in the flo of next st 2 rows below, 1 sc in the blo of next st, 1 drop down dc in the flo of next st 2 rows below, *1 sc in the blo of each of next 3 sts, 1 drop down dc in the flo of next st 2 rows below, 1 sc in the blo of next st, 1 drop down dc in the flo of next st 2 rows below; rep from * around to last 2 sts, 1 sc in the blo of last 2 sts, sl st in the blo of first sc to join—24 sts. Change to B.

Round 6:
With B, rep round 3.
Round 7:
With A, rep round 4.
Round 8:
With B, rep round 5.
Round 9:
Rep round 3.
Round 10:
With B, rep round 5.
Round 11:
With A, rep round 4.
Round 12:
With B, rep round 3. Sl st through both loops. Cut A. Fold cozy in half with the seam to the side. Sc the cozy together by working through the blo of sts across—12 sts. Fasten off and weave in ends.

Tassel:
With A cut, 10 strands of yarn at 6″ long. Use a piece of string or twine to tie around the centre of the strands. Use another piece of yarn to tie a small tassel ball and knot the yarn. Thread the tails down through the knot and trim the tails. Then thread the string on a yarn needle and tie it to the side/front of the cozy. Thread on a wooden bead and knot for hanging.

Copyright Disclaimer
This pattern is the sole property of MJ’s Off the Hook Designs. This pattern is copyright protected and cannot be copied or reproduced in any way. You are welcome to sell your finished items from this pattern. I require a reference or link for my design. My photos are copyright protected and are not to be used to sell your items.
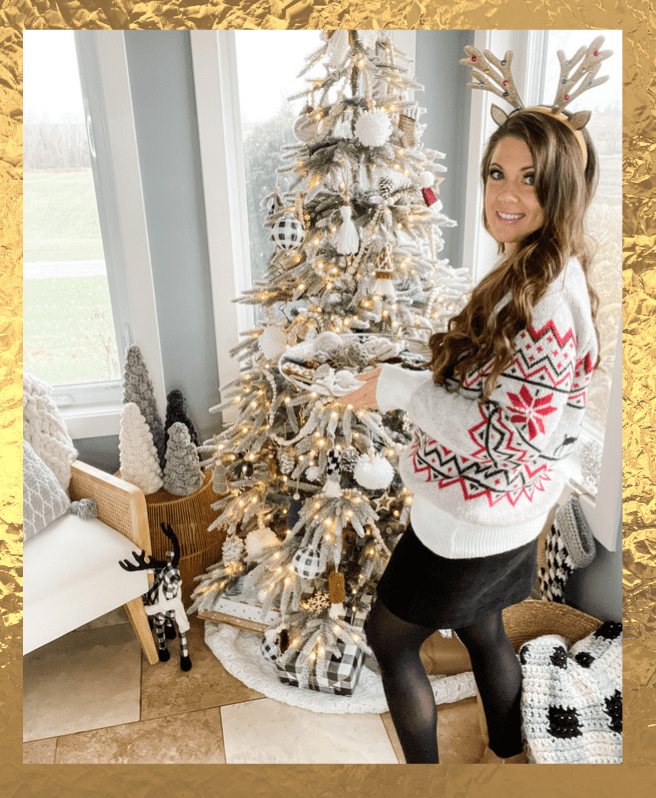
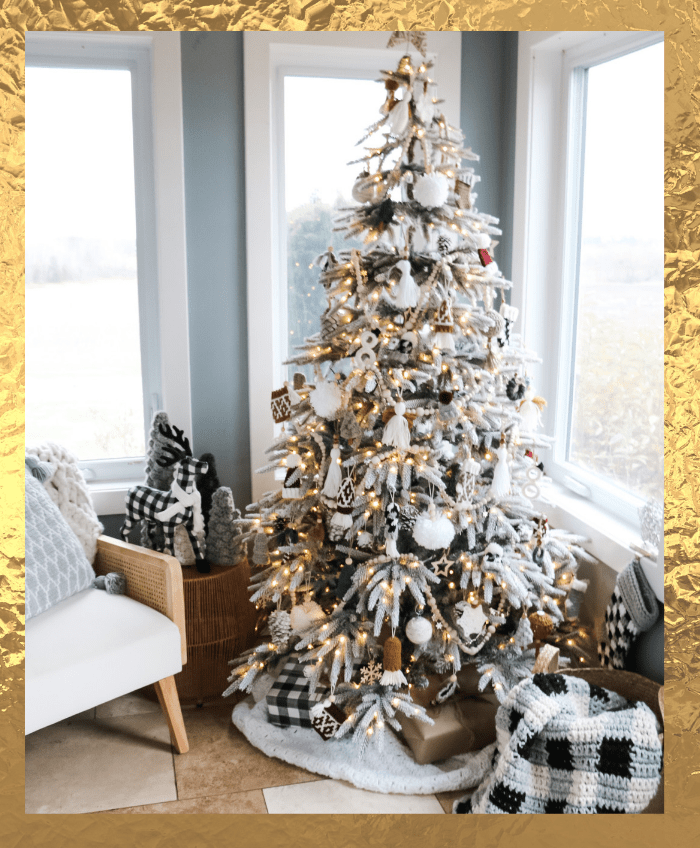
I’m so happy with how my Christmas Tree turned out. I added wooden bead garland and a few pinecone ornaments. I used my Easy C2C Blanket for my Tree Skirt and the Chunky Buffalo Plaid Crochet Throw to stay with the plaid theme. If you love my Christmas Sweater you can get it HERE and my skirt HERE. They really helped give my tree the rustic aesthetic I was going for!
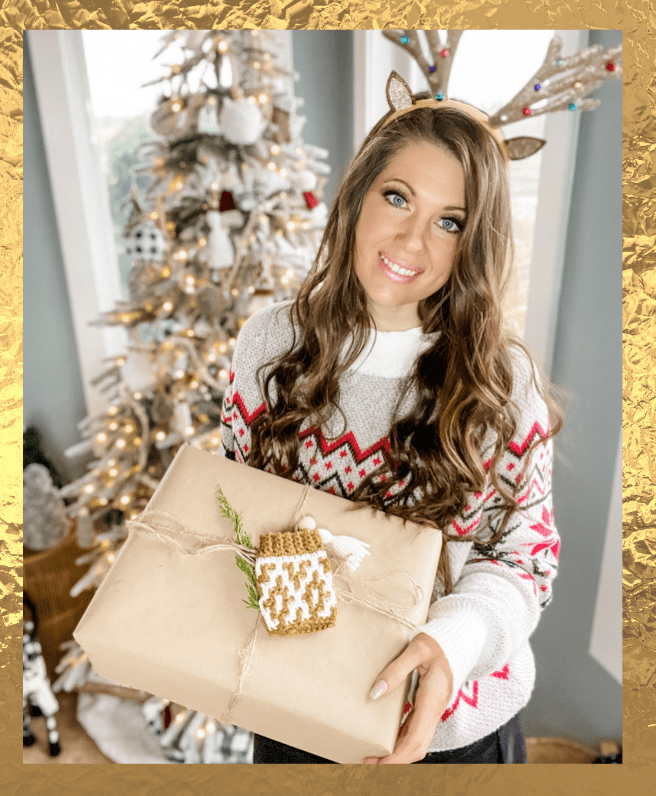
Not only do these crochet ornaments look beautiful on a Christmas tree, but they make the perfect present toppers as well. The crochet decorations vary in skill level, and some can be made with no crochet experience. That way, the entire family can get involved.
For more designs by MJ’s Off The Hook Designs see our Ravelry, Etsy, LoveCrafts, WeCrochet or Ribblr Shop. Check out our Facebook and Instagram for daily inspiration!

*This post contains affiliate links at no cost to you!

You’ve got questions, we’ve got a community!
Crocheting is better with friends! Join our group to post pictures and ask all your pattern support questions.