*This post may contain affiliate links to support the cost of this blog. At no cost to you, I may make a small commission if you purchase through these links. Read our Privacy Policy HERE
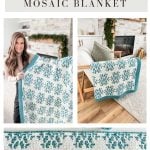
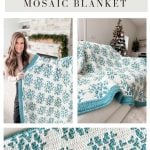
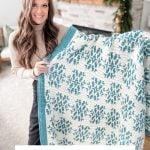
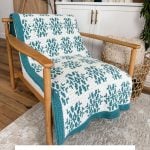
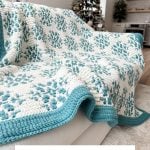

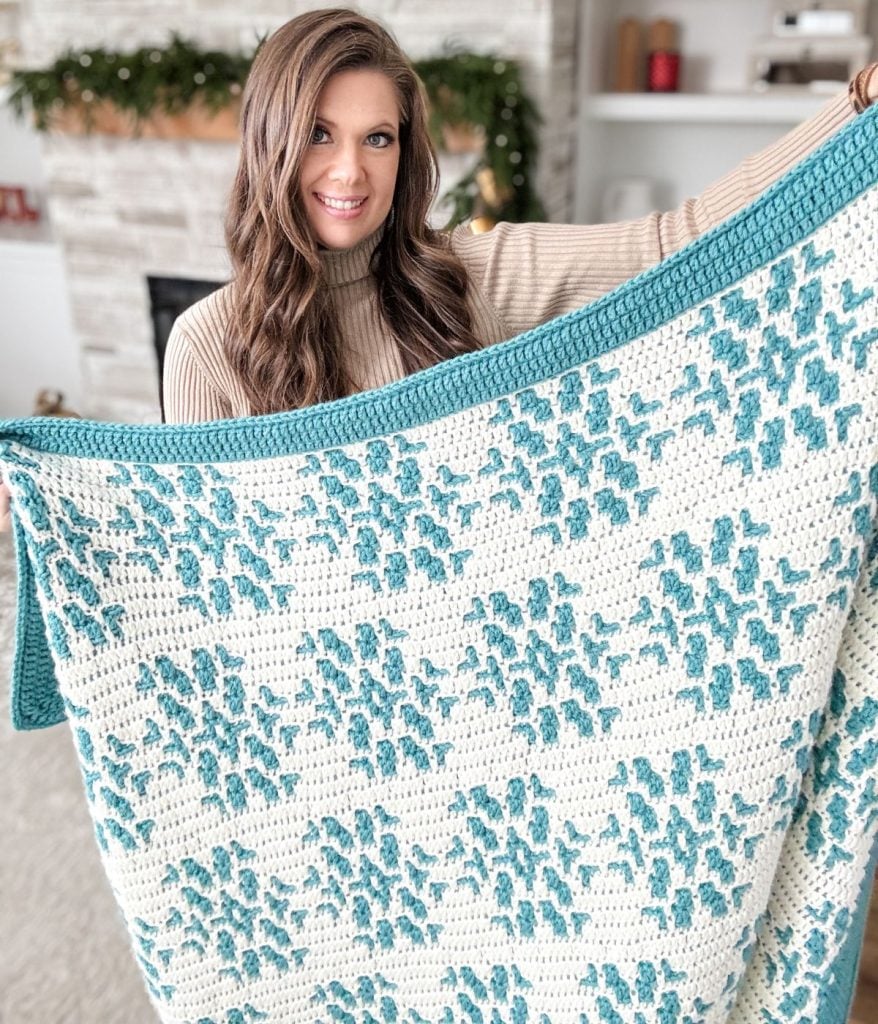
Introducing the Snow Flurries Mosaic Snowflake Blanket!
Add a festive and cozy touch to your winter decor with this charming snowflake mosaic blanket.
This stylish blanket measures approximately 54″ x 60″, making it the perfect size for a throw. Whether you’re snuggling up on the couch or adding a warm, decorative touch to your bed, this blanket has you covered!

Project Overview
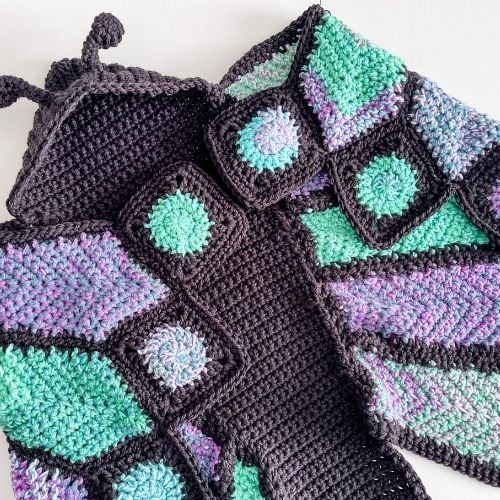
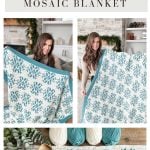
The Snow Flurries Mosaic Blanket features a beautiful snowflake design created using the overlay mosaic crochet technique. Finished with a clean double border that hides yarn tails, the pattern includes written instructions, a chart, and a step by step video tutorial.
Skill level: Intermediate
Sizes: One size, 54″ x 60″
Yarn Weight: Worsted weight #4
Yarn: Mary Maxim Starlette CDN
Hook Sizes: US G+/7 (4.5mm)
Construction: Overlay mosaic technique
Video Tutorial: https://youtu.be/M-HWVICaMLQ
Key Takeaways
- The Snowflake Blanket features a charming snowflake design and measures 54″ x 60″, making it perfect for cozying up in winter.
- Designed using the overlay mosaic crochet technique, this pattern comes with detailed instructions, a chart, and a video tutorial.
- This project is suitable for intermediate crocheters, using worsted weight yarn and specific hook sizes.
- The pattern emphasizes the satisfaction of creating intricate designs without hassle, making it enjoyable for crocheters.
- Follow the tutorial closely to achieve beautiful results with your Snowflake Blanket.
Crocheted using the soft and durable Mary Maxim Starlette Worsted Weight Yarn, this blanket is designed to be both beautiful and long-lasting.
The Snow Flurries Mosaic Blanket features the overlay mosaic crochet technique, a simple yet effective method for creating intricate colour work patterns without the hassle of carrying or changing yarn throughout a row. Plus, we’ve included a double border to neatly conceal the tails, eliminating the need for weaving them in!
Whether you prefer to follow a written pattern, work from a mosaic chart, or learn through our step-by-step video tutorial, we’ve made it easy for crocheters of all levels to enjoy this pattern.

Snowflake Blanket Pattern
I’ve been dreaming of making a snowflake blanket for so long, and it’s finally finished! ❄️ I started this project last winter but kept getting sidetracked with other fun ideas (you know how it goes!). Big projects like this take time, but I pulled it out this November, stuck with it, and now it’s complete—and I’m absolutely loving it!
With its easy-to-learn repeat, this oversized snowflake blanket is a joy to crochet, and I’m sure you’ll love making it just as much as I did.
One of my favorite things about crocheting mosaic designs is watching the pattern come to life—it’s like a game! Each row adds a new piece to the puzzle, and it’s so satisfying and fun to see it all take shape.

Can I Use The Inset Method Instead?
With inset mosaic crochet, each design row is worked over two rows. While you can adapt many designs to inset mosaic, it may slightly change the look of the original pattern.
I usually pick the mosaic method that best suits the design we’re creating. I know many of you love the simplicity of no tails—trust me, I get it! It’s tempting to want to use the inset method for everything.
Using the inset mosaic crochet method on this snowflake blanket would stretch out the snowflakes, altering their shape and making them look a bit off. It’s best to stick with the overlay technique for this one to keep the snowflakes looking just right!
Video Tutorial
In this detailed guide, we’ll walk you through how to read and follow an overlay mosaic chart, demonstrating the first few rows to help you get started on this beautiful blanket. You’ll learn the techniques needed to create stunning mosaic patterns, ensuring your project comes to life with ease.

Yarn Requirements
Worsted Weight #4 Shown in White and Aqua
100% Acrylic, 180yds/100g
White (A): 9 balls
Aqua (B): 11 balls
Mosaic Crochet Blanket Size
Skill Level
Gauge

Suitable Yarn Substitutes
Crochet Hooks Required

Materials Needed
Helpful Resources
- Join our Facebook Crochet Community for pattern support and inspiration
- Subscribe on YouTube for hundreds of free tutorials
- Sign up for our newsletter and receive 40% off your first Ravelry purchase!
- Sign up for our YouTube Membership
Abbreviations
Ch – Chain
Dc – Double Crochet
Flo – Front Loop Only
Rep – Repeat
RS – Right Side
Rev – Reverse
Sc – Single Crochet
Sk – Skip
Sl St – Slip Stitch
Sp(s) – Space(s)
St(s) – Stitch(es)
WS – Wrong Side
( ) – Work step in parentheses in indicated stitch
Special Stitches

Upgrade to the premium pdf pattern!
Digital PDF Download
Digital pattern only. No physical item will be shipped.
Snow Flurries Mosaic Crochet Snowflake Blanket
FAQ & Terms
This pattern requires a beginner skill level
This pattern is professionally written in technical writing and tech edited for accuracy. You need to be comfortable reading technical repeats.
Written in standard American terms
This post may contain affiliate links. Purchases made through these links may earn MJ’s Off The Hook Designs Inc. a small commission at no extra cost to you. Content on this site is supported by ads—please do not block or remove them.
Copyright
All patterns, photos, and written content are the property of MJ’s Off The Hook Designs Inc. and protected by copyright law.
Usage
Free patterns are for viewing only on this blog. You may not copy, download, print, screenshot, or redistribute any part of the pattern. Access must remain through this page with ads visible. Use of ad blockers, reader view, or any similar tools that remove or hide ads and site content is strictly prohibited.
Legal Notice
Unauthorized reproduction or distribution may result in copyright infringement penalties.
By accessing this post, you agree to these terms and conditions.
Yes! You may sell finished items made from MJ’s patterns, but please credit:
“Pattern by MJ’s Off The Hook Designs Inc.”
Pattern Support is only available in our Facebook Community group and Video Tutorials.
No additional support is provided for modified patterns, alternate yarns, or changes to gauge.
If you’re seeing the message “Email subscription failed, please try again”, don’t worry — it’s usually an easy fix! Here are a few quick things to try:
First, double-check your login details. Make sure you’re signing in with the same email you originally used to create your Grow account. If you’re not sure, click “Forgot Password” to reset your login. Once you’ve updated it, return to my site and try again.
Next, clear your browser’s cache and cookies. Sometimes the login just gets stuck. You can also try opening the page in a private or incognito window, or switching to another browser like Chrome, Safari, or Firefox to see if that does the trick.
It also helps to make sure you’re logged into Grow directly. Visit https://grow.me and sign in there first. Once you’re logged in, come back to my site and refresh the page — your pattern should unlock automatically.
If you’re still having trouble, check your browser’s privacy settings. Grow needs cookies to verify your account, so make sure cookies and cross-site tracking are allowed. On iPhone, go to Settings → Safari → Privacy & Security, then turn off “Prevent Cross-Site Tracking” and “Block All Cookies.” On Android or Chrome, go to Settings → Site Settings → Cookies and select “Allow all cookies.”
Lastly, ad blockers or browser extensions can sometimes block the login pop-up. Try turning them off temporarily while you sign in. If nothing seems to work, log out of Grow completely by going to https://grow.me, selecting your profile icon, and choosing Log Out. Then come back to my site and try logging in again.
If you’re still stuck after trying all of this, please reach out through my Contact Page and let me know what device and browser you’re using (and include a screenshot if you can).

Row 30:
With B, put a slip knot on hook, ch 1, 1 sc in the first st, *1 sc in the blo next st, 1 mdc next 2 sts, 1 sc in the blo of next 17 sts, 1 mdc next 2 sts; rep from * across to last 2 sts, 1 sc in the blo next st, 1 sc in last st, ch 1, cut B.
Row 31:
With A, put a slip knot on hook, ch 1, 1 sc in the first st, *1 mdc next st, 1 sc in the blo of next 2 sts, 1 mdc next st, 1 sc in the blo of next 2 sts, 1 mdc next 11 sts, 1 sc in the blo of next 2 sts, 1 mdc next st, 1 sc in the blo of next 2 sts; rep from * across to last 2 sts, 1 mdc next st, 1 sc in last st, ch 1, cut A.
Row 32:
With B, put a slip knot on hook, ch 1, 1 sc in the first st, *1 sc in the blo next 4 sts, 1 mdc next 2 sts, 1 sc in the blo of next 11 sts, 1 mdc next 2 sts, 1 sc in the blo next 3 sts; rep from * across to last 2 sts, 1 sc in the blo next st, 1 sc in last st, ch 1, cut B.
Row 33:
With A, put a slip knot on hook, ch 1, 1 sc in the first st, *1 sc in the blo next st, 1 mdc next 2 sts, 1 sc in the blo next 3 sts, 1 mdc next 2 sts, 1 sc in the blo next st, 1 mdc next 5 sts, 1 sc in the blo next st, 1 mdc next 2 , 1 sc in the blo next 3 sts, 1 mdc next 2 sts; rep from * across to last 2 sts, 1 sc in the blo next st, 1 sc in last st, ch 1, cut A.
Row 34:
With B, put a slip knot on hook, ch 1, 1 sc in the first st, *1 mdc next st, 1 sc in the blo next 2 sts, 1 mdc next 2 sts, 1 sc in the blo next 3 sts, 1 mdc next st, 1 sc in the blo next 5 sts, 1 mdc next st, 1 sc in the blo next 3 sts, 1 mdc next 2 sts, 1 sc in the blo next 2 sts; rep from * across to last 2 sts, 1 mdc next st, 1 sc in last st, ch 1, cut B.
Row 35:
With A, put a slip knot on hook, ch 1, 1 sc in the first st, * 1 sc in the blo next 2 sts, 1 mdc next st, 1 sc in the blo next 2 sts, 1 mdc next st, 1 sc in the blo next st, 1 mdc next st, 1 sc in the blo next 3 sts, 1 mdc next st, 1 sc in the blo next 3 sts, 1 mdc next st, 1 sc in the blo next st, 1 mdc next st, 1 sc in the blo next 2 sts, 1 mdc next st, 1 sc in the blo next st; rep from * across to last 2 sts, 1 sc in the blo next st, 1 sc in last st, ch 1, cut A.
Row 36:
With B, put a slip knot on hook, ch 1, 1 sc in the first st, *1 sc in the blo next st, 1 mdc next st, 1 sc in the blo next 4 sts, 1 mdc next st, 1 sc in the blo next 9 sts, 1 mdc next st, 1 in the blo next 4 sts, 1 mdc next st; rep from * across to last 2 sts, 1 mdc next st, 1 sc in last st, ch 1, cut B.
Row 37:
With A, put a slip knot on hook, ch 1, 1 sc in the first st, * 1 mdc next st, 1 sc in the blo next 4 sts, 1 mdc next st, 1 sc in the blo next 3 sts, 1 mdc next 5 sts, 1 sc in the blo next 3 sts, 1 mdc next st, 1 sc in the blo next 4 sts; rep from * across to last 2 sts, 1 mdc next st, 1 sc in last st, ch 1, cut A.
Row 38:
With B, put a slip knot on hook, ch 1, 1 sc in the first st, *1 sc in the blo next st, 1 mdc next st, 1 sc in the blo next 4 sts, 1 mdc next st, 1 sc in the blo next 9 sts, 1 mdc next st, 1 sc in the blo next 4 sts, 1 mdc next st; rep from * across to last 2 sts, 1 sc in the blo next st, 1 sc in last st, ch 1, cut B.
Row 39:
Rep row 35.
Row 40:
Rep row 34.
Row 41:
Rep row 33.
Row 42:
Rep row 32.
Row 43:
Rep row 31.
Row 44:
Rep row 30.
Row 45:
Rep row 29.
Row 46:
Rep row 28.
Row 47:
Rep row 27.
Row 48:
With A, put a slip knot on hook, ch 1, 1 sc in the first st, 1 sc in the blo in each st across, 1 sc in last st, ch 1, cut A.
Row 49:
With A, put a slip knot on hook, ch 1, 1 sc in the first st, 1 mdc in each st across, 1 sc in last st, ch 1, cut A.
Row 50 – 191:
Rep rows 2-49, 2 more times, rep rows 2-47 1 time. Fasten off.
Double Border:
Slip Stitch Round:
RS facing With B (easier to see sts) or A and larger hook, join yarn in any st along the top edge of the blanket. Loosely sl st across to corner, at corner ch 2, turn and sl st in each row along the side; at corner ch 2, turn and sl st in each st across the bottom; at corner ch 2, turn and sl st in each row along the side, at corner ch 2, turn and sl st in each st across, cut yarn. Join with the seamless join method. Knot to starting tail and trim.
Back Side – with smaller hook
Round 1:
WS facing with B, join yarn in the back leg of sl st along the top edge of the blanket. Ch 3 (counts as 1 dc here and throughout), 1 dc in each loop around blanket, at each corner work 1 dc in the first ch of ch-2, ch 2, 1 dc in the second ch of ch-2, sl st in the third ch of ch-3 to join.
Front Side – with smaller hook
Round 1:
RS facing with B, join yarn in the back loop of sl st along the top edge of the blanket. Ch 3 (counts as 1 dc here and throughout), 1 dc in each blo around, at each corner work 1 dc in the first ch of ch-2, ch 2, 1 dc in the second ch of ch-2, sl st in the third ch of ch 3 to join.
Rounds 2-3:
Ch 3, 1 dc in each st around, at each corner work 1 dc in the first ch of ch-2, ch 2, 1 dc in the second ch of ch-2, sl st in the third ch of ch-3 to join. Last round fasten off and weave in ends.
Join Double Border:
Place front and back border together hiding all the tails inside. Trim tails so that they fit inside the border. When crocheting you will go through both the back and front side. RS facing with smaller hook, join yarn in any corner ch-2 sp with a sl st, (sc, ch 2, sc) in sp, 1 sc in the blo of front and the flo of the back, sc around the blanket in this manner joining the border, at each corner work (sc, ch 2, sc), sl st in first sc to join, fasten off and weave in ends.
Blocking
Immerse the blanket in lukewarm water with a small amount of dish soap, baby soap, or woolwash. Let it soak for approximately 25-30 minutes. After soaking, gently squeeze out excess water. To eliminate further moisture, wrap the blanket in a towel and press to absorb excess water. If needed, repeat with additional towels.
Next, lay the damp blanket out on blocking mats and carefully pin it to the desired measurements. While pinned, allow the blanket to air dry completely. Once dry, remove the pins to reveal a beautifully blocked and finished blanket.
I hope you enjoyed making my Mosaic Crochet Snowflake Blanket Pattern!

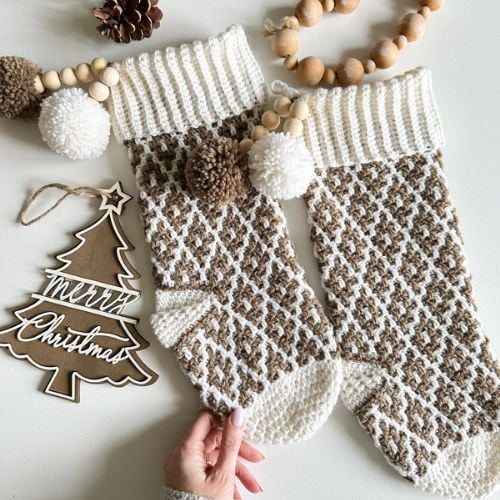
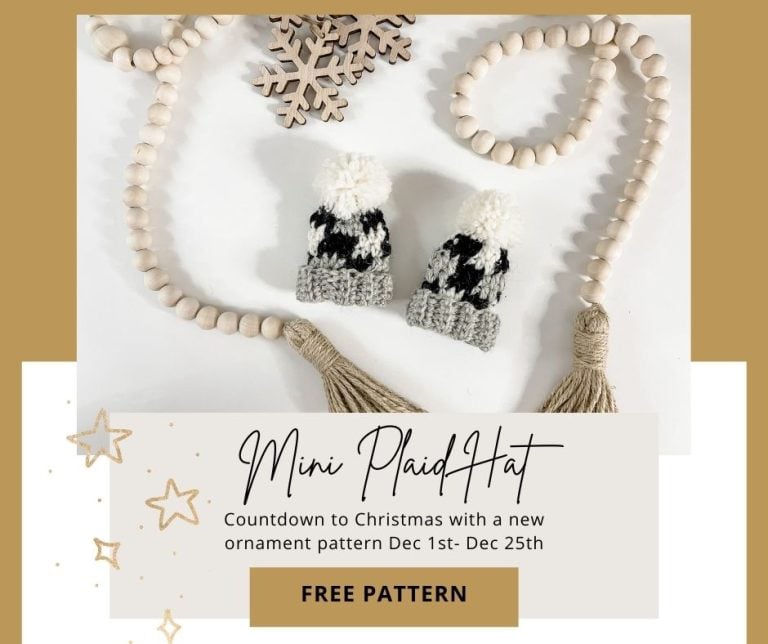
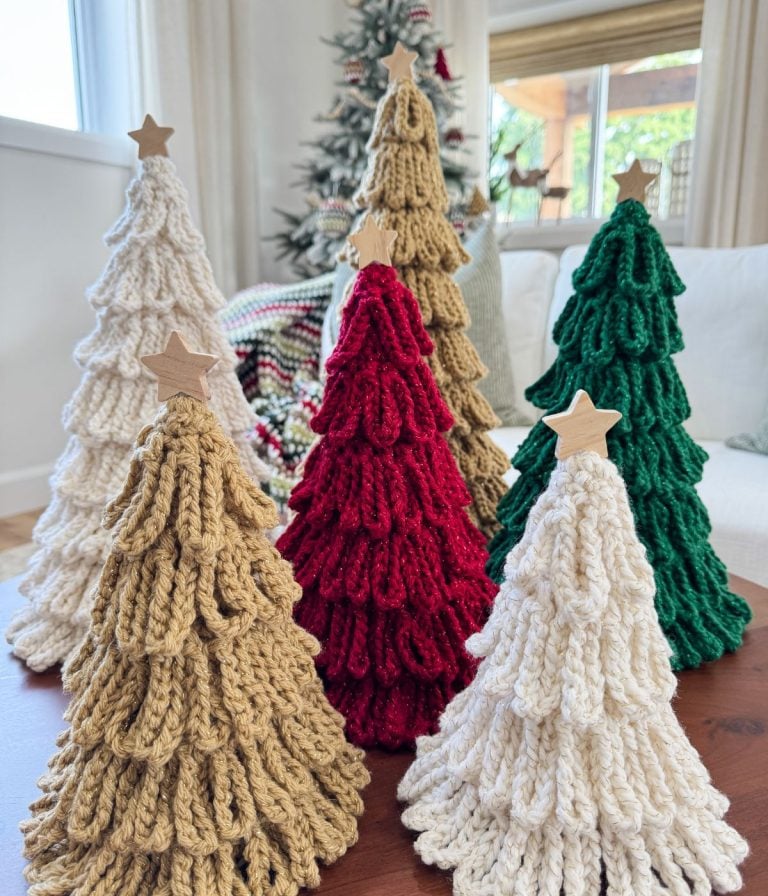
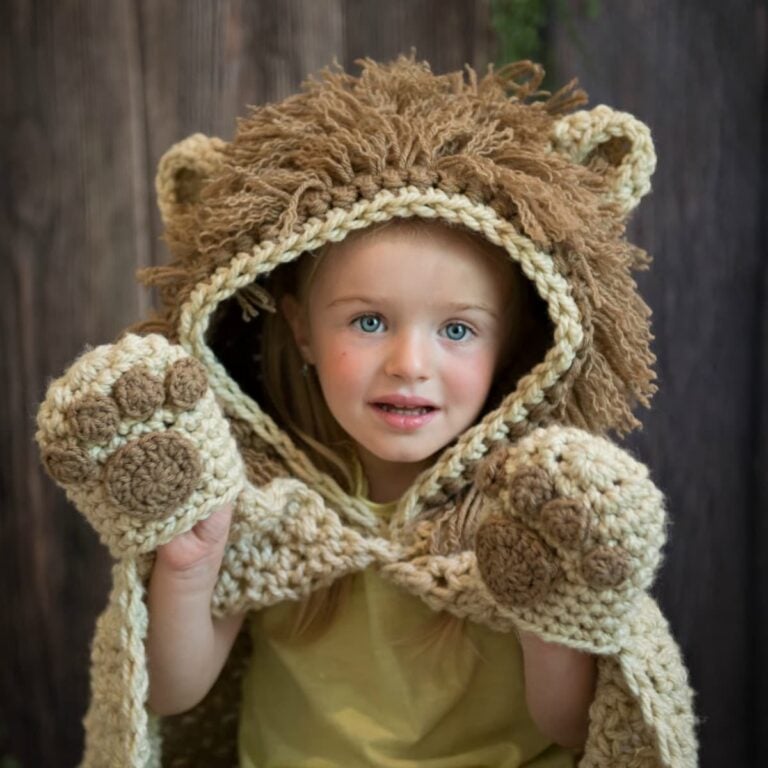
If you like this pattern, you may also enjoy:
This pattern is designed by Michelle Moore of MJ’s Off The Hook Designs Inc, based in Lakefield, Ontario, Canada. Your go-to source for modern, easy crochet patterns. Published on December 5th, 2024.
Thank you for visiting MJ’s Off The Hook Designs. I hope you enjoyed this pattern and feel inspired to pick up your hook and start creating.
You can find even more crochet patterns in our Ravelry and Etsy shops.
For daily inspiration and behind-the-scenes peeks, join me over on Facebook or Instagram, or join our YouTube Membership for exclusive content!
You’ve got questions, we’ve got a community!
Crocheting is better with friends! Join our group to post pictures and ask all your pattern support questions.