*This post may contain affiliate links to support the cost of this blog. At no cost to you, I may make a small commission if you purchase through these links. Read our Privacy Policy HERE
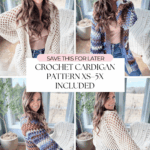
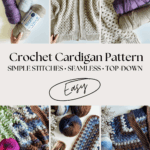
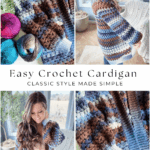
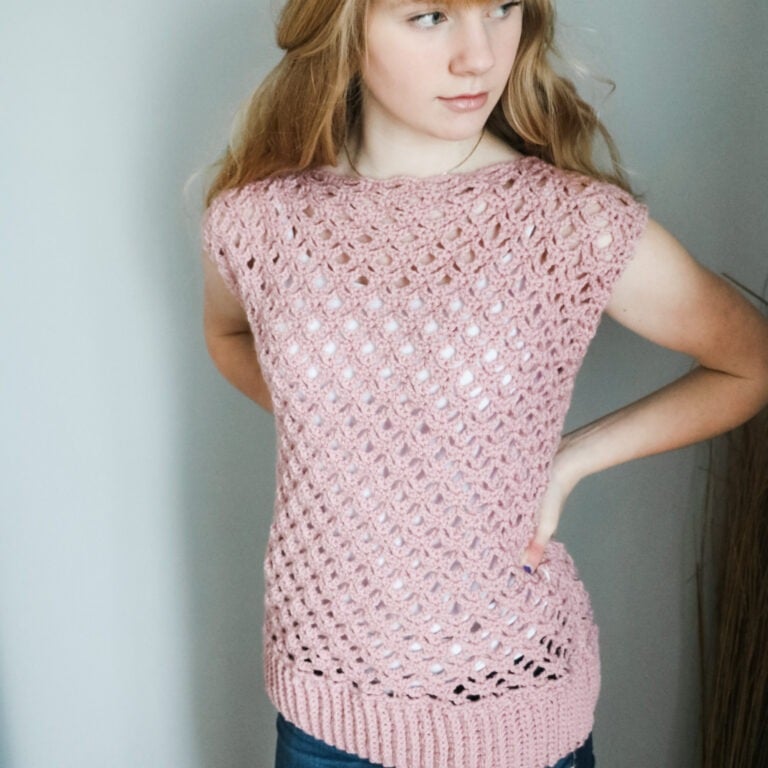
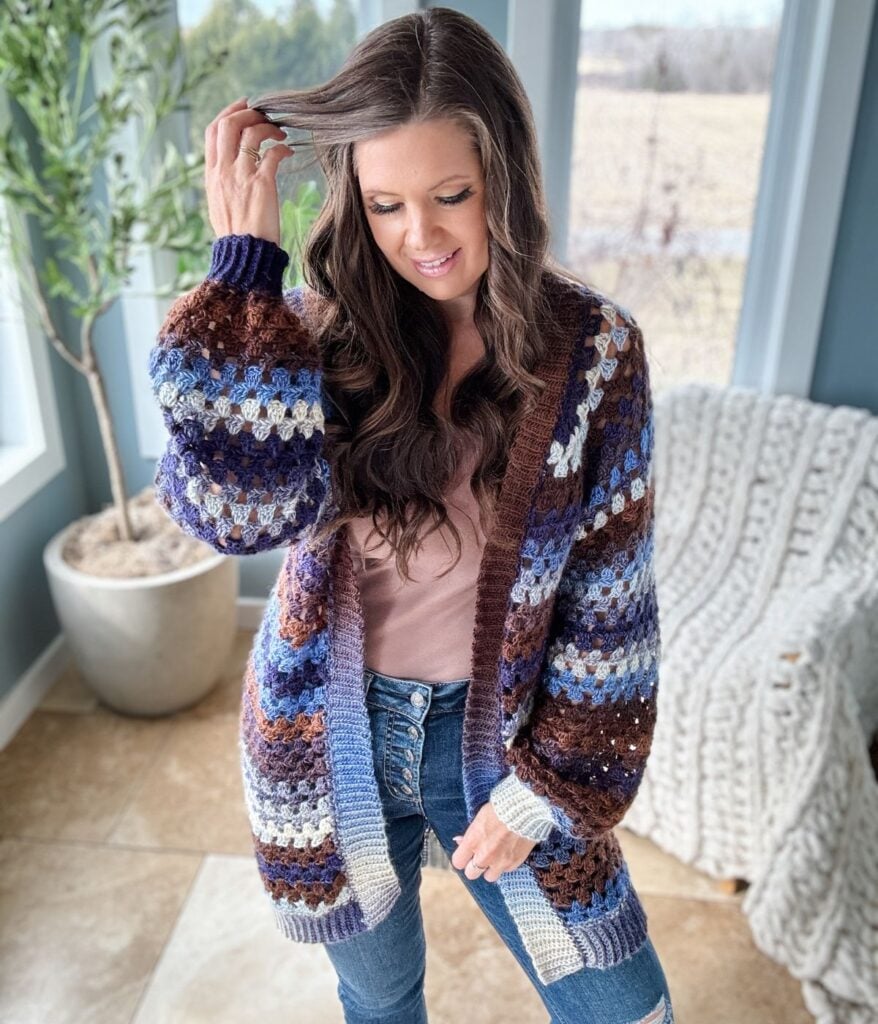
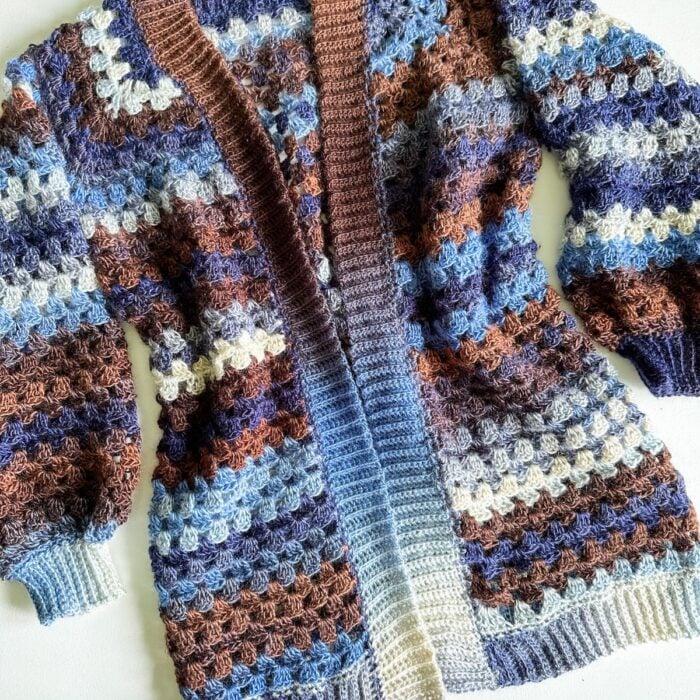
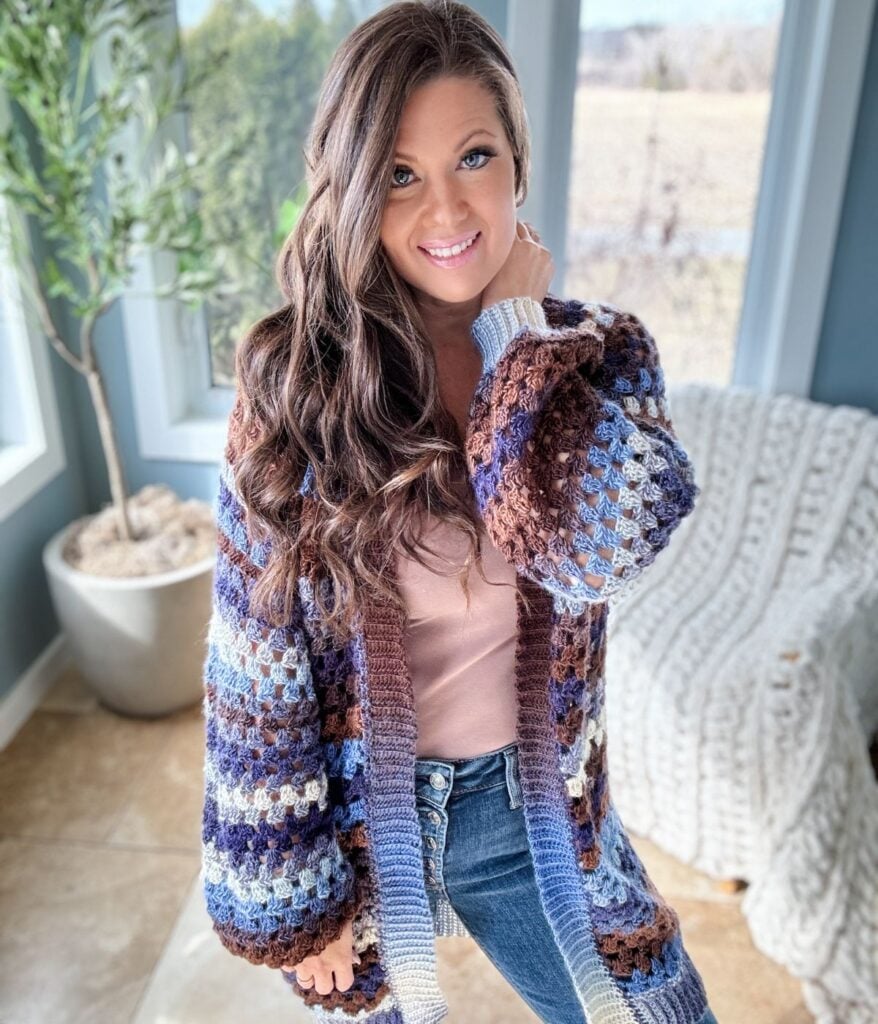
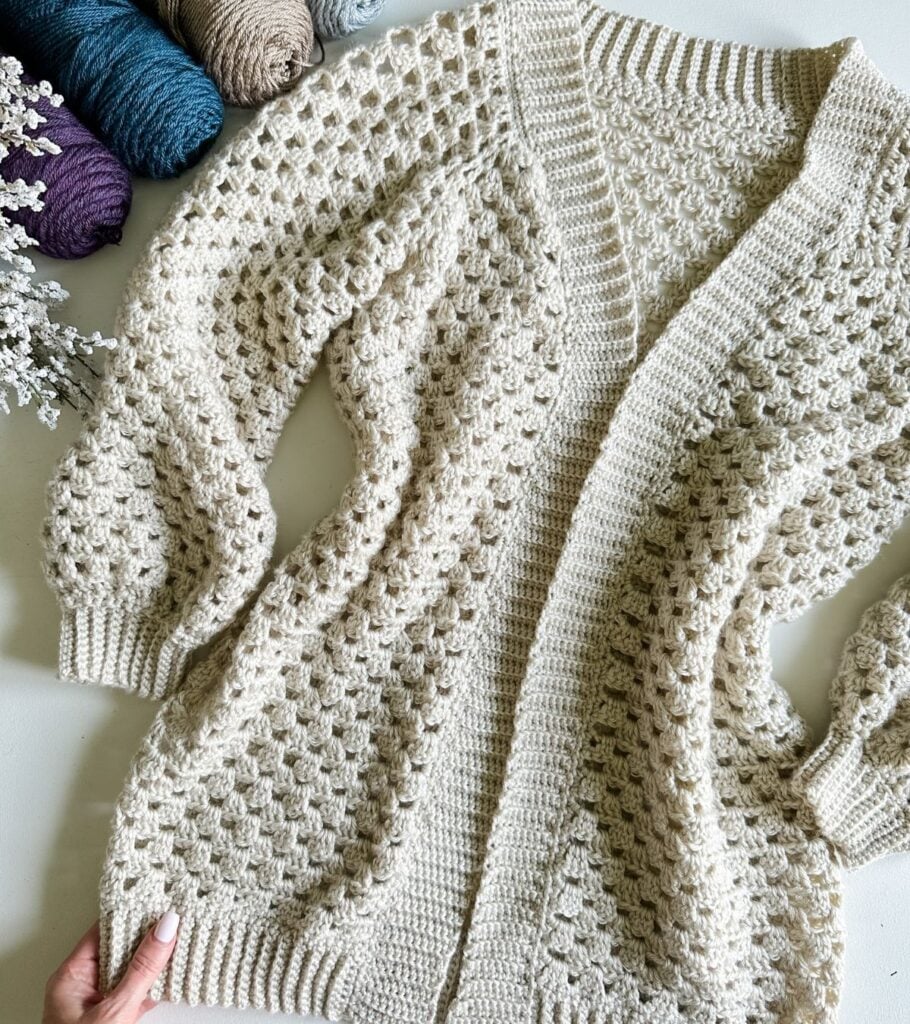
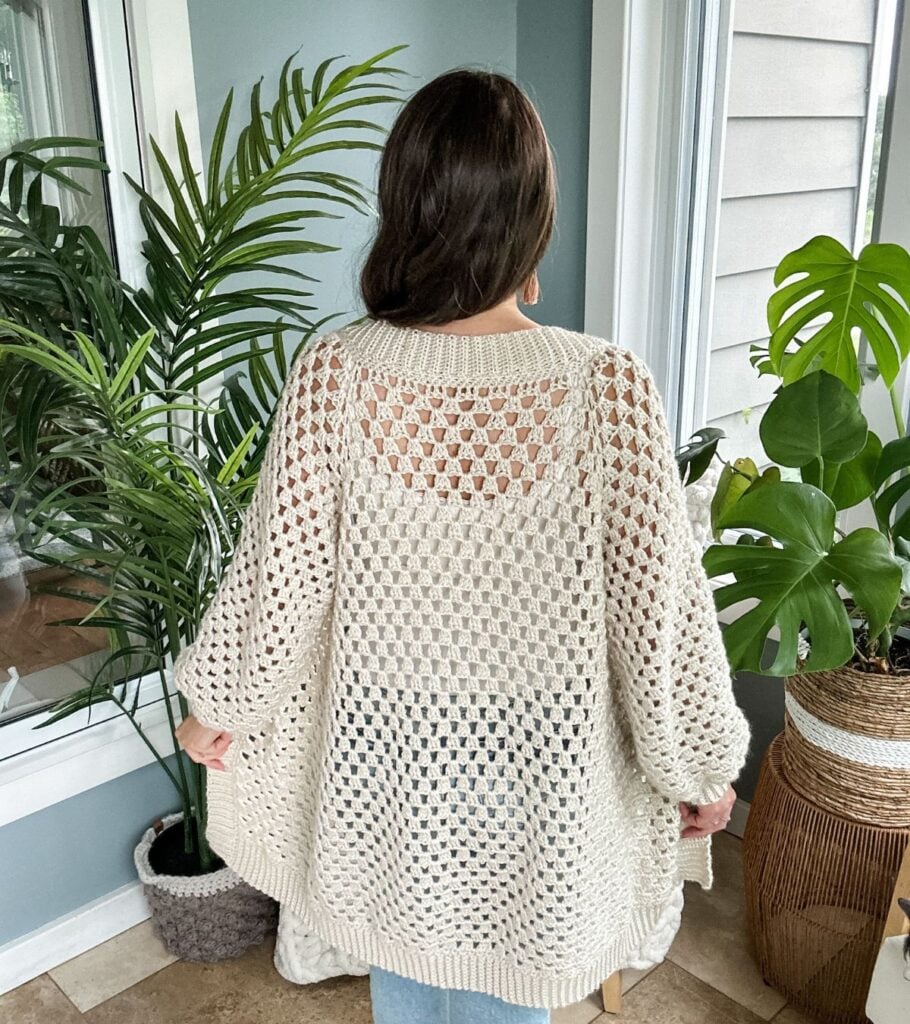
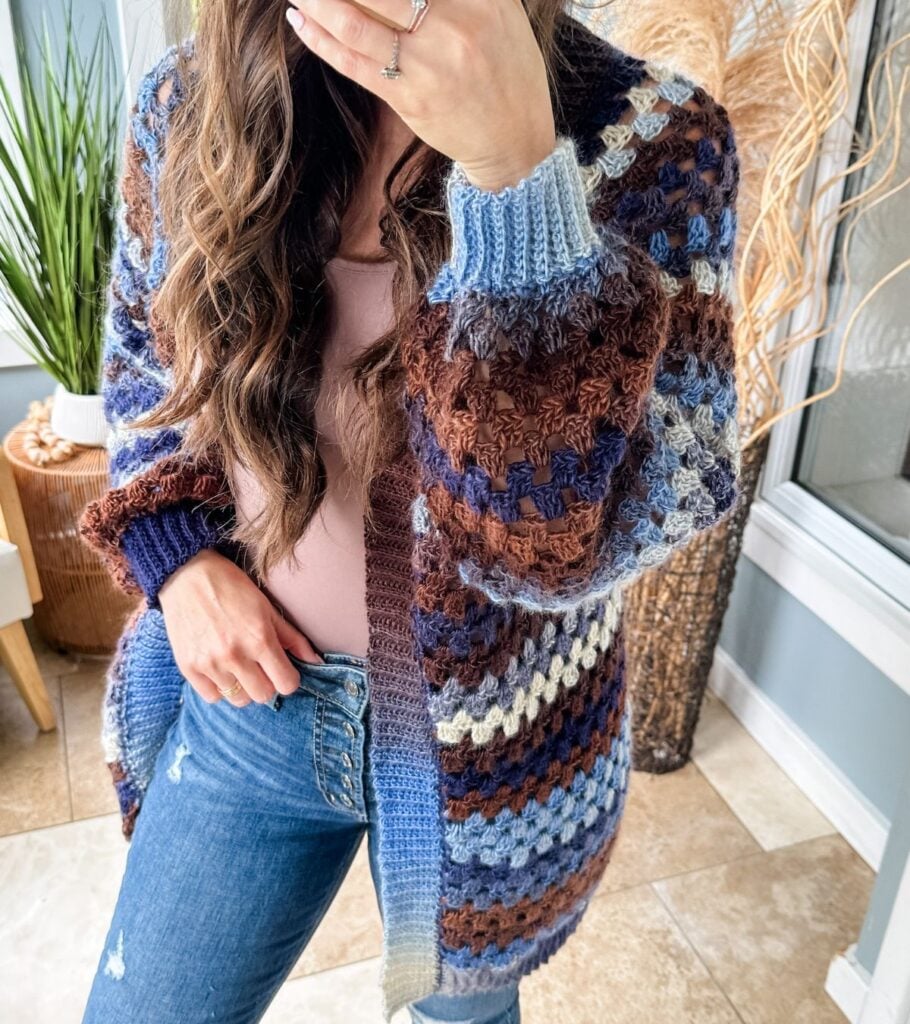
We are excited to introduce our latest crochet pattern, a stunning and seamless raglan-style cardigan. The Granny Stitch Cardigan is worked from the top down in rows, making it perfect for those who don’t enjoy seaming or are new to crochet.
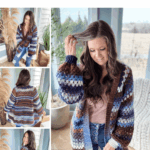
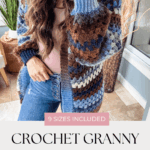
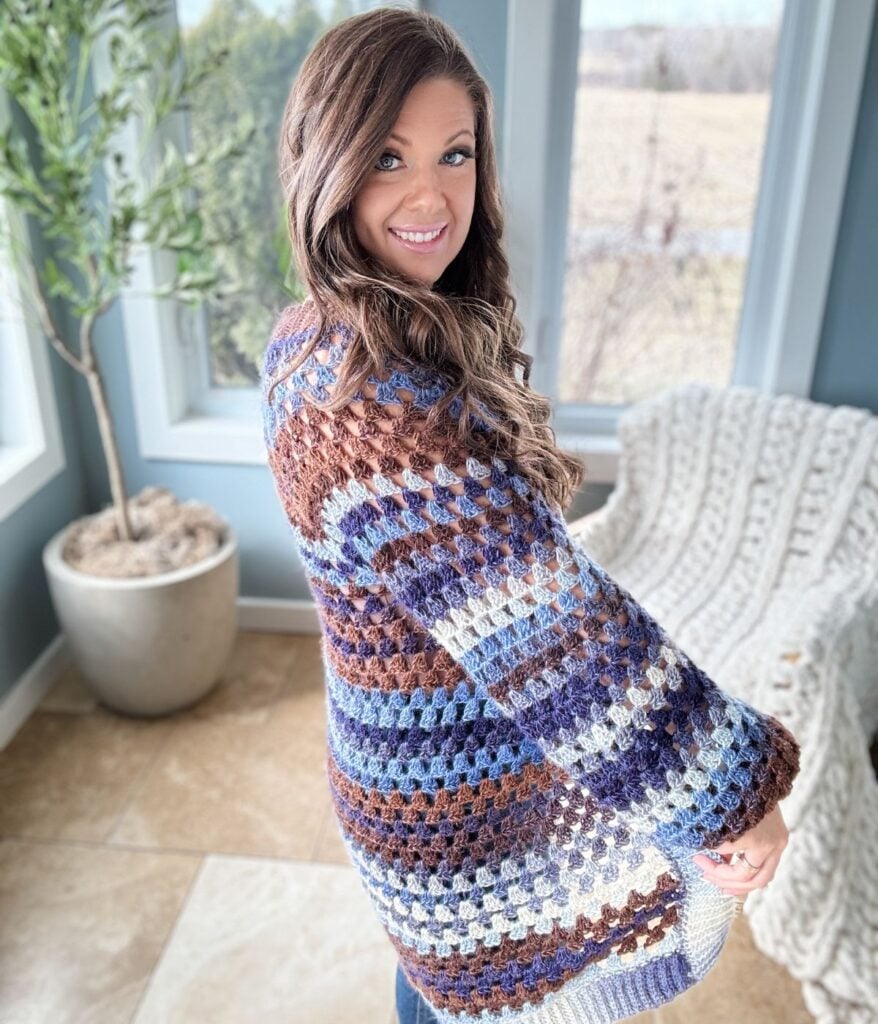
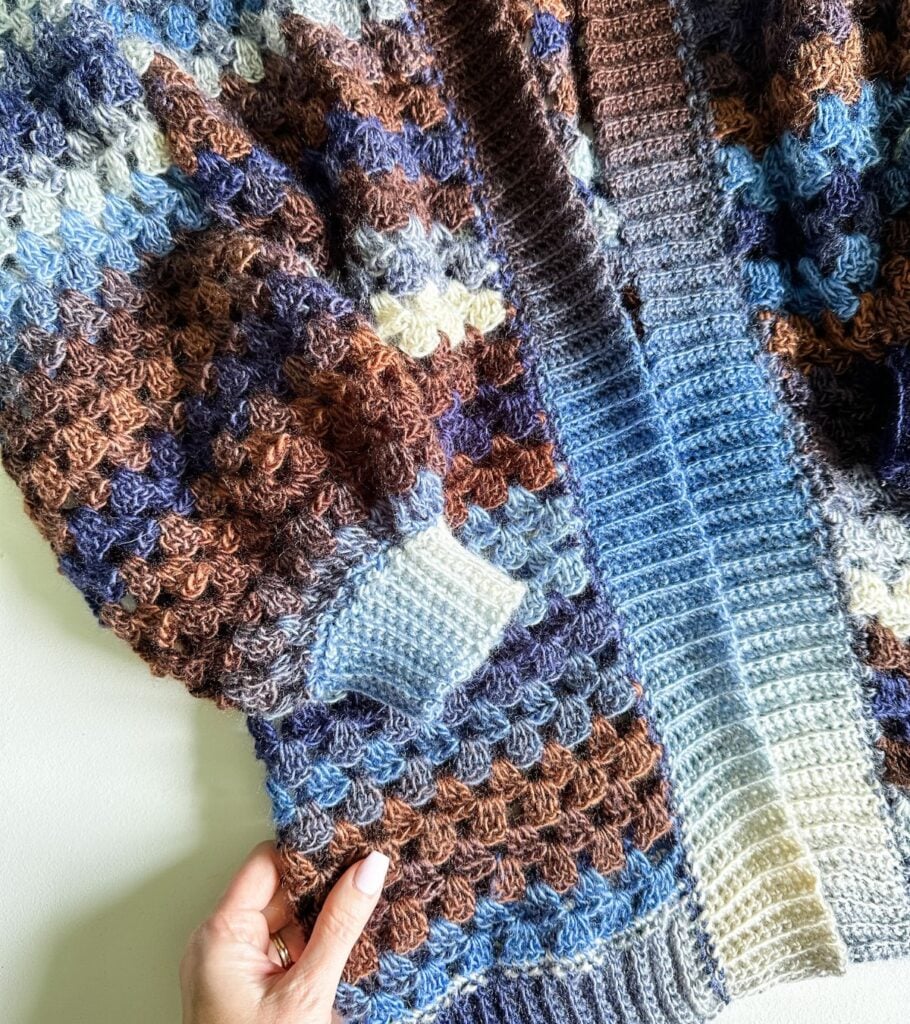
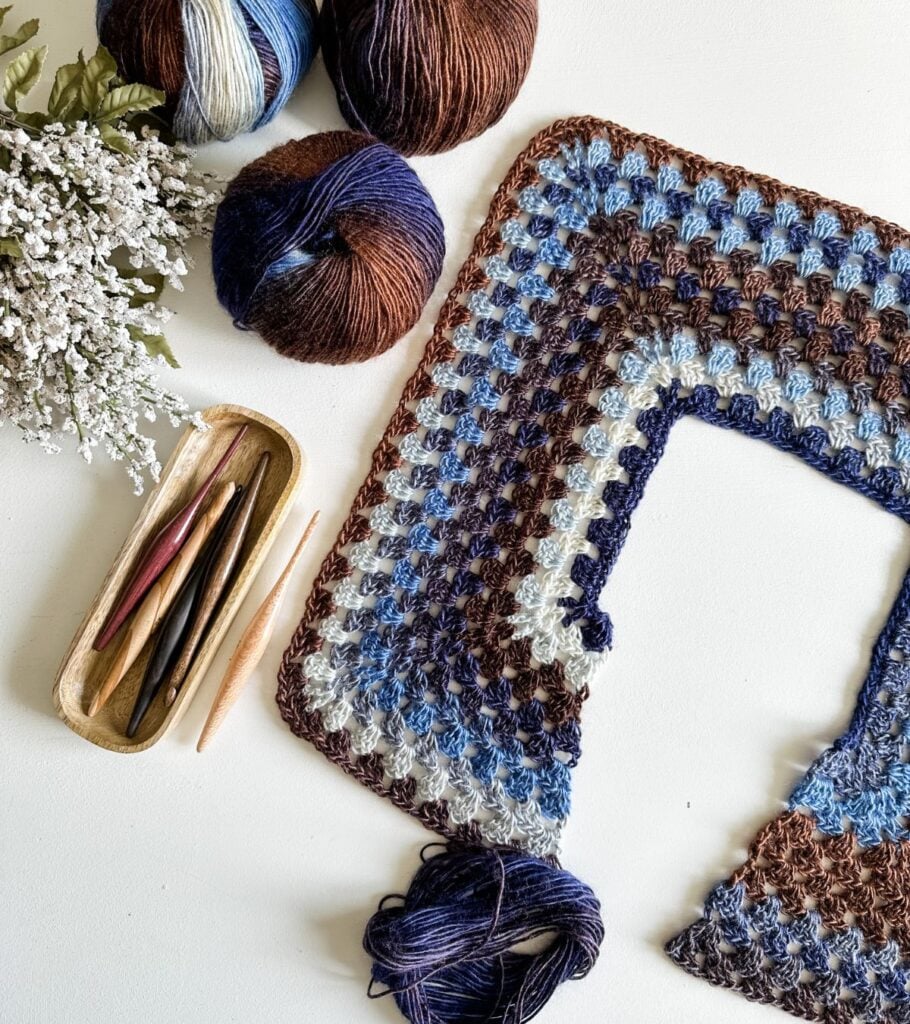
This pattern uses a simple granny stitch cluster pattern featuring double crochet stitches and ch-1 spaces. The result is a beautiful and textured cardigan that you can wear on many occasions. This intermediate design includes sizes from XS-5X, allowing you to tailor it to your preferences and style.
We’ve got you covered with a step-by-step video tutorial, guiding you through the whole process from start to finish. Our instructions are written in an easy-to-follow format, enabling a smooth and enjoyable crocheting experience.
Below you will find everything you need to crochet this easy Granny Stitch Cardigan, including the yarn, hook, materials, free written pattern for blog subscribers, pictures and a video tutorial. If you love this Free Crochet Cardigan pattern, please share!
Key Takeaways
- The Granny Stitch Cardigan is a seamless top-down crochet pattern perfect for beginners and experienced crafters alike.
- It features an easy granny stitch cluster pattern and comes in sizes XS-5X, allowing customization for every body type.
- A step-by-step video tutorial accompanies the pattern, ensuring a smooth crocheting experience.
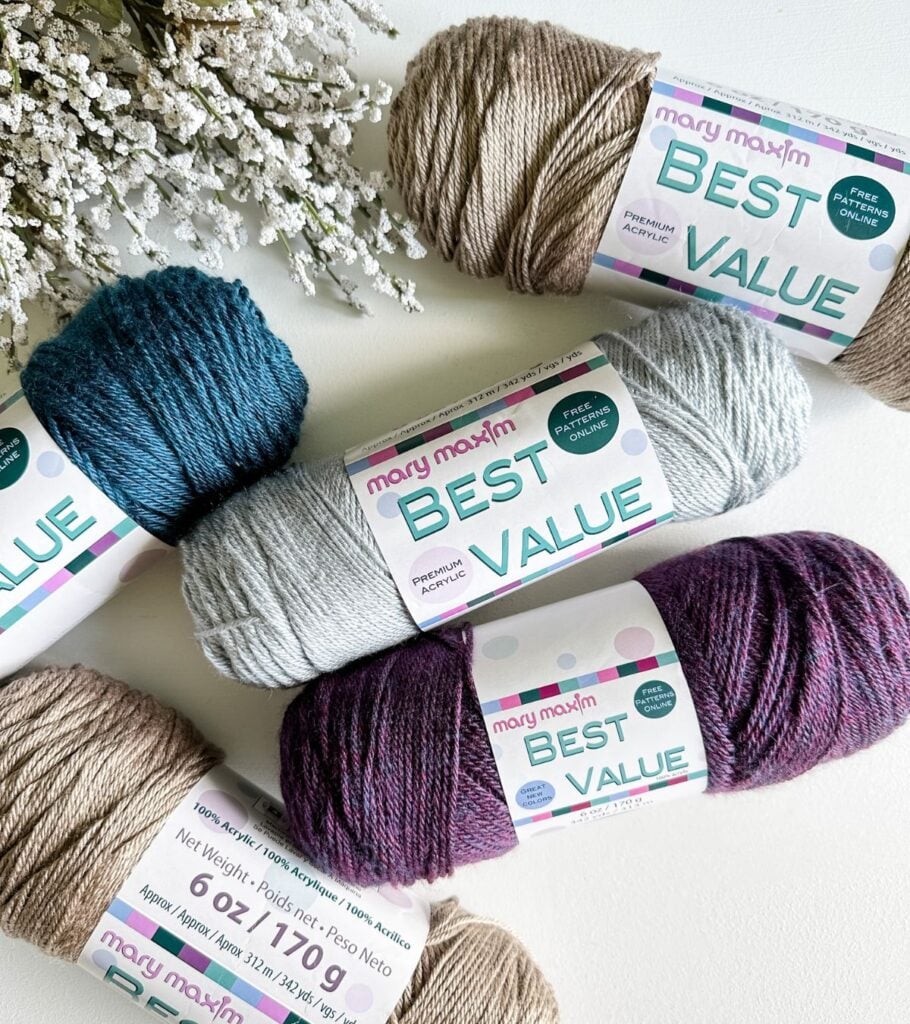
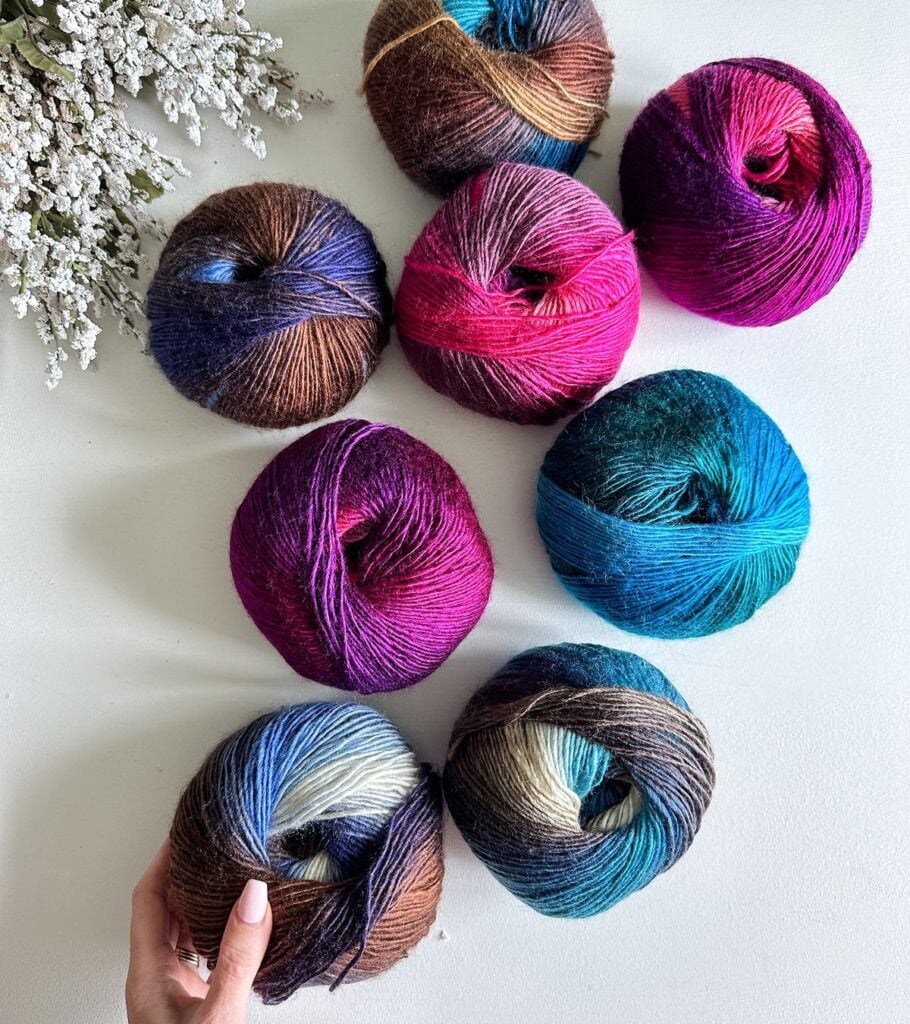
- The pattern uses Mary Maxim Prism and Best Value Yarn, offering beautiful colour options and a cozy feel.
- Yarn substitution options and required materials are provided, making it adaptable for various preferences.
Disclaimer
This post contains affiliate links for the items I used to crochet this pattern and clothing articles I have modelled at no cost to you. I make a small commission if you purchase through these links. This blog post also displays ads. The revenue I receive from Ads, and affiliate links, allows me to post this crochet pattern for free on my blog. I do so in good faith that you will not copy and paste this pattern or distribute it in any way. This free pattern is only available for viewing; you cannot print it off. If you prefer not to view the pattern on the blog, you may purchase an AD-FREE digital PDF pattern in one of my pattern shops for a small fee. Whether you purchase this pattern or view the pattern on my blog, I greatly appreciate your support and readership.
Is Crocheting a Cardigan Easy?
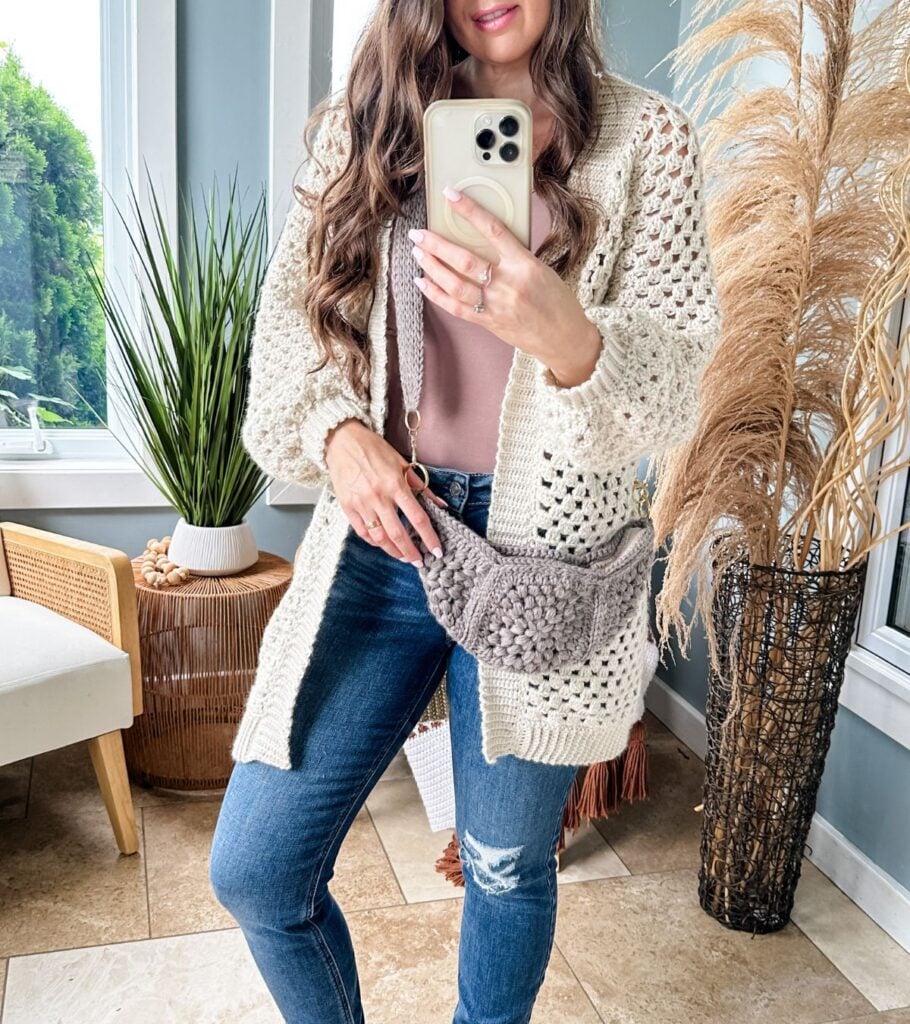
Crocheting a cardigan is such a fun and rewarding experience. The Granny Stitch Cardigan pattern may look daunting, but I assure you it is a lot easier than it looks. With our step-by-step video tutorial for support along the way, you will be on your way to crocheting this trendy and fashionable granny stitch cardigan in no time!
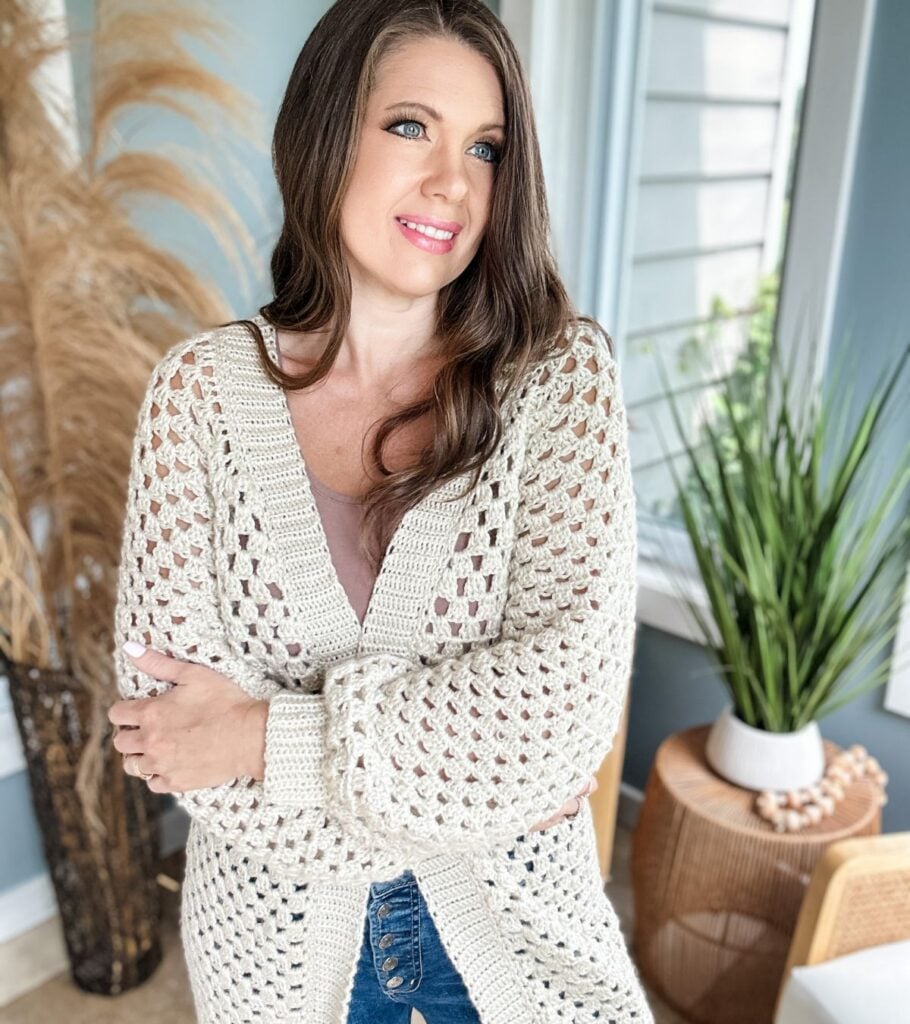
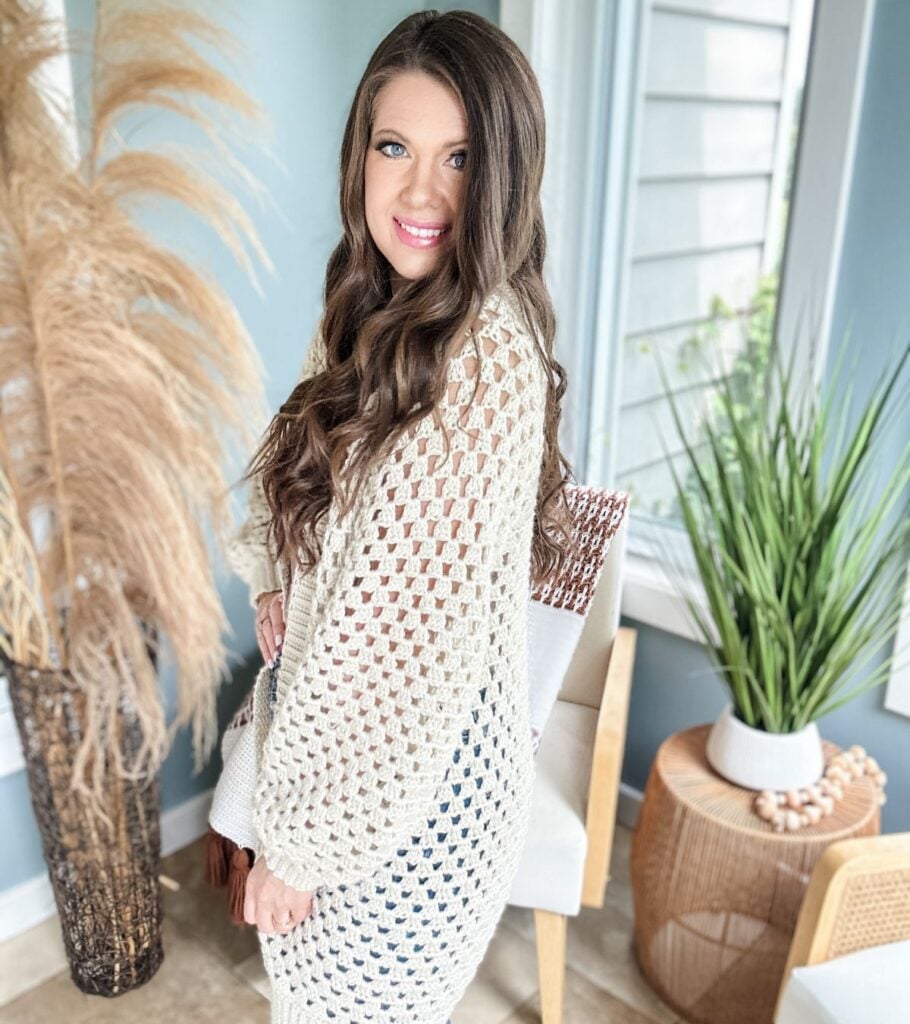
I’m excited to share with you a new design for my latest obsession, the granny stitch! This timeless crochet technique has inspired me to create this fabulous Granny Stitch Cardigan that perfectly complements my Granny Pop collection. Whether you’re enjoying a cool summer evening or adding a cozy layer on breezy fall days, this cardigan is an absolute must-have. I hope that you fall in love with the Granny Pop Cardigan just as much as I have!
What Yarn is Best for a Crochet Cardigan?
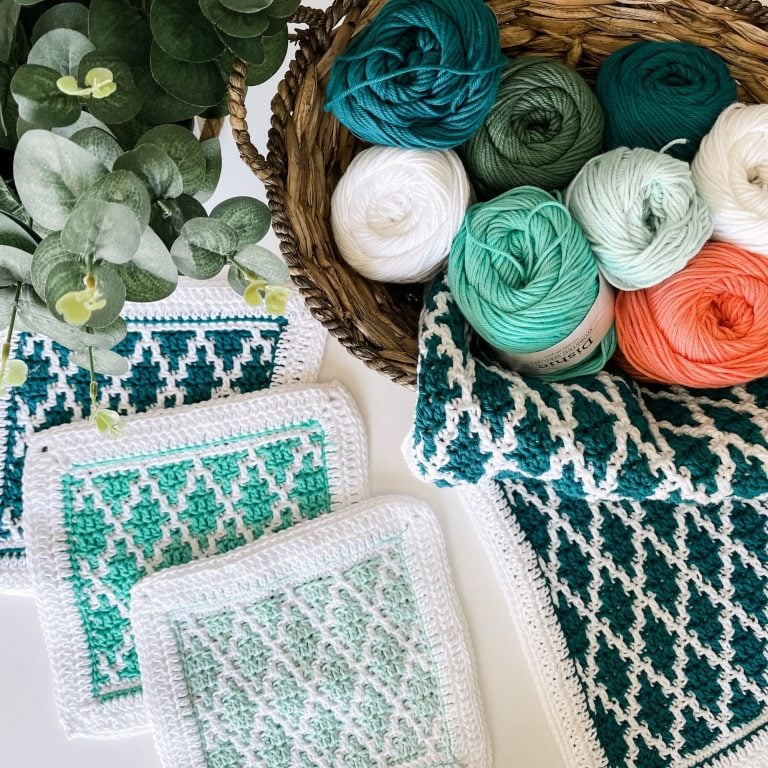
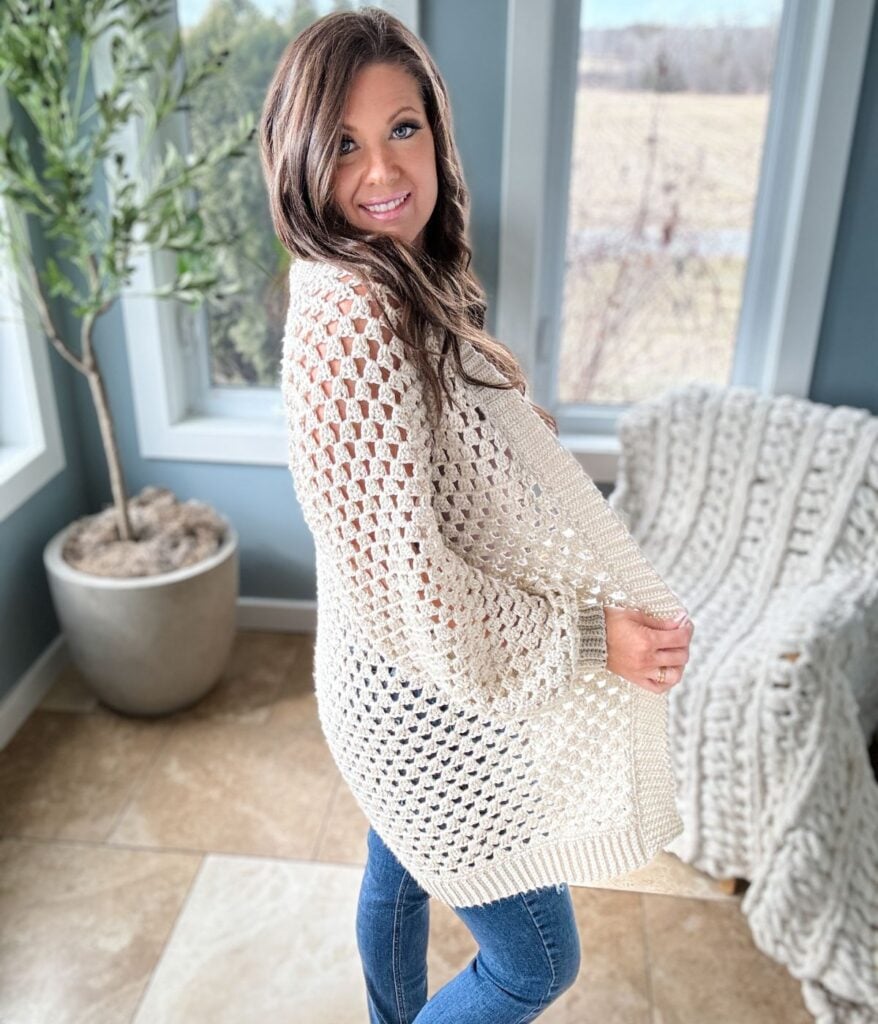
The Granny Stitch Cardigan is designed with care and attention to detail, using the versatile and so soft Mary Maxim Prism and Mary Maxim Best Value Yarn. As any crocheter knows, the choice of yarn for a cardigan depends on various factors, such as the season, temperature, and design. In this case, the combination of the airy and open Granny Stitch pattern with the cozy warmth of acrylic yarns creates the ideal transitional piece for the summer to fall months.
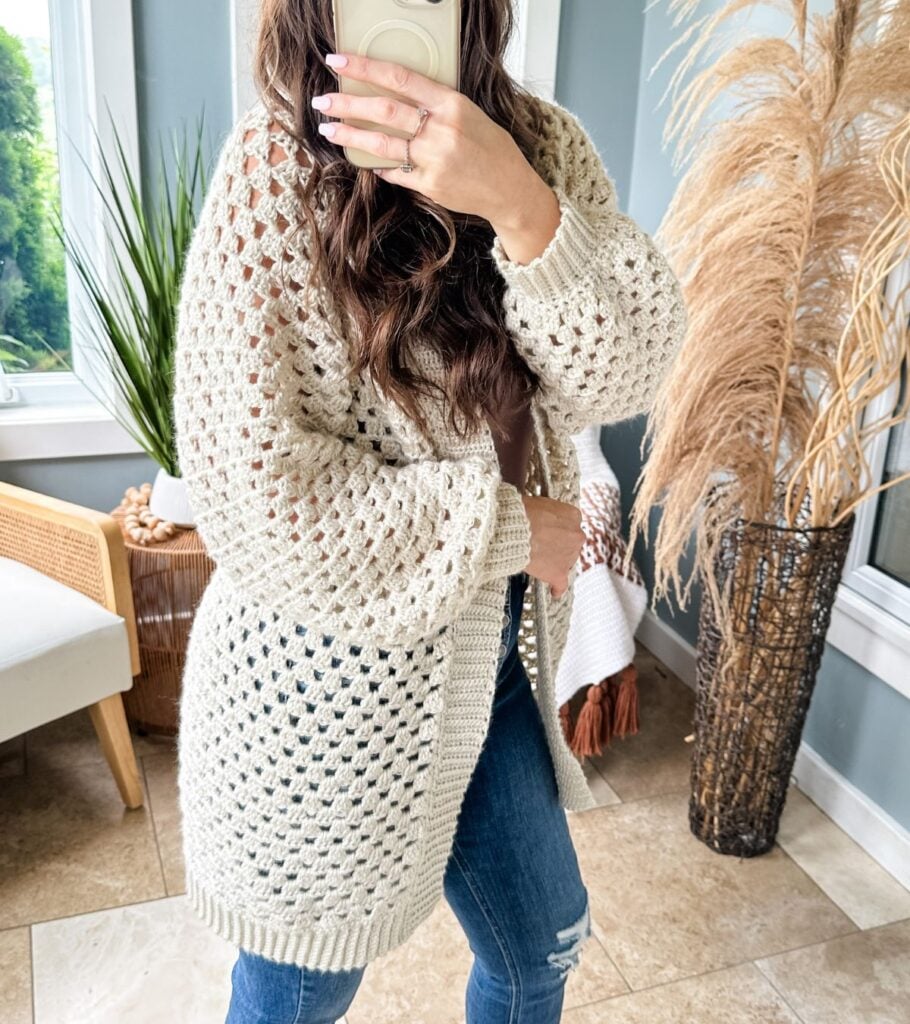
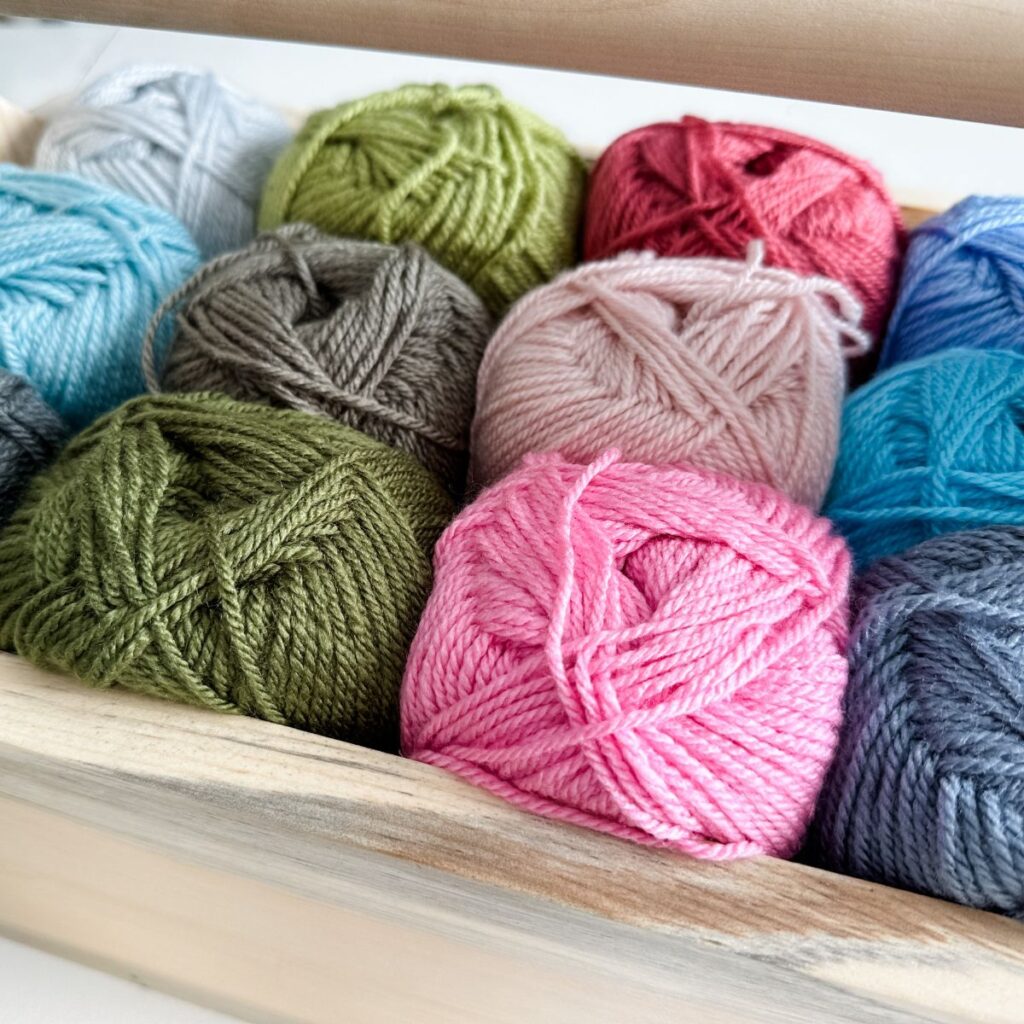
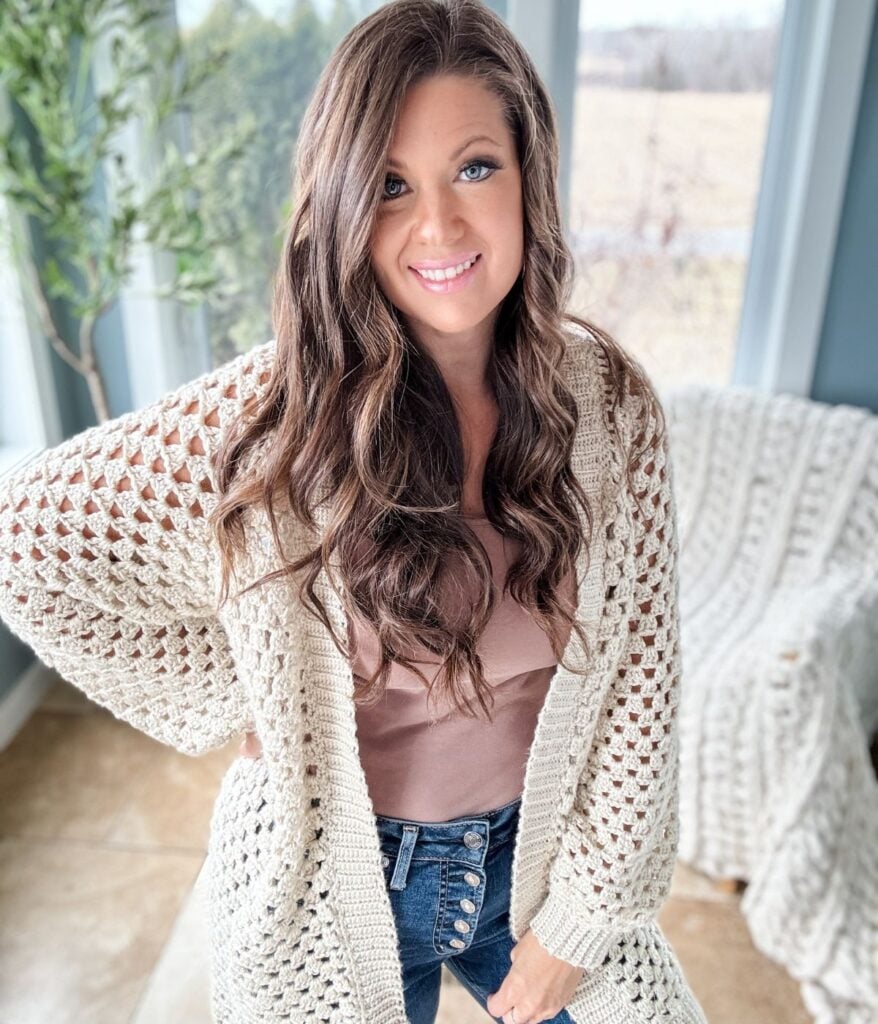
These yarns offer a beautiful selection of colours. With Mary Maxim’s Best Value collection, you’ll discover a delightful array of solid yet tastefully moderate shades, while the Prism assortment presents a wonderful selection of gradient colours. The Prism yarn, in particular, imparts a distinct wool-like appearance, while Best Value yarn maintains its classic charm. Such variety allows you to tailor your cardigan to your personal preferences and style, ensuring a unique and delightful granny stitch cardigan.
Video
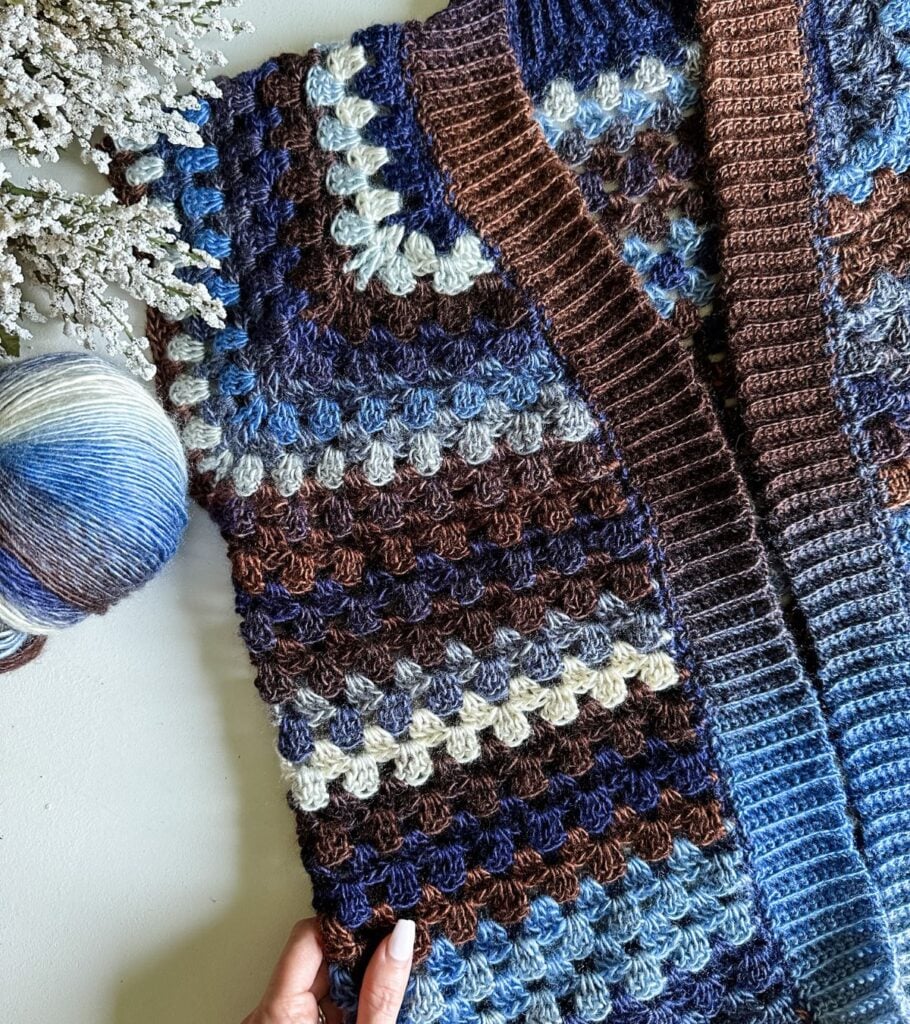
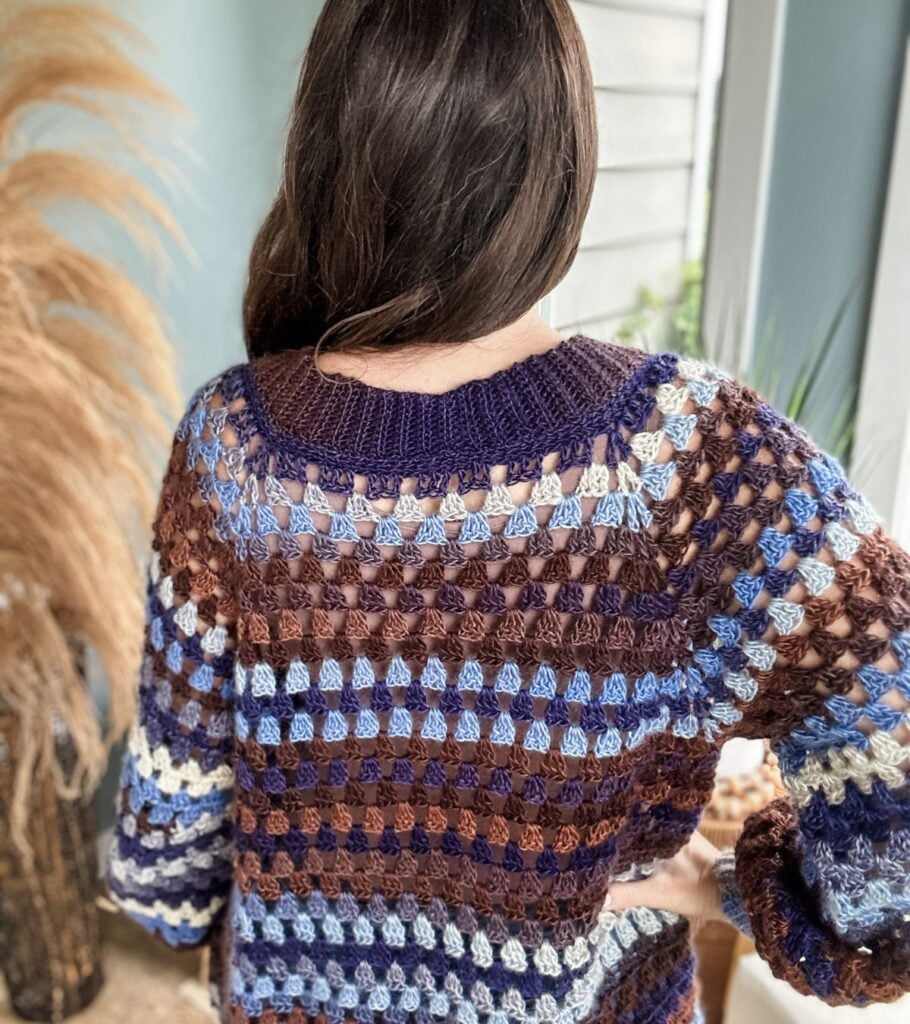
In this video, we will guide you through each step of the pattern so you can create your very own beautiful crochet cardigan. We’ll start with crocheting the yoke, walking you through the whole process of separating the sleeves and body. Next, we’ll demonstrate how to crochet the body, finishing off with a join-as-you-go ribbed band.
We’ll then move on to crocheting the collar and joining back onto our work to crochet the sleeves, which we’ll finish off with join-as-you-go ribbed cuffs. As we go, we’ll teach you how to crochet the granny stitch cluster pattern, enabling you to achieve the textured and polished look of the finished product.
Granny Pop Cardigan
This video tutorial is perfect for crocheters who enjoy visual learning and want to achieve a perfect-fitting cardigan. It’s detailed and easy to follow, with guidance on crochet techniques that are necessary to achieve the best results.
Yarn Requirements
Shown in Lakeside
Light Weight #3
290 Yards, 100 Grams, 100% Acrylic
See the Size Chart below for yarn requirements in XS-5X
Worsted Weight #4
342yd/170g, 100% Acrylic
Shown in Cottonwood
See the Size Chart below for yarn requirements
Purchase the kit from Mary Maxim!
The Kit includes the prism yarn of your choice and the PDF pattern!
Substituting yarn
Yarn substitution is an indispensable skill for crocheters, empowering you to achieve desired results in case the original yarn listed in a pattern is unavailable.
The Granny Pop Cardigan is crocheted using Mary Maxim Best Value, a 100% acrylic worsted weight (4) yarn in colour Cottonwood, as well as Mary Maxim Prism, a stunning gradient yarn in a DK weight (3) and 100% acrylic composition, specifically in colour Lakeside.
If you wish to substitute the yarn for this pattern, I have provided a list of suitable alternatives below. However, please keep in mind that it is important to do a gauge swatch with your chosen yarn and adjust your hook size accordingly to achieve the pattern’s specified gauge for correct sizing. This will ensure that the final garment turns out as intended.
Yarn Substitutes
Mellowspun (CDN) is Made of soft, 100% premium acrylic with a special twist that we are very proud of! Choose from 33 luscious shades of dk-weight yarn that blend and complement each other.
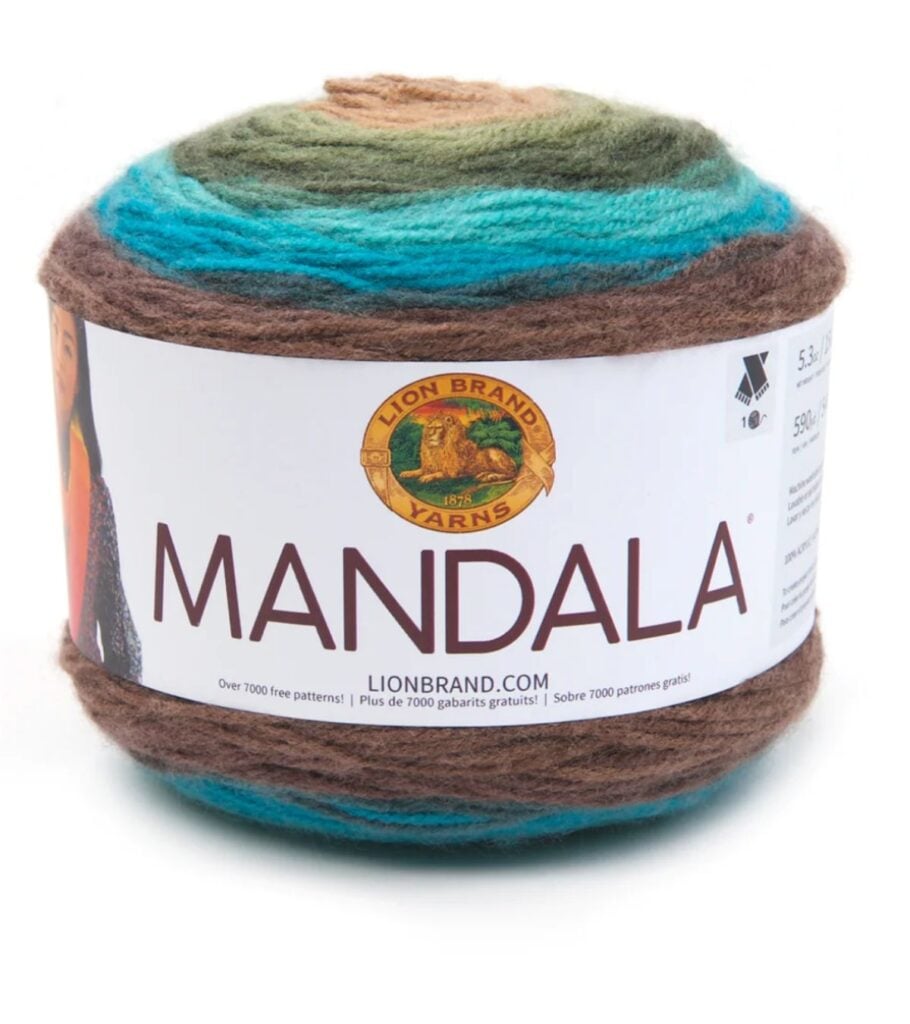
Lion Brand Mandela will also work great as an affordable gradient alternative. King Cole Riot DK is an excellent wool/acrylic substitute coming in a few dark variegated woodsy colours.
Premier Bamboo Fair (CDN) Bamboo Fair, the perfect blend of bamboo fibre and cotton, boasts a silky softness and subtle sheen that’s ideal for warm-weather projects. Perfect for a day trip to the beach or a summer picnic. It’s 60% bamboo and 40% cotton, and each is 3.5 oz. The ball contains 273 yds.
Brava Sport – Brava is an affordable and versatile 100% acrylic yarn that’s gentle on sensitive skin but also hard-wearing for durability. Perfect for projects that require easy care and maintenance, it’s hypoallergenic and machine washable, making it accessible for everyone.
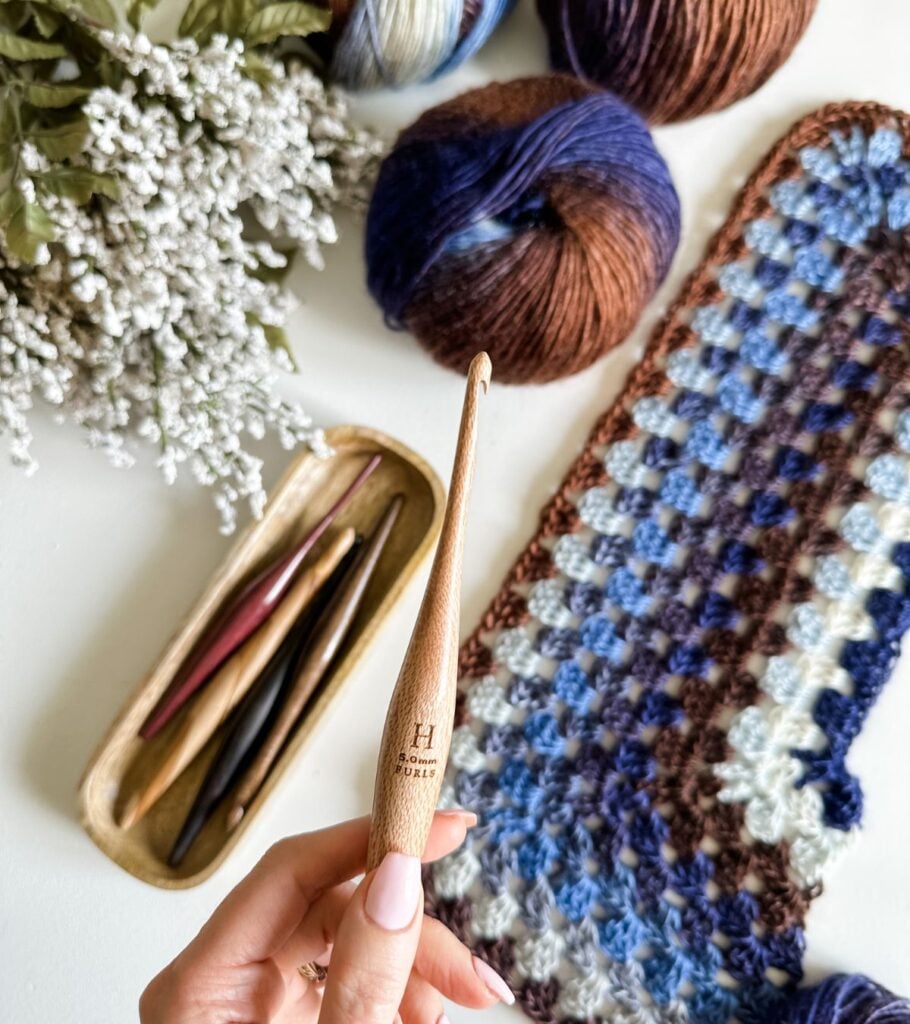
Crochet Hooks Needed
Or size needed to obtain gauge
Use code MJS15 for 15% off Furls Crochet
Additional Supplies
Helpful Resources
- Join our Facebook Crochet Community for pattern support and inspiration
- Subscribe on YouTube for hundreds of free tutorials
- Sign up for our newsletter and receive 40% off your first Ravelry purchase!
- Sign up for our YouTube Membership
Granny Stitch Cardigan Sizing
XS( S, M, L, XL, 2X, 3X, 4X, 5X)
The Schematic is included in the PDF digital download crochet pattern.
Gauge
Body: 4-3 dc cluster and 4 ch-sps (16 sts) & 7 rows equal to 4″ with 5mm crochet hook in dc pattern
Ribbing: 10 sts & 10 rows equal to 2″ with 4.5mm crochet hook in sc blo
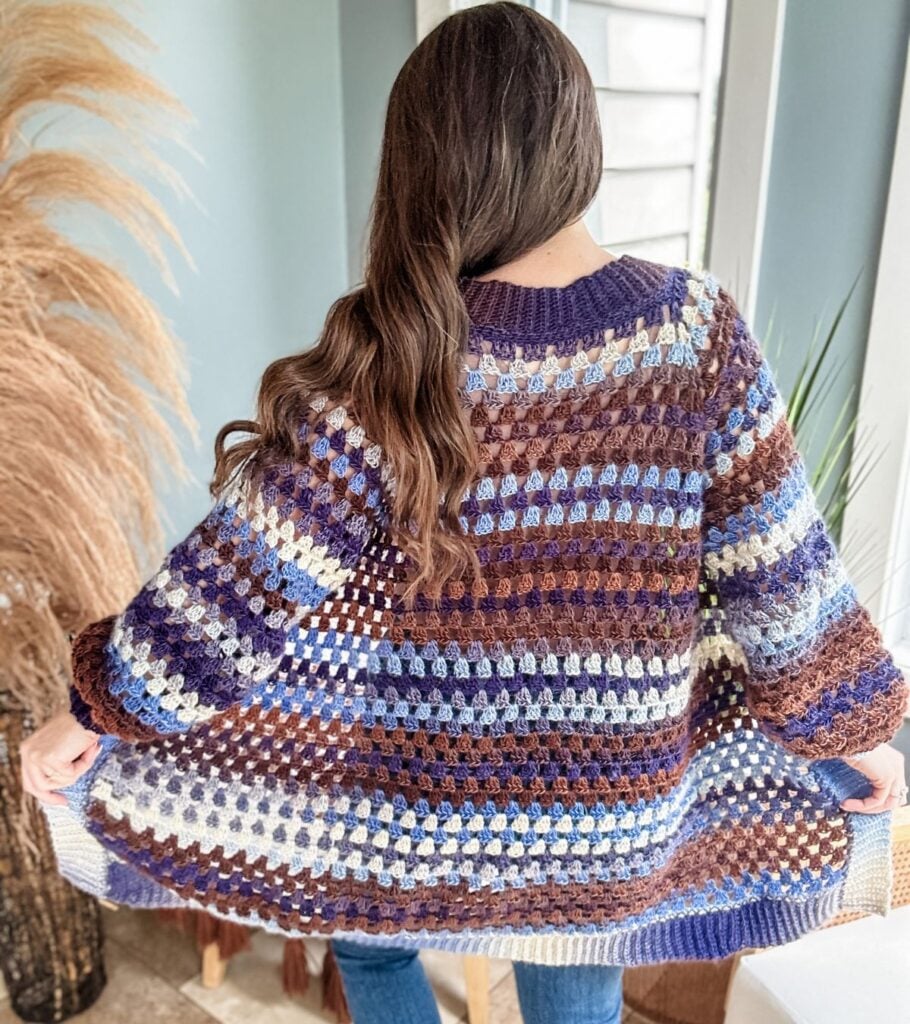
Granny Stitch Cardigan Construction
The Granny Pop Cardigan pattern is worked from the top down in rows until the desired size is reached. Once this occurs, you will separate the sleeves and body by following our instructions. From there, you will continue to work the body in rows, finishing it off with a band and collar. Next, you’ll need to join back onto the sleeves and work them in the round, following our step-by-step guide. We’ll show you how to finish off the sleeves with a beautiful cuff, providing you with a seamless and professional look.
Purchase the Beautifully Designed AD-FREE PDF Download
The PDF includes the Schematic Measurements and optional sleeve decrease instructions.
Grab a Copy of the Granny Pop Collection Ebook
The Ebook includes Granny Pop Pullover, Granny Pop Cardigan, Granny Pop Hoodie, Mini Pop Cardigan, Mini Pop Pullover, and the Granny Pop V-Neck Patterns!
Granny Stitch Cardigan Pattern
FAQ & Terms
This pattern requires an intermediate skill level.
This pattern is professionally written in technical writing and tech edited for accuracy. You need to be familiar with technical repeats.
1. Affiliate Links & Ad Support
This post may contain affiliate links. At no extra cost to you, purchases made through these links may earn MJ’s Off The Hook Designs a small commission. The content on this site is supported by advertisements. By using this site, you agree not to circumvent, block, or tamper with these ads.
2. Copyright & Intellectual Property
All content on this blog, including free crochet patterns, instructions, charts, photos, videos, and written materials, is the property of MJ’s Off The Hook Designs Inc. and is protected under copyright and other intellectual property laws.
3. Personal Viewing & Use Only
Free patterns published on this site are provided for viewing only on this blog. You may not:
• Copy, download, print, take screenshots, or redistribute the pattern in any form (digital or physical) outside this blog.
• Post the pattern or instructions elsewhere online or share it publicly without written consent.
Even for “personal use,” the pattern must only be used while viewing this blog post with the ads intact. Tampering with, hiding, or removing ads while accessing the pattern is strictly prohibited.
4. Screenshots & Unauthorized Sharing
Screenshots or any other method of copying the pattern for offline use or redistribution is prohibited. Sharing patterns in forums, social media groups, or private messages without permission is also prohibited.
5. Legal Enforcement
Violation of these terms may constitute copyright infringement and could result in civil or criminal penalties under intellectual property laws. By using this pattern, you agree to comply fully with these terms.
6. Questions & Permissions
For questions about these terms or for permission to use or share patterns outside of these rules, please contact MJ’s Off The Hook Designs Inc. in writing.
Thank you for respecting our work and supporting MJ’s Off The Hook Designs.
Yes! You may sell finished items made from MJ’s patterns, but please credit:
“Pattern by MJ’s Off The Hook Designs Inc.”
Pattern Support is only available in our Facebook Community group and Video Tutorials.
No additional support is provided for modified patterns, alternate yarns, or changes to gauge.
XS (S, M, L, XL, 2X, 3X, 4X, 5X)
Notes
The cardigan is worked from the top down in Rows. All sizes begin the same. Continue working the yoke until the desired size is reached. The pattern is written for the smallest size, with the larger sizes in parentheses ( ). If there is only 1 number, it applies to all sizes—a step-by-step video tutorial is provided on YouTube for the size small.
Size Chart & Yarn Requirments
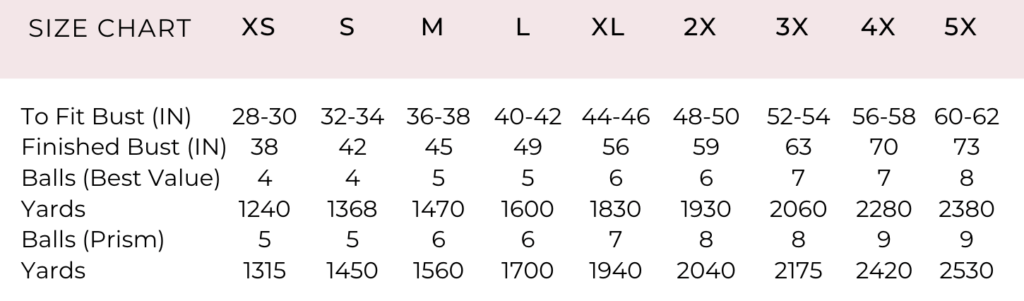
Oversized fit with 8+ inches of Positive Ease. Choose the size based on the preferred Finished Bust Measurement.
Note: Please take note that for Sizes Small, it requires approximately 4 balls of Best Value yarn and 5 balls of Prism yarn. To ensure that you have enough yarn for your project, I highly recommend ordering some extra as a precaution.
Additionally, I want to mention that when working with the Prism yarn, I found that slightly more yardage was used compared to the Best Value yarn. This difference could be attributed to the minor variation in yarn weight or tension while crocheting.
It’s always better to have a little extra yarn on hand than to run out halfway through your project. Happy crocheting!
Abbreviations
Blo – Back Loop Only
Ch – Chain
Dc – Double Crochet
Rep – Repeat
RS – Right Side
Sc – Single Crochet
Sk – Skip
Sl St – Slip Stitch
Sp(s) – Space(s)
St(s) – Stitch(es)
V St – dc, ch 1, dc in the same st
WS – Wrong Side
( ) – Work step in parentheses in indicated stitch
[ ] – Work step in brackets the number of times indicated
Pattern
Yoke
Setup Row (RS):
With the larger hook, ch 80, 1 sc in the back bump of the 2nd ch from hook and in each ch across, turn—79 sts.
Row 1 (WS):
Ch 3 (counts as 1 dc), work 3 dc in the first st, ch 1, sk next st (front panel), V st (dc, ch 1, dc) in the next st, ch 1, sk st, *dc in each of the next 3 sts, ch 1, sk st; rep from * [4 more times] (sleeve), V st next st, ch 1, sk st, *dc in each of the next 3 sts, ch 1, sk st; rep from * [6 more times] (back), V st next st, ch 1, sk st, *dc in each of the next 3 sts, ch 1, sk st; rep from * [4 more times] (sleeve), V st next st, ch 1, sk st, 4 dc in the last st, turn—19 clusters, 4 V sts.
Row 2 (Front panel Incr.):
Ch 3, work 3 dc in the sp between the first and second dc, ch 1, 3 dc in next ch-1 sp, ch 1, V st in the ch-1 sp of V st, ch 1, *3 dc in next ch-1 sp, ch 1; rep from across to the next V st, V st in the ch-1 sp of V st, ch 1, *3 dc in next ch-1 sp, ch 1; rep from across to the next V st, V st in the ch-1 sp of V st, ch 1, *3 dc in next ch-1 sp, ch 1; rep from across to the next V st, V st in the ch-1 sp of V st, ch 1, 3 dc in next ch-1 sp, ch 1, 4 dc in sp between the third dc and turning ch, turn—24 clusters, 4- V sts.
Row 3:
Ch 4 (counts as 1 dc, ch 1), *3 dc in next ch-1 sp, ch 1; rep from * across to the next V st, V st in the ch-1 sp of V st, ch 1, *3 dc in next ch-1 sp, ch 1; rep from across to the next V st, V st in the ch-1 sp of V st, ch 1, *3 dc in next ch-1 sp, ch 1; rep from across to the next V st, V st in the ch-1 sp of V st, ch 1, *3 dc in next ch-1 sp, ch 1; rep from across to the next V st, V st in the ch-1 sp of V st, ch 1, *3 dc in next ch-1 sp, ch 1; rep from * across, 1 dc in turning ch, turn—27 clusters, 4 V sts, 2 dc.
Row 4:
Ch 3, work 3 dc in the first ch-1 sp, ch 1, *3 dc in next ch-1 sp, ch 1; rep from * across to the next V st, V st in the ch-1 sp of V st, ch 1, *3 dc in next ch-1 sp, ch 1; rep from across to the next V st, V st in the ch-1 sp of V st, ch 1, *3 dc in next ch-1 sp, ch 1; rep from across to the next V st, V st in the ch-1 sp of V st, ch 1, *3 dc in next ch-1 sp, ch 1; rep from across to the next V st, V st in the ch-1 sp of V st, ch 1, *3 dc in next ch-1 sp, ch 1; rep from * across to last ch-1 sp, 4 dc in ch-1 sp, turn—32 clusters, 4 V sts.
Row 5 (Front panel Incr.):
Ch 3, work 3 dc in the sp between the first and second dc, ch 1, *3 dc in next ch-1 sp, ch 1; rep from * across to V st, V st in the ch-1 sp of V st, ch 1, *3 dc in next ch-1 sp, ch 1; rep from across to the next V st, V st in the ch-1 sp of V st, ch 1, *3 dc in next ch-1 sp, ch 1; rep from across to the next V st, V st in the ch-1 sp of V st, ch 1, *3 dc in next ch-1 sp, ch 1; rep from across to the next V st, V st in the ch-1 sp of V st, ch 1, *3 dc in next ch-1 sp, ch 1, rep from * across to last cluster, 4 dc in sp between the third dc and turning ch, turn—37 clusters, 4 V sts.
Rows 6-10 (12, 14, 16, 18, 20, 22, 24, 26):
Rep Rows 3 to 5, ending on Rows 4 (3, 5, 4, 3, 5, 4, 3, 5). Ending with 58 (66, 76, 84, 92, 102, 110, 118, 128) clusters.
Separate Body and Sleeves
Body XS
Row 1 (WS):
Ch 3, work 3 dc in the sp between the first and second dc, ch 1, *3 dc in next ch-1 sp, ch 1; rep from * across to V st, sk V st, sk sleeve section and the next V st, *3 dc in next ch-1 sp, ch 1; rep from across to the next V st, sk V st, sk sleeve section and the next V st, *3 dc in next ch-1 sp, ch 1; rep from * across to the last cluster, 4 dc in sp between the third dc and turning ch, turn—33 clusters.
Body S (XL, 4X)
Row 1 (WS):
Ch 3, work 3 dc in the first ch-1 sp, ch 1, *3 dc in next ch-1 sp, ch 1; rep from * across to the next V st, sk V st, sk sleeve section and the next V st, *3 dc in next ch-1 sp, ch 1; rep from across to the next V st, sk V st, sk sleeve section and the next V st, *3 dc in next ch-1 sp, ch 1; rep from * across to last ch-1 sp, 4 dc in ch-1 sp, turn—37 (51, 65) clusters.
Body M (L, 2X, 3X, 5X)
Row 1 (WS):
Ch 4 (counts as 1 dc, ch 1), *3 dc in next ch-1 sp, ch 1; rep from * across to the next V st, sk V st, sk sleeve section and the next V st, *3 dc in next ch-1 sp, ch 1; rep from across to the next V st, sk V st, sk sleeve section and the next V st, *3 dc in next ch-1 sp, ch 1; rep from * across, 1 dc in turning ch, turn—41 (45, 55, 59, 69) clusters.
The Fonts and Back are now worked continuously in rows until the desired length is reached.
XS (S, XL, 4X)
Row 2 (RS):
Ch 4 (counts as 1 dc, ch 1), *3 dc in next ch-1 sp, ch 1; rep from * across, 1 dc in turning ch, turn—32 (36, 50, 64) clusters.
Row 3:
Ch 3, work 3 dc in the first ch-1 sp, ch 1, *3 dc in next ch-1 sp, ch 1; rep from * across to the last ch-1 sp, 4 dc in ch-1 sp, turn—33 (37, 51, 65) clusters.
Rows 4-33 (31, 25, 19):
Rep Row 2 & 3. The pattern is designed in such a way that all sizes, including the yoke, have the same length. This means that there are fewer rows worked for larger sizes. If you wish to alter the length of the cardigan, you may do so as desired.
Row 34 (32, 26, 20):
Ch 1, work 1 sc in the next dc and in each dc and ch-1 sp across, end with 1 sc in the turning ch, turn—133 (149, 205, 261) sts.
M (L, 2X, 3X, 5X)
Row 2 (RS):
Ch 3, work 3 dc in the first ch-1 sp, ch 1, *3 dc in next ch-1 sp, ch 1; rep from * across to the last ch-1 sp, 4 dc in ch-1 sp, turn—42 (46, 56, 60, 70) clusters.
Row 3:
Ch 4 (counts as 1 dc, ch 1), *3 dc in next ch-1 sp, ch 1; rep from * across, 1 dc in turning ch, turn—41 (45, 55, 59, 69) clusters.
Rows 4- 29 (27, 23, 21, 17):
Rep Row 2 & 3. The pattern is designed in such a way that all sizes, including the yoke, have the same length. This means that there are fewer rows worked for larger sizes. If you wish to alter the length of the cardigan, you may do so as desired.
Row 30 (28, 24, 22, 18):
Ch 1, work 1 sc in each dc and ch-1 sp across, end with 2 sc in the turning ch, turn—167 (183, 223, 239, 279) sts. * add an additional st for an even number (optional).
Band
The band is joined as you go to the body edge.
Row 1:
With the smaller hook, ch 11, 1 sc in the 2nd ch from hook and in each ch across, sk first st at the body edge, sl st in the next 2 sts (body edge), turn—10 sts.
Row 2:
Sk sl sts, 1 sc in the blo of each st across, turn—10 sts.
Row 3:
Ch 1, work 1 sc in the blo of each st across, sl st in next 2 sts (body edge), turn—10 sts.
Rows 4-134 (150, 168, 184, 206, 224, 240, 262, 280):
Rep Row 2 & 3 ending on Row 2.
Collar
Setup Row (RS):
With RS facing and smaller hook, put a slip knot on the hook, and join yarn to the bottom corner of the right front panel. Sc in each st across the band, 2 sc per each row across the right front, 1 sc in each st across the neck, 2 sc in each row across the left front, 1 sc in each st across the band, turn.
Join-As-You-Go Ribbing
Row 1:
With the smaller hook, ch 11, 1 sc in the 2nd ch from hook and in each ch across, sk first st at the base row, sl st in the next 2 sts (base row), turn—10 sts.
Row 2:
Sk sl sts, 1 sc in the blo of each st across, turn—10 sts.
Row 3:
Ch 1, work 1 sc in the blo of each st across, sl st in next 2 sts (base row), turn—10 sts.
Rep Row 2 & 3 across the collar edge of the cardigan. Fasten off and weave in ends.
Sleeves (Left & Right)
Note: In the samples provided, the sleeves are crocheted without any decreases. If you prefer to narrow out the sleeves by adding decreases, I have provided instructions on how to decrease the granny cluster in the PDF.
Round 1 (WS):
Put a slip knot on the larger hook (leave a long tail); at the underarm, work a sl st in the first V st (to the right), sl st in the next V st ( to the left), sl st in the next ch-1 sp, ch 3, 2 dc in ch-1 sp, ch 1, *3 dc in next ch-1 sp, ch 1; rep from *around, sl st in ch 3 to join, TURN—15 (17, 19, 21, 23, 25, 27, 29, 31) clusters. Use the starting tail to stitch closed the hole under the arm.
Round 2:
Ch 3, 2 dc in the first ch-1 sp, ch 1, *3 dc in next ch-1 sp, ch 1; rep from * around, sl st in ch 3 to join, turn—15 (17, 19, 21, 23, 25, 27, 29, 31) clusters.
Rounds 3-26:
Rep Round 2. Last round, don’t turn. Crochet the sleeves to the desired length. The band will add an additional 2″ to the sleeve length.
Round 27 (RS):
With the smaller hook, ch 1, work 1 sc in the 2nd dc of the 3 dc cluster, work 1 sc in each ch-1 sp and the 2nd dc of the 3 dc cluster around, sl st in the first sc to join—30 (34, 38, 42, 46, 50, 54, 58, 62) sts.
Cuff
The cuff is joined as you go to the sleeve edge.
Row 1:
With the smaller hook, ch 11, 1 sc in the 2nd ch from hook and in each ch across, sk first st at the sleeve edge, sl st in the next 2 sts (sleeve edge), turn—10 sts.
Row 2:
Sk sl sts, 1 sc in the blo of each st across, turn—10 sts.
Row 3:
Ch 1, work 1 sc in the blo of each st across, sl st in next 2 sts (sleeve edge), turn—10 sts.
Rows 4-30 (34, 38, 42, 46, 50, 54, 58, 62):
Rep Row 2 & 3 ending on Row 2. Last Row, ch 1, with RS facing sl st cuff together, fasten off and weave in ends.
Granny Stitch Cardigan Finishing:
For a professional finish and to prevent the ribbing from curling, I recommend lightly steaming the cardigan and ribbing. This can be done by gently using a steamer to release any wrinkles and flatten the ribbing.
You May Also Love These Patterns
This pattern is designed by Michelle Moore of MJ’s Off The Hook Designs Inc based in Lakefield Ontario Canada. Your go to source for modern easy crochet patterns. Published on June 29th, 2023.
Thank you for visiting MJ’s Off The Hook Designs I hope you enjoyed this pattern and feel inspired to pick up your hook and start creating.
You can find even more crochet patterns in our Ravelry and Etsy shops.
For daily inspiration and behind the scenes peeks join me over on Facebook or Instagram or join our YouTube Membership for exclusive content!
You’ve got questions, we’ve got a community!
Crocheting is better with friends! Join our group to post pictures and ask all your pattern support questions.