*This post may contain affiliate links to support the cost of this blog. At no cost to you, I may make a small commission if you purchase through these links. Read our Privacy Policy HERE


If you’ve just learned how to crochet and you’re ready to make your first real project, this is the perfect place to start!
When we designed the Easiest Crochet Pumpkin, we really wanted to create a fall pattern that a true beginner could make. Nothing complicated, no tricky shaping, and no advanced stitches. If you can work a half double crochet stitch, you can make this pumpkin.

And the best part? It starts as a simple rectangle.
That’s it! You’ll crochet a rectangle using basic half-double crochet stitches worked through the back loop to create a pretty ribbed texture. Once your rectangle is finished, you’ll seam it together, stuff it, and shape it into the cutest little pumpkin.
Want less distractions?
Join Off the Hook Crochet Club
Join the Off The Hook Crochet Club and enjoy hundreds of MJ’s crochet patterns ad-free, plus exclusive resources, member perks and new free patterns added every week.
It’s simple, cozy, and such a fun way to take the crochet stitches you’ve been practicing and turn them into something you can actually display in your home.

Project Overview
Bring all the cozy feelings of fall into your home with the Pumpkin Patch Blanket. Filled with sweet little pumpkins and warm autumn colours, this blanket is perfect for curling up with on crisp fall mornings and chilly evenings.
Crocheted with Timeless Tones Anti-Pilling DK yarn, the mix of pumpkin and solid granny squares creates a charming patchwork look that feels like your very own handmade pumpkin patch. Drape it over your favourite chair, add it to the end of your bed or cozy up underneath it all season long.
Skill level: Beginner
Sizes: Mini, XS, S, M, L, XL
Yarn Weight: DK Weight #3
Yarn: MJ’s Off The Hook Designs Timeless Tones
The Perfect Next Project After Learning to Crochet
Learning your first crochet stitches is exciting, but there comes a point when you’re ready to stop making practice swatches and actually make something.
That was a big part of the inspiration behind this pattern.
If you’ve been following along with my Learn to Crochet Series, this pumpkin is a great project to make once you’ve learned the half double crochet stitch. You’ll get lots of practice working the same stitch while also learning how something as simple as a rectangle can be transformed into a finished crochet project.
Because the construction is so straightforward, you can focus on getting comfortable holding your hook, maintaining your tension, recognizing your stitches and working consistent rows without having to worry about a complicated pattern.
By the end, you have an adorable pumpkin instead of another practice swatch!
New to crochet? Start with my Learn to Crochet Series first, then come back and make your first pumpkin.
Why This Crochet Pumpkin Is So Beginner Friendly
We wanted this to be one of those patterns you could confidently recommend to someone who says, “I just learned how to crochet. What should I make first?”
You only need to know a few basic crochet skills, and the main body of the pumpkin is simply worked back and forth in rows.
There’s no complicated shaping to crochet. The ribbed rectangle does all the work. Once it’s seamed and stuffed, a few simple finishing steps transform it into a beautiful pumpkin.
It’s also a forgiving project. Your stitches don’t have to be absolutely perfect for your finished pumpkin to look adorable, which makes it especially nice when you’re still getting comfortable with crochet.

Six Pumpkin Sizes Included
Once you make one, you’re probably going to want an entire pumpkin patch!
The pattern includes six sizes, so you can make everything from adorable mini pumpkins to larger pumpkins for your fall décor.
Crochet them in classic pumpkin orange, soft creams and neutrals, or mix in your favourite autumn colours. I used Timeless Tones Anti-Pilling DK yarn, which makes it easy to put together a beautiful coordinated fall palette.
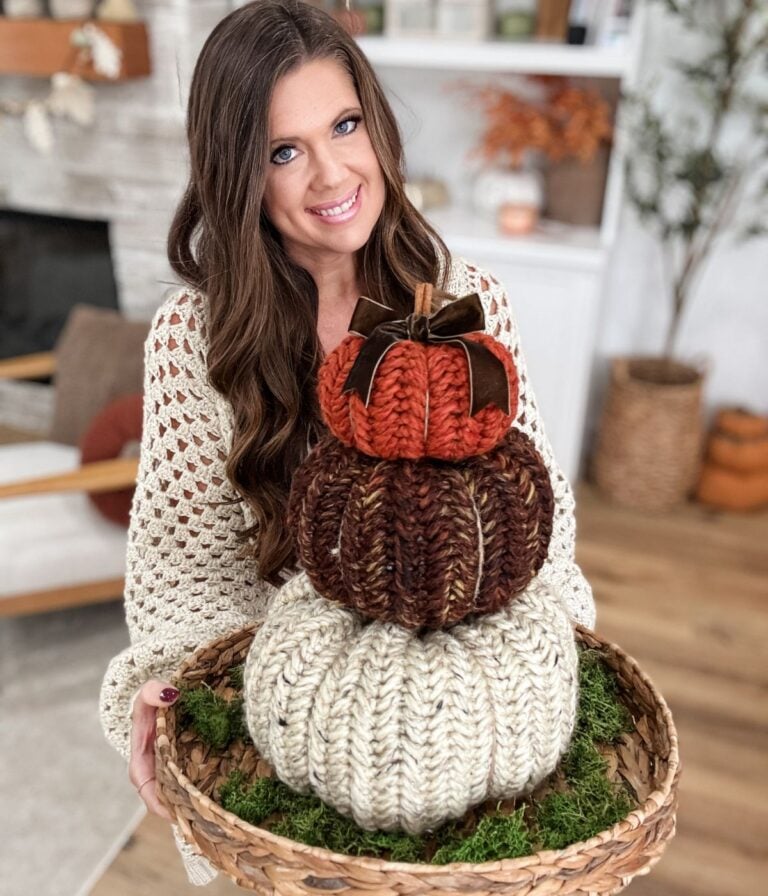
You can make just one, group several sizes together or stack your pumpkins to create a cozy fall display.
Make a Crochet Pumpkin Garland
The mini size is perfect for making a crochet pumpkin garland.
Make a collection of mini pumpkins in different fall colours, or keep them all orange for a classic look. Simply weave twine through the tops of the pumpkins and space them along the twine.
Hang your finished garland across a mantel, shelf or doorway for an easy handmade touch of fall.

Make a Crochet Pumpkin Wreath
You can also turn the mini pumpkins into a beautiful fall pumpkin wreath.
I used a greenery wreath for mine, but a grapevine wreath or another wreath base would work beautifully too.
Simply insert wire stems through the bottoms of the mini pumpkins, arrange them around the wreath and twist the wire around the wreath to secure them. Add a pretty bow and you have a handmade fall wreath filled with little crochet pumpkins.
I’ve also included a video tutorial showing you how I assemble the wreath, attach the pumpkins and make the bow.

Customize Your Pumpkin Patch
One of my favourite things about this pattern is how easy it is to make it your own.
Try traditional orange pumpkins with cinnamon stick stems, or create a softer neutral pumpkin patch with cream, beige and brown. You could also bring in rich greens, rusts, golds or any colours that coordinate with your fall décor.
Finish your pumpkins with a cinnamon stick stem and add a simple twine bow or ribbon if you’d like.
Make one for a little fall accent or crochet a whole collection for your home.
Video Tutorial
Video Tutorial

Yarn Requirements
MJ’s Off The Hook Designs Timeless Tones (CDN)
DK Weight #3, 100% Premium Acrylic, 273 yds/100 g. Shown in Pumpkin, Driftwood, Warm Cocoa, Deep Lagoon, Sunflower Field, Snowflake
Yarn Amounts:
Mini (XS, S, M, L, XL)
40 (60, 90, 110, 145, 180) Yards
Crochet Hooks Needed
or the size needed to obtain the gauge
Supplies
Would you like to save this?
You can unsubscribe at any time.

Gauge
Pattern: 20 sts and 12 rows equal to 4″ in half double crochet back loop only with a 5mm crochet hook
Read our beginners guide to gauge
Yarn Substitutes
This pattern was designed using Timeless Tones DK Weight #3 yarn
273 yds/100 g = 2.73 yds per gram
When substituting yarn, look for a DK-weight yarn with a similar yards per gram ratio to achieve comparable results.
Suggested Substitutions
Mary Maxim Mellowspun DK (CDN): 284 yds/100 g = 2.84 yds per gram
Knit Picks Brava Baby: 273 yds/100 g = 2.73 yds per gram
Premier Basix DK (CDN): 306 yds/100 g = 3.06 yds per gram
Lion Brand Color Theory: 246 yds/100 g = 2.46 yds per gram
Adjust hook size if needed to achieve the correct gauge and maintain a soft, flexible fabric.
Construction
The pumpkins are worked flat from side to side in rows to form a rectangle. The rectangle is folded in half and the short ends are slip stitched together to form a tube. The bottom is closed by working single crochet stitches into every other row, then weaving the yarn through each sc and pulling tightly to close. The pumpkin is stuffed and the top is closed in the same manner. Yarn is wrapped around the pumpkin to create 6 evenly spaced indents, then finished with a cinnamon stick stem and optional twine bow or ribbon.
Sizes
| Size | Rectangle Width (in) | Rectangle Length (in) | Finished Circ. (in) | Finished Height (in) |
|---|---|---|---|---|
| Mini | 3 | 6 | 9 | 2 |
| XS | 4 | 8 | 12 | 2.5 |
| S | 5 | 10 | 15 | 3 |
| M | 6 | 12 | 19 | 3.5 |
| L | 7 | 14 | 23 | 4 |
| XL | 8 | 16 | 26 | 4.5 |
Abbreviations
Blo – Back Loop Only
Ch – Chain
Hdc – Half Double Crochet
Rep – Repeat
RS – Right Side
Sl St – Slip Stitch
St(s) – Stitch(es)
WS – Wrong Side

Digital Download + No Ads!
Upgrade to the Digital PDF Download
The beautifully formatted PDF includes the complete Easiest Pumpkin pattern plus printable gift tags, perfect for gifting your finished pumpkins or preparing them for craft markets.
Digital pattern only. No physical item will be shipped.
Pattern
Notes: To customize the size of the pumpkin, add or subtract multiples of 5 sts to adjust the height and 6 rows to adjust the circumference.
Mini (XS, S, M, L, XL)
Row 1 (RS):
Ch 16 (21, 26, 31, 36, 41), work 1 hdc in the 2nd ch from hook, work 1 hdc in each ch across, turn — 15 (20, 25, 30, 35, 40) sts.
Row 2 (WS):
Ch 1 (not included as a st here and throughout), work 1 hdc in the blo of each st across, turn — 15 (20, 25, 30, 35, 40) sts.
Rows 3 to 18 (24, 30, 36, 42, 48):
Rep Row 2. Ch 1. With RS facing, fold the rectangle in half. Working through the back loop of each st on the final row and the corresponding starting ch, sl st the two ends together to form a tube. Turn the tube so the RS is facing out and the slip stitch seam is on the inside.
Bottom Closure
Round 1:
Ch 1, work 1 sc in every other row around the edge, working into each raised row, for a total of 9 (12, 15, 18, 21, 24) sc. Sl st in the first sc to join. Fasten off, leaving a tail for closing.
Using a yarn needle, weave the tail through each sc around. Pull tightly to close the bottom opening. Weave the tail around the closure again in the opposite direction to secure and close any remaining gaps. Cut tail.
Assembly & Finishing
Stuff the pumpkin firmly and evenly with polyester fibre fill.
Join yarn to the top edge at the seam, ch 1, and work 1 sc in every other row (each raised row) around the opening. Sl st in the first sc to join. Fasten off, leaving a long tail. Using a yarn needle, weave the tail through every other sc around the opening. Insert the cinnamon stick into the centre, then pull the tail tightly to close. Weave the tail around the opening and back through in the opposite direction to secure and close any remaining gaps.
Using the long yarn tail, create 6 evenly spaced indents around the pumpkin. Wrap the yarn around the outside of the pumpkin approximately every 3 (4, 5, 6, 7, 8) hdc rows. Insert the needle through the bottom centre of the pumpkin and bring it up through the top centre. Pull firmly to create an indent. Repeat around the pumpkin until you form all 6 indents.
Secure and weave in the tail. Embellish with a twine bow or ribbon, if desired.
Pumpkin Garland
Turn the mini pumpkins into a simple fall garland using twine. Make the pumpkins in a variety of colours, or keep them all one colour for a more classic look.
Cut a length of twine and weave it through the tops of the mini pumpkins, spacing them evenly along the twine. Continue adding pumpkins until the garland reaches your desired length. Hang across a mantel, shelf, doorway, or anywhere you want to add a little handmade fall décor.
Pumpkin Wreath
Use the mini pumpkins to create a beautiful fall wreath. Start with a greenery, grapevine or wreath base of your choice. Make a variety of mini pumpkins in your favourite fall colours.
Push a wire stem through the bottom of each pumpkin, then position the pumpkins around the wreath as desired. Wrap and twist the wire around the wreath to secure each pumpkin in place. Finish by adding a decorative bow. A step-by-step video tutorial shows how to assemble the wreath, make the bow, and attach the pumpkins.
Wreath Tutorial: https://youtu.be/KvL69ID4hfE

Looking for more beginner projects?
- Easiest Dishcloth Pattern
- Granny Stitch Throw
- Easy C2C Blanket
- Easiest Beanie Pattern
- Chunky Suzette Pocket Shawl
Yes! This pattern was designed specifically with beginners in mind. If you know how to chain and work a half double crochet stitch, this is a great first project to try after learning the crochet basics. The pumpkin begins as a simple rectangle, so there is no complicated crochet shaping involved.
The main pumpkin is worked using the half double crochet stitch through the back loop. This creates the beautiful ribbed texture that helps give the finished pumpkin its shape. You will also use basic stitches during the finishing process.
Absolutely. In fact, that is exactly who we designed this pattern for! If you have been following my Learn to Crochet Series and have learned the half double crochet stitch, this is a perfect project to make next. It gives you plenty of practice while allowing you to create something fun and useful for your home.
It’s much easier than it looks! You simply crochet a rectangle, seam the ends together, gather the bottom, stuff the pumpkin and close the top. The pumpkin is then shaped and finished with a cinnamon stick stem.
The pattern includes six sizes, so you can crochet a whole pumpkin patch in different sizes. Make one for a small fall accent, group several together or stack different sizes for a cozy fall display.
The mini pumpkins are perfect for more than just displaying on their own. String several together with twine to make a crochet pumpkin garland, or attach them to a greenery or grapevine wreath to create a handmade pumpkin wreath.
Yes! You may sell finished items made from MJ’s patterns, but please credit:
“Pattern by MJ’s Off The Hook Designs Inc.”
All patterns, photos, and written content are the property of MJ’s Off The Hook Designs Inc. and protected by copyright law.
Usage
Free patterns are for viewing only on this blog. You may not copy, download, print, screenshot, or redistribute any part of the pattern. Access must remain through this page with ads. The use of tools that remove or hide ads or site content is strictly prohibited.
Legal Notice
Unauthorized reproduction or distribution may result in copyright infringement penalties.
By accessing this post, you agree to these terms and conditions.
This post may contain affiliate links. Purchases made through these links may earn MJ’s Off The Hook Designs Inc. a small commission at no extra cost to you. Content on this site is supported by ads—please do not block or remove them.
I hope you love our Easiest Pumpkin Crochet Pattern. You might also love these crochet patterns:
This pattern is designed by Michelle Moore of MJ’s Off The Hook Designs Inc., based in Lakefield, Ontario, Canada. Your go-to source for modern, easy crochet patterns. Published on September 10, 2026.
Thank you for visiting MJ’s Off The Hook Designs! I hope you enjoyed this pattern and feel inspired to pick up your hook and start creating.
You can find even more crochet patterns in our Ravelry and Etsy shops.
For daily inspiration and behind-the-scenes peeks, join me over on Facebook or Instagram or join our YouTube Membership for exclusive content!
You’ve got questions, we’ve got a community!
Crocheting is better with friends! Join our group to post pictures and ask all your pattern support questions.