*This post may contain affiliate links to support the cost of this blog. At no cost to you, I may make a small commission if you purchase through these links. Read our Privacy Policy HERE
I have been wanting to design a checker crochet pumpkin for SO long!

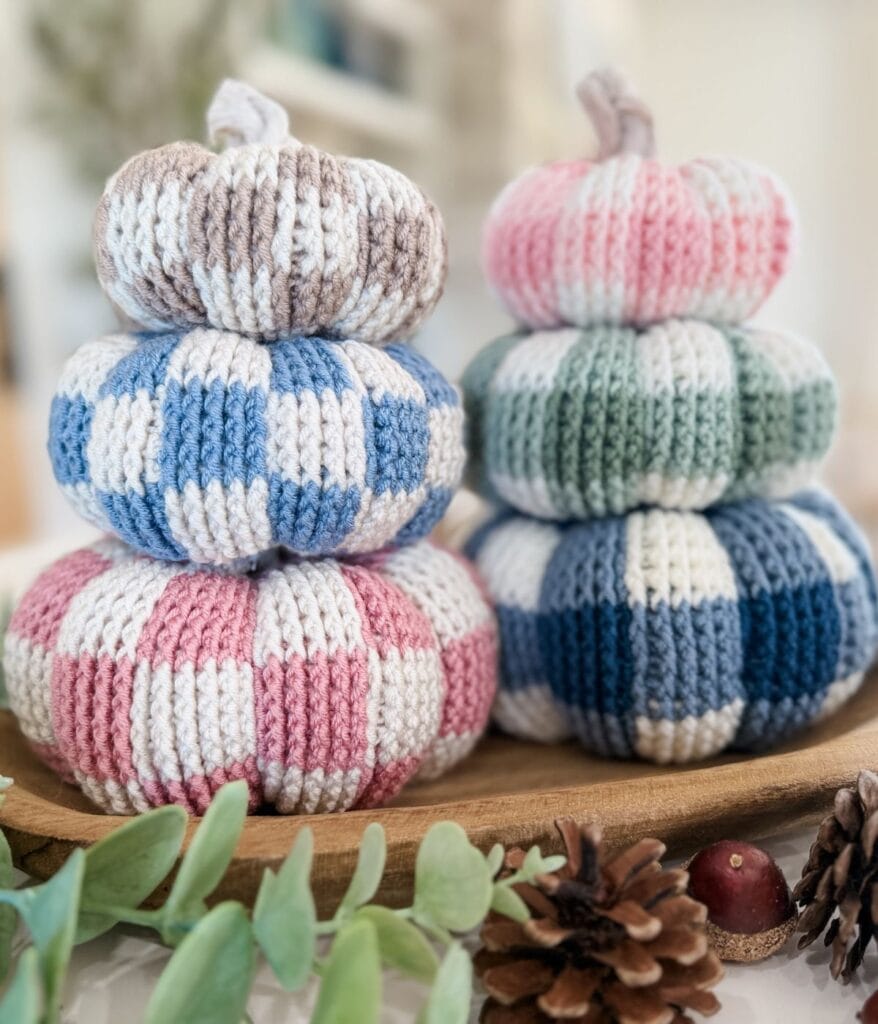
Checker patterns have been everywhere, from pillows and blankets to home décor, and I absolutely love the modern, trendy look. I’ve had a checker pumpkin on my design list forever, so it was only a matter of time before that inspiration made its way into a pumpkin pattern.
And I am obsessed with how these turned out!
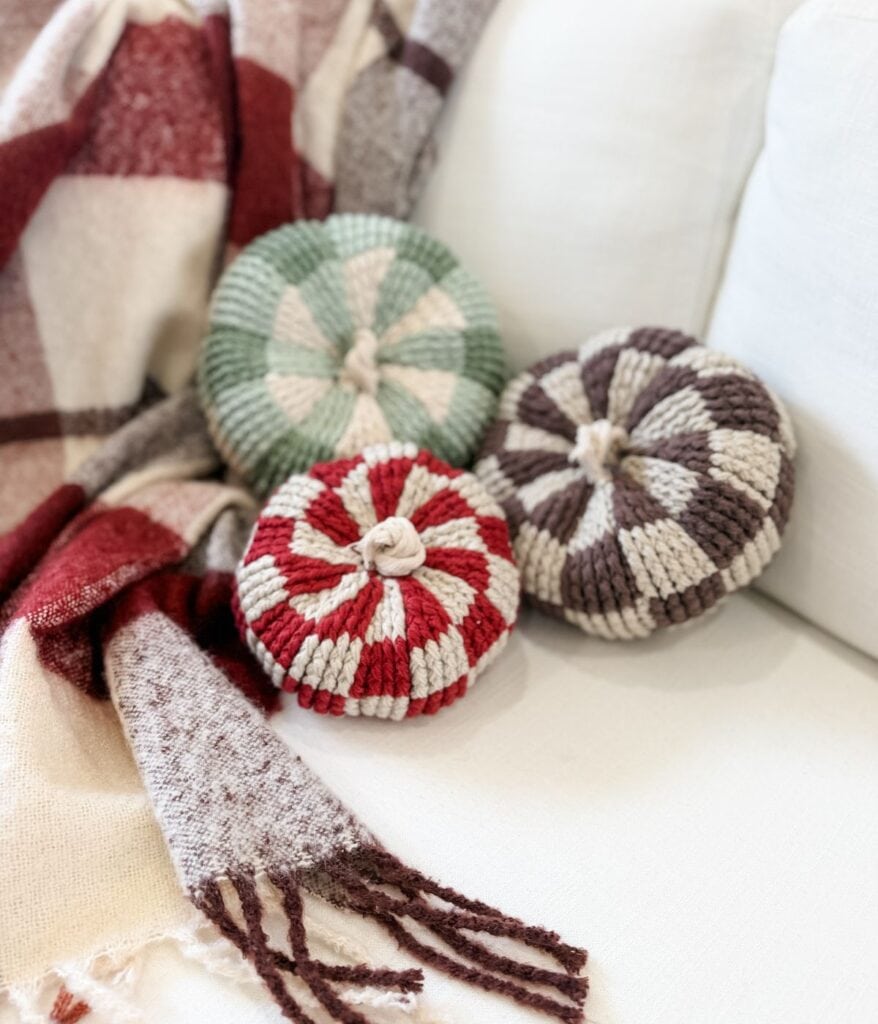
The Country Gingham Pumpkins combine that trendy checker look with the cozy, classic feel of gingham. The pattern includes both options, so you can go traditional and cozy with a three-colour gingham or keep it bold and modern with a two-colour checker design.
Want less distractions?
Join Off the Hook Crochet Club
Join the Off The Hook Crochet Club and enjoy hundreds of MJ’s crochet patterns ad-free, plus exclusive resources, member perks and new free patterns added every week.
Best of all, the Country Gingham Pumpkins crochet pattern is now FREE to view right here on the blog!
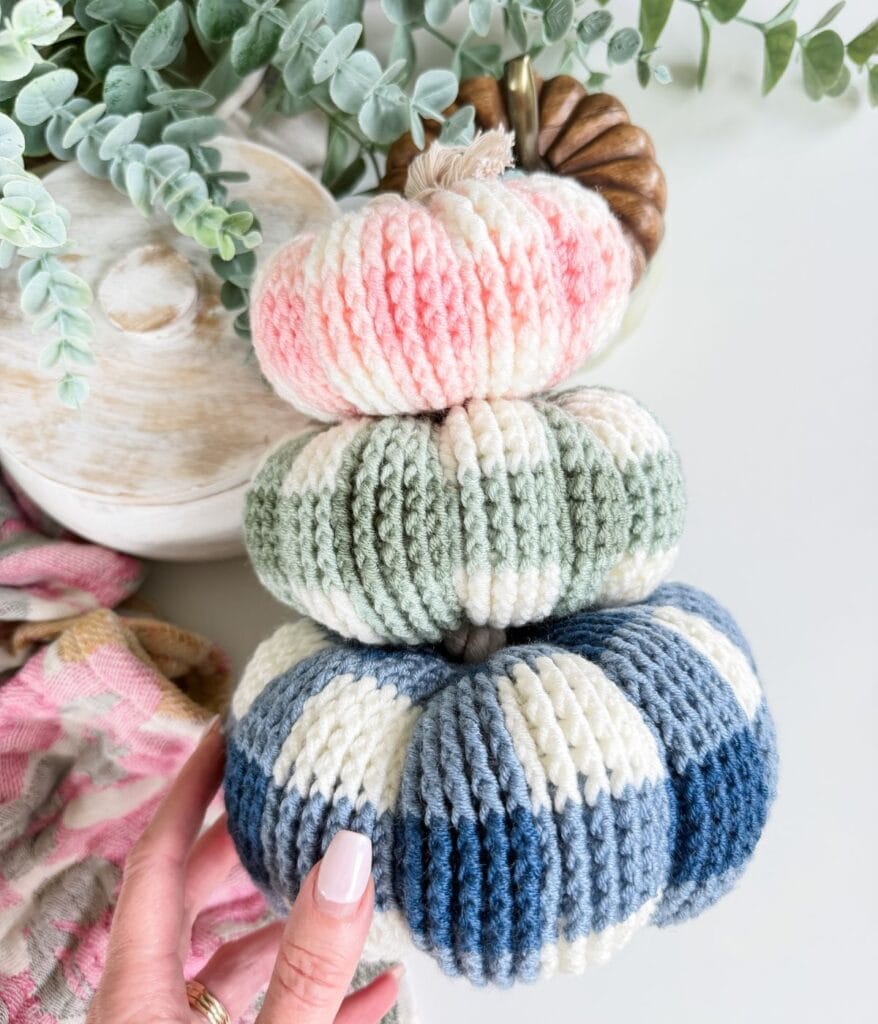
Project Overview
Add a cozy handmade touch to your fall décor with the Country Gingham Pumpkins. This pattern includes Small, Medium and Large pumpkins with two colourwork options: classic gingham or bold checker.
Worked from the bottom up in the round, front post double crochet stitches create a thick, ribbed texture while simple colour changes form the checkered design.
Customize your pumpkins with your favourite fall colours and finish with a rope or cinnamon stick stem. Make them individually or stack the different sizes for a beautiful fall display. A full step-by-step video tutorial is included.
Skill level: Intermediate
Sizes: S (M, L)
Yarn Weight: DK Weight #3
Yarn: MJ’s Off The Hook Designs Timeless Tones
Hook Sizes: 5 mm
Construction: Worked in the Round from the bottom up
Video Tutorial: https://youtu.be/TW1kwrtW0ao
A Modern Twist on the Crochet Pumpkin
I love a classic crochet pumpkin, but I wanted these to feel a little different from the pumpkins we’ve made in the past.
The checker trend was really the starting point for this design. I love how something as simple as alternating blocks of colour can completely change the look of a project. The checker version feels fun and modern, while the gingham version has that softer country look that is perfect for fall.
The front post double crochet stitches add a beautiful ribbed texture to the fabric and give the pumpkins that thick, cozy look I wanted.
Once they’re stuffed and shaped, those little blocks of colour really pop!
Three Crochet Pumpkin Sizes
The Country Gingham Pumpkins pattern includes three sizes: Small, Medium and Large. Make just one for a little pop of fall colour, group a few together, or crochet all three sizes and stack them for a cozy fall display.
Size & Yarn Requirements
| Size | Finished Circ. | Finished Height | Gingham A/B | Gingham C | Checker A/B |
|---|---|---|---|---|---|
| Small | 14″ | 2.5″ | 100 yds each | 50 yds | 125 yds each |
| Medium | 17.5″ | 3″ | 140 yds each | 70 yds | 175 yds each |
| Large | 21″ | 3.5″ | 180 yds each | 90 yds | 225 yds each |
Yarn amounts are approximate. Gingham uses Colours A, B and C. Checker uses Colours A and B only. Amounts are listed per colour and have been rounded to allow for differences in tension and finishing.
Finished measurements may vary depending on how firmly the pumpkin is stuffed and shaped.
Gingham or Checker: Which One Will You Make?
This might be my favourite part of the pattern because you can get two completely different looks from the same design.
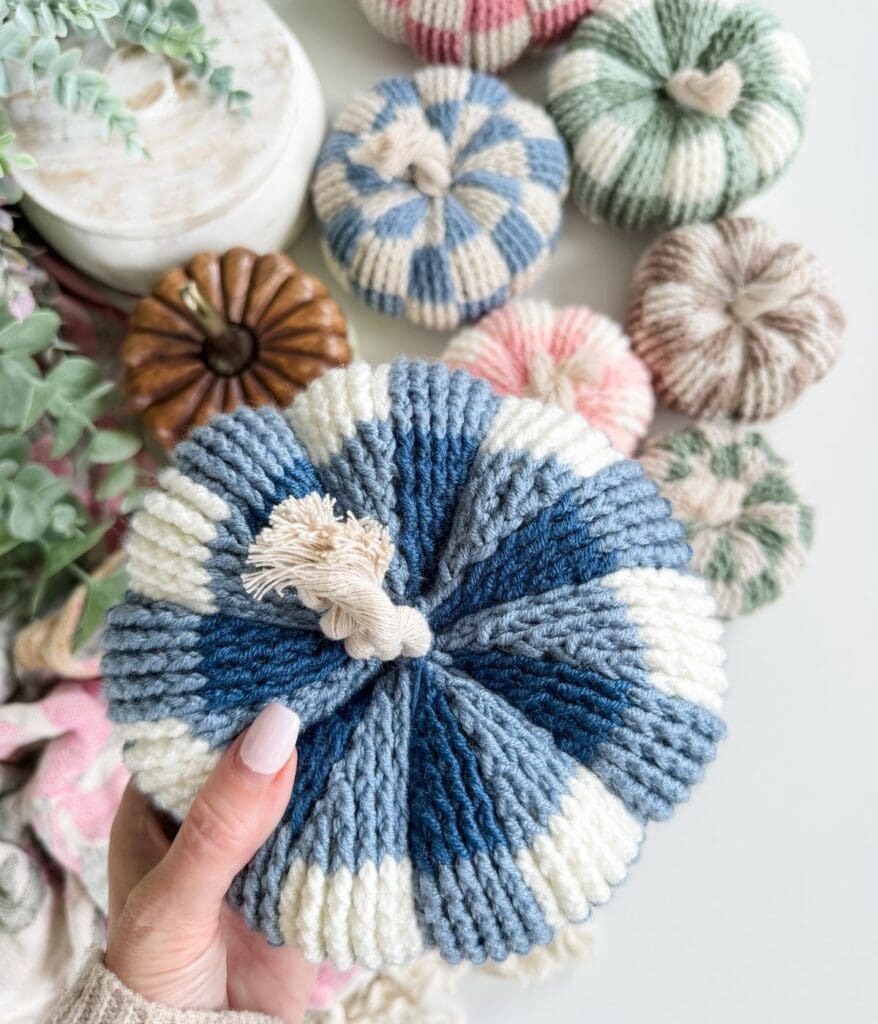
The Gingham Pumpkin uses three colours. Choose a darker shade for Colour A, a lighter coordinating shade for Colour B and a light neutral for Colour C. This gives you that classic gingham effect.
The Checker Pumpkin uses just two colours, A and B, for a bolder checkered look.
And you definitely don’t have to stick to traditional fall colours!
I love the idea of soft pinks, blues, greens and creamy neutrals mixed in with those warmer fall shades. Changing the colours can take these from classic country fall décor to something really modern and trendy.
Made with Timeless Tones
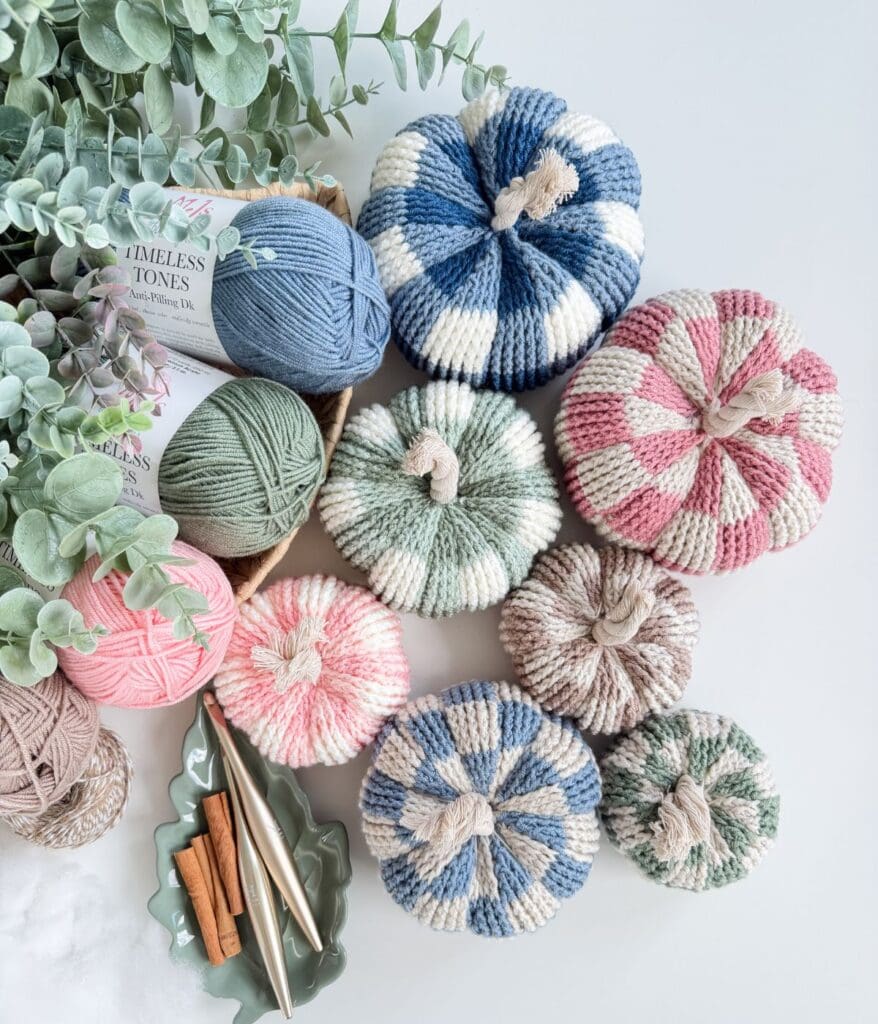
Of course, I made my pumpkins in my MJ’s Off The Hook Designs Timeless Tones (CDN) from Mary Maxim.
Timeless Tones is a #3 DK weight premium acrylic with 273 yards per 100 g ball. The colour palette makes this pattern especially fun because there are so many shades that work beautifully together for gingham and checker combinations.
For my samples, I mixed shades including Oat Milk, Toasted Almond, Faded Denim, Petal Pink, Sweet Peony, Rosewater, Soft Thyme, Eucalyptus, Coastal Blue and Vanilla Frosting.
This is also a great project for playing around with colour combinations you may already have in your yarn stash.
Make Them Chunky!
Want an even bigger pumpkin?
You can use the exact same pattern to create a larger, chunky version!
Hold three strands of Timeless Tones together and use an 8 mm crochet hook, then follow the instructions for whichever pumpkin size you want to make.
This is such a fun way to change up the pattern and create bigger pumpkins without needing a completely separate set of instructions.
Video Tutorial
Video Tutorial

Yarn Requirments
MJ’s Off The Hook Designs Timeless Tones (CDN)
DK Weight #3, 100% Premium Acrylic, 273 yds/100 g.
Crochet Hook
or the size needed to obtain the gauge
Materials
Gauge
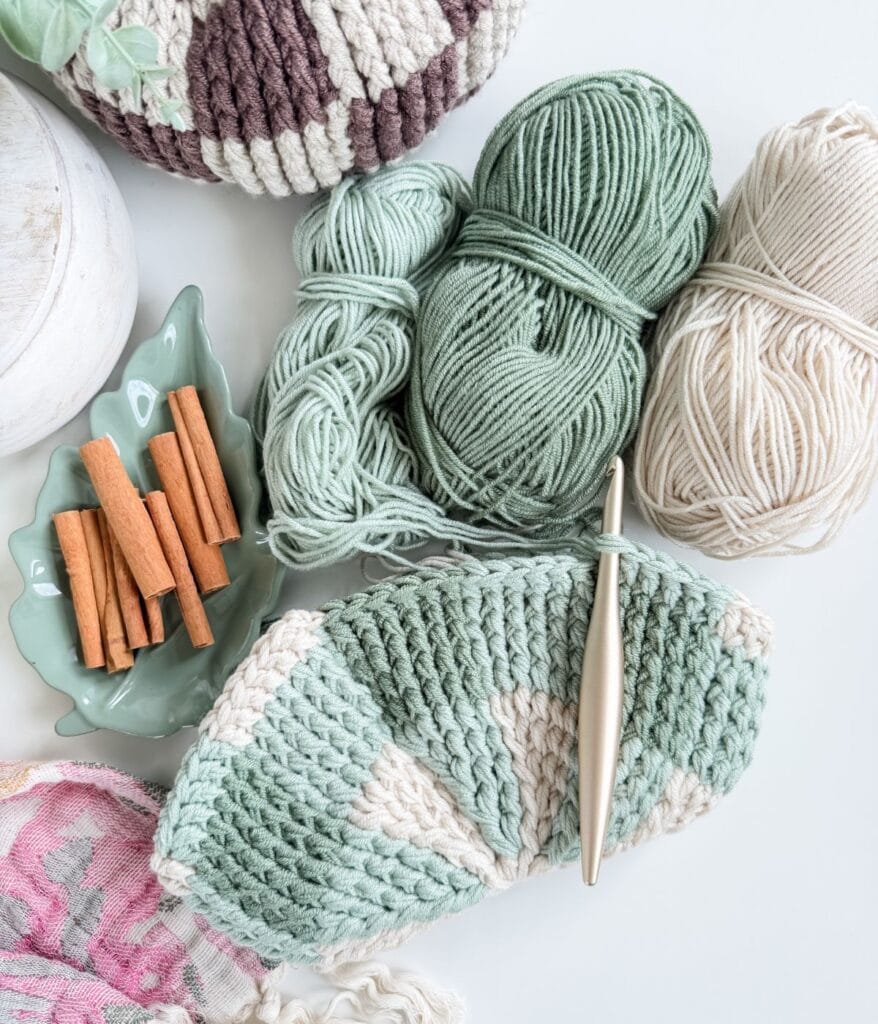
7 sts and 7 rows equal to 2″ in front post double crochet
Suitable Yarn Substitutes
This pattern was designed using Timeless Tones DK Weight #3 yarn
273 yds/100 g = 2.73 yds per gram
When substituting yarn, look for a DK-weight yarn with a similar yards per gram ratio to achieve comparable results.
Suggested Substitutions
Mary Maxim Mellowspun DK (CDN): 284 yds/100 g = 2.84 yds per gram
Knit Picks Brava Baby: 273 yds/100 g = 2.73 yds per gram
Premier Basix DK (CDN): 306 yds/100 g = 3.06 yds per gram
Lion Brand Color Theory: 246 yds/100 g = 2.46 yds per gram
Adjust hook size if needed to achieve the correct gauge and maintain a soft, flexible fabric.
Abbreveations
Ch – Chain
Dc – Double Crochet
Fpdc – Front Post Double Crochet
Fpdc2tog – Front Post Double Crochet 2 Together
Rep – Repeat
Sl St – Slip Stitch
St(s) – Stitch(es)
Front Post Double Crochet (fpdc): Yarn over, insert hook from front to back to front around the post of the indicated stitch, yarn over and pull up a loop, yarn over and pull through 2 loops, yarn over and pull through remaining 2 loops.
Front Post Double Crochet 2 Together (fpdc2tog): Yarn over, insert hook from front to back to front around the post of the next stitch, yarn over and pull up a loop, yarn over and pull through 2 loops. Yarn over, insert hook from front to back to front around the post of the next stitch, yarn over and pull up a loop, yarn over and pull through 2 loops, yarn over and pull through all 3 loops on hook.
Digital Download + No Ads!
Upgrade to the Digital PDF Download
Digital pattern only. No physical item will be shipped.
Pattern
Notes: Pumpkins are worked from the bottom up in the round. Instructions are provided separately for the Small, Medium and Large sizes. Front post double crochet stitches create a thick, ribbed texture.
The Gingham Pumpkin uses three colours, A, B and C. The Checker Pumpkin uses two colours, A and B. Instructions are written for the Gingham Pumpkin. When the colour sequence differs for the Checker Pumpkin, the Checker colour is shown in parentheses.
When changing colours, work the final yarn over of the last stitch with the next colour. Do not cut or work over the unused yarn. Simply drop the unused colour behind the work and pick it back up when needed, creating floats along the inside of the pumpkin. The video tutorial demonstrates how to change colours and manage the floats.
The Small, Medium and Large pumpkins are worked with one strand of Timeless Tones and a 5 mm crochet hook. For a larger, chunky version of each size, triple the yarn using three strands held together and an 8 mm crochet hook. Follow the same pattern instructions for the corresponding size.
The technique for working three strands from a single ball of yarn is demonstrated in the video tutorial.
Small
Round 1:
Would you like to save this?
You can unsubscribe at any time.
With A, Magic Ring, ch 2 (not included as a stitch here and throughout), work 14 dc in ring, pull ring tight, sl st in first dc to join—14 sts.
Round 2 (Incr.):
Ch 2, work 2 fpdc first st, change to B (drop A), work 2 fpdc next st, change to A (drop B), * work 2 fpdc next st, change to B, work 2 fpdc next st, change to A; rep from * around, sl st in first fpdc to join—28 sts.
Round 3 (Incr.):
With A ch 2, work 1 fpdc first st, work 2 fpdc next st, change to B, work 1 fpdc next st, work 2 fpdc next st, change to A, * work 1 fpdc next st, work 2 fpdc next st, change to B, work 1 fpdc next st, work 2 fpdc next st, change to A; rep from * around, sl st in first fpdc to join—42 sts.
Round 4 (Incr.):
With A ch 2, work 1 fpdc first 2 sts, work 2 fpdc next st, change to B, work 1 fpdc next 2 sts, work 2 fpdc next st, change to A, * work 1 fpdc next 2 sts, work 2 fpdc next st, change to B, work 1 fpdc next 2 sts, work 2 fpdc next st, change to A; rep from * around, last st do not change to color A, keep B, sl st in first fpdc to join—56 sts.
Round 5:
With B, ch 2, *work 1 fpdc in each of next 4 sts, change to C (A for Checker), work 1 fpdc in each of next 4 sts, change to B; rep from * around, last st, do not change to A, keep B, sl st in first fpdc to join—56 sts.
Round 6:
Rep Round 5.
Round 7:
Rep Round 5, changing to A in the last st—56 sts.
Rounds 8-10:
Rep Round 5, alternating A and B, changing to B in the last st of Round 10—56 sts.
Rounds 11-13:
Rep Rounds 5 to 7, changing to A in the last st of Round 13—56 sts.
Round 14 (Decr.):
With A, ch 2, work 1 fpdc in each of first 2 sts, work 1 fpdc2tog over next 2 sts, change to B, work 1 fpdc in each of next 2 sts, work 1 fpdc2tog over next 2 sts, change to A, *work 1 fpdc in each of next 2 sts, work 1 fpdc2tog over next 2 sts, change to B, work 1 fpdc in each of next 2 sts, work 1 fpdc2tog over next 2 sts, change to A; rep from * around, sl st in first fpdc to join—42 sts.
Round 15 (Decr.):
With A, ch 2, work 1 fpdc in first st, work 1 fpdc2tog over next 2 sts, change to B, work 1 fpdc in next st, work 1 fpdc2tog over next 2 sts, change to A, *work 1 fpdc in next st, work 1 fpdc2tog over next 2 sts, change to B, work 1 fpdc in next st, work 1 fpdc2tog over next 2 sts, change to A; rep from * around, sl st in first fpdc to join—28 sts.
Round 16 (Decr.):
With A, ch 2, work 1 fpdc2tog over first 2 sts, change to B, work 1 fpdc2tog over next 2 sts, change to A, *work 1 fpdc2tog over next 2 sts, change to B, work 1 fpdc2tog over next 2 sts, change to A; rep from * around, sl st in first fpdc to join—14 sts. Cut B. Fasten off A, leaving a long tail for creating the pumpkin indents.
Medium
Rounds 1-4:
Work Rounds 1 to 4 of Small Pumpkin—56 sts.
Round 5 (Incr.):
With A, ch 2, work 1 fpdc in each of first 3 sts, work 2 fpdc in next st, change to B, work 1 fpdc in each of next 3 sts, work 2 fpdc in next st, change to A, *work 1 fpdc in each of next 3 sts, work 2 fpdc in next st, change to B, work 1 fpdc in each of next 3 sts, work 2 fpdc in next st, change to A; rep from * around, changing to B in the last st, sl st in first fpdc to join—70 sts.
Round 6:
With B, ch 2, *work 1 fpdc in each of next 5 sts, change to C (A for Checker), work 1 fpdc in each of next 5 sts, change to B; rep from * around, sl st in first fpdc to join—70 sts.
Rounds 7-8:
Rep Round 6.
Round 9:
Rep Round 6, changing to A in the last st—70 sts.
Rounds 10-13:
Rep Round 6, alternating A and B, changing to B in the last st of Round 13—70 sts.
Rounds 14-17:
Rep Rounds 6 to 9, changing to A in the last st of Round 17—70 sts.
Round 18 (Decr.):
With A, ch 2, work 1 fpdc in each of first 3 sts, work 1 fpdc2tog over next 2 sts, change to B, work 1 fpdc in each of next 3 sts, work 1 fpdc2tog over next 2 sts, change to A, *work 1 fpdc in each of next 3 sts, work 1 fpdc2tog over next 2 sts, change to B, work 1 fpdc in each of next 3 sts, work 1 fpdc2tog over next 2 sts, change to A; rep from * around, sl st in first fpdc to join—56 sts.
Round 19 (Decr.):
With A, ch 2, work 1 fpdc in each of first 2 sts, work 1 fpdc2tog over next 2 sts, change to B, work 1 fpdc in each of next 2 sts, work 1 fpdc2tog over next 2 sts, change to A, *work 1 fpdc in each of next 2 sts, work 1 fpdc2tog over next 2 sts, change to B, work 1 fpdc in each of next 2 sts, work 1 fpdc2tog over next 2 sts, change to A; rep from * around, sl st in first fpdc to join—42 sts.
Round 20 (Decr.):
With A, ch 2, work 1 fpdc in first st, work 1 fpdc2tog over next 2 sts, change to B, work 1 fpdc in next st, work 1 fpdc2tog over next 2 sts, change to A, *work 1 fpdc in next st, work 1 fpdc2tog over next 2 sts, change to B, work 1 fpdc in next st, work 1 fpdc2tog over next 2 sts, change to A; rep from * around, sl st in first fpdc to join—28 sts.
Round 21 (Decr.):
With A, ch 2, work 1 fpdc2tog over first 2 sts, change to B, work 1 fpdc2tog over next 2 sts, change to A, *work 1 fpdc2tog over next 2 sts, change to B, work 1 fpdc2tog over next 2 sts, change to A; rep from * around, sl st in first fpdc to join—14 sts. Cut B. Fasten off A, leaving a long tail for finishing.
Large
Rounds 1-4:
Work Rounds 1 to 4 of Small Pumpkin—56 sts.
Round 5:
Work Round 5 of Medium Pumpkin—70 sts.
Round 6 (Incr.):
With A, ch 2, work 1 fpdc in each of first 4 sts, work 2 fpdc in next st, change to B, work 1 fpdc in each of next 4 sts, work 2 fpdc in next st, change to A, *work 1 fpdc in each of next 4 sts, work 2 fpdc in next st, change to B, work 1 fpdc in each of next 4 sts, work 2 fpdc in next st, change to A; rep from * around, changing to B in the last st, sl st in first fpdc to join—84 sts.
Round 7:
With B, ch 2, *work 1 fpdc in each of next 6 sts, change to C (A for Checker), work 1 fpdc in each of next 6 sts, change to B; rep from * around, sl st in first fpdc to join—84 sts.
Rounds 8-10:
Rep Round 7.
Round 11:
Rep Round 7, changing to A in the last st—84 sts.
Rounds 12-16:
Rep Round 7, alternating A and B, changing to B in the last st of Round 16—84 sts.
Rounds 17-21:
Rep Rounds 7 to 11, changing to A in the last st of Round 21—84 sts.
Round 22 (Decr.):
With A, ch 2, work 1 fpdc in each of first 4 sts, work 1 fpdc2tog over next 2 sts, change to B, work 1 fpdc in each of next 4 sts, work 1 fpdc2tog over next 2 sts, change to A, *work 1 fpdc in each of next 4 sts, work 1 fpdc2tog over next 2 sts, change to B, work 1 fpdc in each of next 4 sts, work 1 fpdc2tog over next 2 sts, change to A; rep from * around, sl st in first fpdc to join—70 sts.
Round 23 (Decr.):
With A, ch 2, work 1 fpdc in each of first 3 sts, work 1 fpdc2tog over next 2 sts, change to B, work 1 fpdc in each of next 3 sts, work 1 fpdc2tog over next 2 sts, change to A, *work 1 fpdc in each of next 3 sts, work 1 fpdc2tog over next 2 sts, change to B, work 1 fpdc in each of next 3 sts, work 1 fpdc2tog over next 2 sts, change to A; rep from * around, sl st in first fpdc to join—56 sts.
Round 24 (Decr.):
With A, ch 2, work 1 fpdc in each of first 2 sts, work 1 fpdc2tog over next 2 sts, change to B, work 1 fpdc in each of next 2 sts, work 1 fpdc2tog over next 2 sts, change to A, *work 1 fpdc in each of next 2 sts, work 1 fpdc2tog over next 2 sts, change to B, work 1 fpdc in each of next 2 sts, work 1 fpdc2tog over next 2 sts, change to A; rep from * around, sl st in first fpdc to join—42 sts.
Round 25 (Decr.):
With A, ch 2, work 1 fpdc in first st, work 1 fpdc2tog over next 2 sts, change to B, work 1 fpdc in next st, work 1 fpdc2tog over next 2 sts, change to A, *work 1 fpdc in next st, work 1 fpdc2tog over next 2 sts, change to B, work 1 fpdc in next st, work 1 fpdc2tog over next 2 sts, change to A; rep from * around, sl st in first fpdc to join—28 sts.
Round 26 (Decr.):
With A, ch 2, work 1 fpdc2tog over first 2 sts, change to B, work 1 fpdc2tog over next 2 sts, change to A, *work 1 fpdc2tog over next 2 sts, change to B, work 1 fpdc2tog over next 2 sts, change to A; rep from * around, sl st in first fpdc to join— 14 sts. Cut B. Fasten off A, leaving a long tail for finishing.
Finishing
Stuff the pumpkin firmly with polyester fibrefill.
If using rope for the pumpkin stem, cut a piece approximately 3″ long. Alternatively, use a cinnamon stick or another preferred material for the stem.
Thread the long tail onto a yarn needle. Weave through every other stitch around the top opening. Insert the rope stem into the centre of the pumpkin and pull the tail firmly to close the opening around the stem. If desired, add a small amount of hot glue around the base of the stem for extra security. To secure the opening, weave the yarn through the thicker layer of stitches around the top in one direction, then weave back through in the opposite direction. Pull firmly to tighten and secure the opening.
Next, use the remaining tail to create the pumpkin indents. At a colour transition between A and B, weave the yarn down through the post stitches, following the line of the colour change to the bottom of the pumpkin. Bring the yarn through the bottom of the pumpkin and back up through the centre top opening. Pull firmly to create an indent along the side of the pumpkin. Skip 8 (10, 12) sts for Small (Medium, Large), then weave the yarn down through the post stitches to the bottom of the pumpkin. Bring the yarn back up through the centre top opening and pull firmly to create the next indent.
Continue in this manner around the pumpkin, spacing the indents evenly and pulling each one firmly to shape the pumpkin. Once all indents are complete, securely weave in the remaining tail and trim.
Looking for beginner projects?
- Easiest Dishcloth Pattern
- Granny Stitch Throw
- Easy C2C Blanket
- Easiest Beanie Pattern
- Chunky Suzette Pocket Shawl
What is the difference between the gingham and checker crochet pumpkins?
The Gingham Pumpkin uses three colours to create the softer, traditional gingham effect. The Checker Pumpkin uses two colours for a bolder, more modern checker design. Both versions are made using the same basic pumpkin construction.
Is the Country Gingham Pumpkin pattern beginner-friendly?
I would rate this pattern Intermediate because it uses front post double crochet stitches, colour changes and floats. However, the construction itself is quite repetitive once you get going, and the step-by-step video tutorial walks you through the techniques used in the pattern.
Do I need to cut the yarn every time I change colours?
No. The unused colour is dropped behind the work and picked back up when needed. This makes the colourwork much easier and avoids having dozens of ends to weave in when your pumpkin is finished.
Can I use a different yarn for this crochet pumpkin?
Absolutely. Gauge isn’t critical for this project, which makes it a fun pattern for experimenting with different yarn weights.
A lighter yarn with a smaller hook will create a smaller pumpkin, while heavier yarn or multiple strands held together with a larger hook will create a bigger, chunkier pumpkin.
Whatever yarn you choose, use a hook that gives you a firm fabric with minimal gaps so the stuffing stays hidden.
How can I make a larger crochet pumpkin?
One of my favourite options is to hold three strands of DK yarn together and use an 8 mm crochet hook. Simply follow the same instructions for your chosen size.
You can also experiment with heavier yarn weights and larger hooks to create even more sizes.
Yes! You may sell finished items made from MJ’s patterns, but please credit:
“Pattern by MJ’s Off The Hook Designs Inc.”
All patterns, photos, and written content are the property of MJ’s Off The Hook Designs Inc. and protected by copyright law.
Usage
Free patterns are for viewing only on this blog. You may not copy, download, print, screenshot, or redistribute any part of the pattern. Access must remain through this page with ads. The use of tools that remove or hide ads or site content is strictly prohibited.
Legal Notice
Unauthorized reproduction or distribution may result in copyright infringement penalties.
By accessing this post, you agree to these terms and conditions.
This post may contain affiliate links. Purchases made through these links may earn MJ’s Off The Hook Designs Inc. a small commission at no extra cost to you. Content on this site is supported by ads—please do not block or remove them.
I hope you love our Checker Pumpkin Pattern. You might also love these crochet patterns:
This pattern is designed by Michelle Moore of MJ’s Off The Hook Designs Inc., based in Lakefield, Ontario, Canada. Your go-to source for modern, easy crochet patterns. Published on October 5, 2026.
Thank you for visiting MJ’s Off The Hook Designs! I hope you enjoyed this pattern and feel inspired to pick up your hook and start creating.
You can find even more crochet patterns in our Ravelry and Etsy shops.
For daily inspiration and behind-the-scenes peeks, join me over on Facebook or Instagram or join our YouTube Membership for exclusive content!
You’ve got questions, we’ve got a community!
Crocheting is better with friends! Join our group to post pictures and ask all your pattern support questions.