*This post may contain affiliate links to support the cost of this blog. At no cost to you, I may make a small commission if you purchase through these links. Read our Privacy Policy HERE
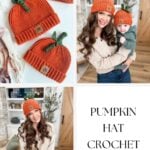
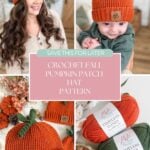
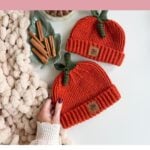
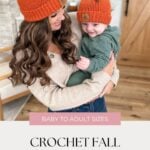
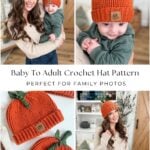
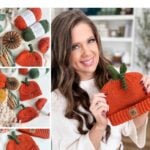
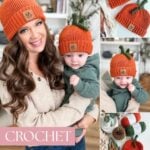
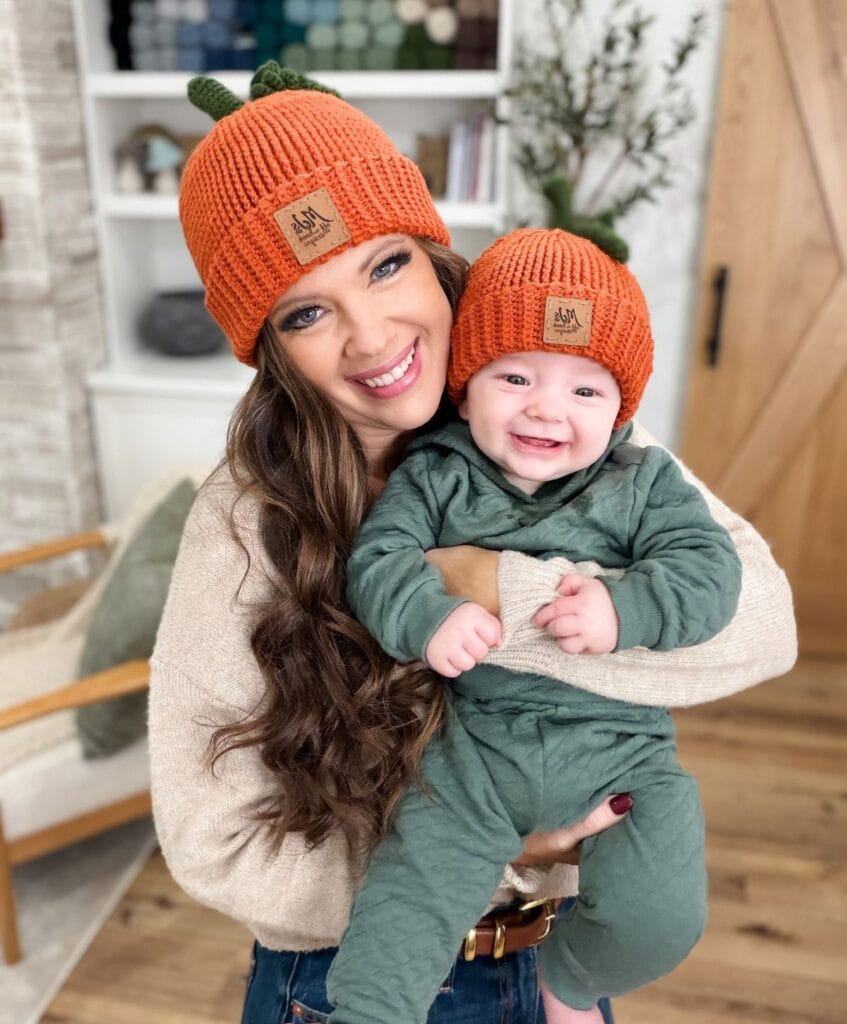
I mean… how could my grandbabies not have pumpkin hats for fall?!
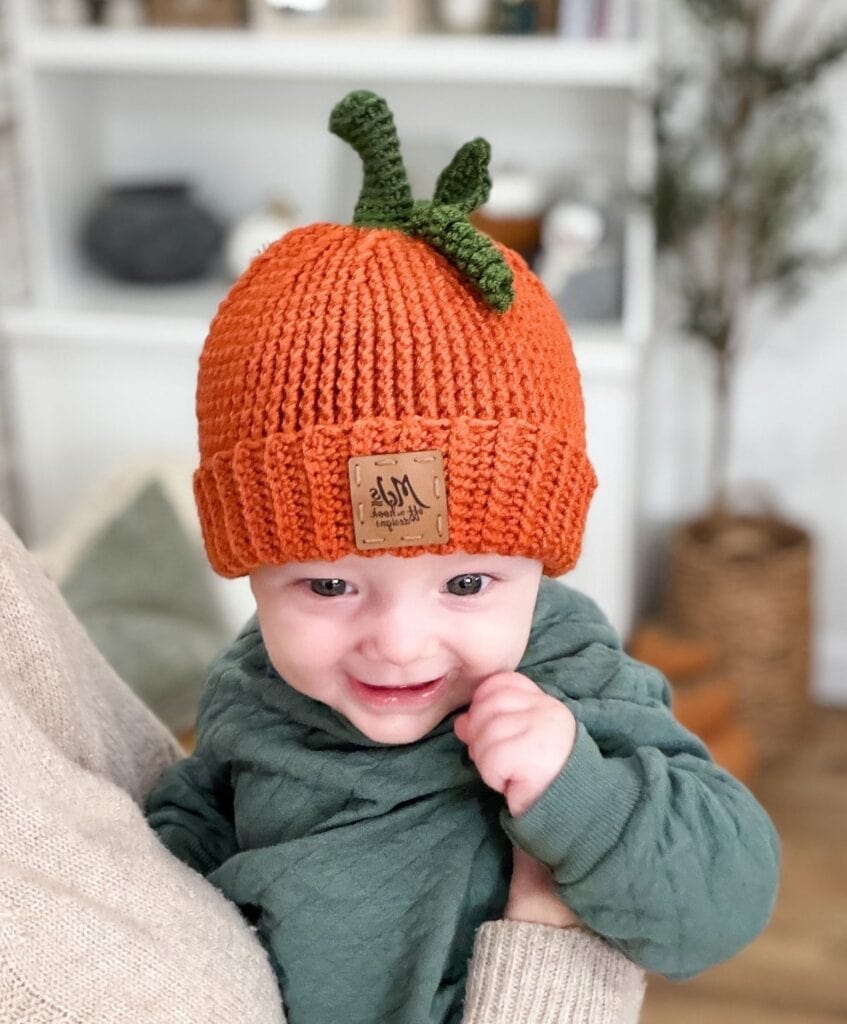
Once I started thinking about cozy fall makes, I knew I had to design a little pumpkin-inspired hat. And of course, once I made the baby version, I couldn’t stop there.
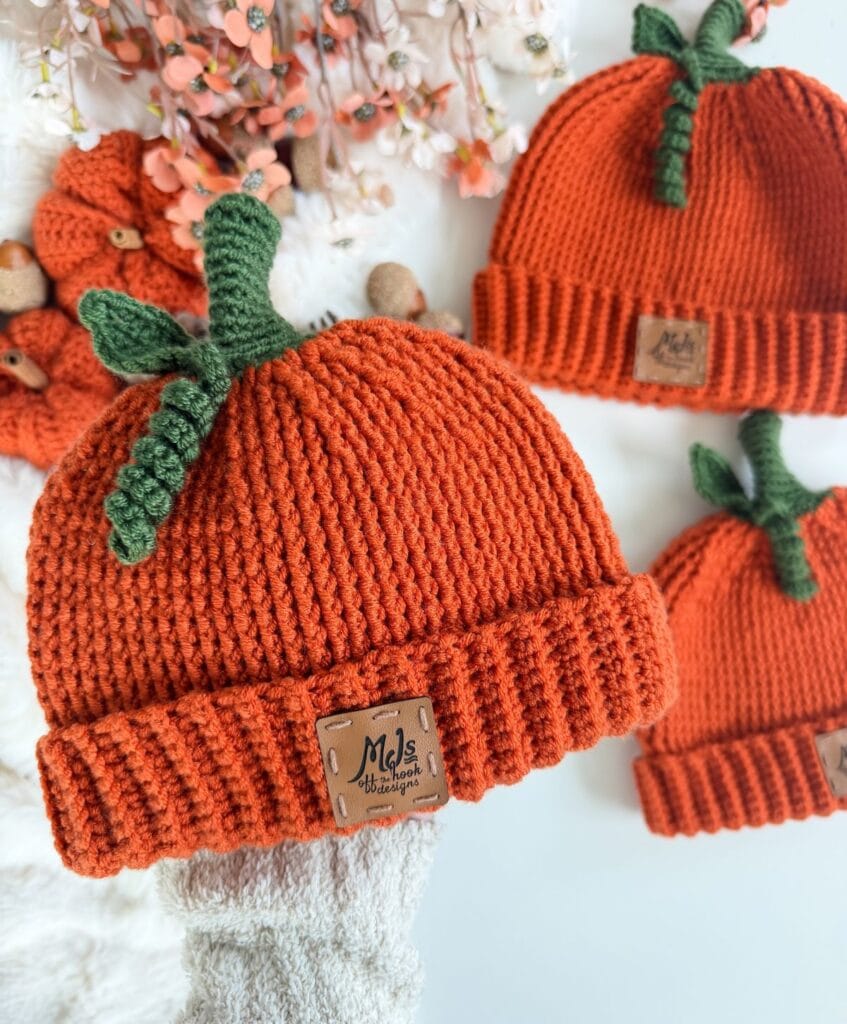
The Pumpkin Patch Hat is now available to view for free on the blog, and I graded it from 3-6 Months to Large Adult because, honestly, why should the babies get all the fun?
This cute fall crochet project is perfect for pumpkin patch trips, fall family photos, Thanksgiving, Halloween, or just everyday cozy weather.
Want less distractions?
Join Off the Hook Crochet Club
Join the Off The Hook Crochet Club and enjoy hundreds of MJ’s crochet patterns ad-free, plus exclusive resources, member perks and new free patterns added every week.
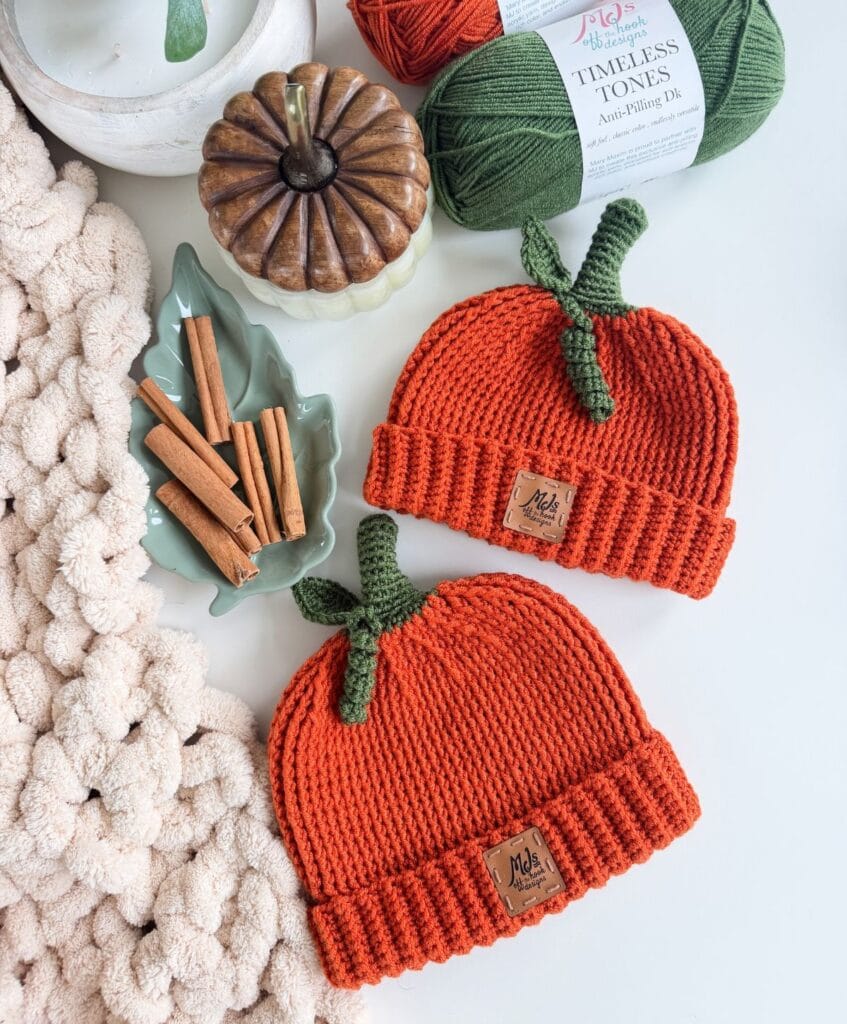
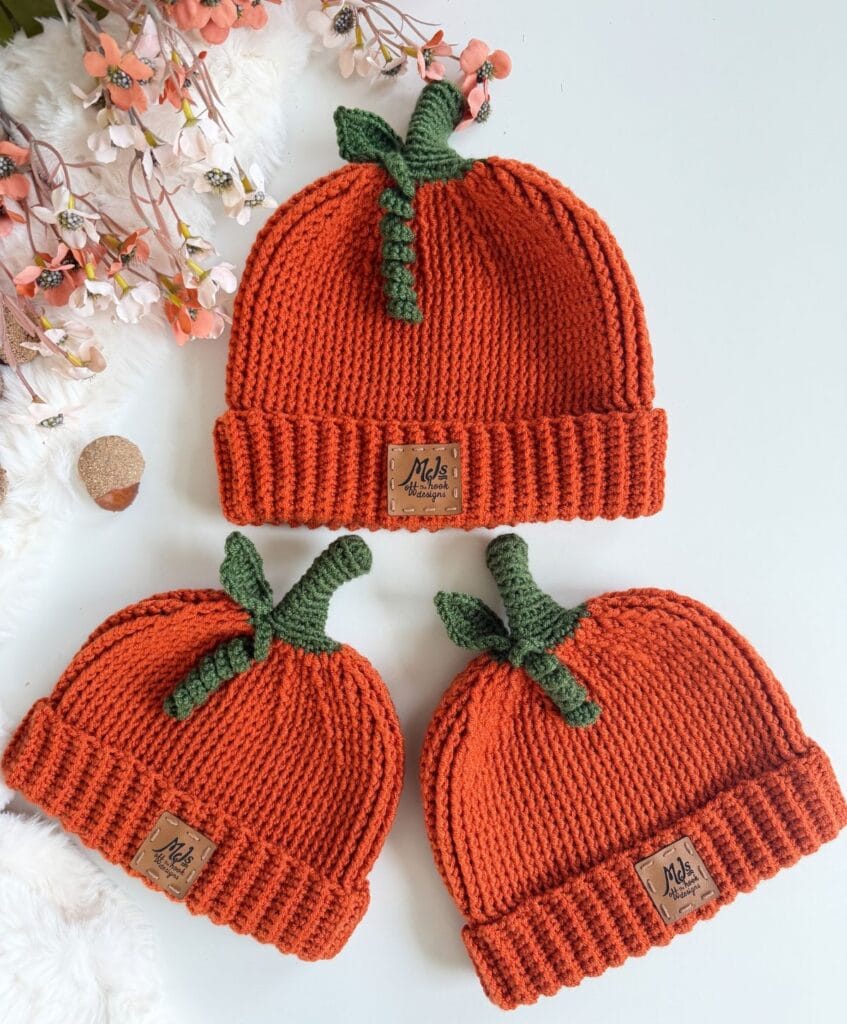
The hat is worked top-down with a beautifully textured pumpkin stitch pattern, a folded ribbed brim, and the sweetest little stem, leaf, and curly vine on top.
And yes, there’s a full step-by-step video tutorial too!

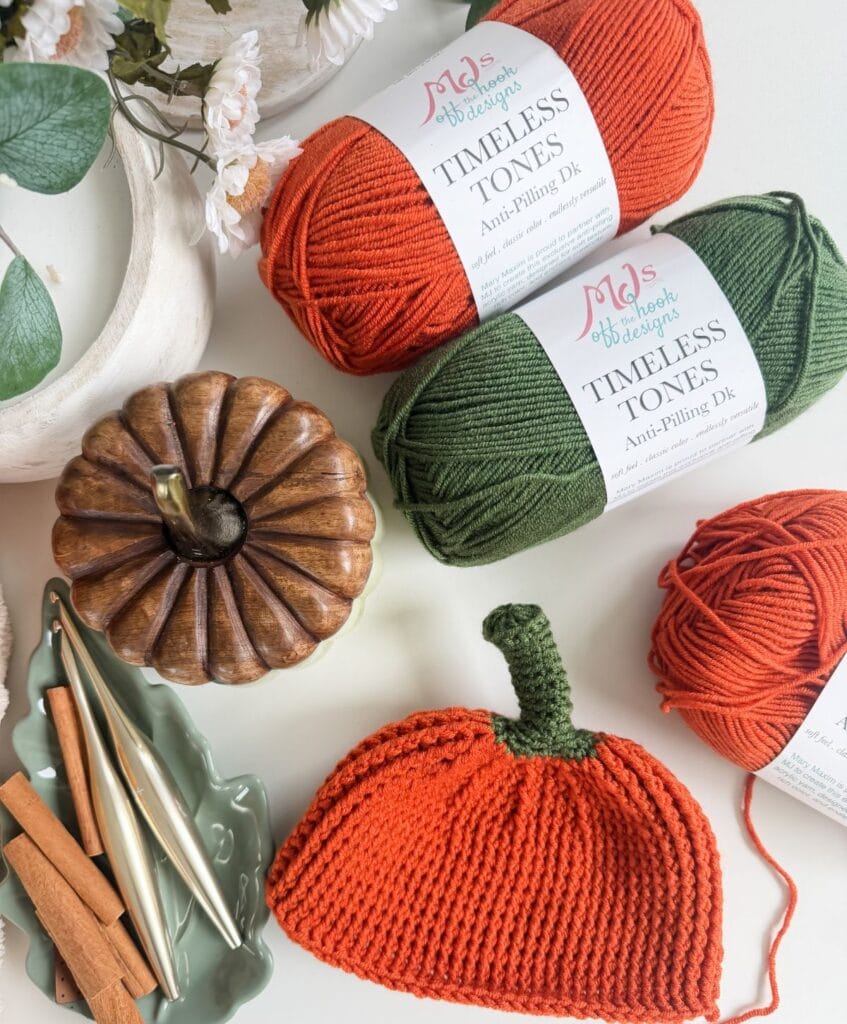
Project Overview
The Pumpkin Patch Hat is a cozy fall accessory designed with a beautifully textured pumpkin-inspired look and a classic folded brim. Finished with an optional stem, leaf and curly vine, it has just the right amount of seasonal charm!
The pattern includes sizes from 3-6 Months through Large Adult, making it a fun option for the whole family. Make it in classic pumpkin orange or switch up the colours for a more modern fall palette.
Skill level: Intermediate
Sizes: Baby to Adult
Yarn Weight: DK Weight #3
Yarn: MJ’s Off The Hook Designs Timeless Tones
Hook Sizes: 5 mm & 4.5 mm
Construction: Worked in the round from the top-down
Video Tutorial: https://youtu.be/9CObdRMnxgE
About the Pumpkin Patch Hat
The Pumpkin Patch Hat is a textured crochet pumpkin hat designed for the whole family.
I wanted the body of the hat to have that beautiful ridged look you see on a real pumpkin, so the main section is worked in front post double crochet. The shaping gives the hat a soft, rounded pumpkin look while still fitting like a cozy beanie.
A few details I love:
- 6 sizes from 3-6 Months to Large Adult
- Worked top-down
- Textured front post double crochet body
- Cozy folded ribbed brim
- Optional crochet stem
- Crochet leaf
- Curly vine
- Designed with DK weight yarn
- Full step-by-step video tutorial
- Free crochet pattern available right here on the blog
Best Yarn for a Crochet Pumpkin Hat
I designed the Pumpkin Patch Hat using Timeless Tones Anti-Pilling DK, my signature yarn line with Mary Maxim.
Timeless Tones is a #3 DK weight yarn with a soft, lofty feel and beautiful stitch definition, which works especially well for the textured front post stitches in this pattern.
For the sample, I used:
- Olive Grove for the stem, leaf and vine
- Pumpkin Spice for the main hat
The finished texture really shows off the pumpkin shaping.
You can absolutely substitute another DK-weight yarn, but I recommend choosing something with a similar weight and softness so the hat stays comfortable and stretchy.
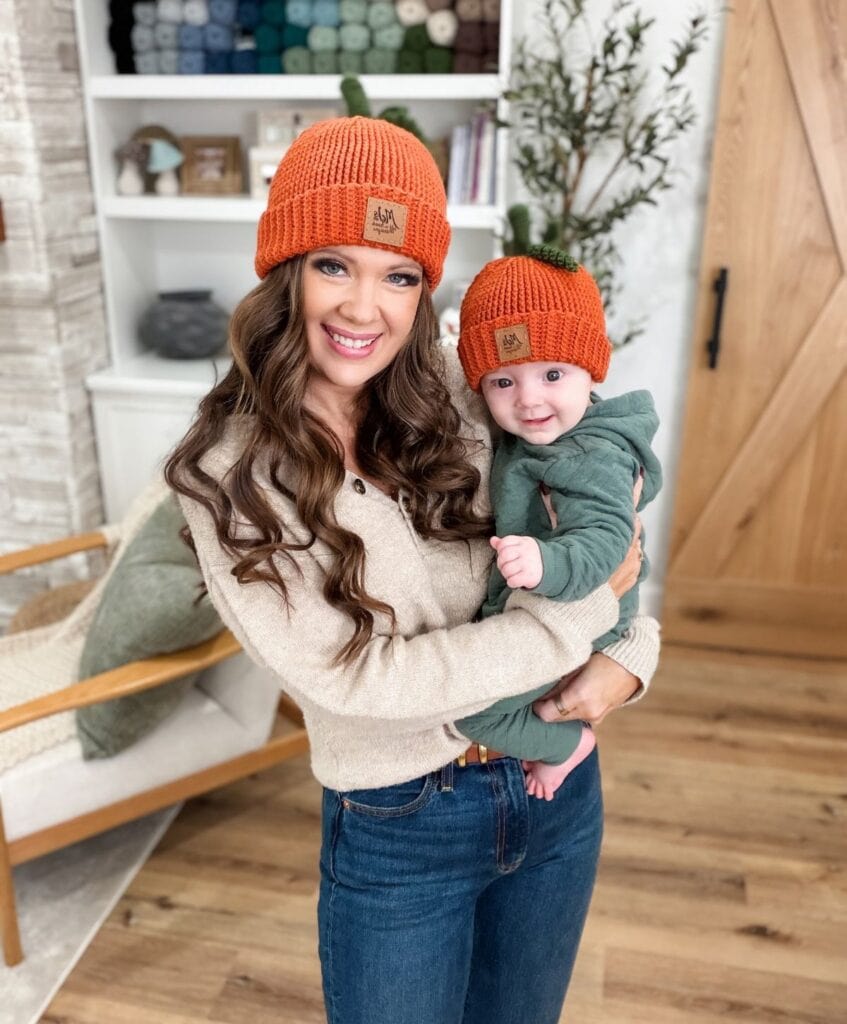
Pumpkin Patch Hat Sizes
The free crochet pumpkin hat pattern includes:
- 3-6 Months
- 6-12 Months
- Toddler
- Child
- Adult
- Large Adult
That means you can make a tiny baby pumpkin hat, a toddler pumpkin beanie, kids’ fall hats, or matching adult pumpkin hats too.
A whole family pumpkin patch would be pretty adorable.
How the Crochet Pumpkin Hat Is Constructed
The hat is worked from the top down in joined rounds.
You begin with the stem, then change to the main hat colour and work the crown increases.
The body is worked primarily in front post double crochet, which creates the vertical ridges and gives the hat its pumpkin-inspired texture.
Once the hat body is complete, the ribbed brim is worked directly onto the lower edge using a join-as-you-go method.
The leaf and curly vine are made separately and sewn to the stem at the end.
Video Tutorial
Video Tutorial

Yarn
MJ’s Off The Hook Designs Timeless Tones (CDN)
DK Weight #3, 100% Premium Acrylic
273 yds/100 g, Shown in: Olive Grove (A) and Pumpkin Spice (B)
Sizes: 3-6 Months (6-12 Months, Toddler, Child, Adult, Large Adult)
A: 45 Yds
B: 175 (200, 230, 265, 300, 340) yds
Crochet Hooks
or the size needed to obtain the gauge
Supplies
Gauge
Pattern: 9 sts and 8 rows equal to 2″ in fpdc with 5 mm crochet hook
Construction
The Pumpkin Patch Hat is worked from the top down, beginning with the stem. The stem is worked in joined rounds, followed by the hat body in front post double crochet for a textured pumpkin look. The brim is worked directly onto the lower edge of the hat using a join as you go ribbing method with the smaller hook. The brim is then folded up for the finished look.
The Curly Vine and Leaf are made separately and sewn securely to the side of the stem before finishing.
Abbreviations
Blo – Back Loop Only
Ch – Chain
Dc – Double Crochet
Fpdc – Front Post Double Crochet
Hdc – Half Double Crochet
Rep – Repeat
RS – Right Side
Sc – Single Crochet
Sl St – Slip Stitch
St(s) – Stitch(es)
WS – Wrong Side
Front Post Double Crochet (fpdc): Yarn over, insert hook from front to back to front around the post of the indicated stitch, yarn over and pull up a loop, yarn over and pull through 2 loops, yarn over and pull through remaining 2 loops.
Project Tips
- The stem is optional. To make the hat without the stem, begin with a Magic Ring using B and the larger hook, work the starting stitch count for your size, then work the Round 11 increase before continuing with the Hat instructions.
- Count your stitches after each increase round to make sure you have reached the stitch count listed for your size.
- Starting stitch counts vary between sizes. A larger size may begin with fewer stitches than a smaller size. This is intentional, so always follow the stitch count listed at the end of each round.
- The beginning ch 2 is not included as a stitch.
- When changing from A to B, complete the final yarn over of the last stitch with B for a clean colour change.
- The hat body is designed with negative ease and should stretch comfortably to fit the recommended head circumference.
- Adjust the length of the Curly Vine by working more or fewer starting chains.
- When attaching the Leaf and Curly Vine, bring the yarn tails to the inside of the hat and secure them well before weaving in the ends.
| Size | Finished Hat Circumference | To Fit Head Circumference | Hat Height with Brim Folded |
|---|---|---|---|
| 3 to 6 Month | 14″ | 15 to 16″ | 5.5″ |
| 6 to 12 Month | 15″ | 16 to 17″ | 6″ |
| Toddler | 16″ | 17 to 18″ | 6.5″ |
| Child | 17″ | 18 to 20″ | 7″ |
| Adult | 18″ | 20 to 22″ | 7.5″ |
| Large Adult | 19″ | 22 to 24″ | 8″ |
Suitable Yarn Substitutes
This pattern was designed using Timeless Tones DK Weight #3 yarn
273 yds/100 g = 2.73 yds per gram
When substituting yarn, look for a DK-weight yarn with a similar yards per gram ratio to achieve comparable results.
Suggested Substitutions
Mary Maxim Mellowspun DK (CDN): 284 yds/100 g = 2.84 yds per gram
Knit Picks Brava Baby: 273 yds/100 g = 2.73 yds per gram
Premier Basix DK (CDN): 306 yds/100 g = 3.06 yds per gram
Lion Brand Color Theory: 246 yds/100 g = 2.46 yds per gram
Adjust hook size if needed to achieve the correct gauge and maintain a soft, flexible fabric.
Digital Download + No Ads!
Upgrade to the Digital PDF Download
Digital pattern only. No physical item will be shipped.
Pattern
Notes: Starting stitch counts vary by size, so a larger hat may begin with fewer stitches than a smaller hat. This is intentional. Follow the stitch count listed at the end of each increase round.
The Stem and Join As You Go Band are written for all sizes. Hat instructions are written separately for each size.
The ch 2 at the beginning of rounds is not included as a st.
The hat is worked from the top down in joined rounds.
Finished length is measured with the brim folded up.
3-6 Months (6-12 Months, Toddler, Child, Adult, Large Adult).
Stem
Round 1:
With A and larger hook, Magic Ring, ch 2, (not included as a st here and throughout) work 10 (11, 12, 11, 12, 10) dc in the magic ring, pull ring tight, sl st in the first st to join —10 (11, 12, 11, 12, 10) sts.
Rounds 2-10:
Ch 1, work 1 sc in the blo of each st around, sl st in the blo of the first st to join —10 (11, 12, 11, 12, 10) sts.
Round 11:
Ch 1, work 2 sc in the blo of each st around, changing to B on the final yarn over of the last st, sl st in the blo of the first st to join—20 (22, 24, 22, 24, 20) sts.
Continue to the instructions for your size.
3-6 Month
Round 1:
With B and larger hook, ch 2, *1 dc in the first st, 2 dc in the next st; rep from * around, sl st in the first st to join—30 sts.
Round 2:
Ch 2, *1 fpdc in the first 2 sts, 2 fpdc in the next st; rep from * around, sl st in the first st to join—40 sts.
Round 3:
Ch 2, work 1 fpdc in each st around, sl st in the first st to join—40 sts.
Round 4:
Ch 2, *1 fpdc in the first 3 sts, 2 fpdc in the next st; rep from * around, sl st in the first st to join—50 sts.
Round 5:
Ch 2, work 1 fpdc in each st around, sl st in the first st to join—50 sts.
Round 6:
Ch 2, *1 fpdc in the first 4 sts, 2 fpdc in the next st; rep from * around, sl st in the first st to join—60 sts.
Rounds 7-15:
Ch 2, work 1 fpdc in each st around, sl st in the first st to join—60 sts.
Round 16:
Ch 1, work 1 sc in each st around, sl st in the first st to join—60 sts. Proceed to Join As You Go Band.
6-12 Month
Round 1:
With B and larger hook, ch 2, *1 dc in the first st, 2 dc in the next st; rep from * around, sl st in the first st to join—33 sts.
Would you like to save this?
You can unsubscribe at any time.
Round 2:
Ch 2, *1 fpdc in the first 2 sts, 2 fpdc in the next st; rep from * around, sl st in the first st to join—44 sts.
Round 3:
Ch 2, work 1 fpdc in each st around, sl st in the first st to join—44 sts.
Round 4:
Ch 2, *1 fpdc in the first 3 sts, 2 fpdc in the next st; rep from * around, sl st in the first st to join—55 sts.
Round 5:
Ch 2, work 1 fpdc in each st around, sl st in the first st to join—55 sts.
Round 6:
Ch 2, *1 fpdc in the first 4 sts, 2 fpdc in the next st; rep from * around, sl st in the first st to join—66 sts.
Rounds 7-17:
Ch 2, work 1 fpdc in each st around, sl st in the first st to join—66 sts.
Round 18:
Ch 1, work 1 sc in each st around, sl st in the first st to join—66 sts. Proceed to Join As You Go Band.
Toddler
Round 1:
With B and larger hook, ch 2, *1 dc in the first st, 2 dc in the next st; rep from * around, sl st in the first st to join—36 sts.
Round 2:
Ch 2, *1 fpdc in the first 2 sts, 2 fpdc in the next st; rep from * around, sl st in the first st to join—48 sts.
Round 3:
Ch 2, work 1 fpdc in each st around, sl st in the first st to join—48 sts.
Round 4:
Ch 2, *1 fpdc in the first 3 sts, 2 fpdc in the next st; rep from * around, sl st in the first st to join—60 sts.
Round 5:
Ch 2, work 1 fpdc in each st around, sl st in the first st to join—60 sts.
Round 6:
Ch 2, *1 fpdc in the first 4 sts, 2 fpdc in the next st; rep from * around, sl st in the first st to join—72 sts.
Rounds 7-19:
Ch 2, work 1 fpdc in each st around, sl st in the first st to join—72 sts.
Round 20:
Ch 1, work 1 sc in each st around, sl st in the first st to join—72 sts. Proceed to Join As You Go Band.
Child
Round 1:
With B and larger hook, ch 2, *1 dc in the first st, 2 dc in the next st; rep from * around, sl st in the first st to join—33 sts.
Round 2:
Ch 2, *1 fpdc in the first 2 sts, 2 fpdc in the next st; rep from * around, sl st in the first st to join—44 sts.
Round 3:
Ch 2, work 1 fpdc in each st around, sl st in the first st to join—44 sts.
Round 4:
Ch 2, *1 fpdc in the first 3 sts, 2 fpdc in the next st; rep from * around, sl st in the first st to join—55 sts.
Round 5:
Ch 2, work 1 fpdc in each st around, sl st in the first st to join—55 sts.
Round 6:
Ch 2, *1 fpdc in the first 4 sts, 2 fpdc in the next st; rep from * around, sl st in the first st to join—66 sts.
Round 7:
Ch 2, work 1 fpdc in each st around, sl st in the first st to join—66 sts.
Round 8:
Ch 2, *1 fpdc in the first 5 sts, 2 fpdc in the next st; rep from * around, sl st in the first st to join—77 sts.
Round 9:
Ch 2, work 1 fpdc in each st around to the last st, 2 fpdc in the last st, sl st in the first st to join—78 sts.
Rounds 10-21:
Ch 2, work 1 fpdc in each st around, sl st in the first st to join—78 sts.
Round 22:
Ch 1, work 1 sc in each st around, sl st in the first st to join—78 sts. Proceed to Join As You Go Band.
Adult
Round 1:
With B and larger hook, ch 2, *1 dc in the first st, 2 dc in the next st; rep from * around, sl st in the first st to join—36 sts.
Round 2:
Ch 2, *1 fpdc in the first 2 sts, 2 fpdc in the next st; rep from * around, sl st in the first st to join—48 sts.
Round 3:
Ch 2, work 1 fpdc in each st around, sl st in the first st to join—48 sts.
Round 4:
Ch 2, *1 fpdc in the first 3 sts, 2 fpdc in the next st; rep from * around, sl st in the first st to join—60 sts.
Round 5:
Ch 2, work 1 fpdc in each st around, sl st in the first st to join—60 sts.
Round 6:
Ch 2, *1 fpdc in the first 4 sts, 2 fpdc in the next st; rep from * around, sl st in the first st to join—72 sts.
Round 7:
Ch 2, work 1 fpdc in each st around, sl st in the first st to join—72 sts.
Round 8:
Ch 2, *1 fpdc in the first 5 sts, 2 fpdc in the next st; rep from * around, sl st in the first st to join—84 sts.
Rounds 9-23:
Ch 2, work 1 fpdc in each st around, sl st in the first st to join—84 sts.
Round 24:
Ch 1, work 1 sc in each st around, sl st in the first st to join—84 sts. Proceed to Join As You Go Band.
Large Adult
Round 1:
With B and larger hook, ch 2, *1 dc in the first st, 2 dc in the next st; rep from * around, sl st in the first st to join—30 sts.
Round 2:
Ch 2, *1 fpdc in the first 2 sts, 2 fpdc in the next st; rep from * around, sl st in the first st to join—40 sts.
Round 3:
Ch 2, work 1 fpdc in each st around, sl st in the first st to join—40 sts.
Round 4:
Ch 2, *1 fpdc in the first 3 sts, 2 fpdc in the next st; rep from * around, sl st in the first st to join—50 sts.
Round 5:
Ch 2, work 1 fpdc in each st around, sl st in the first st to join—50 sts.
Round 6:
Ch 2, *1 fpdc in the first 4 sts, 2 fpdc in the next st; rep from * around, sl st in the first st to join—60 sts.
Round 7:
Ch 2, work 1 fpdc in each st around, sl st in the first st to join—60 sts.
Round 8:
Ch 2, *1 fpdc in the first 5 sts, 2 fpdc in the next st; rep from * around, sl st in the first st to join—70 sts.
Round 9:
Ch 2, work 1 fpdc in each st around, sl st in the first st to join—70 sts.
Round 10:
Ch 2, *1 fpdc in the first 6 sts, 2 fpdc in the next st; rep from * around, sl st in the first st to join—80 sts.
Round 11:
Ch 2, work 1 fpdc in each st around, sl st in the first st to join—80 sts.
Round 12:
Ch 2, *1 fpdc in the first 7 sts, 2 fpdc in the next st; rep from * around, sl st in the first st to join—90 sts.
Rounds 13-25:
Ch 2, work 1 fpdc in each st around, sl st in the first st to join—90 sts.
Round 26:
Ch 1, work 1 sc in each st around, sl st in the first st to join—90 sts. Proceed to Join As You Go Band.
Join As You Go Band
Row 1:
With B and smaller hook, ch 13 (15, 17, 19, 21, 23), work 1 sc in the 2nd ch fr a Row 2. Ch 1, with WS facing, sl st the first and last rows of the band together to join. Fasten off and weave in ends.
Curly Vine
With A and larger hook, ch 20, or adjust the number of chs to make the vine shorter or longer as desired. Work 3 sc in the 2nd ch from hook and 3 sc in each ch across. The vine will naturally curl as you work. Fasten off, leaving a long tail for sewing.
Using the yarn tail, sew the vinesecurely to the side of the stem. Bring the yarn tails to the inside of the hat and weave in securely. If desired, knot the tails together on the inside before weaving in the ends.
Leaf
Round 1:
With A and smaller hook, ch 12, sl st in the 2nd ch from hook, 1 sc in the next ch, 1 hdc in the next ch, 1 dc in each of the next 4 chs, 1 hdc in the next ch, 1 sc in the next ch, sl st in the next ch, (1 sc, ch 1, 1 sc) in the final ch. Working along the opposite side of the foundation ch, sl st in the next ch, 1 sc in the next ch, 1 hdc in the next ch, 1 dc in each of the next 4 chs, 1 hdc in the next ch, 1 sc in the next ch, sl st in the last ch, sl st in the first sl st to join.
Fasten off, leaving a long tail for sewing.
Using the yarn tails, sew the leaf securely to the side of the stem, positioned behind the Curly Vine. Bring the yarn tails to the inside of the hat and knot securely or weave in the ends.
Finishing
For a polished finishing touch, sew a personalized tag to the folded brim of the hat.
Weave in any remaining ends and trim excess yarn.
Looking for beginner projects?
- Easiest Dishcloth Pattern
- Granny Stitch Throw
- Easy C2C Blanket
- Easiest Beanie Pattern
- Chunky Suzette Pocket Shawl
Can I make the hat without the stem?
Yes. The stem is optional.
The pattern includes instructions for beginning the hat without the full stem if you prefer a simpler crochet beanie.
What sizes are included?
The pattern includes six sizes:
3-6 Months, 6-12 Months, Toddler, Child, Adult and Large Adult.
Is this a good baby pumpkin hat pattern?
Yes. The smallest size is 3-6 Months, followed by 6-12 Months, making it a cute fall crochet hat for babies.
Always make sure decorative
Yes! You may sell finished items made from MJ’s patterns, but please credit:
“Pattern by MJ’s Off The Hook Designs Inc.”
All patterns, photos, and written content are the property of MJ’s Off The Hook Designs Inc. and protected by copyright law.
Usage
Free patterns are for viewing only on this blog. You may not copy, download, print, screenshot, or redistribute any part of the pattern. Access must remain through this page with ads. The use of tools that remove or hide ads or site content is strictly prohibited.
Legal Notice
Unauthorized reproduction or distribution may result in copyright infringement penalties.
By accessing this post, you agree to these terms and conditions.
This post may contain affiliate links. Purchases made through these links may earn MJ’s Off The Hook Designs Inc. a small commission at no extra cost to you. Content on this site is supported by ads—please do not block or remove them.
I hope you love our Crochet Pumpkin Hat Pattern. You might also love these crochet patterns:
This pattern is designed by Michelle Moore of MJ’s Off The Hook Designs Inc., based in Lakefield, Ontario, Canada. Your go-to source for modern, easy crochet patterns. Published on October 26, 2026.
Thank you for visiting MJ’s Off The Hook Designs! I hope you enjoyed this pattern and feel inspired to pick up your hook and start creating.
You can find even more crochet patterns in our Ravelry and Etsy shops.
For daily inspiration and behind-the-scenes peeks, join me over on Facebook or Instagram or join our YouTube Membership for exclusive content!
You’ve got questions, we’ve got a community!
Crocheting is better with friends! Join our group to post pictures and ask all your pattern support questions.